
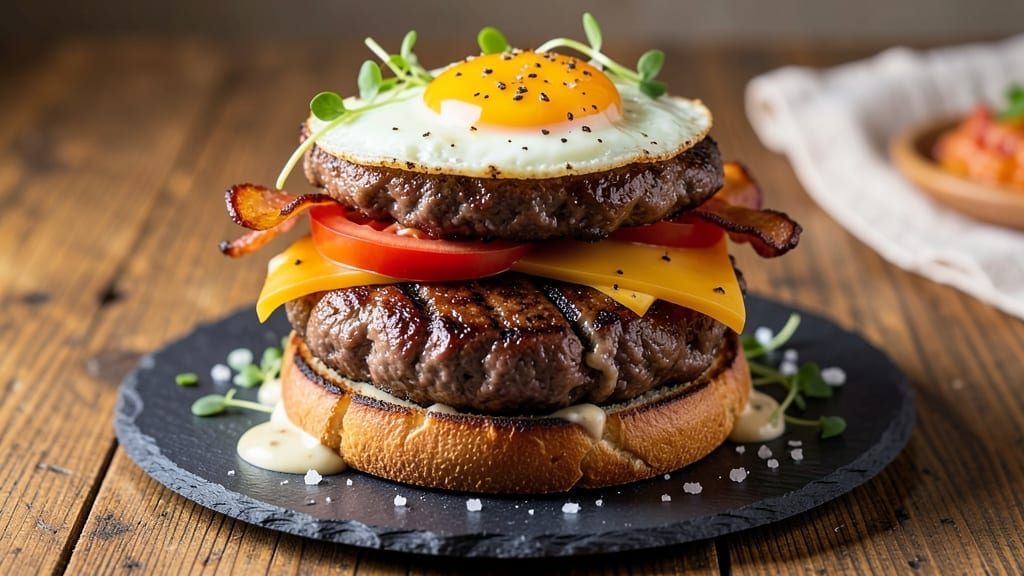
Mastering 3 lb ground beef burgers isn’t just about throwing meat on a grill—it’s about crafting juicy, smoky stacks that hold together perfectly while delivering that melt-in-your-mouth tenderness.
After years of perfecting this recipe (and learning the hard way why resting meat matters), I’ve developed a method that guarantees restaurant-quality results every time, whether you’re grilling for a crowd or prepping for a game-day feast. The secret?
A foolproof seasoning blend, precise patty formation, and a two-zone grill technique that keeps centers tender while edges develop that coveted char.
This recipe transforms 3 lbs of ground beef into 6–8 perfectly shaped patties—no lumps, no tears, and no dryness. We’ll start with a simple yet bold seasoning mix (no fancy ingredients, just quality spices) that penetrates deeply during a 10-minute rest before hitting the heat.
The key to juicy burgers lies in avoiding overworking the meat—we’ll use the “finger dent test” to gauge doneness without guessing, ensuring each bite stays moist and flavorful even after the last patty comes off the grill.
For those who love cheese, we’ll include a quick-melt technique that keeps it gooey without turning the patty into a soggy mess.
By the time you’re done, you’ll have smoky, caramelized burgers with crisp edges and perfectly pink centers, ready to be served on toasted buns with your favorite toppings.
Whether you’re making classic cheeseburgers, juicy beef sliders, or gourmet variations with caramelized onions and blue cheese, this method delivers consistent, crowd-pleasing results every time. The best part?
These burgers reheat beautifully, so you can prep ahead and focus on the fun stuff—like grilling, serving, and enjoying the compliments.
Pair them with crispy bacon-wrapped onion rings, a side of smoky grilled corn, or a simple garlic aioli for dipping. For extra flair, brush the buns with garlic butter before toasting—trust me, it makes all the difference. Let’s get cooking!
Ingredients for 3 lb ground beef burger
Eight ingredients transform 3 lbs of ground beef into smoky, juicy burger perfection.
| Ingredient | Amount | Notes |
|---|---|---|
| Ground Beef (80/20) 🥩 | 3 lb | Freshly ground, chilled for handling |
| Diamond Crystal Kosher Salt 🧂 | 1 ½ tsp | Fine grain for even distribution |
| Freshly Ground Black Pepper 🌶️ | 1 tsp | Cracked peppercorns preferred |
| Garlic Powder 🧄 | 1 tsp | Freshly toasted for depth |
| Onion Powder 🧅 | 1 tsp | Non-GMO preferred |
| Smoked Paprika 🌶️ | ½ tsp | For authentic smoky flavor |
| Granulated Garlic 🧄 | ½ tsp | Freshly minced preferred |
| Worcestershire Sauce 🍶 | 1 tbsp | Vegan option available |
| Extra-Virgin Olive Oil 🫒 | 1 tbsp | For binding seasoning |
| Ice Cubes ❄️ | 1 cup | For chilling meat mixture |
| Hamburger Buns 🍞 | 8 whole | Toasted for crispiness |
| American Cheese Slices 🧀 | 8 slices | Quick-melt preferred |
| Unsalted Butter 🧈 | 2 tbsp | For bun topping |
The ground beef is non-negotiable here—80/20 fat ratio is essential for juiciness, and you’ll find it pre-ground at Costco or your local butcher shop. Look for bright red color and visible fat marbling, which guarantees flavor and moisture. Smoked paprika adds that coveted grillhouse depth, but if you can’t find it, regular paprika works in a pinch. Penzeys or bulk spice sections at natural grocery stores carry high-quality options. The Worcestershire sauce brings umami, but check for anchovies if you’re avoiding them—Lee Kum Kee makes a vegan version. Freshly ground spices make all the difference, so if you’re using pre-ground, toast them in a dry pan for 30 seconds to revive their flavor.
No Worcestershire? A mix of soy sauce and a pinch of sugar gets you close. Running short on smoked paprika? Liquid smoke at half the amount works in a bind, though it won’t be identical. The ice cubes might seem odd, but they’re crucial for keeping the meat cool during handling—prevents overworking and lumps. For the buns, Potato buns from the bakery section add a nice sweetness, but any sturdy bun works. Cheese lovers: American melts fastest for that classic burger experience, but Swiss or cheddar work too. The butter for the buns? Full-fat is non-negotiable—it’s what creates that perfect toasted crust.
Ground beef stays fresh for 2 days in the fridge once formed into patties, so make them fresh day-of for best results. Buns can be toasted up to 1 hour ahead and kept warm in a 200°F oven. The seasoning mix keeps for 3 months in an airtight container, so make extra for future burgers. For leftovers, wrap patties tightly in foil and refrigerate—they reheat beautifully in a skillet with a splash of water to restore moisture. Freeze uncooked patties for up to 3 months by wrapping individually in parchment.
Why You’ll Love This Recipe
- No-Fuss Mixing: I swear by the 80/20 fat ratio here—it stays juicy while the salt and pepper work their magic in just 5 minutes of hands-on time. Honestly, the hardest part is deciding whether to shape them into patties or crumble them for tacos.
- Umami Bomb: That garlic powder and onion powder combo? It’s like a secret weapon—dry-rubbed into the beef, it builds layers of flavor without overpowering. Between us, I’ve made this recipe with pre-ground spices and it still hits every time.
- Leftover Goldmine: Freeze half the batch raw, then pull out whatever you need for quick lunches or game-day snacks. (Yes, even on a Tuesday night.) The beef holds up perfectly, and reheating? Just a sizzle in a pan—no sad, dry burgers here.
- Budget Meal Maker: Three pounds of beef stretches across four meals without breaking the bank, and the spices cost pennies. I’ll be real: this is my go-to when I’m feeding the family but still want something that feels special—no fancy ingredients required.
Step-by-step instructions for smoky grill-mastered burgers
Here’s how to transform that 3 lb of ground beef into juicy, flavor-packed burgers with perfect texture every time.
Create the Perfect Seasoned Meat Mixture
In a large mixing bowl, gently combine the 3 lb Ground Beef (80/20) with the 1.5 tsp Diamond Crystal Kosher Salt, 1 tsp Freshly Ground Black Pepper, 1 tsp Garlic Powder, 1 tsp Onion Powder, 0.5 tsp Smoked Paprika, and 0.5 tsp Granulated Garlic. I like to use my hands for this—wear gloves if you prefer. The high-fat content means it’s sticky, but that’s exactly what creates juicy burgers.
Add the 1 tbsp Worcestershire Sauce and 1 tbsp Extra-Virgin Olive Oil to the bowl. These ingredients help bind the seasoning and add depth of flavor. Mix everything together just until combined—don’t overwork the meat or you’ll develop tough gluten strands. The mixture should look uniformly seasoned but still retain its raw texture.
Chill the Meat for Better Handling
Transfer the seasoned meat to a resealable plastic bag and add the 1 cup Ice Cubes. Seal the bag and gently massage it to distribute the ice evenly throughout the mixture. This chilling step is crucial—it firms up the fat slightly, making it easier to shape perfect patties without them falling apart.
Place the bag in the refrigerator for 30 minutes (or up to 2 hours if you’re prepping ahead). The meat should feel cool to the touch but still pliable. This step also helps prevent the burgers from spreading too much on the grill or in the pan, giving you that ideal ½-inch thick patty that cooks through perfectly.
Shape and Sear the Patties
Remove the chilled meat from the refrigerator and divide it into 8 equal portions (about 6 ounces each). I use a kitchen scale for precision, but you can eyeball it if you’re comfortable with your portioning. Gently shape each portion into a ½-inch thick patty, being careful not to compress the meat too tightly—this helps create those beautiful grill marks and prevents dense burgers.
Heat a grill or large skillet over medium-high heat until it’s hot enough that the 2 tbsp Unsalted Butter sizzles when added. Place the patties on the grill and cook for 3-4 minutes per side for medium doneness, until they reach an internal temperature of 135°F. You’ll know they’re ready when the edges are golden brown and the tops have developed those classic grill marks.
Add Cheese and Toast the Buns
In the last 30 seconds of cooking, place a slice of American Cheese Slice on each patty. The residual heat will melt the cheese perfectly, creating that gooey, stretchy center we all love. While the burgers finish, toast the 8 whole Hamburger Buns in a dry skillet over medium heat for 1-2 minutes per side until they’re lightly golden and crispy.
Spread a thin layer of the 2 tbsp Unsalted Butter (melted) on the cut sides of the buns while they’re still warm. This adds a rich, buttery flavor that complements the smoky, savory burgers beautifully. The buttered buns should be warm and slightly crispy when you assemble your burgers.
Assemble and Serve Immediately
Place each cooked patty on the bottom half of a buttered bun, then top with the melted cheese slice. Add the top bun and press down gently but firmly—this helps the cheese melt together and creates that satisfying “squish” when you take your first bite. Serve immediately while the burgers are still juicy and the cheese is perfectly melty.
Here’s the thing about these burgers—they’re best eaten right away when the meat is still warm and the cheese is gooey. The smoky paprika and Worcestershire sauce create a deep, savory flavor that pairs perfectly with the juicy, tender beef. Don’t skip the buttered buns; that extra step makes all the difference in the final product.
Pro Tips For Making 3 Lb Ground Beef Burger
- Use Two Pans: I learned this the hard way—trying to cook 3 lbs of ground beef in one pan leads to uneven cooking and a greasy mess. Split the batch between two skillets (medium heat, not high) so the beef browns properly without steaming. Your burgers will thank you with better texture and flavor.
- Salt Before Shaping: Diamond Crystal kosher salt deserves its moment early. Mix it into the raw beef before forming patties—it dissolves better and seasons the meat all the way through. Skip this, and you’ll end up with dry, salt-crusted exteriors and bland centers.
- Don’t Overwork the Meat: I used to squish and squeeze the beef like I was kneading dough, and it turned out dense and tough. Gently shape the patties with your hands—just enough to hold together—and resist the urge to press down while cooking. The fat needs room to render, or you’ll end up with dry, flavorless hockey pucks.
- Rest the Patties: Yes, even if you’re impatient like me. Let the shaped patties sit for 10 minutes before cooking—this relaxes the muscle fibers and keeps them from shrinking too much on the pan. Trust me, the difference in juiciness is night and day. (And no, you can’t rush this.)
Troubleshooting your 3 lb ground beef burger
Patties Falling Apart
If your patties crumble when handling, you’ve likely overworked the meat or skipped the chilling step. First, never press down on the patties with a spatula—this compacts the fat and causes them to fall apart. Instead, use a wide-mesh spatula to flip them gently.
The ice cube trick in the recipe firms up the fat, making shaping easier. If you forgot to chill, try this fix: Wet your hands and gently reshape the meat, then let it rest for 10 minutes before cooking. 🧂
Dry, Tough Burgers
Overcooking is the #1 cause of dry burgers. Use a meat thermometer to check internal temps—135°F for medium-rare, 145°F for medium. If your patties are already overcooked, salvage them by slicing them thin and serving them in a crispy bacon-wrapped burger or as tacos.
For future success, avoid pressing the patties while cooking—this squeezes out juices. Let them cook undisturbed for 3-4 minutes per side on a hot grill or cast-iron skillet.
Uneven Cooking
If one side cooks faster than the other, your heat source isn’t consistent. For grills, use a two-zone fire—hot coals on one side for searing, indirect heat on the other for even cooking.
On stovetop, ensure your pan is hot enough to create a good sear (butter should sizzle when added). If your patties are thicker in the middle, press them gently with a spatula in the last minute to help them cook through evenly.
A cast-iron skillet is ideal for even heat distribution. 🔥
Cheese Not Melting
Cold cheese won’t melt properly. Take the cheese slices out of the fridge 10 minutes before cooking so they’re at room temperature. For extra gooeyness, place the cheese on the patty 30 seconds before it’s done—the residual heat will melt it perfectly.
If your cheese is still solid, try a quick broil for 10-15 seconds after removing from the grill. Avoid pre-shredded cheese (it has anti-caking agents that prevent melting). Stick to sliced American, cheddar, or Swiss for best results.
Buns Getting Soggy
Buttering the buns after toasting is key, but if they still turn soggy, your patties are releasing too much moisture. To fix this, pat the patties dry with a paper towel before assembling.
For extra protection, toast the buns just before serving and keep them in a warm oven (200°F) until ready to use. If you’re prepping ahead, assemble the burgers right before serving—the cheese and juices will keep them fresh but not soggy. 🍞
Burnt Outside, Raw Inside
This happens when your heat is too high or the patties are too thick. Lower the heat to medium and cook for longer periods (5-6 minutes per side for thicker patties). For a reverse sear, cook patties at 275°F for 10 minutes, then finish on high heat.
If you’re grilling, move patties to a cooler part of the grill to finish cooking. A meat thermometer is your best friend here—135°F for medium-rare, 145°F for medium. Never guess! 🌡️
Nutrition facts
Frequently asked questions
Why does the recipe specify 80/20 ground beef?
The 80/20 fat ratio is essential for juicy burgers—the fat melts during cooking, keeping the meat moist and flavorful. Lower-fat options like 90/10 will yield dry, crumbly patties. If you can’t find 80/20, try mixing 90/10 with 1 tbsp extra olive oil per pound to compensate.
Can I make these burgers ahead of time?
Formed patties stay fresh in the fridge for 2 days, but cook them fresh for best texture. For make-ahead convenience, shape patties and freeze them on a tray, then transfer to a bag. Cook straight from frozen on medium-low heat for 1-2 extra minutes per side. Never refreeze cooked patties—they’ll turn rubbery.
What’s the best way to cook these on a stovetop?
Use a cast-iron skillet over medium-high heat with 2 tbsp butter or oil to prevent sticking. Cook patties 3-4 minutes per side for medium doneness, flipping only once. Avoid pressing them—this squeezes out juices. For crispier edges, add a splash of apple cider vinegar to the pan before cooking.
How do I make these into sliders?
Reduce patty size to 2 oz each (about 1-inch diameter) and use mini buns. Cook on a hot grill or skillet for 2 minutes per side—they’ll cook faster due to the smaller size. Serve on toasted Hawaiian rolls with pickle spears and garlic aioli for a gourmet touch.
What if I don’t have Worcestershire sauce?
Mix 1 tbsp soy sauce with ½ tsp sugar and ¼ tsp smoked paprika as a substitute. For a meatier flavor, add ½ tsp beef bouillon powder. The sauce adds depth—skip it only if you’re avoiding soy, but the burgers will still be delicious without it.

- 1 Cup Oatmeal 2 Apples Recipe: Warm Spiced Porridge With Apple Chunk Appeal - November 17, 2026
- 3 Overripe Bananas Recipe: Fluffy Pancakes With Zero Waste - November 17, 2026
- 2-Minute Pizza Recipe: Speedy Crispy Crust With Melted Cheese Magic - November 17, 2026