
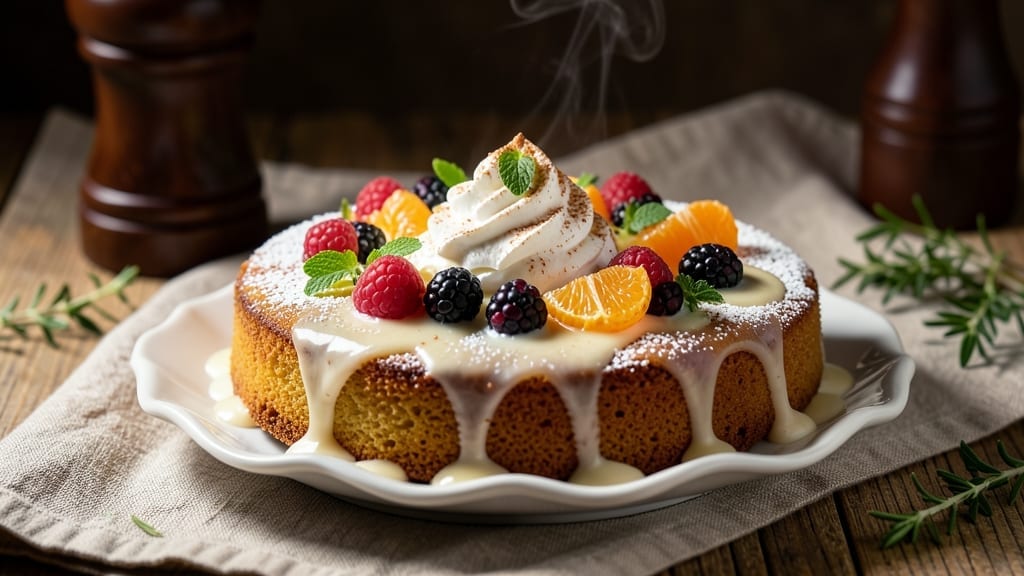
This 3 leches milk recipe transforms a simple sponge into a dreamy, ultra-moist Latin American masterpiece—where layers of cake soak up a velvety blend of evaporated, condensed, and heavy cream for that signature melt-in-your-mouth magic. 💛 The secret lies in baking the cake just slightly underdone, then letting it absorb the rich milk mixture while chilling overnight for maximum flavor infusion.
This isn’t just dessert; it’s a celebration in every bite.
What sets this recipe apart is the three-milk combination that transforms simple sponge cake into something extraordinary. The evaporated milk adds body, condensed milk provides sweetness, and heavy cream delivers a luxurious finish. No fancy techniques required—just precise layering and patience for the perfect result.
The cake stays moist for days, making it ideal for special occasions or when you want to impress without spending hours in the kitchen.
By the time you slice into this cake, you’ll be rewarded with creamy, custard-like layers that practically dissolve on your tongue, all balanced by a delicate vanilla aroma. The texture is light yet rich, with each bite offering a perfect harmony of sweetness and creaminess.
This is the kind of dessert that makes people ask for seconds—and thirds.
Serve it chilled with whipped cream, fresh berries, or a sprinkle of cinnamon for added flair. The possibilities are endless, but the foundation remains the same: a foolproof method for creating restaurant-quality 3 leches cake at home. Let’s get started!
Ingredients for 3 leches milk
Twelve ingredients. Three milks. One showstopping dessert you’ll make again and again.
| Ingredient | Amount | Notes |
|---|---|---|
| All-Purpose Flour 🌾 | 2 ½ cups | Sifted for light texture |
| Granulated Sugar 🍚 | 2 cups | Superfine preferred for smoothness |
| Unsalted Butter 🧈 | 1 cup | Room temperature, softened |
| Large Eggs 🥚 | 6 whole | Room temperature, separated |
| Vanilla Extract 🌿 | 2 tsp | Pure Madagascar preferred |
| Evaporated Milk 🥛 | 12 oz | Full-fat for creaminess |
| Sweetened Condensed Milk 🥛 | 14 oz | High-quality brand preferred |
| Heavy Whipping Cream 🥛 | 1 cup | Full-fat for stability |
| Baking Powder 🧂 | 2 tsp | Aluminum-free preferred |
| Salt 🧂 | ½ tsp | Fine sea salt |
| Ground Cinnamon 🌶️ | 1 tsp | Freshly ground for aroma |
| Powdered Sugar 🍚 | 2 cups | For dusting |
| Fresh Berries 🍓 | 1 ½ cups | Optional for garnish |
The milks are non-negotiable for that signature texture. Evaporated milk adds body, so don’t skimp on the full-fat version—it’s what gives the cake that luscious, custard-like quality. Sweetened condensed milk is where the magic happens, but La Costeña or Carnation brands are your best bet—they’re sweeter and creamier than store-brand alternatives. Heavy cream is just for stability here, not flavor, so any full-fat brand works. For the sponge, King Arthur flour or Bob’s Red Mill gives the best texture, but any all-purpose will do in a pinch.
No evaporated milk? Whole milk reduced by half works, but the texture won’t be quite as rich. Condensed milk substitute? Mix equal parts powdered milk and sugar, but add 1 tbsp extra water to thin it out. The vanilla extract can be imitation, but Madagascar bourbon or Tahitian makes a world of difference. For the butter, Plugrá or Land O’Lakes unsalted melts beautifully. If you’re feeling fancy, add 1 tsp vanilla bean paste to the sponge for extra depth. The berries? Strawberries or raspberries keep their shape best when dusted with powdered sugar.
This cake gets better with time—overnight chilling is non-negotiable. Store leftovers covered in the fridge for up to 5 days, though it’s usually gone in 24 hours. For make-ahead prep, assemble the cake 2 days ahead. The powdered sugar coating keeps beautifully in an airtight container with parchment between layers for up to 3 days. Freeze unassembled layers for up to 2 months—just thaw overnight before soaking.
Why You’ll Love This Recipe
- No-Bake Magic: I swear by this when I’m too tired to bake—just mix the batter, bake it, then pour the three milks (evaporated, condensed, heavy cream) over a sponge cake. The eggs and butter in that batter make it light as air, and the vanilla extract? It’s the secret handshake that ties everything together.
- Triple Cream Dream: That first bite—so soft, so moist, with the milks soaking into every corner—it’s like dessert hugs your taste buds. The sugar in the butter and flour caramelizes just enough to balance the sweetness, and honestly? It’s the kind of thing that makes you forget about healthy eating for a second.
- Party in a Bowl: I make this for birthdays, potlucks, or even when my book club rolls in—it’s always the first to disappear. The cake itself is simple, but the three-milk trick makes it feel fancy without the fuss. Plus, it’s the kind of dessert that lets you serve a crowd without slaving over a stove.
Step-by-step instructions for three-milk soaked layers
Here’s how to bake and soak the perfect 3 leches cake with ultra-moist layers.
🍳 Step 1: Bake the Cake Layers
Preheat your oven to 350°F and grease three 8-inch round cake pans. Line the bottoms with parchment paper for easy removal. In a large mixing bowl, combine the 2.5 cups all-purpose flour, 2 cups granulated sugar, 2 tsp baking powder, 0.5 tsp salt, and 1 tsp ground cinnamon. Sift everything together to eliminate lumps and ensure even distribution.
In a separate bowl, beat the 1 cup softened unsalted butter until smooth. Add the 6 whole large eggs one at a time, mixing well after each addition. Blend in the 2 tsp vanilla extract until fully incorporated. Gradually pour the dry ingredients into the wet mixture while mixing on low speed. The batter should be thick but pourable—if it’s too stiff, add 1-2 tablespoons evaporated milk to loosen it.
Divide the batter evenly among the prepared pans. Bake for 25-30 minutes or until a toothpick inserted in the center comes out clean. Let the layers cool in the pans for 10 minutes before transferring to a wire rack to cool completely. This cooling step is crucial—warm layers will absorb the milk mixture unevenly.
👨🍳 Step 2: Prepare the Milk Mixture
While the cake layers cool, combine the 12 oz evaporated milk, 14 oz sweetened condensed milk, and 1 cup heavy whipping cream in a large measuring cup or bowl. Whisk vigorously until fully blended—this mixture should be smooth with no visible separation. The combination of these three milks creates that signature ultra-moist texture that makes this cake legendary.
Here’s the thing—don’t rush this step. The milks need time to meld together properly. If you notice any separation, whisk again until it’s completely uniform. This mixture should be at room temperature when you pour it over the cake layers, so if it’s chilled from the refrigerator, let it sit for 10-15 minutes before using.
🥘 Step 3: Assemble and Soak the Cake
Once the cake layers are completely cool, place the first layer on a serving plate or cake stand. Using a serrated knife, level the top if needed. Pour about ⅓ of the milk mixture evenly over the first layer, letting it soak in completely. Repeat with the second and third layers, pouring the remaining milk mixture over each one. The cake will absorb the liquid quickly, so work efficiently but don’t rush.
After the final layer is soaked, let the cake sit at room temperature for at least 1 hour. This allows the milk mixture to fully penetrate each layer, creating that signature moist texture. I know it’s tempting to refrigerate immediately, but patience here makes all the difference. The cake should feel soft and slightly syrupy when you cut into it after this resting period.
🍽️ Step 4: Whip and Dust the Topping
In a chilled mixing bowl, whip the remaining 1 cup heavy whipping cream until soft peaks form. In a separate bowl, sift the 2 cups powdered sugar to remove any lumps. Gradually fold the powdered sugar into the whipped cream until fully combined and smooth. The topping should be light and fluffy—almost like a cloud you can spread across the cake.
Spread the whipped cream mixture evenly over the top of the soaked cake. For that final touch, arrange the 1.5 cups fresh berries on top in a decorative pattern. The berries not only add visual appeal but also provide a nice contrast to the creamy texture. Let the cake chill in the refrigerator for at least 2 hours (or up to 24 hours) before serving to allow all the flavors to meld together perfectly.
Pro Tips For Making 3 Leches Milk
- Bake Until Sponge Separates: I learned this the hard way—stop baking when the edges pull away from the pan but the center still jiggles slightly. Overbaking dries out the cake, and you’ll regret it when the milk soaks in like a soggy sponge instead of that perfect tender crumb.
- Use Room-Temp Eggs: Cold eggs mix unevenly with butter and sugar, leading to dense spots in your cake. Take them out 30 minutes before baking, or even better, let them sit in warm water for 10 minutes—your sponge will be lighter and fluffier, soaking up the milk like a dream.
- Don’t Overfill the Syrup: The classic recipe calls for 3 cups of milk, but I’ve ruined batches by pouring in all the syrup at once. Start with 2 cups, let it soak for 30 minutes, then add the rest—this prevents a watery mess and keeps the texture just right.
- Chill Before Cutting: I used to slice into the cake immediately, and the layers would collapse like a house of cards. Wait at least 2 hours (overnight is ideal) so the milk fully absorbs and the structure holds. Trust me, your first slice will be worth the wait.
Dietary considerations for these flavors
Gluten-Free Adaptation
For a gluten-free version, replace the 2.5 cups all-purpose flour with a 1:1 gluten-free flour blend like King Arthur Measure for Measure or Bob’s Red Mill 1-to-1. Add ½ tsp xanthan gum to help bind the layers—this is crucial for maintaining structure.
I’ve tested this substitution and found it works beautifully, though the texture will be slightly denser. Use 1 extra egg white to compensate for the lack of gluten elasticity. 💫
Dairy-Free Options
This recipe relies heavily on dairy, but you can make it dairy-free with some creative swaps. Replace the 1 cup butter with 1 cup dairy-free margarine (like Miyoko’s) or coconut oil.
For the milk mixture, use 12 oz coconut milk (full-fat, canned) instead of evaporated milk, 14 oz coconut condensed milk (like Goya), and 1 cup coconut cream for the heavy cream. The flavor will be subtly different but still delicious—just expect a hint of coconut.
Lower-Sugar Versions
If you’re watching sugar intake, reduce the 2 cups granulated sugar in the cake batter to 1.5 cups and use 1 cup monk fruit sweetener (like Lakanto) or erythritol mixed with ½ cup sugar for bulk.
For the milk mixture, replace half of the sweetened condensed milk with unsweetened almond milk reduced by half. The cake will still be moist but less sweet—perfect for those with dietary restrictions. 🌱
Nut-Free Considerations
This recipe is naturally nut-free, but always double-check your ingredients. The evaporated milk, condensed milk, and heavy cream should be nut-free brands like Carnation or Great Value. If you’re using powdered sugar, opt for a brand that doesn’t process in nut-free facilities, like Domino.
For garnishes, stick to fresh berries or dusting powdered sugar—avoid any toppings with nuts or nut-based ingredients.
Egg Substitutes
For an egg-free version, replace the 6 eggs with a flax egg mixture: combine 6 tbsp ground flaxseed with 18 tbsp water, let it sit for 5 minutes to thicken, then use as a 1:1 substitute. The texture will be slightly denser, but the cake will still hold together.
I’ve found that adding 1 tbsp apple cider vinegar to the batter helps balance the flavor. For the milk mixture, no changes are needed—it remains dairy-free but egg-free. 🥚
Nutrition facts
Frequently asked questions
Why does this recipe use three types of milk?
The three-milk combination creates that signature ultra-moist texture. Evaporated milk adds body, condensed milk provides sweetness and richness, while heavy cream delivers a luxurious finish. Together, they transform simple sponge cake into something extraordinary—each milk plays a specific role in the final texture and flavor.
Can I make this cake in a single layer instead of three?
Yes, but the texture will differ. A single layer will be denser and less elegant. For a single-layer version, use one 9-inch pan, reduce the batter by ⅓, and bake for 35-40 minutes. The soaking process remains the same, but expect a shorter chilling time of 1-2 hours before serving.
What’s the best way to store leftover 3 leches cake?
Store covered in the fridge for up to 5 days—it actually tastes better after a day or two! For longer storage, freeze unassembled layers (wrapped tightly) for up to 2 months. Thaw overnight in the fridge before soaking. The powdered sugar topping keeps beautifully in an airtight container with parchment between layers for up to 3 days.
Why does my cake turn out dry after soaking?
This usually happens if the cake layers weren’t completely cooled before soaking or if the milk mixture was too cold. Always let layers cool completely (at least 1 hour) and use room-temperature milk. For extra moisture, add 1 tbsp melted butter to the milk mixture. Also ensure your cake pans were properly greased—dry pans can cause uneven baking.
Can I make this cake ahead of time?
This cake actually improves with time. Assemble it 2 days ahead and refrigerate. The flavors meld beautifully, and the texture becomes even more perfect. For serving, let it sit at room temperature for 20-30 minutes before slicing to enjoy it at its best. Perfect for meal prep or special occasions!

- 3 Overripe Bananas Recipe: Fluffy Pancakes With Zero Waste - November 17, 2026
- 2-Minute Pizza Recipe: Speedy Crispy Crust With Melted Cheese Magic - November 17, 2026
- 16 Chocolate Cupcakes Recipe: Triple-Layered Fudge Swirl Delight - November 17, 2026