
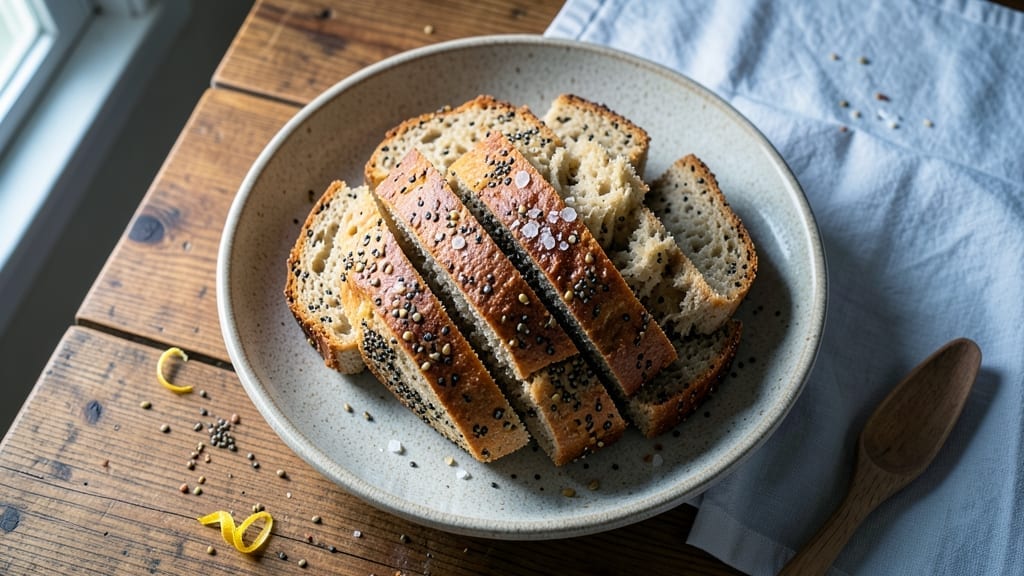
This 3-seed bread recipe delivers a nutty, rustic loaf with minimal effort—no kneading required. The combination of sunflower, flax, and chia seeds adds texture and depth, while a simple no-knead method ensures perfect results every time.
I’ve baked this version dozens of times, and it never fails to impress with its crisp crust and tender crumb.
The secret lies in the dough’s hydration and seed preparation. Toasting the seeds lightly before mixing enhances their flavor, and the right balance of flour and water creates a dough that’s easy to shape without overworking.
Proofing overnight in the fridge develops deep flavor, while a steam bath during baking guarantees that signature artisan crust.
By the time it emerges from the oven, you’ll have a golden-brown loaf with a satisfying crunch and a soft, airy interior. The seeds add a subtle crunch in every bite, making this bread perfect for sandwiches, toast, or serving alongside soups.
It’s the kind of homemade loaf that elevates any meal.
This recipe scales beautifully—whether you’re baking one loaf for a family dinner or doubling the batch for holiday gatherings. The no-knead approach means less cleanup and more time enjoying the process. Let’s get started!
Ingredients for 3 seed bread
Four cups flour plus three seeds create a rustic loaf with minimal effort.
| Ingredient | Amount | Notes |
|---|---|---|
| All-Purpose Flour 🌾 | 4 cups | Unbleached preferred for lighter crumb |
| Sunflower Seeds 🌻 | ½ cup | Raw, unsalted, lightly toasted |
| Flaxseeds 🌾 | ¼ cup | Whole, golden or brown |
| Chia Seeds 🌱 | ¼ cup | Whole, lightly toasted |
| Active Dry Yeast 🍞 | 2 ¼ tsp | Or 1 packet instant yeast |
| Granulated Sugar 🍚 | 1 tbsp | For yeast activation |
| Salt 🧂 | 1 ½ tsp | Diamond Crystal preferred |
| Warm Water 💧 | 1 ½ cups | 110°F for yeast activation |
| Extra-Virgin Olive Oil 🫒 | 2 tbsp | For dough enrichment |
| Cornmeal 🌽 | ¼ cup | For dusting proofing basket |
| Ice Water ❄️ | ½ cup | For final dough adjustment |
The seeds are non-negotiable for that signature crunch and nutty depth. Buy them in bulk from stores like Whole Foods or Trader Joe’s—they stay fresher longer. Toast them lightly in a dry pan for 3-4 minutes until fragrant; this enhances their flavor dramatically. For the flour, King Arthur or Bob’s Red Mill are my go-tos—they bake consistently. The yeast? Check the expiration date—old yeast won’t activate properly, and you’ll end up with flat bread. Keep it in the fridge until ready to use.
No sunflower seeds? Pumpkin seeds work beautifully, though the flavor will differ slightly. Running short on flax? Sesame seeds at the same amount add a different but equally interesting texture. For the yeast, if you’re at high altitude, consider adding 0.25 tsp more to compensate. The olive oil can be swapped for avocado oil or melted coconut oil if preferred, though olive adds that subtle fruity note. And if your dough feels too sticky after mixing, add ice water 1 tbsp at a time until it comes together just right.
This dough is best proofed overnight in the fridge for maximum flavor development. Store it in an airtight container for up to 2 days before baking. Once baked, the loaf keeps well at room temperature for 3 days wrapped in a clean kitchen towel. For longer storage, slice and freeze—it reheats beautifully in a toaster or oven. The seeds stay fresh and crunchy for months this way, making this a great make-ahead bread.
Why You’ll Love This Recipe
- No-Knead Nightmare Solved: I swear by this dough—just mix, let it rise, and forget it. The seeds do all the texturing work while you’re scrolling or watching TV. Honestly, I’ve burned toast more often than I’ve messed up this bread.
- Nutty Crunch Magic: Sunflower seeds add a buttery richness, flaxseeds bring that earthy depth, and chia? Tiny bursts of ocean-like freshness with every bite. Toast it, and that crunch turns the whole loaf into a flavor upgrade.
- Meal Prep MVP: Slice it fresh, but it’s just as good toasted for breakfast or as a side for soup. Between us, I’ve fed a houseful of guests with one loaf—no one even noticed it was “just bread.” (Yes, even on a Tuesday night.)
- Pantry Goldmine: You’re already using flour and yeast? Add seeds from your bulk bin, and boom—homemade bread that costs pennies per slice. Leftovers? Toss them in a bag—stays fresh for days, no sad ends wasting away.
Step-by-step instructions for 3 seed bread recipe
This no-knead method delivers a nutty, crusty loaf with minimal effort.
Activate the Yeast and Mix the Dough
In a large mixing bowl, combine the 1.5 cups warm water with 1 tbsp granulated sugar and 2.25 tsp active dry yeast. Let this mixture sit for 5-10 minutes until it becomes frothy at the surface—this confirms the yeast is active. If it doesn’t bubble, your yeast may be dead, and you’ll need to start over.
Once the yeast is active, add the 4 cups all-purpose flour, 1.5 tsp salt, and 2 tbsp extra-virgin olive oil to the bowl. Stir with a wooden spoon until a shaggy dough forms. The dough will be sticky, but that’s normal for this no-knead method. Let it rest for 10 minutes while you prepare the seeds.
Toast the Seeds and Prepare the Proofing Basket
In a dry skillet over medium heat, toast the 0.5 cup sunflower seeds, 0.25 cup flaxseeds, and 0.25 cup chia seeds for 3-4 minutes, stirring constantly. They should develop a rich, nutty aroma and turn slightly darker in color. Remove from heat and let them cool while you finish the dough.
Lightly dust a proofing basket or bowl with 0.25 cup cornmeal, ensuring the entire surface is coated. This prevents the dough from sticking and helps create that signature crust. Line the basket with a clean kitchen towel for extra insurance if needed.
Shape and Proof the Dough
After the dough has rested, use a wet spatula to scrape it into the prepared proofing basket. Gently shape it into a round loaf by folding the edges toward the center. Cover the basket with a damp towel and let it proof in a warm place for 1-2 hours, or until the dough has risen to about double its original size. The surface should look puffy and slightly domed.
I like to place the proofing basket in a turned-off oven with the light on for consistent warmth. Avoid cold drafts—they slow down fermentation and affect rise. If the dough rises unevenly, gently press down on any overly puffy spots and let it proof again until even.
Score and Bake for a Crispy Crust
Preheat your oven to 375°F with a Dutch oven inside for 30 minutes. This ensures the oven is hot enough for proper browning. Carefully transfer the dough (still in its basket) to the hot Dutch oven. Using a sharp knife or razor blade, score the top of the dough with a ½-inch deep cross—this controls expansion and adds visual appeal.
Bake covered for 30 minutes, then remove the lid and bake for another 15-20 minutes until the crust is deep golden brown and sounds hollow when tapped. The internal temperature should reach 190-200°F when measured with an instant-read thermometer. If the top browns too quickly, tent loosely with foil to prevent burning.
Cool and Serve for Maximum Flavor
Remove the bread from the Dutch oven and transfer it to a wire rack. Let it cool for at least 30 minutes before slicing—this allows the crumb to set and prevents a gummy texture. The crust should be crispy and nutty, while the interior remains soft and airy.
Serve warm with butter or your favorite jam. The toasted seeds add a delightful crunch and nutty depth to every bite. Store leftovers wrapped in a cloth bag at room temperature for up to 3 days, or freeze for longer storage. The flavor improves as it sits, so this bread tastes even better the next day.
Pro Tips For Making 3 Seed Bread
- TOAST SEEDS FIRST: Skip the raw bite—dry-toast sunflower, flax, and chia seeds in a pan for 3-4 minutes until fragrant. This boosts flavor and prevents that weird, chalky texture when they soak up dough moisture later. (Yes, it’s an extra step, but your bread won’t taste like a health-food afterthought.)
- WEIGH YOUR FLOUR: Scooping flour from the bag packs too much air—use a kitchen scale for the exact 4 cups (about 480g). Too much flour makes dense bread; too little means a gummy mess. I learned this after my first loaf collapsed like a sad soufflé.
- DON’T OVERKNEAD: Stop mixing once the dough pulls cleanly off the bowl (about 5-7 minutes by hand). Overworking it develops gluten too much, turning your bread into a chewy brick. Feel the texture—it should be smooth but still slightly tacky.
- USE WARM WATER FOR YEAST: Mix the yeast with warm water (110°F/43°C) and let it foam for 5 minutes before adding to the dough. Cold water kills it; hot water cooks it. I once forgot and my bread took three hours to rise—now I double-check the temp with my finger (should feel like bathwater).
Essential equipment for great 3 seed bread
Dutch Oven
The Dutch oven is your secret weapon for achieving that perfect crust on this 3-seed bread. I use a 5-quart Lodge cast iron Dutch oven—it retains heat beautifully and creates steam during baking, which is essential for that artisan-style crust.
If you don’t own one, a heavy oven-safe pot with a lid will work in a pinch, though results may vary slightly. Preheat the Dutch oven in the oven before adding the dough to ensure even heat distribution. 🔥
Proofing Basket
A proofing basket (also called a banneton) gives your bread its signature shape and texture. I recommend a round, medium-sized basket with a capacity of about 1.5-2 quarts. If you don’t have one, a well-floured bowl lined with a floured kitchen towel works just as well.
The key is to dust it thoroughly with cornmeal—this prevents sticking and helps create that crisp crust. For extra insurance, I sometimes sprinkle a little extra cornmeal on the towel before placing the dough inside.
Digital Thermometer
Baking bread is a science, and precision matters—especially when aiming for that 190-200°F internal temperature. A digital instant-read thermometer (like the Thermoworks Thermapen) ensures you don’t over- or under-bake. Insert the probe into the center of the loaf before removing it from the oven.
If you don’t have one, the “tap test” works too: a hollow sound means it’s done. Just be careful not to tap too hard—you don’t want to collapse the loaf! ✨
Wooden Spoon
A wooden spoon is a game-changer for mixing the dough. Unlike metal utensils, wood won’t react with the yeast or alter the dough’s temperature. I use a long-handled, sturdy wooden spoon (like the OXO Good Grips) to stir the dough until it comes together.
The gentle scraping action helps incorporate the seeds evenly without overworking the dough. Pro tip: Wet your spoon slightly before mixing to prevent sticking.
Sharp Knife or Razor Blade
Scoring the dough isn’t just for show—it controls expansion and gives your bread a professional finish. A sharp knife or razor blade (like a Japanese pull knife) makes clean, precise cuts.
Dip the blade in water or flour to prevent sticking, then score the dough with a ½-inch deep cross just before baking. This releases steam and prevents the loaf from bursting open unpredictably. A dull knife will tear the dough, so keep it sharp!
Wire Rack
Letting your bread cool on a wire rack is non-negotiable—it prevents soggy bottoms and allows air to circulate for that perfect crust. I use a large, sturdy rack (like the OXO Good Grips) that fits inside my Dutch oven.
If you’re short on space, a clean kitchen towel draped over a bowl works in a pinch, but the rack is ideal. Never place the bread directly on a counter or cutting board—it’ll steam and turn gummy. Give it at least 30 minutes to cool completely before slicing. 💫
Nutrition facts
Frequently asked questions
Can I substitute any of the seeds in this recipe?
While sunflower, flax, and chia seeds create the perfect balance, you can swap them for other seeds like pumpkin, sesame, or even hemp. Just keep the total amount at 1 cup combined. Sesame seeds add a slightly different flavor, while pumpkin seeds bring a richer, earthier taste. Toast them all lightly for maximum flavor!
Why does my dough feel too sticky?
This no-knead dough is naturally sticky due to its higher hydration level. If it’s too wet, add 1 tablespoon of flour at a time until it becomes manageable. For extra help, wet your hands slightly when shaping. The key is to work quickly—don’t overmix, or you’ll develop gluten and lose that signature soft crumb.
Can I bake this bread without a Dutch oven?
Yes, but you’ll need to create steam another way. Place a metal bowl on the oven rack below the bread, then pour 1 cup boiling water into it when you put the bread in. This mimics the steam from a Dutch oven and helps create that crisp crust. Bake on the middle rack for best results.
How do I know when the bread is fully baked?
Look for three signs: the crust should be deep golden brown, the internal temperature should reach 190-200°F (use a thermometer), and it should sound hollow when tapped on the bottom. If unsure, bake 5 more minutes—underbaked bread will be gummy inside. The crust should be crispy but not burnt!
Can I make this bread without yeast?
No, this recipe relies on yeast for proper rise and texture. However, you could try a seed-based flatbread recipe instead—just omit the yeast and use a higher flour ratio. For this specific recipe, yeast is essential for that light, airy crumb and perfect crust. The no-knead method depends on yeast’s slow fermentation for flavor development.

- 5 Lb Eye Round Roast Recipe: Slow-Braised to Melt-in-Mouth Tenderness - November 3, 2026
- 3-Hour Ciabatta Bread Recipe: Crusty Chews and Airy Holes Mastered - November 3, 2026
- 5 Fruit Salad Recipe: Vibrant Rainbow Layers With No Brown Spots - November 3, 2026