
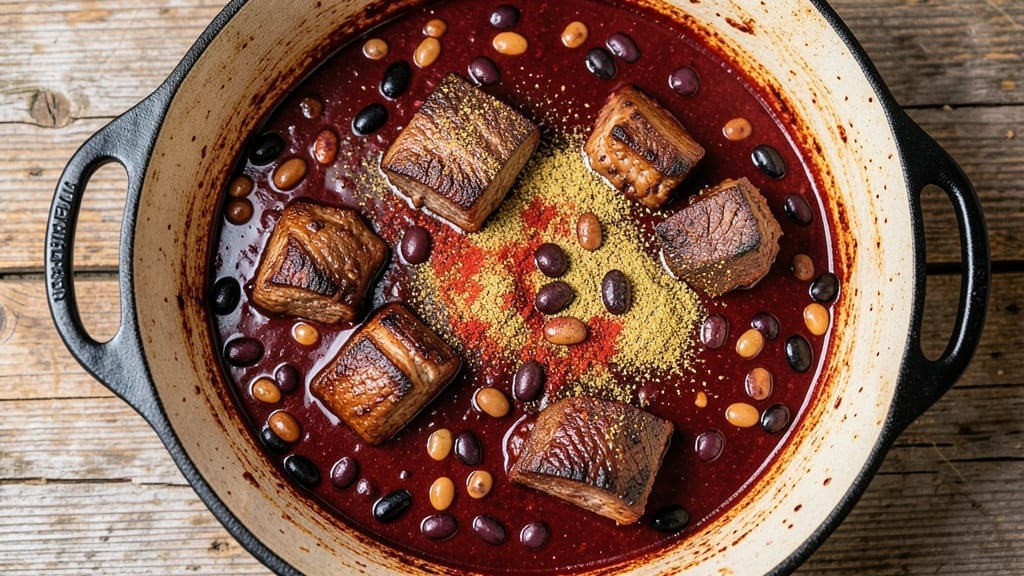
Cooking a 30-gallon chili isn’t just about feeding a crowd—it’s about creating a shared experience that brings people together around a pot of smoky, spiced perfection.
This recipe transforms tough cuts of meat and hearty beans into a symphony of deep flavors that simmer for hours, developing layers of complexity that store-bought versions can’t match. The key lies in balancing bold spices, slow cooking, and precise ingredient ratios to ensure every bowl tastes like the first.
What sets this recipe apart is its scalability—whether you’re feeding a family reunion, a church gathering, or a tailgate party, the same principles apply. We’ll focus on beef chili as the foundation, but I’ll also share how to adapt it for turkey or vegetarian options without sacrificing depth.
The slow-cooking method ensures tender meat and fully developed flavors, while safety tips will help you manage large batches like a pro. No shortcuts here—just time-tested techniques that deliver restaurant-quality results at home.
By the time you’re done, you’ll have a pot of chili so rich and aromatic that the smell alone will have everyone gathering around.
The texture is what makes it special—tender chunks of meat, perfectly cooked beans, and a sauce that’s thick enough to coat a spoon but light enough to let the spices shine.
This isn’t just chili; it’s a centerpiece for any gathering, a dish that turns a simple meal into an event.
Serve it with cornbread, tortilla chips, or a dollop of sour cream to let everyone customize their bowl. The leftovers? Even better the next day, as the flavors continue to meld. Let’s get started on a recipe that’s as much about the process as it is about the final product.
Ingredients for 30 gallon chili
Here’s what you’ll need to create a 30-gallon chili that feeds a crowd with bold, balanced flavors.
| Ingredient | Amount | Notes |
|---|---|---|
| Beef Chuck Roast 🥩 | 25 lb | Cubed into 1-inch pieces, chuck preferred |
| Kidney Beans 🌱 | 10 cups | Dried, soaked overnight (or 5 cans, drained) |
| Black Beans 🌱 | 10 cups | Dried, soaked overnight (or 5 cans, drained) |
| Pinto Beans 🌱 | 10 cups | Dried, soaked overnight (or 5 cans, drained) |
| Chili Powder 🌶️ | 4 cups | Medium heat, not hot (Penzeys brand recommended) |
| Ground Cumin 🌿 | 1 cup | Toasted for deeper flavor |
| Garlic Powder 🧄 | ½ cup | Freshly ground preferred |
| Onion Powder 🧅 | ½ cup | Not onion salt |
| Smoked Paprika 🌶️ | ½ cup | For that deep smoky flavor |
| Dried Oregano 🍃 | ¼ cup | Mexican oregano if available |
| Cayenne Pepper 🔥 | ¼ cup | Adjust to taste for heat |
| Salt 🧂 | 1 ½ cups | Kosher or sea salt, not iodized |
| Black Pepper 🌶️ | ½ cup | Freshly ground preferred |
| Tomato Paste 🍅 | 5 cups | No-sugar-added preferred |
| Yellow Onions 🧅 | 10 whole | Diced into 1/2-inch pieces |
| Garlic Cloves 🧄 | 10 cloves | Minced fine |
| Beef Broth 💧 | 10 cups | Low-sodium preferred |
| Water 💧 | 20 cups | Filtered preferred |
| Lemon Juice 🍋 | ½ cup | Brightens flavors |
| Dark Brown Sugar 🍚 | 1 cup | Balances acidity |
| Cocoa Powder 🍫 | ¼ cup | Unsweetened for depth |
The beef is the backbone of this chili—chuck roast is the gold standard because it stays tender through hours of simmering. Costco or Sam’s Club sell it in bulk, which saves money and time. Look for good marbling, not lean cuts. The beans? Dried is ideal—soak them overnight, then drain and rinse before adding. If you’re short on time, canned beans work in a pinch, but they won’t have the same texture. For the spices, Penzeys or bulk bins at Whole Foods have the best quality—avoid the pre-mixed chili seasoning packets. They’re packed with salt and lack depth.
No chuck roast? Turkey thighs or chicken thighs work well—just add an extra 30 minutes to the cooking time. Short on beans? Substitute with lentils or extra kidney beans, but adjust the liquid accordingly. The tomato paste can be swapped for crushed tomatoes (28 oz cans), but you’ll need about 10 cans to match the volume. For the spices, if you don’t have smoked paprika, regular paprika plus a pinch of liquid smoke gets you close. The cocoa powder might seem odd, but it adds that deep, rich complexity—don’t skip it. If you’re making this vegetarian, swap the beef for extra-firm tofu or mushrooms and use vegetable broth instead of beef broth.
This chili tastes even better the next day, so make it a day ahead if you can. Store in food-grade buckets or large stock pots—never metal if it’s going to sit overnight. Keeps for 5-7 days in the fridge or 6 months frozen. For serving, I recommend slow cookers or chafing dishes to keep it warm. Label everything clearly if you’re freezing portions—trust me, you’ll thank yourself later. Leftovers reheat beautifully; just stir in a splash of broth or water if it’s too thick.
Why You’ll Love This Recipe
- No-Chop Needed: The beef chuck roast is the star—just dump it in whole, slow-cook until tender, and forget about chopping. My kids still ask why I bother with anything else after tasting that melt-in-your-mouth texture.
- Deep, Smoky Richness: That chili powder isn’t just seasoning—it’s the backbone. When the beans and beef marry after hours of simmering, you get layers of heat and earthiness that turn simple ingredients into something ridiculously satisfying.
- Game-Day Crowdpleaser: Between us, this is the only chili I make for tailgates or big gatherings. Thirty gallons means no one leaves hungry, and the mix of kidney, black, and pinto beans keeps every bite hearty—no sad, watery servings here.
- Leftovers That Save Me: Honestly, I make this on Sundays because the fridge stays stocked for a week. The flavors only get better the next day, and freezing portions means I’m never scrambling for dinner after a long workweek. Budget-friendly? Absolutely.
Step-by-step instructions for crowd-pleasing chili
Here’s how to build a legendary 30-gallon chili that feeds a crowd with deep, complex flavors.
Brown the Beef for Maximum Flavor
In a large stockpot or Dutch oven, heat 2 tablespoons of oil over medium-high heat. Add the 25 lb beef chuck roast in batches, making sure not to overcrowd the pan. Brown the beef on all sides for 8-10 minutes total, until it develops a deep crust. This step is crucial—it builds the foundation of your chili’s rich flavor.
As the beef browns, you’ll see those beautiful caramelized bits forming on the bottom of the pot. These are packed with flavor, so don’t scrape them out. Once all the beef is browned, transfer it to a large bowl and set it aside. You’ll add it back later after building the flavor base.
Build the Spice and Aromatic Base
In the same pot, add 10 whole yellow onions that have been diced into ½-inch pieces and 10 cloves garlic that have been minced. Cook these for 5-7 minutes until the onions are soft and translucent, stirring occasionally. The onions should release their moisture and begin to caramelize slightly.
Now it’s time to add the spices. Stir in 4 cups chili powder, 1 cup ground cumin, 0.5 cup garlic powder, 0.5 cup onion powder, 0.5 cup smoked paprika, 0.25 cup dried oregano, and 0.25 cup cayenne pepper. Cook these spices for 1-2 minutes, stirring constantly, until they become fragrant and the mixture darkens slightly. This step releases the full flavor potential of your spices.
Add Liquids and Tomato Paste
Pour in 10 cups beef broth and 20 cups water, then stir in 5 cups tomato paste. Bring the mixture to a boil, then reduce heat to medium-low and let it simmer for 15 minutes, stirring occasionally. This allows the tomato paste to fully incorporate and the flavors to meld together.
After 15 minutes, return the browned beef to the pot. Add 10 cups kidney beans, 10 cups black beans, and 10 cups pinto beans (if using dried beans, make sure they’re drained and rinsed). Stir in 1.5 cups salt and 0.5 cup black pepper. The mixture should be bubbling gently but not boiling vigorously.
Simmer and Develop Complex Flavors
Cover the pot and let the chili simmer on low heat for 4-6 hours, stirring occasionally. The longer it simmers, the deeper the flavors will become. After 2 hours, taste the chili and adjust the seasoning if needed. You might want to add more salt, cayenne, or even a splash of lemon juice to brighten the flavors.
About 30 minutes before the chili is done, stir in 1 cup dark brown sugar and 0.25 cup cocoa powder. These ingredients add a subtle sweetness and depth that balances the heat and acidity. The chili should be thick and rich, with a glossy sheen on top. If it’s too thick, you can add a bit more water or broth to reach your desired consistency.
Rest and Serve
Once the chili has simmered for 4-6 hours and reached your desired thickness and flavor, remove it from the heat. Let it rest for at least 30 minutes before serving. This resting period allows the flavors to fully meld and the chili to thicken slightly as it cools.
Serve the chili hot with all the classic toppings: shredded cheese, sour cream, chopped onions, and fresh cilantro. This 30-gallon chili is perfect for feeding a crowd, and every bite will be packed with rich, smoky, and spicy flavors that keep everyone coming back for more. Enjoy your chili feast!
Pro Tips For Making 30 Gallon Chili
- Sear the Chuck First: High heat. Seriously, crank it up for 5-7 minutes per side on that beef chuck roast before adding anything else—this isn’t just for flavor, it’s for texture. I learned this the hard way when my first 30-gallon batch turned out mushy; the crust locks in moisture and keeps the meat tender through hours of simmering.
- Soak Beans Overnight: Skip the quick-soak hacks. Three different bean types (kidney, black, pinto) all need 12+ hours in cold water to soften properly—yes, even if you’re impatient like me. Drain and rinse right before adding them to the pot, or your chili will taste like a bean-water stew instead of rich, hearty goodness.
- Simmer Low and Slow: Start hot, finish low. Boil for the first 30 minutes to build flavor, then drop to a bare simmer (180-190°F)—any hotter and the beans turn to mush, the meat gets tough. I used to rush this, and my chili always ended up watery. Trust the process; it’s the only way to get that deep, smoky depth in 30 gallons.
- Brown the Chili Powder: Toast that chili powder in a dry skillet for 30 seconds before mixing it in—just until you smell the spices wake up. Sounds weird, but it works: the raw, bitter edge softens, and the flavor becomes layered instead of one-dimensional. (Your future self will notice the difference.)
Wine and beer pairings for this dish
Red Wine Pairings
A bold Zinfandel from California is my go-to pairing for this chili—its jammy fruit and peppery notes complement the smoky spices beautifully. Look for a 2018 Dry Creek Vineyard Zinfandel with its dark berry flavors and subtle oak.
The alcohol content helps cut through the richness while enhancing the chili’s depth. Serve slightly chilled to let the wine’s acidity balance the heat. 🍷
Malbec for Heat Lovers
If your chili has extra cayenne, a Argentinian Malbec like Catena Zapata stands up to the heat with its dark fruit and velvety tannins. The wine’s smoky undertones mirror the chili’s paprika, while its smooth finish prevents palate fatigue.
Aim for a 2019 vintage—younger Malbecs have enough acidity to refresh between bites.
Beer Pairings
A Mexican lager like Modelo Especial is my top beer choice—its crisp, clean profile lets the chili’s complex flavors shine without overpowering them. The light maltiness contrasts nicely with the smoky spices.
For a local option, try Corona Extra or Pacifico—both have enough carbonation to cleanse the palate between servings. 🍺
IPA for Spice Enthusiasts
If you love a hoppy kick, a West Coast IPA like Stone Ruination pairs surprisingly well with the chili’s heat. The citrusy hops cut through the richness, while the malt backbone stands up to the spices.
Serve the IPA slightly warmer than usual to enhance its floral notes against the chili’s smokiness.
Cider for a Refreshing Twist
For a non-alcoholic option, try a dry hard cider like Angry Orchard Crisp Apple. The tart apple flavors complement the chili’s sweetness, while the effervescence helps balance the heat. Chill it thoroughly—this cider’s crispness makes it perfect for hot summer gatherings when chili is still on the menu. 🍏
Serving Temperature Tips
Wine should be served slightly cooler than room temperature—around 60-65°F for reds—to preserve their acidity. Beers and ciders work best well-chilled at 38-42°F. The contrast between the warm chili and cold beverage creates a satisfying sensory experience that keeps guests reaching for seconds. 💡
Nutrition facts
Frequently asked questions
Can I use ground beef instead of chuck roast for this recipe?
While chuck roast is ideal for its tender texture, you can substitute with ground beef—just use 30 lbs total (80/20 blend for best flavor). Brown it thoroughly first to develop deep, meaty notes. The cooking time will be shorter (3-4 hours instead of 4-6 hours), but you’ll need to add 1 extra cup of tomato paste to compensate for moisture loss.
How do I adjust the spice level for kids or sensitive eaters?
For milder chili, reduce the cayenne pepper to 1 tablespoon and skip the smoked paprika (or use half the amount). Keep the chili powder at 3 cups and add 1 extra cup of cocoa powder for depth without heat. Always make a small batch first to test the flavor—this lets you adjust before committing to the full 30-gallon pot.
What’s the best way to keep chili warm for 100+ servings?
Use a combination of slow cookers and chafing dishes. Divide the chili into 3-4 large slow cookers (8-10 quarts each) on low heat. For buffet-style serving, use electric chafing dishes filled with hot water (not boiling) and place the chili pots on top. Replace water every 2 hours to maintain 165°F+ temperature.
Can I make this vegetarian? What should I substitute?
Replace the beef with 30 lbs of extra-firm tofu (pressed and cubed) or mushrooms (20 lbs cremini + 10 lbs portobello). Use vegetable broth instead of beef broth and add 2 cups of tomato paste + 1 cup of nutritional yeast for umami depth. The beans will still provide protein, but you may want to add 10 lbs of lentils for extra heartiness.
How do I store and reheat leftovers safely?
Cool the chili to 70°F within 2 hours, then refrigerate in food-grade buckets or large glass jars. Leftovers keep for 5-7 days. To reheat, transfer portions to a pot and warm on low heat, stirring frequently, until reaching 165°F. For freezing, portion into 1-gallon containers and freeze for up to 6 months. Thaw overnight in the fridge—never at room temperature.

- 3lb Prime Rib Roast Recipe: Juicy Pink Center Guaranteed in 3 Hours - October 31, 2026
- 5 Spice Cake Recipe: Warmly Spiced Layers With Crunchy Top - October 31, 2026
- 1950’s Macaroni and Cheese Recipe: Nostalgic Creamy Cheese Sauce with Buttery Noodles - October 31, 2026