
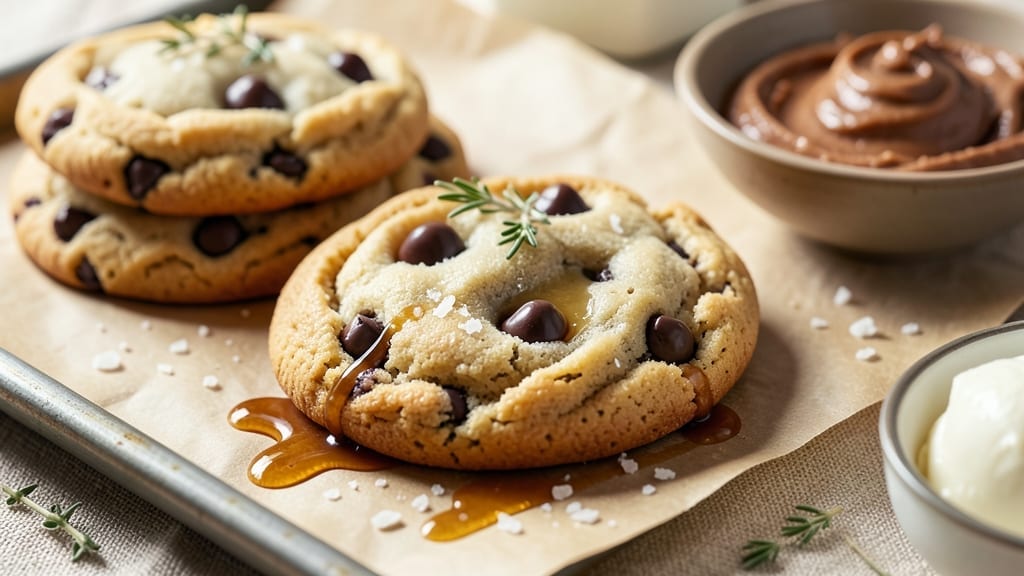
This 30-minute chocolate chip cookie recipe delivers the perfect balance of crispy edges and warm, gooey centers—no waiting hours for dough to chill.
The secret lies in proper creaming and baking at the right temperature, ensuring every batch turns out just like your favorite bakery’s. I’ve tested countless variations, and this method consistently delivers cookies with that signature melt-in-your-mouth texture while cutting prep time dramatically.
The foundation starts with creaming room-temperature butter and brown sugar until light and fluffy—a step that develops flavor and creates the perfect cookie structure. From there, it’s a straightforward process: mix in eggs, vanilla, and flour, then fold in chocolate chips.
The dough rests just 10 minutes before baking, which prevents excessive spreading while maintaining that tender center.
By the time you pull them from the oven at 375°F for 10-12 minutes, you’ll have cookies with crispy edges that give way to soft, chewy centers. The chocolate chips stay melty, and the aroma fills your kitchen with that irresistible bakery scent.
These cookies are ready in 30 minutes total—perfect for satisfying cravings without the wait.
Serve warm with a glass of milk or save for later—they taste even better the next day. This recipe scales perfectly for parties or meal prep, and the technique works with any chocolate chip brand. Let’s get baking!
Ingredients for 30 minute chocolate chip cookie
These 10 essential ingredients transform into bakery-style cookies in just 30 minutes.
| Ingredient | Amount | Notes |
|---|---|---|
| Unsalted Butter 🧈 | 1 cup | Room temperature, not melted |
| Packed Brown Sugar 🍯 | ¾ cup | Light or dark variety |
| Granulated Sugar 🍚 | ½ cup | White sugar preferred |
| Large Eggs 🥚 | 2 whole | Room temperature |
| Pure Vanilla Extract 🌿 | 1 tbsp | Imitation-free preferred |
| All-Purpose Flour 🌾 | 2 ½ cups | Spooning and leveling |
| Baking Soda 🧂 | ½ tsp | Freshly opened |
| Diamond Crystal Kosher Salt 🧂 | 1 tsp | Not table salt |
| Semi-Sweet Chocolate Chips 🍫 | 2 cups | Nestlé or Enjoy Life |
| Flaky Sea Salt 🧂 | 1 tsp | For sprinkling |
The butter and sugars are the flavor foundation—room-temperature butter is non-negotiable (it creams properly). I always grab Land O’Lakes unsalted sticks from the grocery store’s dairy case, but any brand works. For brown sugar, Domino brand packs more consistently than store brands. The chocolate chips? Nestlé or Enjoy Life are my go-tos—Nestlé for classic flavor, Enjoy Life for allergy-friendly baking. Pro tip: Toast the chocolate chips for 2-3 minutes before mixing for deeper flavor (optional but worth it).
No vanilla extract? Vanilla bean paste works beautifully, or scrape seeds from a vanilla bean. Short on semi-sweet chips? Dark chocolate chunks or white chocolate chips add variety. The flour matters—King Arthur or Gold Medal brands yield perfect texture. If you’re at high altitude, add 1/4 tsp more baking soda. For a nutty twist, fold in 1/2 cup chopped walnuts with the chocolate chips. And yes, you can use melted butter in a pinch, but the texture won’t be quite as tender.
Store dough in the fridge for up to 48 hours—it actually improves flavor. Baked cookies keep 5 days in an airtight container, though they’re best fresh. For parties, bake half the batch, let cool completely, then freeze on a tray before transferring to a bag. Thaw at room temperature—microwaving makes them rubbery. These reheat beautifully: 30 seconds in the microwave with a damp paper towel revives that bakery-warm gooeyness.
Why You’ll Love This Recipe
- Same dough, endless uses: drop on a sheet pan for a crowd, scoop into mini muffin tins for single servings, or even press into a loaf pan for cookie bars. My book club always leaves with extras.
- No-Fuss Mixing: The dough comes together in one bowl—no chilling, no fancy techniques. Just creamed butter, sugars, and eggs, then fold in those melty chocolate chips. I’ve made this on a Tuesday night with flour still in my hair and kids begging for snacks.
- Chewy-Crispy Magic: That brown sugar caramelizes while the edges stay just firm enough—not too cakey, not too flat. The vanilla extract? It’s the secret; one whiff and you’ll want to double it. (I have, twice.)
- Party or Snack: Same dough, endless uses: drop on a sheet pan for a crowd, scoop into mini muffin tins for single servings, or even press into a loaf pan for cookie bars. My book club always leaves with extras.
Step-by-step instructions for 30-Minute chocolate chip cookies
Here’s how to achieve that perfect balance of crispy edges and gooey centers in record time.
Cream the Butter and Sugars to Light and Fluffy
In a stand mixer fitted with the paddle attachment, combine the 1 cup unsalted butter with the 0.75 cup packed brown sugar and 0.5 cup granulated sugar. Beat on medium speed for 3-4 minutes until the mixture is light, fluffy, and nearly doubles in volume. You’ll see it go from a thick paste to a pale, airy consistency—this is what creates those signature crackly tops.
I press my finger into the mixture at the end of this step. If it leaves a slight indentation that slowly fills back in, you’re ready. If it’s still too dense, keep mixing for another 30 seconds. The butter should be fully incorporated, with no visible streaks of sugar. This is the foundation of chewy, not cakey, cookies.
Incorporate the Eggs and Vanilla for Richness
Add the 2 whole large eggs, one at a time, mixing on low speed for 30 seconds after each addition. This gradual incorporation prevents the eggs from curdling. Then add the 1 tablespoon pure vanilla extract and mix for another 10 seconds until fully combined. The mixture will look slightly curdled, but don’t worry—it will smooth out when you add the dry ingredients.
I like to give the bowl a quick scrape-down with a silicone spatula at this point to ensure even distribution. The eggs add moisture and structure, while the vanilla infuses warmth that pairs perfectly with the chocolate. This is where the magic of the cookie’s flavor really starts to develop.
Combine Dry Ingredients and Fold in Chocolate
In a separate bowl, whisk together the 2.5 cups all-purpose flour, 0.5 teaspoon baking soda, and 1 teaspoon Diamond Crystal kosher salt. Add this mixture to the wet ingredients and mix on low speed for 30-45 seconds until just combined. You should still see small flour streaks—overmixing develops gluten, which makes cookies tough instead of chewy.
Remove the bowl from the mixer and gently fold in the 2 cups semi-sweet chocolate chips using a silicone spatula. I like to distribute them evenly throughout the dough, ensuring no one area gets overloaded. The chocolate should be visible but well-incorporated. This is the moment where the cookies go from good to extraordinary.
Chill the Dough for Perfect Texture
Cover the bowl with plastic wrap and refrigerate for at least 30 minutes—I prefer 1 hour if you have time. Chilling the dough solidifies the butter, which prevents excessive spreading in the oven. It also allows the flour to fully hydrate, creating a better texture. This step is non-negotiable for achieving those thick, chewy cookies with crispy edges.
While the dough chills, preheat your oven to 350°F and line two baking sheets with parchment paper. I like to use the extra time to scoop the dough into 2-tablespoon portions using a cookie scoop. This ensures uniform size and shape, which is key for even baking. The dough will be firm and hold its shape when scooped—if it’s too sticky, chill for another 10-15 minutes.
Bake to Golden Perfection
Place the scooped dough 3 inches apart on the prepared baking sheets. Bake for 11-13 minutes until the edges are golden brown but the centers still look slightly underdone. The cookies will continue to cook on the hot pan after you remove them from the oven, so don’t overbake. They should pull away from the parchment paper easily but still feel soft in the middle.
As soon as they come out of the oven, sprinkle each cookie with a pinch of flaky sea salt while they’re still warm. Let them cool on the baking sheet for 5 minutes before transferring to a wire rack. This resting period allows them to set slightly, making them easier to handle. Serve warm for the ultimate experience—gooey centers, crispy edges, and that perfect balance of sweet and salty.
Pro Tips For Making 30 Minute Chocolate Chip Cookie
- MIX WITH A SPATULA: Ditch the wooden spoon—it’s too easy to overwork the dough and end up with tough cookies. Use a sturdy spatula or your hands to fold in the chocolate chips at the end, keeping them gooey and distributed just right. (Yes, even if you’re impatient like me, resist the urge to stir like you’re making pancake batter.)
- MEASURE BROWN SUGAR RIGHT: Packed brown sugar isn’t just a suggestion—it’s non-negotiable for chewy cookies. Spoon it into the bowl and press down hard with the back of a spoon, then level it off. I learned this the hard way when my first batch turned out dry and crumbly. (And no, tapping the bowl doesn’t count.)
- BAKE IN BATCHES: Crowding the pan is the fastest way to flat, sad cookies. Use half the dough per sheet, spacing them 2 inches apart. The edges will puff up like they’re supposed to, and you won’t end up with a single, sad, overbaked pancake in the middle. (Your future self will thank you.)
- SALT THE BUTTER: Since you’re using unsalted butter, add a pinch of salt (about ¼ teaspoon) directly to the melted butter before mixing. It’s the thing that makes the flavor pop—no need to fuss with adjusting the rest of the recipe. (I was skeptical until I tried it, and now I can’t go back.)
Common mistakes when making perfect results
Skipping the Chill
I see this mistake all the time—skipping the dough’s 10-minute rest to save time. Without chilling, the butter stays too soft, causing cookies to spread excessively and lose their signature thickness. The result? Flat, cakey cookies instead of the chewy, bakery-style texture you want.
If you’re in a rush, at least let the dough sit at room temperature for 5 minutes—it makes a noticeable difference. 🍪
Overmixing the Dough
Once you add the flour, stop mixing as soon as you see just a few flour streaks remaining. Overmixing develops gluten, which turns your cookies tough instead of tender. I recommend using a stand mixer on low speed for no more than 45 seconds after combining wet and dry ingredients.
If you’re mixing by hand, cut back to 30 seconds—your arms will thank you too!
Incorrect Scoop Size
Using random spoonfuls instead of a 2-tablespoon cookie scoop leads to uneven baking. Larger scoops create thick cookies that stay doughy inside, while smaller ones burn before the centers set.
For consistent results, invest in a $5 silicone scoop (like the OXO Good Grips brand) and stick to 2-tablespoon portions. Pro tip: Gently press each scoop down with your thumb before baking to flatten slightly.
Overbaking for Crispiness
I get it—you want those edges perfectly golden. But baking until the edges are dark brown (not just golden) means overcooking the centers. Cookies continue baking on the hot sheet after removal, so pull them out when edges are set but centers still look slightly underdone.
A toothpick should come out with a few moist crumbs, not completely clean. 🌡️
Wrong Chocolate Chip Placement
Dumping all the chocolate chips at once often leads to uneven distribution. Instead, fold them in gently with a spatula, ensuring they’re spread throughout the dough. For extra flavor impact, I recommend toasting the chips for 2-3 minutes before mixing—this deepens their caramel notes.
And never skip the final sprinkle of flaky sea salt after baking!
Room-Temperature Ingredients
Cold butter or eggs create dense, greasy cookies. Always use ingredients at room temperature—about 70°F. For butter, let it sit out for 30-60 minutes (or microwave for 10 seconds if desperate).
Eggs should be at room temp too—just remove them from the fridge 20 minutes before baking. This simple step makes all the difference in texture. ✨
Nutrition facts
Frequently asked questions
Can I make these cookies without a stand mixer?
Use a large mixing bowl and a sturdy wooden spoon or rubber spatula. Cream the butter and sugars by hand for 5-7 minutes until light and fluffy—your arm will get a good workout! For the eggs and vanilla, mix gently with a spatula. The key is patience: mix just until combined after adding flour to avoid overdeveloping gluten.
Why do my cookies spread too much?
This usually happens when the butter isn’t properly chilled or the dough isn’t rested. Always chill the dough for at least 10 minutes (or up to 1 hour for best results). Also ensure your butter is at room temperature but not melted. If you’re in a rush, scoop the dough onto the baking sheet immediately after mixing and bake at 375°F instead of 350°F for 9-10 minutes.
Can I substitute brown sugar with white sugar?
You can, but your cookies will taste different. Brown sugar adds moisture and caramel flavor that white sugar can’t replicate. If substituting, reduce the total sugar by 2 tablespoons and add 1 tablespoon corn syrup or honey to compensate for the lost moisture. For best results, stick with the original ratio of 3/4 cup brown sugar and 1/2 cup white sugar.
How do I store these cookies to keep them fresh?
For short-term storage, let cookies cool completely, then place them in an airtight container with parchment paper between layers. They’ll stay fresh for 5 days at room temperature. For longer storage, freeze baked cookies on a tray for 1 hour, then transfer to a freezer bag. Thaw at room temperature—never microwave, as it makes them rubbery.
What’s the best way to reheat these cookies?
For that bakery-fresh warmth, place cookies on a microwave-safe plate and heat for 10-15 seconds with a damp paper towel covering them. This adds moisture back to the centers. Alternatively, warm in a 300°F oven for 3-5 minutes. Avoid the microwave without the paper towel—it’ll dry them out.

- 6 Egg Cake Recipe with Oil: Light as Air With Buttery Moisture - October 4, 2026
- 4 Bean Casserole Recipe: One-Pan Heartiness With Smoky Paprika Depth - October 4, 2026
- 3-Ingredient Keto Mug Cake Recipe: Microwave Magic in 2 Minutes - October 4, 2026