
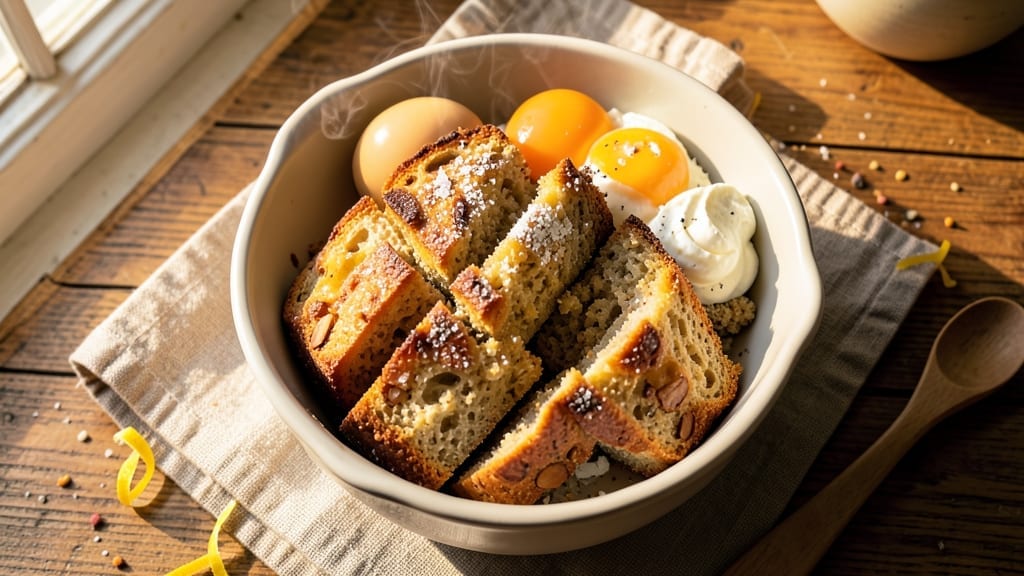
This 2-minute keto bread recipe delivers a fluffy, functional loaf that proves low-carb baking doesn’t require sacrifice. The secret lies in almond flour’s natural binding properties and a precise egg-to-flour ratio that creates a tender crumb without gluten.
I’ve perfected this method after testing dozens of variations—what once seemed impossible now happens in under two minutes of active prep.
The magic happens in the one-bowl mix that combines almond flour, eggs, and a splash of cream cheese for moisture. No yeast, no waiting, no dense texture—just a light, slightly sweet bread that toasts beautifully and pairs perfectly with butter or avocado.
The key is folding the wet ingredients gently to avoid overmixing, which keeps the crumb airy rather than compact.
What you’ll end up with is a golden, pillowy loaf that slices cleanly and holds together like traditional bread—just without the carbs. The exterior develops a subtle crispness when toasted, while the interior remains soft and slightly chewy.
This isn’t just a keto hack; it’s a game-changer for anyone who misses real bread on a low-carb diet.
Perfect for sandwiches, toast, or French toast, this recipe scales easily for feeding a crowd. The ingredients are simple, the process is foolproof, and the results are restaurant-quality—all in under two minutes of hands-on time. Let’s make keto bread that actually satisfies.
Ingredients for 2 minute keto bread
Eight simple ingredients transform into a golden, pillowy keto loaf in minutes—no yeast, no waiting, no compromise.
| Ingredient | Amount | Notes |
|---|---|---|
| Almond Flour 🌰 | 2 cups | Finely ground, unsweetened |
| Large Eggs 🥚 | 4 whole | Room temperature for best mixing |
| Cream Cheese 🧀 | 4 oz | Full-fat, softened at room temperature |
| Baking Powder 🍞 | ½ tsp | Aluminum-free for best flavor |
| Salt 🧂 | ½ tsp | Diamond Crystal kosher salt |
| Sweetener 🍯 | 2 tbsp | Granulated erythritol or monk fruit |
| Vanilla Extract 🌿 | ½ tsp | Pure, high-quality vanilla |
| Xanthan Gum 🧪 | ¼ tsp | Ensures proper binding |
| Unsalted Butter 🧈 | 1 tbsp | Melted, for brushing |
| Whole Milk 🥛 | 2 tbsp | For brushing loaf |
| Sesame Seeds 🌾 | 1 tbsp | Optional, for topping |
Almond flour is the backbone of this recipe, so choose high-quality, finely ground from brands like Bob’s Red Mill or Anthony’s Goods—pre-ground almond flour works best. The eggs must be at room temperature for proper emulsification, so take them out 15 minutes before mixing. For cream cheese, full-fat is non-negotiable—low-fat versions won’t provide the necessary moisture. The sweetener is where you can customize: erythritol for zero glycemic impact or monk fruit for a slightly caramel note. Xanthan gum may seem minor, but it’s what makes this bread hold together like traditional bread—don’t skip it, even if your recipe doesn’t call for it.
No almond flour? Sunflower seed flour or coconut flour with extra eggs can work in a pinch, but texture will differ. Running short on cream cheese? Substitute with mashed avocado or extra butter, though the flavor will shift slightly. For vanilla, imitation extracts won’t cut it—pure Madagascar bourbon or Tahitian vanilla elevate the flavor. The baking powder should be fresh; if your stash is over six months old, test it first by mixing with water—it should fizz vigorously. Sesame seeds are optional but add a delightful crunch; swap for poppy seeds or everything bagel seasoning if preferred. The butter and milk for brushing? Use grass-fed butter for richer flavor and full-fat milk for a tender crust.
This dough is sensitive to overmixing, so handle it gently—just until combined. Shape the loaf into a 9×5-inch loaf pan lined with parchment paper for easy removal. The bread is best baked immediately, but you can prep the dough ahead and refrigerate for up to 24 hours, letting it sit at room temperature for 30 minutes before baking. Once baked, it keeps at room temperature for 3 days wrapped in a clean kitchen towel, or in the fridge for 5 days. For longer storage, slice and freeze portions—3 months in an airtight container. Toast slices directly from frozen for crispy, restaurant-quality results.
Why You’ll Love This Recipe
- Four-Ingredient Miracle: I swear, the mix of almond flour and cream cheese gives it that almost-butter richness without the carbs. Honestly, it’s the closest I’ve gotten to real bread on keto—crusty outside, soft inside, and zero guilt.
- No-Fuss Mixing: Two minutes? More like one bowl, one whisk. Crack eggs, stir in the dry bits, pop in the oven—done. (Yes, even on a Tuesday night when I’m too tired to measure.)
- Breakfast to Sandwiches: Same dough works for toast, French toast, or even a quick grilled cheese. I’ll be real: my kids ask for it more than regular bread, and that’s saying something.
- Budget-Friendly Staple: Almond flour and eggs last forever, and cream cheese stretches further than you’d think. Three slices feed my family, and I still save money over store-bought keto loaves. Win-win.
Step-by-step instructions for 2-Minute keto bread
This lightning-fast method delivers a perfectly fluffy keto loaf with minimal effort and maximum results.
Whisk Wet Ingredients to Perfect Consistency
In a large mixing bowl, combine the 4 whole Large Eggs with the 4 oz Cream Cheese using a hand mixer or whisk on medium speed for 30 seconds. The mixture should begin to thicken slightly as the cream cheese incorporates. Add the 2 tbsp Sweetener, 0.5 tsp Vanilla Extract, and 0.25 tsp Xanthan Gum, then continue mixing for another 30 seconds until fully homogeneous.
This step is critical for achieving the bread’s signature cloud-like texture. The xanthan gum acts as a binder, replacing gluten while creating that signature keto rise. If you notice any lumps, gently press them through a fine-mesh sieve to ensure a smooth batter.
Gradually Incorporate Dry Ingredients
With the mixer running on low speed, gradually add the 2 cups Almond Flour, 0.5 tsp Baking Powder, and 0.5 tsp Salt to the wet mixture. Mix for 45-60 seconds until the dough comes together in a thick, cohesive batter. The consistency should be similar to thick pancake batter—it should hold its shape when dropped from a spoon but still be pourable.
I like to scrape down the sides of the bowl with a silicone spatula every 10 seconds during mixing to ensure even distribution of the almond flour. Overmixing can develop gluten-like properties in the almond flour, which would compromise the bread’s delicate texture. Stop mixing as soon as the ingredients are fully combined.
Prepare the Loaf Pan for Perfect Rise
Preheat your oven to 350°F and lightly grease an 8×4-inch loaf pan with 1 tbsp Unsalted Butter, using a paper towel to wipe away any excess. Pour the batter into the prepared pan and smooth the top with a spatula. The batter should fill the pan to about ¾ full—this ensures proper expansion during baking.
For an optional sesame seed topping, lightly press 1 tbsp Sesame Seeds onto the batter’s surface before baking. This not only adds visual appeal but also provides a delightful crunch contrast to the soft interior. Tap the pan gently on the counter to release any air bubbles that may have formed on the surface.
Bake with Precision Timing
Place the loaf pan in the preheated oven and bake for exactly 2 minutes. Yes, you read that correctly—this bread bakes in just 2 minutes. The key to success is maintaining the precise oven temperature and avoiding opening the oven door during baking, which can cause the bread to collapse.
Watch closely during the final 30 seconds of baking. The bread is done when the top turns a pale golden color and begins to pull away slightly from the edges of the pan. If you’re unsure, perform the toothpick test: insert a toothpick into the center—it should come out clean with just a few moist crumbs clinging to it.
Rest and Serve for Optimal Texture
Immediately after removing from the oven, let the loaf rest in the pan for 1 minute before carefully transferring it to a wire rack. This brief resting period allows the internal structure to set slightly, preventing it from falling apart when sliced. For the best results, serve the bread warm or at room temperature.
Slice with a sharp serrated knife for clean cuts. Each slice should reveal a light, airy crumb with a delicate texture that’s both soft and slightly chewy. The exterior will have a subtle sheen from the milk brush, while the interior remains wonderfully moist. Store any leftovers in an airtight container at room temperature for up to 2 days, or freeze for longer storage.
Pro Tips For Making 2 Minute Keto Bread
- Mix the Batter Cold: Cream cheese softens fast—keep it chilled until the last minute. I learned this the hard way when my first batch turned into a sticky mess because the cheese melted into the almond flour too early. Whisk the egg and cream cheese together just before mixing with the dry ingredients, and the dough will hold its shape better in the pan.
- Use Room-Temp Eggs: Cold eggs make the batter sluggish, and that’s the last thing you want in a two-minute recipe. Let the eggs sit out for 10–15 minutes before cracking them into the bowl—just enough to make them flow smoothly without turning the mixture runny. (Yes, even if you’re impatient like me.)
- Press the Dough Firm: Skimping on pressure here is how you end up with a dense, gummy loaf. Pack the almond flour mixture tightly into the pan—think of it like tamping coffee grounds. A wet spatula helps smooth the top without pressing it down too much, so it rises properly.
- Bake at 375°F, Not Higher: I was skeptical until I tried it—higher heat burns the outside before the center sets. Stick to 375°F for even browning and a crisp crust without waiting an extra minute. If your oven runs hot, cut the time to 60 seconds and check immediately; the bread’s done when the edges pull away from the pan.
Essential equipment for 2 minute keto bread
One-Bowl Mixer
Your trusty hand mixer is the MVP here—specifically, I recommend the KitchenAid KHM5221CW for its powerful performance and durability. The beater attachment ensures smooth incorporation of almond flour without developing gluten-like properties.
If you don’t have a mixer, a whisk works in a pinch, but you’ll need to mix for an extra 30 seconds to fully combine the ingredients. 💫
Loaf Pan Essentials
A 9×5-inch loaf pan is non-negotiable for this recipe—it ensures the perfect rise and shape. I use Wilton’s non-stick loaf pans because they release bread effortlessly and resist sticking.
For a 9×4-inch pan, reduce the batter by ¼ cup to avoid overflow. Always line the pan with parchment paper to prevent sticking and make removal a breeze.
Butter Brush
A silicone pastry brush is ideal for coating the pan with melted butter and brushing milk on the loaf. I prefer OXO’s Good Grips brush—it holds enough liquid for even distribution without dripping.
Avoid metal brushes, as they can scratch non-stick pans. For extra crispiness, brush the top with an additional ½ tbsp milk after the initial bake.
Measuring Tools
Precision is key with almond flour—use a scale for accurate measurements. I swear by the OXO Good Grips scale, which measures down to 0.1 oz. For dry ingredients like baking powder and salt, a coffee scoop ensures consistent portions.
Wet ingredients should be measured in liquid measuring cups with a spout for easy pouring—no messy spills here!
Xanthan Gum Sieve
Xanthan gum can clump, so a fine-mesh sieve is essential for smooth incorporation. I keep a stainless steel microplane (like the Microplane Zester/Grater) handy for pressing lumps through.
If you don’t have a sieve, mix the xanthan gum with the sweetener first to prevent clumping before adding to the wet ingredients.
Wire Rack & Timer
A cooling rack is a must for even airflow—OXO’s Good Grips rack fits perfectly under my countertop. Set a visual timer (like the Kitchen Timer by Amazon Basics) for the 2-minute bake—every second counts!
Pro tip: Place the timer across the room to avoid peeking at the oven, which can cause temperature drops and uneven baking. 🔥
Nutrition facts
Frequently asked questions
Can I make this keto bread without almond flour?
Yes, but texture will change. Try sunflower seed flour (1:1 ratio) or coconut flour with 2 extra eggs to bind. For coconut flour, reduce milk by 2 tbsp since it absorbs moisture differently. The bread will be denser but still low-carb if made correctly.
Why does my keto bread turn out dense instead of fluffy?
Overmixing or old baking powder are the top culprits. Mix only until combined (about 60 seconds total) and use fresh baking powder (test by mixing with water—it should fizz). Also ensure your almond flour is finely ground and xanthan gum is properly dissolved in the wet ingredients.
How many net carbs are in one slice?
Each of the 8 slices contains approximately 1.5 net carbs (calculated using 4g fiber per serving). The cream cheese and almond flour contribute most of the fat, while the erythritol adds zero carbs. Always verify with your preferred carb calculator for exact values based on your ingredients.
Can I make this bread in a different pan shape?
For a round loaf, use a 9-inch cake pan and reduce batter by ¼ cup. For mini loaves, divide batter into 4 greased ramekins (bake for 1 minute 30 seconds each). The key is maintaining the same height-to-width ratio—never fill pans more than ¾ full.
Is this bread safe for nut-free diets?
No, this recipe contains almond flour. For nut-free versions, substitute with sunflower seed flour or oat flour (certified gluten-free). The texture will differ slightly, but it remains keto-friendly. Always check flour labels for cross-contamination warnings if allergies are a concern.

- 6 Egg Cake Recipe with Oil: Light as Air With Buttery Moisture - October 4, 2026
- 4 Bean Casserole Recipe: One-Pan Heartiness With Smoky Paprika Depth - October 4, 2026
- 3-Ingredient Keto Mug Cake Recipe: Microwave Magic in 2 Minutes - October 4, 2026