
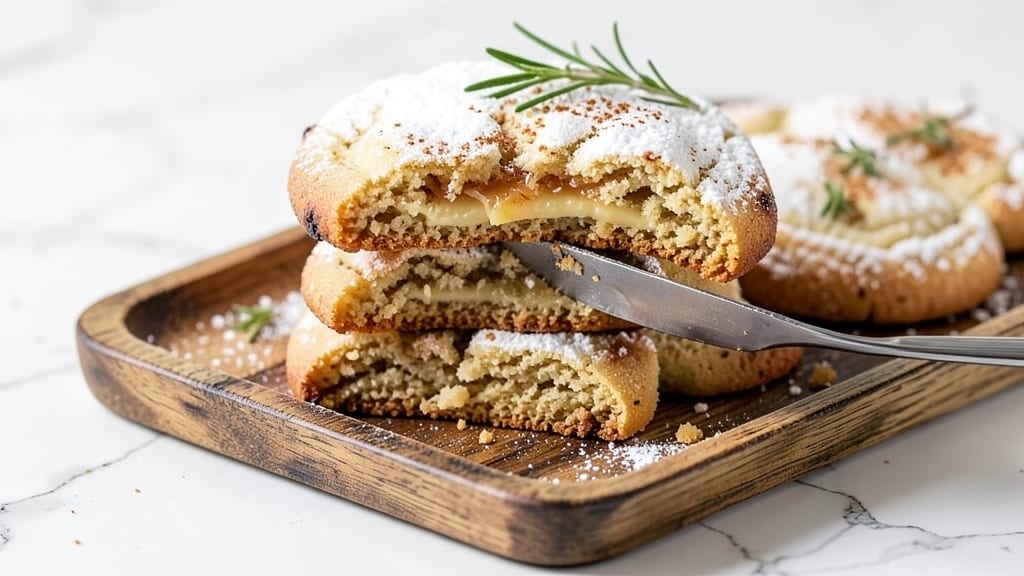
This 321 sugar cookie recipe delivers the perfect balance of crisp edges, tender centers, and a spice profile that lets the frosting shine—no more dry, crumbly cutouts or overly sweet dough.
The secret lies in precise ingredient ratios (3 cups flour, 2 sticks butter, 1 cup sugar) and a foolproof chilling technique that prevents spreading while developing flavor. I’ve baked these for holiday parties and gift-giving, and they consistently earn rave reviews for their texture and frosting-friendly foundation.
The dough’s magic comes from a 1:2:3 ratio of flour to butter to sugar, creating a tender yet sturdy base that holds intricate shapes without cracking.
You’ll work with cold butter and eggs for structure, then chill the dough for 24 hours—this step is non-negotiable for achieving that signature crispy edge and soft center. The spice blend (cinnamon, nutmeg, cloves) enhances the frosting without overpowering it, making these cookies versatile for any decorating style.
By the time you pull them from the oven, you’ll have golden, perfectly shaped cookies with crisp edges that hold their form under piping bags. The frosting (whether royal icing or buttercream) will adhere beautifully, thanks to the dough’s balanced moisture and sugar content.
This recipe isn’t just about the baking—it’s about the confidence of knowing your cutouts will look and taste professional every time.
Whether you’re outlining, flooding, or filling, these cookies take decoration to the next level. The 321 ratio ensures they’re sturdy enough for intricate designs while remaining tender enough to melt in your mouth. Ready to elevate your holiday baking? Let’s get started with the full recipe.
Ingredients for 321 sugar cookie
Here’s what you’ll need to bake the perfect 321 sugar cookies—crisp edges, tender centers, and a spice blend that makes frosting shine.
| Ingredient | Amount | Notes |
|---|---|---|
| All-Purpose Flour 🌾 | 3 cups | Sifted for light texture |
| Unsalted Butter 🧈 | 2 sticks | Cold, cubed for even mixing |
| Granulated Sugar 🍚 | 1 cup | Superfine preferred for smoothness |
| Large Eggs 🥚 | 2 whole | Room temperature for blending |
| Vanilla Extract 🌿 | 1 tbsp | Pure, high-quality extract |
| Ground Cinnamon 🌶️ | 1 ½ tsp | Freshly ground preferred |
| Ground Nutmeg 🌶️ | ½ tsp | Freshly grated for warmth |
| Ground Cloves 🌶️ | ¼ tsp | Lightly toasted for depth |
| Diamond Crystal Kosher Salt 🧂 | ½ tsp | Fine grain for even distribution |
| Cornstarch 🌾 | 1 tbsp | For tender, sturdy dough |
| Powdered Sugar 🍚 | ½ cup | For frosting base (optional) |
| Heavy Cream 🥛 | ¼ cup | For buttercream (optional) |
The flour is non-negotiable here—King Arthur or Gold Medal work best for that tender yet sturdy texture. Butter should be cold and cubed (not melted)—this keeps the dough from spreading. I always grab European-style butter like Plugrá or Land O’Lakes European Style for richer flavor. The sugar matters too: superfine sugar dissolves faster, giving you a smoother dough. If you only have granulated, pulse it in a food processor first. For the spices, Penzeys or Spicewalla have the best quality, but regular grocery store brands work fine if they’re fresh. Quick test: if your spices smell like dust, toss them.
No vanilla extract? Vanilla bean paste works in a pinch, or even 1 tsp vanilla sugar if you’re desperate. Short on nutmeg? Mace at half the amount gives a similar warmth. The cornstarch is key for that tender bite—don’t skip it. For the frosting, powdered sugar from Bob’s Red Mill dissolves more easily than store brands. Heavy cream for buttercream? Full-fat is non-negotiable—low-fat makes it grainy. And if you’re making royal icing, meringue powder is your secret weapon for stability. Pro tip: measure your dry ingredients by weight (grams) for even more precision—1 cup flour isn’t always 120g.
Dough keeps for 5 days in the fridge, wrapped tightly in plastic. For longer storage, freeze shaped dough balls for 3 months—they’ll bake straight from frozen. Spices lose potency fast, so store them in a cool, dark place (not above the stove). Butter should be used within 3 months of opening. And if you’re prepping ahead for parties, shape the dough into balls, wrap in parchment, and refrigerate—they’ll hold their shape perfectly until baking day.
Why You’ll Love This Recipe
- No Mixer Needed: I swear by this dough—just creaming butter and sugar until it’s light, then folding in flour like you’re making a snow angel. No stand mixer, no fuss, just elbow grease that pays off with that signature tender crumb.
- Butter-Sugar Magic: That creamed butter and sugar combo? It’s where the real flavor lives—rich, buttery, and just sweet enough to make your taste buds sing. Honestly, the vanilla ties it all together like a warm hug in cookie form.
- Holiday or Snack Attack: These cookies are my secret weapon for Christmas trees, teacher gifts, or when I just need something sweet after dinner. Cut them into stars, trees, or even simple rounds—they’re always a crowd-pleaser.
- Dollar Stretch: Five ingredients, zero waste. The dough keeps for days in the fridge, and baked cookies stay fresh for a week if you wrap them tight. My wallet (and my kids) thank me every time.
Step-by-step instructions for 321 sugar cookies
Here’s how to make cookies that bake up perfectly every time—crisp edges, tender centers, and just the right spice balance.
Cream Butter and Sugar for Light Texture
In a stand mixer fitted with the paddle attachment, beat the 2 sticks unsalted butter and 1 cup granulated sugar on medium speed for 3-4 minutes until light and fluffy. You’ll see the mixture nearly double in volume and become pale in color. This creaming process incorporates air, which creates those signature crackly tops and helps the cookies spread just enough for perfect cutouts.
I like to use a wooden spoon to scrape down the sides of the bowl every 30 seconds—this ensures even mixing and prevents the butter from overheating. You’re looking for a texture that’s smooth and airy, almost like whipped cream. If you’re using superfine sugar, the mixture will blend even more quickly, so keep an eye on it to avoid overmixing.
Add Eggs and Vanilla for Moisture
Add the 2 whole large eggs one at a time, mixing on low speed for 30 seconds after each addition until fully incorporated. Then add the 1 tablespoon vanilla extract and mix for another 10 seconds. The eggs add moisture and structure to the dough, while the vanilla enhances the warm spice notes we’re building.
I always make sure the eggs are at room temperature before adding them—this prevents the butter from seizing up and creates a smoother dough. If you’re in a hurry, you can warm the eggs slightly by placing them in warm water for a few minutes. The mixture might look slightly curdled after adding the eggs, but don’t worry—it will come together beautifully once you add the dry ingredients.
Combine Dry Ingredients for Perfect Balance
In a separate bowl, whisk together the 3 cups all-purpose flour, 1.5 teaspoons ground cinnamon, 0.5 teaspoon ground nutmeg, 0.25 teaspoon ground cloves, 0.5 teaspoon diamond crystal kosher salt, and 1 tablespoon cornstarch. The cornstarch is key here—it adds tenderness and prevents the cookies from becoming too chewy. Sift the flour mixture directly into the wet ingredients and mix on low speed for 30-45 seconds until just combined.
You’ll notice the dough comes together quickly, but don’t overmix—just until you see a few small flour streaks remaining. Overmixing develops gluten and can make your cookies tough. This is where the spice blend really shines: the cinnamon adds warmth, nutmeg brings depth, and cloves contribute a subtle holiday touch without overpowering. The salt balances all the sweetness and enhances the flavors.
Chill the Dough for Easier Handling
Remove the dough from the mixer and divide it into 4 equal portions (about 1 pound each). Flatten each portion into a 1-inch thick disk and wrap tightly in plastic wrap. Refrigerate for at least 1 hour or up to 24 hours. Chilling is crucial—it firms up the butter, which prevents excessive spreading in the oven and makes the dough much easier to roll out.
I like to let the dough chill overnight when possible—this allows the flavors to meld even more and results in a more tender cookie. If you’re short on time, the 1-hour minimum still works, but be gentle when rolling to avoid cracking. The dough should be cold but pliable when you’re ready to roll it out. This step makes all the difference in achieving those perfect, frosting-friendly cutouts.
Roll and Cut for Uniform Cookies
Preheat your oven to 375°F and line two baking sheets with parchment paper. On a lightly floured surface, roll out one disk of dough to about 1/8-inch thickness using a rolling pin. I find that a 12-inch pizza dough roller works perfectly for even thickness. Use cookie cutters to cut out shapes and transfer them to the prepared baking sheets, leaving 1 inch between each cookie.
For the best results, reroll the scraps once and cut out more cookies—there’s no waste in this recipe! Place the baking sheets on the middle rack of your oven and bake for 8-10 minutes until the edges are golden brown but the centers still look slightly underdone. They’ll continue cooking on the hot pan after you remove them from the oven. Let them cool on the baking sheet for 5 minutes before transferring to a wire rack to cool completely.
Pro Tips For Making 321 Sugar Cookie
- CHILL THE DOUGH: DESCRIPTION: After mixing, wrap the dough in plastic and refrigerate for at least 24 hours—yes, even if you’re eager. I used to skip this and ended up with cookies that spread like pancakes and baked unevenly. The wait makes them crispier, less sweet, and easier to handle.
- CREAM THE BUTTER COLD: DESCRIPTION: Use butter straight from the fridge, not softened at room temp. I learned this the hard way when my cookies turned out greasy and flat. Cold butter creates pockets of steam, giving you that perfect crack and texture. Beat it just until combined, not until it looks like mashed potatoes.
- WEIGH THE FLOUR: DESCRIPTION: Scoop and level your flour—no packing or tapping the cup. I used to eyeball it, and my cookies were either dense or crumbly. A kitchen scale (or a clean, dry measuring cup) guarantees consistency. Too much flour makes them tough; too little makes them spread like a disaster.
- BAKE IN BATCHES: DESCRIPTION: Crowd the pan, and your cookies will bake unevenly—hot spots, pale edges, sad faces. Leave at least 2 inches between cookies and rotate the tray halfway through. My first batch looked like a science experiment, but spacing fixed everything. Yes, it’s slower, but worth it.
Wine and beer pairings for this dish
Sweet White Wine
For these spiced sugar cookies, a crisp Moscato d’Asti or Pinot Grigio from Italy is my go-to choice. The light acidity and subtle sweetness cut through the buttercream without overpowering the warm spices like cinnamon and nutmeg.
I love pairing it with buttercream-frosted cookies—the wine’s effervescence cleanses your palate between bites. 🍷
Spiced Red Wine
A Gewürztraminer from Alsace adds an unexpected but delicious twist. This aromatic red has lychee and rose notes that complement the cookie’s spice blend beautifully. Serve it slightly chilled to enhance its fruity character.
For a bolder option, try a Spätburgunder with low tannins—it pairs well with cookies that have dark chocolate accents. 🍇
Creamy Beer Pairings
For beer lovers, a Belgian Witbier like Hoegaarden works wonders. The coriander and citrus notes in the beer mirror the cookie’s spice profile while adding a refreshing contrast.
I also enjoy a honey ale—the caramel sweetness enhances the cookie’s buttery richness. Keep the beer well-chilled to balance the warm spices. 🍺
Coffee Liqueur Finish
If you’re serving cookies with royal icing, a small glass of Kahlúa or Tia Maria makes an elegant after-dinner pairing. The coffee’s bitterness balances the sweetness, while the vanilla notes in the liqueur complement the cookie’s vanilla extract. Serve it neat or over ice for a sophisticated touch. ☕
Seasonal Cider Option
During fall and winter holidays, a dry hard cider like Strongbow or Angry Orchard adds a festive touch. The apple notes in the cider echo the cookie’s subtle sweetness, while its crisp acidity refreshes your palate. Choose a cider with low residual sugar to avoid clashing with the buttercream. 🍎
Nutrition facts
Frequently asked questions
Why is this called a “321” sugar cookie?
The name refers to the classic 3-step decorating technique: 1 for outlining with royal icing, 2 for filling with a contrasting color, and 3 for flooding with a smooth top layer. This method creates professional-looking cookies with crisp edges that hold their shape perfectly under piping bags. The dough’s 1:2:3 ratio of flour to butter to sugar also mirrors this numbered approach!
Can I make these cookies without a stand mixer?
Use a sturdy wooden spoon or hand mixer to cream the butter and sugar for 5-7 minutes until light and fluffy. For the dough, mix by hand in a large bowl using a rubber spatula—just work in 30-second bursts to avoid overmixing. The key is patience: let the butter soften slightly if needed, but don’t melt it completely. Chilling the dough becomes even more important when mixing by hand.
How do I prevent my cookies from spreading too much?
Three critical steps: 1 Use cold butter (cubed and chilled), 2 Chill the dough for at least 24 hours, and 3 Roll to 1/8-inch thickness. Also, bake on the middle rack at 375°F for 8-10 minutes—they’ll look slightly underdone at first but set as they cool. For extra insurance, place baking sheets on ice packs for 5 minutes before baking.
Can I use this dough for other shapes besides cutouts?
Yes! This dough works beautifully for round cookies (use a 2-inch round cutter), sandwich cookies (bake twice, then fill with jam or cream), or even cookie bars (press into a pan and bake for 12-15 minutes). For intricate shapes, use a sharp cookie cutter and reroll scraps gently. The dough’s sturdy yet tender texture makes it versatile for any design—just adjust baking time by 1-2 minutes for thicker shapes.
What’s the best way to store these cookies?
For freshness, keep in an airtight container with parchment paper between layers for up to 5 days. To freeze, bake the cookies fully, cool completely, then place in a single layer on a tray before transferring to a freezer bag. They’ll keep for 3 months. For decorated cookies, store them unfrosted and add icing just before serving—this prevents sogginess. If you must refrigerate frosted cookies, use a cooling rack first to avoid condensation.

- 6 Egg Cake Recipe with Oil: Light as Air With Buttery Moisture - October 4, 2026
- 4 Bean Casserole Recipe: One-Pan Heartiness With Smoky Paprika Depth - October 4, 2026
- 3-Ingredient Keto Mug Cake Recipe: Microwave Magic in 2 Minutes - October 4, 2026