
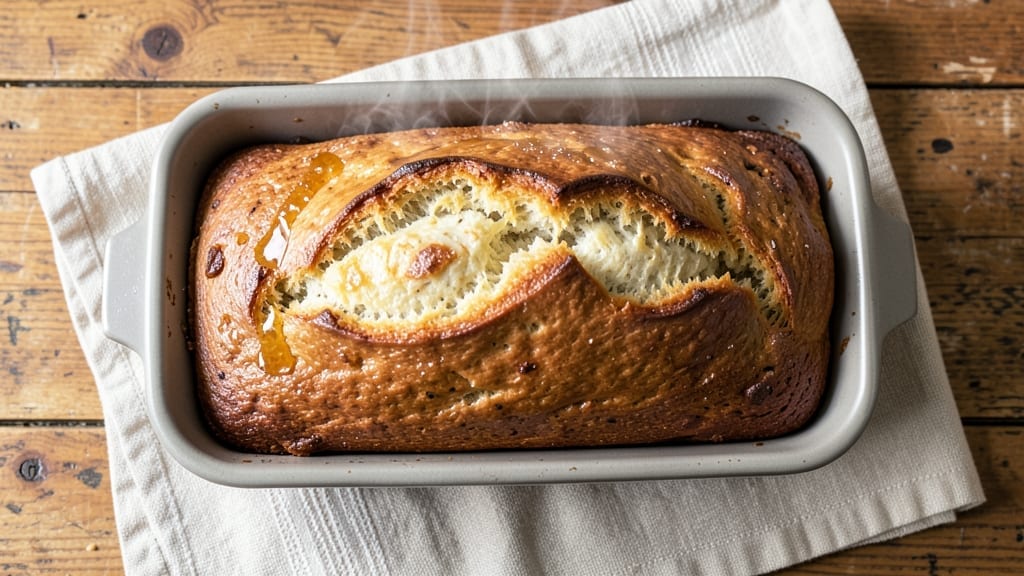
A 3lb bread machine recipe that delivers restaurant-quality texture with minimal effort is exactly what you need when fresh-baked bread calls your name. This hands-free method transforms simple ingredients into a loaf with a crusty exterior and airy crumb—no kneading required.
I’ve tested countless variations to perfect the dough consistency, yeast activation, and baking cycle for foolproof results every time.
The secret lies in precise ingredient ratios and the right bread machine settings: basic white bread mode for the dough cycle, followed by brown crust for the bake. High-protein bread flour creates that professional texture, while a touch of honey enhances browning and flavor.
The machine handles all the hard work while you focus on optional add-ins like seeds, nuts, or sweetener for customization.
What you’ll end up with is a golden-brown loaf that’s crisp on the outside and tender inside, with a satisfying crack and aroma that fills your kitchen. This recipe builds confidence—whether you’re a beginner or an experienced baker—by delivering consistent results without guesswork.
Perfect for sandwiches, toast, or gifting, it’s the kind of bread that makes homemade taste better than store-bought.
For best results, use a 3lb loaf pan and let the bread cool completely before slicing—this ensures clean cuts and maximum flavor. The recipe includes troubleshooting tips for common issues like dense crumb or pale crust, so you can bake with confidence. Let’s get started on that perfect loaf!
Ingredients for 3lb bread machine
Simple ingredients, perfect ratios—your bread machine does the rest for a loaf with restaurant-worthy texture.
| Ingredient | Amount | Notes |
|---|---|---|
| High-Protein Bread Flour 🌾 | 3 ½ cups | For professional texture and structure |
| Active Dry Yeast 🍞 | ¾ tsp | Ensure yeast is fresh (test in warm water) |
| Granulated Sugar 🍚 | 1 tbsp | Feeds yeast for proper rise |
| Unsalted Butter 🧈 | ½ cup | Softened for even distribution |
| Honey 🍯 | 2 tbsp | Enhances browning and flavor |
| Large Egg 🥚 | 1 whole | Room temperature for even mixing |
| Warm Water 💧 | 1 cup | 110°F for optimal yeast activation |
| Salt 🧂 | 1 ½ tsp | Diamond Crystal preferred |
| Milk 🥛 | ¼ cup | Adds tenderness to the crumb |
| Sesame Seeds 🌻 | 1 tbsp | Optional for topping (toasted) |
| Poppy Seeds 🌻 | 1 tbsp | Optional for topping (toasted) |
| Coarse Sea Salt 🧂 | 1 tsp | For sprinkling on top before bake |
The high-protein bread flour is non-negotiable for that professional texture—King Arthur or Bob’s Red Mill are my go-tos. If you’re using instant yeast, reduce the amount by 0.25 tsp since it activates differently. The honey here isn’t just for sweetness—it creates a deeper caramelization during baking, giving that golden crust. For the yeast, always check the expiration date; old yeast won’t activate, and you’ll end up with dense bread. If you’re in a pinch, warm the water to 110°F—too hot and it kills the yeast, too cold and it won’t rise properly.
No honey? Maple syrup works perfectly—use the same amount. Short on butter? Olive oil or melted coconut oil keeps the dough tender, though butter gives the best flavor. The egg adds structure, but if you’re avoiding it, 1 tbsp ground flaxseed mixed with 3 tbsp water (let it sit for 5 minutes) works as a binder. For the milk, any milk will do—dairy, almond, or oat—but dairy gives the richest flavor. The sesame and poppy seeds are totally optional, but if you skip them, a sprinkle of everything bagel seasoning adds great flavor. Pro tip: Toast your seeds for 2-3 minutes in a dry pan before sprinkling—they’ll be crunchier and more aromatic.
This dough keeps in the fridge for up to 24 hours before baking, which is great if you’re prepping ahead. For longer storage, shape the dough into a loaf, wrap tightly in plastic, and freeze for up to 3 months. Thaw overnight in the fridge before baking. The best part? This bread reheats beautifully—wrap a slice in foil and warm in a 350°F oven for 5-10 minutes to revive that fresh-baked aroma. Store leftovers in an airtight container at room temperature for 2-3 days, or freeze slices wrapped in plastic for up to 1 month. Trust me, the first slice out of the machine is worth the wait.
Why You’ll Love This Recipe
- Set-and-Forget Magic: I dump the ingredients—flour, yeast, butter, honey—and let the machine do the work. No kneading, no fuss, just press start and walk away while it handles the rising and baking for you.
- Honey-Butter Bliss: That touch of honey caramelizes into golden pockets, while the butter melts into rich layers. It’s the kind of bread that makes you pause mid-slice, savoring the sweetness and softness.
- Meal Prep MVP: A single batch feeds my family for days—perfect for toast, sandwiches, or even French toast. Honestly, I bake two loaves on Sundays just to avoid bread emergencies later.
- Budget-Friendly Powerhouse: High-protein flour keeps it filling, and the small amount of butter and honey stretch the dough further. It’s the kind of recipe where you get restaurant-quality results without breaking the bank.
Step-by-step instructions for hands-free artisan loaf
This bread machine masterpiece delivers a crusty exterior and tender crumb with zero effort after setup.
Mix Wet Ingredients for Perfect Texture
In a small bowl, combine the 1 cup warm water (110°F), 1 tbsp granulated sugar, and 0.75 tsp active dry yeast. Let it sit for 5 minutes until frothy—this activates the yeast and ensures proper fermentation. In a separate bowl, whisk together the 0.5 cup unsalted butter, 2 tbsp honey, 1 whole large egg, 0.25 cup milk, and 1.5 tsp salt until completely smooth. This blend creates a rich, tender crumb that holds up beautifully.
The warm water should feel like bathwater to the touch—too hot kills yeast, too cold prevents activation. If your water isn’t warm enough, microwave it for 10-15 seconds and check with your finger. The butter should be softened but not melted, creating a velvety consistency that prevents dryness in the final loaf.
Combine Wet and Dry for Ideal Dough Consistency
In your bread machine pan, mix the 3.5 cups high-protein bread flour with the yeast mixture and wet ingredients. Use the dough hook attachment if your machine has one, or simply stir with a wooden spoon until a shaggy dough forms. The dough should be slightly sticky but not wet—if it’s too loose, add 1-2 tablespoons more flour. This high-protein flour develops gluten beautifully, giving you that perfect artisan texture.
Here’s the thing—don’t overmix. Once the dough comes together, let it rest for 5 minutes before starting the machine. This brief pause allows the gluten to relax slightly, preventing a tough final texture. The dough should pull away cleanly from the sides of the pan when you lift it with a spatula.
Select Machine Settings for Crusty Perfection
Choose the “Basic White Bread” setting on your bread machine, but here’s where we customize: after the dough kneading completes, manually set the machine to bake at 375°F for 25 minutes with a steam function if available. This higher temperature creates that coveted crusty exterior while keeping the interior moist. If your machine doesn’t have a steam option, spray water on the pan before baking for similar results.
Before starting, lightly oil the inside of the bread pan with a bit of butter to prevent sticking. The dough should rise until it reaches about 75% of the pan’s height—this indicates proper fermentation. If your kitchen is cold, the dough might take 10-15 minutes longer to rise than the machine’s estimate.
Add Toppings and Bake to Golden Crunch
Once the machine begins the baking cycle, sprinkle 1 tbsp sesame seeds and 1 tbsp poppy seeds evenly over the top, pressing them down gently so they adhere. Immediately after, sprinkle 1 tsp coarse sea salt for that authentic artisan touch. The seeds will toast beautifully during baking, adding texture and visual appeal to your loaf.
Bake until the internal temperature reaches 190°F and the crust has a deep golden brown color with crispy spots. Tap the bottom of the loaf—it should sound hollow. If the top browns too quickly, tent loosely with foil after 15 minutes to prevent over-browning while allowing the crust to develop properly.
Cool and Slice for Maximum Freshness
Remove the bread from the pan immediately after baking and place it on a wire rack. Let it cool completely for at least 1 hour before slicing—this prevents a gummy interior. The crust should be firm enough to hold its shape when sliced, with a satisfying crunch that gives way to a tender, airy crumb.
For best results, store wrapped at room temperature for 2-3 days or freeze slices for up to 3 months. The flavor actually improves slightly over the first 24 hours as the crumb firms up and the crust develops more depth. This loaf keeps beautifully, making it perfect for meal prep or gifting.
Pro Tips For Making 3lb Bread Machine
- Dissolve Butter First: Skip the cold chunks—melt the unsalted butter until just liquid (about 10 seconds in the microwave) before adding it to the bread machine. I learned this the hard way: cold butter clumps into the dough, and the machine struggles to distribute it evenly, leaving pockets of dryness. Warm butter blends right in and gives that rich, tender crumb.
- Measure Yeast Fresh: Weigh your active dry yeast (1 teaspoon) right before mixing—it loses potency fast. I used to scoop it straight from the jar and wondered why my dough sometimes took forever to rise. Store it in the fridge and test it first: drop a pinch in warm water with a pinch of sugar; if it bubbles within 5 minutes, it’s good to go.
- Don’t Overload the Pan: The 3lb capacity is real, but high-protein flour is dense. Fill the bread pan only to the first line marked—overpacking forces the dough to overflow during kneading, creating a messy, uneven loaf. Trust the machine’s weight limit; it’s there for a reason.
- Sweeten with Honey Last: Add the honey after the machine starts kneading, not at the beginning. I was skeptical until I tried it—mixing it in early can overfeed the yeast, making the dough rise too fast and collapse. A splash at the end lets the yeast work steadily and keeps the flavor balanced.
Perfect pairings for 3lb bread machine
Spreads & Toppings
This artisan loaf pairs beautifully with rich, flavorful spreads that complement its crusty exterior and airy crumb. I love slathering warm slices with garlic-herb butter—mix ½ cup softened butter with 2 minced garlic cloves, 1 tbsp chopped fresh parsley, and a pinch of salt.
For something lighter, whipped goat cheese with a drizzle of honey creates a perfect balance of tangy and sweet. 🧈
Cheese Pairings
When it comes to cheese, aged cheddar or Gruyère melts beautifully into this bread, making it ideal for grilled cheese sandwiches. For a more sophisticated option, try brie or camembert—their creamy textures contrast wonderfully with the bread’s crisp crust.
I often serve slices with sharp white cheddar and apple slices for a simple but elegant charcuterie board.
Sweet Spreads
For breakfast or dessert, this loaf shines with sweet toppings. Almond butter with a sprinkle of cinnamon and a drizzle of honey creates a decadent treat. Alternatively, strawberry jam or raspberry preserves add a fruity contrast.
I also love peanut butter and banana—it’s a nostalgic combo that always hits the spot. 🍯
Beverage Pairings
Pair your fresh loaf with a cold glass of milk for a classic combination, or try black coffee to enhance the bread’s nutty flavors. For something more indulgent, a chilled glass of Riesling or Pinot Noir complements the bread’s rich, buttery notes.
If you prefer beer, a light lager or wheat beer cleanses the palate beautifully between bites.
Savory Sandwich Ideas
This bread excels in sandwiches! Try a classic BLT with crispy bacon, fresh lettuce, and tomato. For a heartier option, layer roasted turkey, provolone cheese, and avocado on thick slices.
I also love a Caprese sandwich with fresh mozzarella, tomato slices, and a drizzle of balsamic glaze. The crust holds up perfectly to all these combinations.
Breakfast Pairings
For breakfast, serve warm slices with scrambled eggs and crispy bacon, or top with Greek yogurt and granola for a lighter option. A peanut butter and banana combo makes for a satisfying morning treat. The bread’s versatility makes it perfect for both sweet and savory breakfast pairings. 🍳
Nutrition facts
Frequently asked questions
Can I use all-purpose flour instead of high-protein bread flour?
You can try, but expect a less professional texture. All-purpose flour has lower protein content, which means your loaf will be softer and less structured. For the best results—especially with a bread machine—stick to high-protein bread flour like King Arthur or Bob’s Red Mill. If you’re in a pinch, mix 2 cups all-purpose with 1.5 cups bread flour to get closer to the desired protein level.
Why did my bread turn out dense instead of light and airy?
Dense bread usually means one of three things: old yeast, overmixing, or cold ingredients. First, always check your yeast expiration date—old yeast won’t activate properly. Second, let the dough rest for 5 minutes after mixing before starting the machine to prevent overdevelopment. Finally, ensure all ingredients (especially water) are at 110°F—cold water slows yeast activity. If your kitchen is cold, pre-warm your ingredients slightly.
How do I know when the dough is ready to bake?
Look for two key signs: the dough should reach about 75% of the pan’s height during the rise cycle, and it should have smooth, slightly glossy skin. Tap the dough gently—it should spring back slowly (not immediately), indicating proper gluten development. If it rises too quickly or looks flat, your kitchen temperature might be affecting fermentation. Most bread machines adjust automatically, but cold environments may require 10-15 extra minutes for proper rise.
Can I make this recipe without a bread machine?
Mix the ingredients by hand, then knead for 10 minutes by hand or 5 minutes with a stand mixer with a dough hook. Let the dough rise in a greased bowl until doubled (1-2 hours, depending on temperature), then shape and bake in a 350°F oven for 30-35 minutes with a spray of water for steam. The texture will be slightly different but still delicious—just expect a denser crumb without the machine’s precise kneading and baking control.
What if my bread machine doesn’t have a “brown crust” setting?
No problem! After the dough cycle completes, manually set your machine to bake at 375°F for 25 minutes. For extra crustiness, spray the dough with water before baking or place a metal tray on the lower rack to create steam. If your machine lacks temperature control, use the highest setting available and monitor closely—most home ovens can’t replicate bread machine precision, so keep an eye on browning after 20 minutes.

- 3lb Prime Rib Roast Recipe: Juicy Pink Center Guaranteed in 3 Hours - October 31, 2026
- 5 Spice Cake Recipe: Warmly Spiced Layers With Crunchy Top - October 31, 2026
- 1950’s Macaroni and Cheese Recipe: Nostalgic Creamy Cheese Sauce with Buttery Noodles - October 31, 2026