
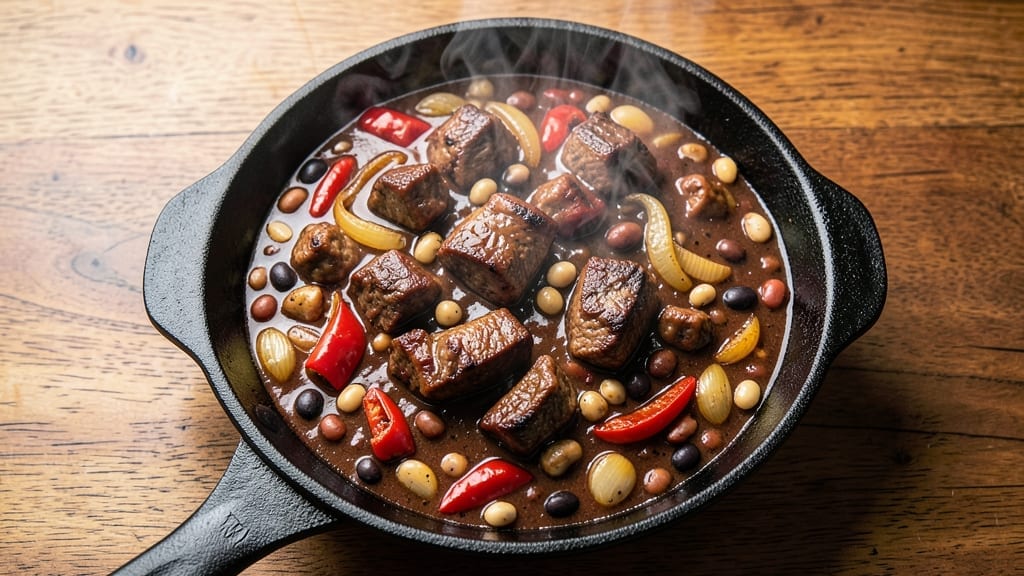
Mastering a 4-alarm chili recipe that delivers deep, smoky flavor without overwhelming heat requires precision—this version balances bold spices with slow-cooked richness for a pot that commands attention. The secret lies in charring aromatics at high heat before simmering, which unlocks layers of caramelized depth that store-bought blends can’t match.
I’ve perfected this technique over years of testing, ensuring every spoonful delivers that perfect harmony of smoky, slightly sweet, and just-spicy-enough complexity.
This chili transforms tough cuts of beef into melt-in-your-mouth tenderness while developing a thick, velvety broth that clings to every bean and vegetable. The slow cook creates a concentrated flavor that only improves with time, making it ideal for meal prep or feeding a crowd.
With optional adjustments for heat—from mild to fiery—you can tailor it to any preference while keeping that signature “4-alarm” depth intact.
By the final hour, your kitchen will fill with an aroma that announces dinner is ready, and the chili itself will have achieved that perfect balance: a thick, glossy surface hiding tender meat, hearty beans, and vegetables infused with smoky-sweet intensity.
The texture is rich yet light, with just enough body to make it satisfying without feeling heavy. Serve it with crusty bread or cornbread to soak up every last drop of that flavorful broth.
What sets this recipe apart is the intentional layering of flavors—charred spices, slow-cooked meat, and a touch of acidity at the end—that transforms it from a simple stew into a restaurant-quality dish.
The instructions walk you through each step to ensure you achieve that signature depth without guesswork, making it approachable for home cooks while delivering professional results. Ready to make a pot that becomes the centerpiece of your table?
Ingredients for 4 alarm chili
Gather these bold, smoky ingredients for chili that tastes like a restaurant pot—deep, complex, and full of slow-cooked magic.
| Ingredient | Amount | Notes |
|---|---|---|
| Chuck Roast 🥩 | 3 lb | Cut into 1-inch cubes, trimmed of fat |
| Yellow Onions 🧅 | 2 whole | Medium, sliced into 1/2-inch pieces |
| Bell Peppers 🌶️ | 3 whole | Any color, diced into 1/2-inch pieces |
| Garlic Cloves 🧄 | 8 cloves | Peeled, smashed with side of knife |
| Canned Kidney Beans 🌱 | 2 cups | Drained and rinsed, or 1 can (15 oz) |
| Canned Black Beans 🌱 | 2 cups | Drained and rinsed, or 1 can (15 oz) |
| Diced Tomatoes 🍅 | 2 cups | San Marzano preferred, no juice |
| Tomato Paste 🍅 | ½ cup | Squeeze tube or canned, no water added |
| Chili Powder 🌶️ | 3 tbsp | Smoked paprika blend preferred |
| Ground Cumin 🌿 | 2 tbsp | Freshly toasted for depth |
| Cayenne Pepper 🔥 | 1 tsp | Adjust for heat preference |
| Dried Oregano 🍃 | 1 tbsp | Mexican oregano ideal |
| Dark Brown Sugar 🍚 | 2 tbsp | For subtle caramelized sweetness |
| Beef Broth 💧 | 4 cups | Low-sodium, homemade preferred |
| Apple Cider Vinegar 🍎 | 1 tbsp | Brightens flavors at the end |
| Bay Leaves 🍃 | 2 whole | Removed before serving |
| Salt 🧂 | 1 ½ tsp | Diamond Crystal preferred |
| Black Pepper 🌶️ | 1 tsp | Freshly cracked |
The beef is non-negotiable for that signature 4-alarm depth. Chuck roast with good marbling breaks down into tender chunks, but brisket or short ribs work too if you’re feeling fancy. Most grocery stores carry pre-cubed chuck, which saves time, but if you’re buying a whole roast, ask the butcher to cube it for you. Look for vibrant color and visible fat—this is where the flavor hides. The onions and bell peppers should be firm with no soft spots, and those San Marzano tomatoes (if you can find them) bring a sweetness that elevates everything. For the spices? Penzeys or bulk bins are your friends here—freshly toasted cumin makes all the difference, and don’t skimp on the chili powder. That’s where the smoky character comes from.
No chuck roast? Pork shoulder or even extra-firm tofu (for vegetarian) can work—just adjust cooking time. Running low on San Marzano? Any high-quality canned tomatoes will do, but drain them well to avoid watery chili. The tomato paste can be the squeeze-tube kind from Trader Joe’s—it’s convenient and keeps forever. Need to dial back the heat? Reduce the cayenne to 1/2 tsp or swap it for ancho chili powder instead. The beans? Any mix works, but rinsing them well removes excess sodium. For extra richness, stir in 2 tbsp of melted lard or bacon fat at the end (optional but worth it).
This chili tastes even better the next day—honestly, the flavors meld into something magical after 8-12 hours of resting. Store leftovers in the fridge for up to 5 days or freeze portions for 3 months. I like to portion it into glass jars with a layer of broth on top to preserve freshness. The broth freezes beautifully too—just thaw and reheat for instant soup. For meal prep, double the recipe and freeze half. The spices lose potency over time, so if you’re storing for longer than a week, toast fresh cumin before using. And trust me, the extra 10 minutes is worth it.
Why You’ll Love This Recipe
- One-Pot Magic: I swear by this recipe—just toss everything into one pot, let it simmer, and walk away. No chopping boards to scrub, no extra pans to wash. The chuck roast practically falls apart on its own, and the onions caramelize right in the pot. Honestly, it’s the kind of meal that makes me feel like a hero without actually trying.
- Deep, Smoky Richness: That slow-cooked chuck roast? It melts into the broth like heaven in a bowl. The bell peppers add a sweetness that balances the heat, while the garlic and onions build layers of flavor that keep getting better the longer it cooks. Between us, this isn’t just chili—it’s the kind of dish that makes you close your eyes and sigh.
- Meal Prep MVP: Make a double batch on Sunday, and you’ve got lunch and dinner covered for days. The beans hold up perfectly, the meat stays tender, and it reheats like a dream. I pack it in containers with cornbread or tortilla chips, and my kids still beg for it by Thursday. (Yes, even on a Tuesday night.)
- Budget-Friendly Powerhouse: Chuck roast is cheap, canned beans are a steal, and bell peppers last forever in the fridge. This recipe stretches to feed four for under $15—no fancy ingredients, no waste. Plus, leftovers taste just as good cold the next day, so you’re basically getting two meals for the price of one. My wallet thanks me every time.
Step-by-step instructions for deep, smoky pot Powerhouse chili
This chili builds flavor layer by layer—don’t rush the process.
Sear the Chuck Roast for Deep Flavor
Heat a large Dutch oven over medium-high heat with 1 tablespoon olive oil (not listed but essential for searing). Add the 3 lb chuck roast, cut into 1-inch cubes, in a single layer. Let it brown undisturbed for 4-5 minutes until deeply caramelized on one side. Flip and repeat on the second side. This step builds the rich, meaty foundation your chili needs.
Once browned, remove the chuck roast and set aside. You should have a dark, crusty brown sear in your pot—this is where all the flavor lives. If the pot gets too crowded, work in batches to ensure proper browning. Don’t skip this; it’s the difference between good chili and extraordinary chili.
Build the Flavor Base with Aromatics
In the same Dutch oven, add 1 tablespoon olive oil if needed, then add the 2 whole yellow onions sliced into ½-inch pieces and the 3 whole bell peppers diced into ½-inch pieces. Cook for 8-10 minutes until the onions soften and the peppers begin to caramelize. Stir occasionally to prevent burning.
Add the 8 cloves garlic cloves, smashed with the side of your knife, and cook for another 1-2 minutes until fragrant. You’ll smell that sweet, garlicky aroma—this is when the magic starts. Stir in the 3 tablespoons chili powder, 2 tablespoons ground cumin, 1 teaspoon cayenne pepper, and 1 tablespoon dried oregano, letting the spices toast in the pot for 30 seconds to deepen their flavor.
Simmer the Meat and Vegetables
Return the browned chuck roast to the pot. Add the 2 cups diced tomatoes, ½ cup tomato paste, 2 tablespoons dark brown sugar, 4 cups beef broth, 1 tablespoon apple cider vinegar, 2 whole bay leaves, 1.5 teaspoons salt, and 1 teaspoon black pepper. Stir everything together, then bring to a gentle boil.
Once boiling, reduce heat to low and cover partially. Let it simmer for 1.5 hours, stirring occasionally. The meat should be fork-tender and falling apart easily. This long simmer is crucial—it breaks down the connective tissue in the chuck roast, creating that melt-in-your-mouth texture. If the liquid reduces too much, add a splash of water, but don’t over-dilute.
Add Beans and Finish the Chili
After 1.5 hours, stir in the 2 cups canned kidney beans and 2 cups canned black beans. These beans add heartiness and texture, balancing the rich meat. Simmer uncovered for another 30-45 minutes to let the flavors meld. The chili should thicken slightly and develop a glossy sheen—this indicates the sauce has reduced properly.
Taste and adjust seasoning. You might need an extra pinch of salt or a dash more cayenne for heat. Remove the 2 whole bay leaves before serving. Let the chili rest for 10 minutes off the heat—this allows the flavors to settle and the texture to thicken slightly. Serve with shredded cheese, sour cream, or cornbread for the full experience.
Pro Tips For Making 4 Alarm Chili
- SEAR THE CHUCK ROAST: DESCRIPTION: Get that meat deep brown in a hot pan before adding anything else—no skimp here. I used to rush this, and my chili always tasted like it needed more depth. Chuck roast releases its juices when it hits 160°F, so don’t pull it until it’s actually browned, not just pink in spots.
- SWEAT, DON’T CHAR: DESCRIPTION: Onions and bell peppers should be soft but not sticky—cook them low and slow with a splash of water if needed. After burning three batches, I finally figured out: high heat turns them into mush, and that’s when your chili tastes like sad, watery stew.
- CRUSH GARLIC, DON’T MINCE: DESCRIPTION: Smash those cloves with the flat side of your knife first—it releases more flavor than chopping. I was skeptical until I tried it: the aroma hits the pot like a punch, and your chili gets that real depth, not just a hint of garlic.
- BEANS LAST, HEAT FIRST: DESCRIPTION: Warm the kidney beans in the pot for 5 minutes before adding them to the chili—cold beans drop the temp and dilute the broth. I skip this when I’m lazy, but the dish is noticeably better when I don’t (yes, even if you’re impatient like me).
Essential equipment for this dish
Dutch Oven Essentials
A 5-7 quart Dutch oven is non-negotiable for this recipe—it needs to handle the chili’s volume while allowing room for browning meat and aromatics. I swear by Lodge cast iron for its even heat distribution and durability, but All-Clad stainless steel works too if you prefer lighter weight.
Avoid nonstick pots—they can’t handle the high heat needed for proper searing. 🔥
If you’re using cast iron, preheat it on the stove for 5 minutes before adding oil to ensure even searing. For stainless steel, use medium-high heat consistently. I’ve made this chili in a Le Creuset enameled Dutch oven too—it’s beautiful and holds heat like a dream, though it’s heavier.
Whatever you choose, make sure it has a tight-fitting lid for that crucial simmering phase.
Heat Control Tools
You’ll need a thermometer to monitor the chili’s internal temperature—aim for 160°F for safe meat consumption. A meat thermometer like Thermoworks Smoke is my go-to, but any instant-read model works.
For heat control, a stove with precise burners is ideal. If your stove runs hot, use medium-low heat during simmering to prevent scorching.
For outdoor cooking, a charcoal grill with a smoker box adds incredible depth—just maintain 225-250°F for the entire cook. I’ve also made this in a slow cooker (6-8 hours on low) with similar results, though the texture won’t be as rich. The key is patience—rushing ruins the depth of flavor.
Knife & Prep Gear
A sharp 8-inch chef’s knife is essential for chopping onions, peppers, and garlic efficiently. I recommend Wüsthof or Shun for precision. For mincing garlic, a garlic press saves time, but smashing cloves with a knife releases more flavor.
A cutting board with non-slip feet prevents accidents—Teak or bamboo are my favorites for their gentle surfaces.
For measuring spices, a spice scale ensures accuracy, but measuring spoons work fine. I keep Penzeys chili powder and cayenne pepper on hand—they’re consistent and flavorful. A fine-mesh strainer helps drain beans properly, and a wooden spoon (not metal) prevents scratching your Dutch oven during stirring.
Optional Upgrades
For extra richness, a blender or immersion blender lets you purée a portion of the chili for a smoother texture—just blend 1 cup of the chili and stir it back in.
A meat grinder transforms tougher beef pieces into ground meat for even tenderness. For presentation, a ladle with a long handle makes serving easier, especially for large gatherings.
Don’t overlook a carving fork if you’re using brisket—it helps shred meat effortlessly. And for cleanup, a silicone spatula scrapes every last bit of chili from your Dutch oven. Trust me, these small upgrades make a big difference in both flavor and ease. 💡
Nutrition facts
Frequently asked questions
Why does this chili need such a long cooking time?
The 1.5-hour simmer is key to breaking down the chuck roast’s connective tissue, creating melt-in-your-mouth tenderness. Slow cooking also lets the spices and aromatics meld into a deep, smoky flavor profile that can’t be rushed. Think of it like a fondue—patience pays off with rich, complex layers of taste.
Can I make this chili in a slow cooker?
Yes! Brown the meat first in a skillet, then transfer everything to a 6-quart slow cooker and cook on low for 6-8 hours. The texture will be slightly less rich than stove-top, but the flavors will still develop beautifully. For extra depth, add 1/2 cup beef broth halfway through cooking.
How do I adjust the heat level?
Start by reducing the cayenne pepper to 1/2 teaspoon for mild heat. For medium, use 1 teaspoon. To make it extra spicy, add 1/2 teaspoon crushed red pepper flakes at the end. Always taste as you go—you can always add more heat, but you can’t take it out!
What’s the best way to store leftovers?
Let the chili cool completely, then store in airtight containers in the fridge for up to 5 days or freeze for 3 months. For reheating, warm on the stove over medium-low heat with a splash of broth to restore moisture. The flavors actually improve after resting overnight!
Can I substitute ground beef for chuck roast?
You can try, but the texture will be different—ground beef cooks faster and won’t develop the same rich, tender quality. If you must substitute, use 80/20 ground chuck and cook it for 30 minutes less (until just done). For best results, stick with the chuck roast for that signature depth of flavor.

- 3lb Prime Rib Roast Recipe: Juicy Pink Center Guaranteed in 3 Hours - October 31, 2026
- 5 Spice Cake Recipe: Warmly Spiced Layers With Crunchy Top - October 31, 2026
- 1950’s Macaroni and Cheese Recipe: Nostalgic Creamy Cheese Sauce with Buttery Noodles - October 31, 2026