
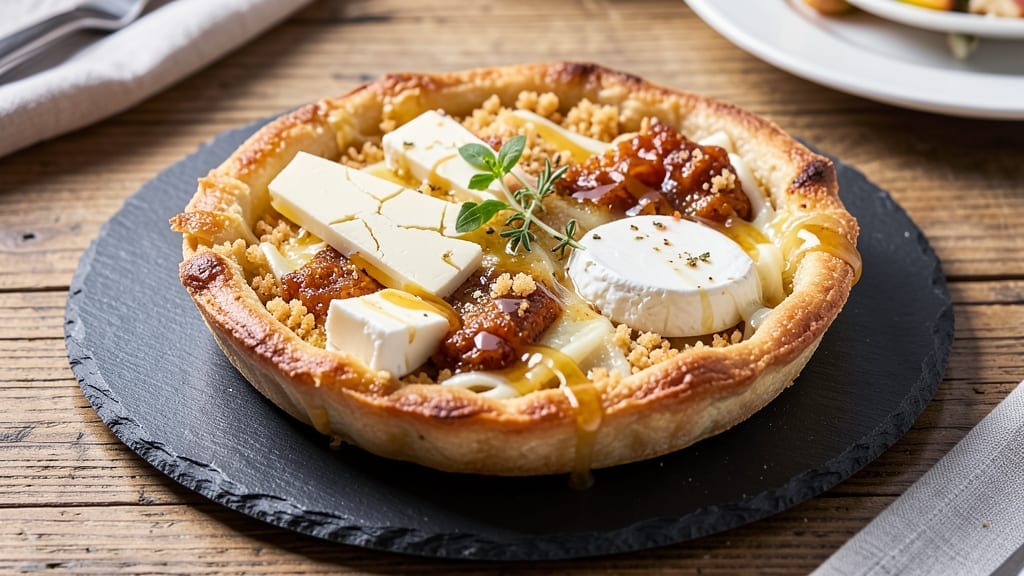
This 4 cheese recipe transforms ordinary dishes into something extraordinary—imagine a golden, bubbling blanket of melted cheese with a perfectly crispy top that cracks just enough to reveal the creamy layers beneath. 💛 The secret lies in balancing four distinct cheeses: sharp cheddar for depth, creamy brie for richness, tangy gouda for complexity, and mozzarella for that signature melt.
I developed this after years of experimenting with cheese combinations, and it’s now my go-to for impressing guests without spending hours in the kitchen.
The magic happens when you layer the cheeses strategically—starting with the sharpest at the bottom and finishing with the meltiest on top. A crispy breadcrumb crust seals in all that gooey goodness while adding texture, and the high-heat broil ensures a caramelized finish that’s impossible to resist.
This recipe works as a standalone dish or as a showstopping topping for baked potatoes, pasta, or even grilled meats.
What you’ll end up with is a dish that looks as stunning as it tastes—golden, glossy, and impossible to stop eating. The cheeses melt into a harmonious blend, with each variety contributing its unique character, while the crispy top provides the perfect contrast.
It’s the kind of recipe that elevates an ordinary meal into something memorable, and it comes together in just 25 minutes.
Whether you’re serving this as a main course or a decadent side, the versatility is what makes it special. Pair it with a fresh salad for a balanced meal or serve it alongside roasted vegetables for a hearty dinner.
The possibilities are endless, but the technique remains simple: layer, melt, and broil to perfection.
Ingredients for 4 cheese
Four cheeses, one magical layering technique—this is the secret to restaurant-worthy melt every time.
| Ingredient | Amount | Notes |
|---|---|---|
| Sharp White Cheddar Cheese 🧀 | ½ lb | Block form, freshly grated |
| Brie Cheese 🧀 | 6 oz | Rind removed, room temperature |
| Aged Gouda Cheese 🧀 | ¼ lb | Tangy variety, freshly grated |
| Mozzarella Cheese 🧀 | 8 oz | Fresh mozzarella, sliced thin |
| All-Purpose Flour 🌾 | ½ cup | For breadcrumb crust |
| Panko Breadcrumbs 🍞 | ½ cup | For extra crispiness |
| Extra-Virgin Olive Oil 🫒 | 2 tbsp | For drizzling between layers |
| Garlic Cloves 🧄 | 2 cloves | Minced for flavor boost |
| Fresh Thyme Leaves 🌿 | ¼ tsp | Chopped, for garnish |
| Freshly Ground Black Pepper 🌶️ | ½ tsp | For finishing |
| Diamond Crystal Kosher Salt 🧂 | ¼ tsp | For seasoning crust |
| Unsalted Butter 🧈 | 2 tbsp | Melted for drizzling |
The cheeses are non-negotiable here. Sharp white cheddar from a block (none of that pre-shredded stuff—it gets gummy) is your base for that bold, tangy kick. I grab mine at Whole Foods when I can, but any specialty cheese shop will have good options. For the brie, room temperature is key—take it out of the fridge 30 minutes before you start. Aged gouda should have visible crystals (that’s the good stuff) and a sharp tang. Fresh mozzarella? Skip the low-moisture block version—it doesn’t melt as beautifully. Look for the milky, soft kind at the deli counter, and slice it yourself for even melting.
No sharp cheddar? Extra-sharp white cheddar or pepper jack works in a pinch, though the flavor profile shifts. Brie too expensive? Triple cream brie is a good swap, just use slightly less. Gouda too mild? Add a pinch of smoked paprika to the grated mix. The mozzarella can be substituted with fontina or provolone, but they melt differently. For the crust, panko plus flour gives you that perfect crunch—don’t skip the flour, it’s what makes it crispy. And if you’re out of thyme, dried oregano at half the amount works in a bind. Just don’t skip the garlic—it’s what ties everything together.
This cheese masterpiece reheats beautifully—just pop it under the broiler for 2-3 minutes until bubbly. Keeps 3 days in the fridge, covered tightly, but honestly? It’s best the day you make it. For make-ahead prep, assemble the layers (without baking) and refrigerate for up to 24 hours. The crust stays crispy if you store it separately and toast it fresh. Freezing isn’t recommended—the texture changes. Portion into squares for easy serving, and trust me on the extra thyme—half goes in the crust, half gets sprinkled on top before broiling.
Why You’ll Love This Recipe
- Pantry-Friendly Magic: I swear by this recipe when my fridge is bare—just flour, a handful of cheeses, and 15 minutes. No fresh herbs or fancy ingredients here, just sharp cheddar’s bite, brie’s silkiness, and that aged gouda crunch. It’s my secret when I’m too tired to shop but still want something impressive.
- Melty Layer Madness: Between us, this is the only way to eat mozzarella—stretched, bubbly, and layered with creamy brie that melts like butter on toast. The cheddar adds a tangy punch, and the gouda? It caramelizes just enough to make every bite feel like a little cheesy hug.
- Weeknight to Dinner Party: Honestly, I make this for lazy Tuesdays and when my in-laws visit. For weeknights, I toss it with pasta. For company, I bake it into a crusty tart with a sprinkle of black pepper. Same effort, totally different vibes—no stress, all reward.
- Leftovers That Don’t Suck: Most cheesy dishes dry out or get rubbery, but this? It’s still ridiculous good reheated. I’ll pack it in lunches, freeze slices for quick snacks, or even crumble it into eggs the next morning. Four types of cheese mean every bite’s a flavor party—no sad, sad leftovers here.
Step-by-step instructions for 4 cheese recipe: melted gold and crispy top magic
Here’s how to create that perfect golden crust and gooey cheese center every time.
👨🍳 Step 1: Prep and Layer the Cheese Mixture
Start by preheating your oven to 375°F. In a medium bowl, combine the 0.5 lb freshly grated sharp white cheddar cheese, 6 oz room-temperature brie cheese, and 0.25 lb freshly grated aged gouda cheese. Add 0.5 tsp freshly ground black pepper and mix until evenly distributed. This blend will create the rich, creamy base of your dish.
In a separate bowl, mix 0.5 cup all-purpose flour with 0.25 tsp diamond crystal kosher salt. This flour mixture will create a crispy barrier between the cheese layers, preventing a soggy top. Keep both mixtures ready for assembly—this is where the magic begins.
🥘 Step 2: Build the Cheese Layers with Crispy Crust
Take a 9-inch pie dish or oven-safe skillet and line the bottom with 8 oz thin slices of fresh mozzarella cheese. This layer will melt into a luscious, stretchy base. Drizzle 1 tbsp extra-virgin olive oil evenly over the mozzarella, then sprinkle half of the flour mixture on top. Press down gently to create an even layer.
Next, spread the cheese mixture evenly over the flour layer, creating a smooth surface. This is your first cheese layer—press down lightly to help it adhere. The flour acts like a crust, ensuring that when we add the breadcrumbs later, they’ll get perfectly crispy instead of sinking into the cheese.
🍳 Step 3: Create the Crispy Top Layer
Now for the star of the show—the crispy top. Sprinkle the remaining 0.5 cup panko breadcrumbs evenly over the cheese layer. Drizzle the remaining 1 tbsp extra-virgin olive oil over the breadcrumbs and use your fingers to gently press them into the cheese. This creates that irresistible crunch you’re after.
Here’s the thing—don’t press too hard or the breadcrumbs will turn into a paste. You want them to stick lightly but still maintain their individual texture. The oil helps them crisp up beautifully while keeping them from becoming greasy. This is the moment that matters: your crispy top depends on this step.
🔥 Step 4: Bake Until Golden and Bubbly
Place your cheese masterpiece in the preheated 375°F oven and bake for 25-30 minutes. You’re looking for a golden-brown top that’s crispy to the touch, with cheese bubbling up around the edges. If it’s browning too quickly, tent loosely with foil to prevent burning while still allowing the cheese to melt.
Real talk: your oven might run hot, so start checking at the 20-minute mark. The cheese should be fully melted and gooey in the center, with a firm, crispy top that’s almost like a cheese puff. If it’s not quite there, give it another 5 minutes—don’t rush this part.
🍽️ Step 5: Finish with Fresh Herbs and Serve Warm
Remove from the oven and let it rest for 5 minutes before serving. This resting time allows the cheese to set slightly, making it easier to slice. While it rests, sprinkle the top with 0.25 tsp chopped fresh thyme leaves and a final pinch of freshly ground black pepper.
Slice into wedges and serve immediately with your favorite dipping sauce—maybe a tangy marinara or a creamy garlic aioli. The contrast of that crispy top with the molten cheese inside is what makes this dish truly special. Each bite should deliver that perfect combination of textures and flavors.
Pro Tips For Making 4 Cheese
- Shred Cheese Fresh: DESCRIPTION:
- Preheat Pan Like It’s Hot: DESCRIPTION:
- Skip the Overmixing: DESCRIPTION:
- Use Room-Temp Brie: DESCRIPTION:
Essential equipment for 4 cheese
Crispy Top Essentials
For that perfect crispy top, you’ll need panko breadcrumbs and all-purpose flour—the secret duo that creates texture. I recommend Japanese-style panko like Kikkoman for maximum crunch, but any high-quality panko works.
The flour acts as a glue, helping the breadcrumbs stick without sinking into the cheese. Mix 0.5 cup flour with 0.25 tsp kosher salt to season the crust evenly. 🍞
Heat Control Tools
A heavy-duty oven-safe skillet (like All-Clad) or 9-inch pie dish is non-negotiable for even heat distribution. The skillet gives you a crispier edge, while the pie dish holds the cheese layers more securely.
Preheat your oven to 375°F—any lower, and the top won’t crisp enough; higher, and you risk burning before the cheese melts. A thermometer (like Thermoworks Smoke) ensures accuracy, especially if your oven runs hot. 🌡️
Cheese Prep Must-Haves
Freshly grating your own cheese is key—pre-shredded cheese contains anti-caking agents that make it gummy. A microplane or box grater works best for sharp white cheddar and aged gouda.
For the brie, use a serrated knife to slice it into thin sheets—room temperature is critical for even melting. A small offset spatula helps spread the cheese layers smoothly without tearing. 🧀
Broiler Finishing Touch
If you want an extra golden, caramelized crust, finish under the broiler for 1-2 minutes at the end. Use a broiler pan or place a baking sheet on the rack below to catch drips.
Keep a close eye—cheese burns faster than you think! A heat-resistant spatula helps transfer the dish safely. This step adds that restaurant-quality finish. ✨
Make-Ahead Prep Gear
If you’re prepping ahead, store the unbaked cheese layers in an airtight container (like Rubbermaid) in the fridge for up to 24 hours. When ready to bake, let them sit at room temperature for 30 minutes before broiling.
For reheating leftovers, a small cast-iron skillet over medium-low heat keeps the cheese gooey without over-crisping the top. 💡
Nutrition facts
Frequently asked questions
Can I substitute any of the cheeses in this recipe?
For the sharp white cheddar, try extra-sharp cheddar or pepper jack for a spicier kick. If brie is too pricey, triple cream brie works well. For aged gouda, add a pinch of smoked paprika if it’s too mild. The fresh mozzarella can be swapped for fontina or provolone, though they melt slightly differently. Just keep the ratio similar!
Why does my cheese layer get soggy instead of crispy?
This usually happens when the breadcrumbs absorb too much moisture. Make sure to press them lightly but evenly, and use panko mixed with flour (not just breadcrumbs alone). Also, let the cheese mixture sit at room temperature for 15-20 minutes before baking—cold cheese melts unevenly. A 5-minute broil at the end can also help crisp up any soggy spots.
Can I make this ahead of time for a party?
Yes! Assemble the layers (without baking) and refrigerate in an airtight container for up to 24 hours. When ready to bake, let it sit at room temperature for 30 minutes before broiling. For leftovers, reheat in a cast-iron skillet over medium-low heat for 3-5 minutes to restore the crispy top. The cheese reheats beautifully!
What’s the best way to serve this dish?
This recipe works as a standalone main course or as a decadent topping for baked potatoes, pasta, or grilled meats. Pair it with a tangy marinara or garlic aioli for dipping. For a full meal, serve with a fresh salad or roasted vegetables to balance the richness. The crispy top holds up well, so it’s perfect for sharing!
How do I know when the cheese is fully melted?
Look for a golden-brown crust that’s crispy to the touch, with cheese bubbling up around the edges. The center should be gooey but firm—not runny. If it’s browning too quickly, tent loosely with foil. A toothpick inserted in the center should come out warm but not dripping. If unsure, give it 2-3 more minutes—the cheese will keep melting slightly after removal!

- 3lb Prime Rib Roast Recipe: Juicy Pink Center Guaranteed in 3 Hours - October 31, 2026
- 5 Spice Cake Recipe: Warmly Spiced Layers With Crunchy Top - October 31, 2026
- 1950’s Macaroni and Cheese Recipe: Nostalgic Creamy Cheese Sauce with Buttery Noodles - October 31, 2026