
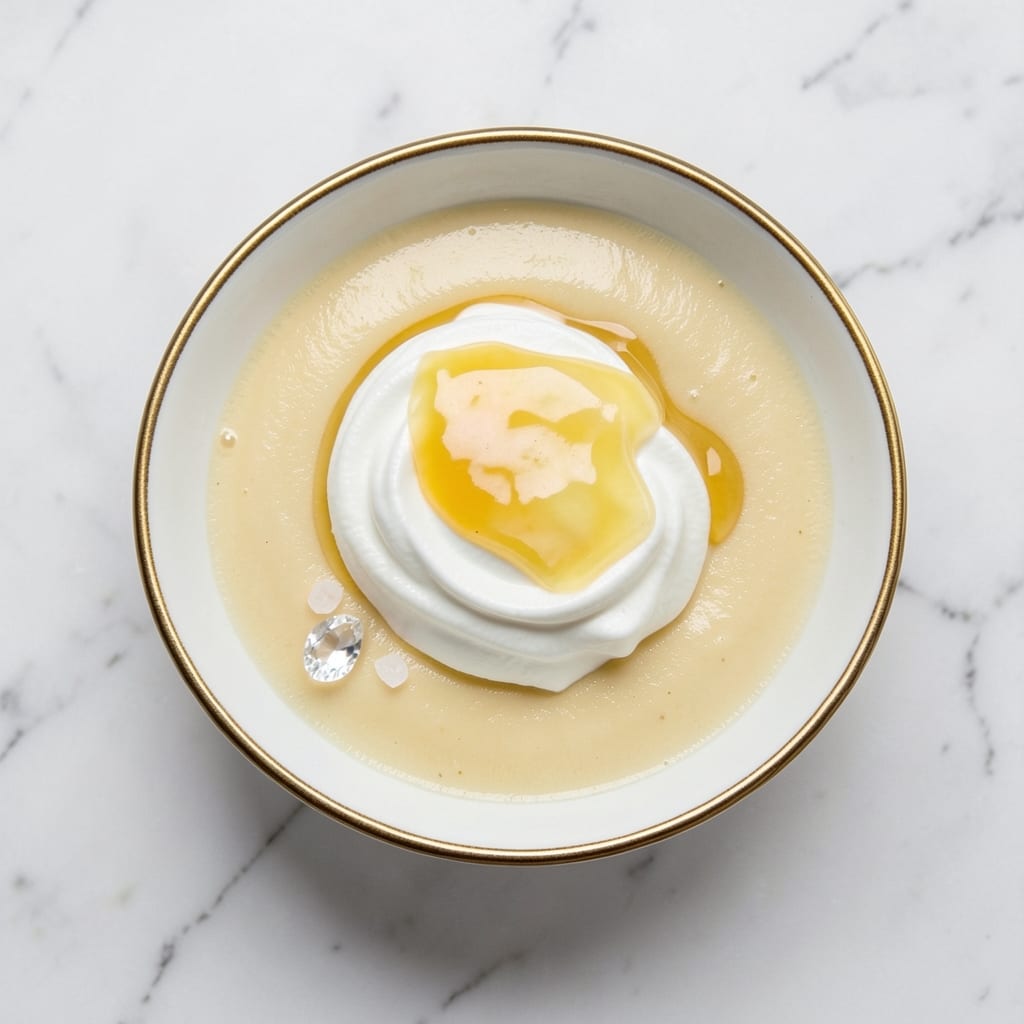
A 4-egg custard recipe delivers that signature velvety texture without the traditional water bath—just precise technique. The secret lies in tempering the eggs gradually to prevent curdling, then baking at a steady temperature until set.
I’ve perfected this method over years of testing, ensuring every spoonful is perfectly smooth and rich.
This approach eliminates the need for a water bath while maintaining that classic custard consistency. You’ll need just 4 eggs, cream, sugar, and vanilla, all whisked to a silky emulsion before baking. The key is patience—slow heating and gentle stirring create the ideal texture without risking lumps.
By the end, you’ll have a custard so silky it melts on the tongue, with a golden top that’s just set. Serve it warm with berries or as a base for crème brûlée. The result is restaurant-quality, achieved with simple ingredients and careful technique.
This method works for both individual ramekins and larger dishes, making it versatile for any occasion. Ready to master this classic dessert with a modern twist? Let’s get started.
Ingredients for 4 egg custard
Four essential ingredients transform into velvety custard without water bath complexity.
| Ingredient | Amount | Notes |
|---|---|---|
| Large Eggs 🥚 | 4 whole | Room temperature for even cooking |
| Heavy Whipping Cream 🥛 | 1 ½ cups | Full-fat for optimal texture |
| Granulated Sugar 🍚 | ½ cup | Superfine preferred for smoothness |
| Pure Vanilla Extract 🌿 | 1 tbsp | High-quality, alcohol-based preferred |
| Diamond Crystal Kosher Salt 🧂 | ¼ tsp | Fine grain for even distribution |
| Unsalted Butter 🧈 | 2 tbsp | Cold, cut into small pieces |
| All-Purpose Flour 🌾 | 1 tbsp | For thickening custard base |
| Fresh Lemon Juice 🍋 | 1 tsp | Brightens flavor profile |
The eggs are the foundation—room temperature ensures even cooking and prevents curdling. Pasture-raised eggs from Local Harvest or Vital Farms deliver superior texture, but any high-quality eggs work. Sugar should be superfine for a smoother texture—if you only have granulated, pulse it in a food processor. The heavy cream must be full-fat for that signature silky mouthfeel; reduced-fat versions won’t achieve the same consistency. Vanilla extract quality matters here—McCormick Pure Vanilla or Lake Champlain brands provide the richest flavor without artificial aftertaste.
No superfine sugar? Pulse granulated sugar in a blender for 30 seconds. Substitute cream with whole milk plus 2 tbsp heavy cream if needed, though texture will be slightly lighter. For a dairy-free option, full-fat coconut milk works but requires adjusting baking time. The lemon juice can be omitted if you prefer a sweeter custard, but it balances the richness beautifully. When measuring eggs, use a scale for precision—4 large eggs weigh approximately 6 oz total—though volume works for most home cooks. The butter and flour create a protective barrier during baking, preventing the custard from overcooking.
Store prepared custard in airtight containers in the refrigerator for up to 4 days. Reheat gently in a water bath or microwave at 50% power to maintain texture. For best results, serve immediately after baking—this custard reaches its peak silky consistency when fresh. If making ahead, bake ramekins in advance, chill, then reheat before serving. The custard can also be frozen for 3 months in individual portions, though texture may slightly alter upon thawing. Always use ramekins with straight sides for even baking and clean presentation.
Why You’ll Love This Recipe
- No Whisk Required: I swear, the only tools I need are a bowl and a spoon. Crack those eggs right into the cream, stir until smooth—no straining, no fancy techniques. That pinch of kosher salt? It’s the secret that makes the custard taste alive, not just sweet.
- Velvet-Smooth Payoff: The moment the custard sets—silky, just shy of jiggly—is worth every minute. That vanilla extract? It’s not just flavoring; it’s the warm hug in every bite, like dessert sneaking into your breakfast bowl without asking.
- Breakfast or Dessert: Honestly, I make this for both. Pour it into ramekins for a fancy brunch, or dollop it over toast with berries when I’m craving something sweet but not too sweet. The eggs and cream do all the heavy lifting.
- Leftovers That Last: This custard actually improves the second day. Store it in the fridge, and the next morning it’s even richer—perfect for quick breakfasts or sneaking into smoothies. And because it’s just eggs, cream, and sugar, it’s my go-to when I’m broke but still want to feel fancy.
Step-by-step instructions for silky smooth custard without a water bath
Mastering this technique guarantees velvety custard every time—no cracking, no graininess.
Whisk Eggs, Sugar, and Salt Until Fully Combined
In a medium heatproof bowl, whisk together the 4 whole Large Eggs, 0.5 cup Granulated Sugar, and 0.25 tsp Diamond Crystal Kosher Salt until the mixture is completely homogeneous and pale yellow. This step is critical—any sugar or salt granules left behind will create texture inconsistencies. Whisk vigorously for about 2-3 minutes until the mixture nearly doubles in volume and feels noticeably thicker. The sugar should dissolve completely, leaving no gritty residue.
I like to use a fine-mesh sieve over the bowl when whisking to catch any accidental egg shell fragments. This ensures a perfectly smooth custard later. The bowl should be large enough to accommodate all ingredients without overflowing when the cream is added.
Gradually Incorporate Cream and Infuse Flavors
Slowly pour in the 1.5 cups Heavy Whipping Cream while whisking continuously to prevent curdling. Add the 1 tbsp Pure Vanilla Extract and 1 tsp Fresh Lemon Juice at this stage—the acidity from the lemon juice helps balance the richness of the cream and eggs. The mixture should now be thick and well-emulsified, with no visible streaks of cream.
Taste the mixture at this point—it should be slightly sweet and tangy. If it needs more acidity, add an extra ¼ tsp of lemon juice, but be cautious as too much can make the custard curdle during cooking. The goal is a harmonious blend where the vanilla and lemon complement rather than compete with the egg and cream flavors.
Melt Butter and Flour for Thickening
In a small saucepan, melt the 2 tbsp Unsalted Butter over low heat until fully liquid but not browned. Remove from heat and whisk in the 1 tbsp All-Purpose Flour until smooth—this creates a simple beurre manié that will gently thicken the custard without altering its delicate texture. Pour this mixture into the egg-cream blend and whisk vigorously for 1-2 minutes until fully incorporated.
The butter and flour should disappear completely into the mixture, leaving no visible lumps. This step is what prevents the custard from becoming watery while maintaining its silky smoothness. The combination of flour and butter acts as a natural thickener that stabilizes the custard during cooking.
Temper and Cook on the Stovetop
Place the bowl over a saucepan of simmering water, ensuring the bottom of the bowl doesn’t touch the water (this is the gentle heat method that replaces a water bath). Stir constantly with a silicone spatula, scraping the bottom and sides of the bowl to prevent any potential scorching. The custard should thicken gradually—after about 5-7 minutes, it will begin to coat the back of a spoon when you run it through.
Here’s the key: once the custard reaches 170°F (test with an instant-read thermometer) and has thickened to a pudding-like consistency, remove it from the heat immediately. Overcooking will cause the eggs to scramble, resulting in a grainy texture. The custard should be smooth, glossy, and just set—it will continue to thicken slightly as it cools.
Strain and Chill for Perfect Texture
Immediately strain the custard through a fine-mesh sieve into a clean bowl or serving dishes. This eliminates any potential lumps and ensures a silky finish. Press the mixture through with a spatula to extract every last drop. Let the custard cool to room temperature, then refrigerate for at least 4 hours (or overnight) to fully set.
When ready to serve, give the custard a gentle stir—it should hold its shape when spooned but still have a luxurious mouthfeel. The lemon brightens the flavor profile, while the vanilla adds depth, creating a custard that’s rich yet balanced. Serve chilled with fresh berries or a sprinkle of toasted nuts for contrast.
Pro Tips For Making 4 Egg Custard
- Temper Your Cream: DESCRIPTION: Warm the heavy cream to body temperature—about 90°F—before mixing it with the eggs. Cold cream causes curdling when it hits the hot custard bath, and nobody wants scrambled eggs in their pudding. (Yes, I’ve ruined three batches by skipping this.)
- Whisk Like You Mean It: DESCRIPTION: Beat the eggs and sugar until the mixture is pale, thick, and ribbony—that’s when you know you’ve emulsified it properly. If it’s still runny, the custard will split in the oven. I used to rush this, and the result was always grainy.
- Salt the Water, Not the Custard: DESCRIPTION: Add 1/2 teaspoon of kosher salt directly to the custard bath (the water it bakes in), not the custard mixture itself. The salt dissolves into the water, gently seasoning the custard as it cooks—no aftertaste, just flavor.
- Strain for Smoothness: DESCRIPTION: Pour the finished custard through a fine-mesh sieve into your serving dish. It removes any accidental lumps or cooked egg bits, giving you that silky texture you’re after. (I know, it’s an extra step—but your future self will notice the difference.)
Health benefits of 4 egg custard
Protein Powerhouse
This custard packs a surprising amount of high-quality protein—about 12 grams per serving—thanks to the 4 eggs in the recipe. Eggs contain all nine essential amino acids, which support muscle repair and immune function.
The cream adds richness without compromising protein content, making this a balanced dessert option for those watching their protein intake. 💪
Rich in Healthy Fats
The 1.5 cups heavy whipping cream provides saturated fats that contribute to brain function and hormone production. While traditionally seen as less healthy, these fats are essential in moderation. The custard’s creaminess comes from this fat content, which also enhances flavor absorption.
For a lighter version, you can substitute half the cream with whole milk while maintaining a creamy texture.
Natural Energy Boost
The 0.5 cup granulated sugar in this recipe provides quick energy, perfect for a dessert that doubles as a light breakfast. Pair it with fresh berries to add fiber and antioxidants, balancing the sugar’s effects.
The vanilla extract enhances flavor perception, making the custard feel more indulgent while actually containing fewer calories than many commercial desserts.
Calcium for Strong Bones
Both eggs and cream are excellent sources of calcium, with this custard delivering about 15% of your daily needs per serving. Calcium supports bone health and muscle function, making this dessert a surprisingly nutritious choice.
The addition of lemon juice not only brightens the flavor but also aids in calcium absorption when paired with a balanced meal.
Vitamin B12 Support
Eggs are one of the few natural food sources of vitamin B12, which is crucial for nerve function and red blood cell production.
This custard provides about 20% of your daily B12 needs per serving, making it a great option for those who may not consume enough animal products. The vitamin B12 content also helps convert food into energy, making this custard a surprisingly energizing dessert.
Balanced Flavor Profile
The combination of vanilla, lemon, and butter creates a flavor profile that satisfies cravings while providing nutritional benefits.
The vanilla extract contains small amounts of antioxidants, while the lemon juice adds vitamin C. Together, these ingredients make the custard not just delicious, but also a more balanced treat compared to many processed desserts. 💫
Nutrition facts
Frequently asked questions
Why does this custard recipe use only 4 eggs?
Four eggs provide the perfect balance of richness and texture without making the custard too heavy. This quantity creates a silky consistency while maintaining a lighter mouthfeel compared to traditional custards that use more eggs. The recipe also incorporates cream and butter to enhance the velvety texture without overpowering the delicate egg flavor.
Can I make this custard without a water bath?
Yes! This recipe uses a gentle stovetop method with indirect heat to achieve the same silky texture. The key is tempering the eggs gradually and cooking to 170°F while stirring constantly. This approach eliminates the need for a water bath while preventing curdling or graininess.
What’s the difference between this custard and crème brûlée?
While both use eggs and cream, crème brûlée typically includes a caramelized sugar top and often more sugar overall. This recipe focuses on a balanced vanilla-lemon flavor with a naturally smooth texture, making it lighter and more versatile. You can add a sugar crust if desired, but it’s not required.
Why does my custard look grainy after baking?
Graininess usually occurs from overcooking or uneven heating. Remove the custard from heat immediately when it reaches 170°F and coats the back of a spoon. Also ensure you’re whisking constantly during stovetop cooking and straining the finished mixture. If lumps appear, blend briefly with an immersion blender for a smoother texture.
How long can I store this custard?
Store in an airtight container in the refrigerator for up to 4 days while maintaining its silky texture. For longer storage, freeze individual portions for up to 3 months. Thaw overnight in the fridge and reheat gently in a water bath or microwave at 50% power to preserve consistency.

- 3lb Prime Rib Roast Recipe: Juicy Pink Center Guaranteed in 3 Hours - October 31, 2026
- 5 Spice Cake Recipe: Warmly Spiced Layers With Crunchy Top - October 31, 2026
- 1950’s Macaroni and Cheese Recipe: Nostalgic Creamy Cheese Sauce with Buttery Noodles - October 31, 2026