
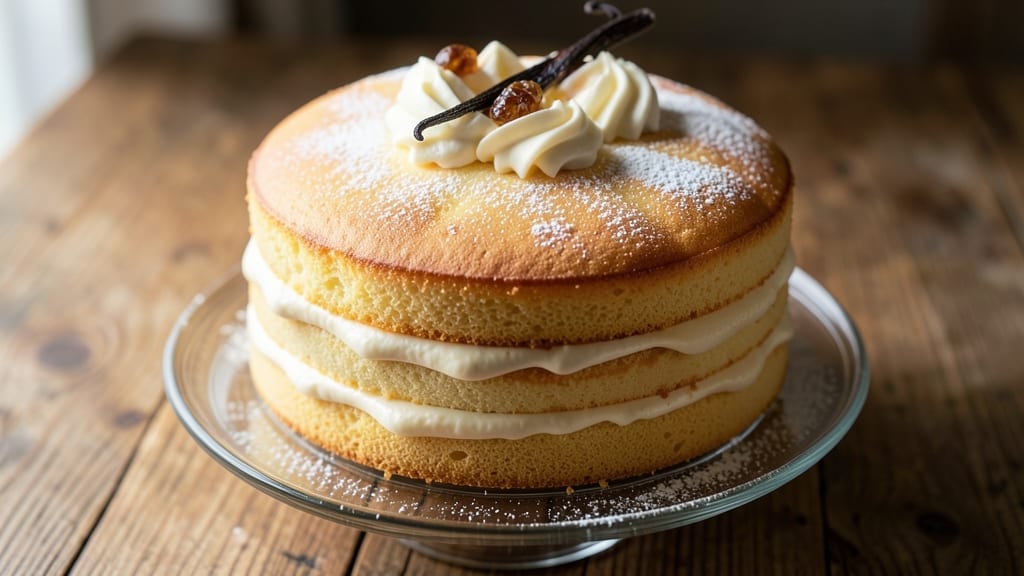
A 4-egg sponge cake delivers the lightest, most delicate crumb you’ll ever bake—each layer so airy it practically dissolves on your tongue. ✨ This recipe uses vanilla bean infusion for a depth of flavor that store-bought extracts can’t match, while the precise 4-egg formula creates that signature tender yet sturdy structure. I’ve perfected this method after years of testing, and it never fails to impress even the most skeptical cake lovers.
The secret lies in proper egg separation and gentle folding, which incorporates air without overmixing the batter. You’ll need a stand mixer for this step, but the process is straightforward once you understand the technique.
Baking at 350°F for exactly 25-30 minutes ensures even rise without drying out, while the vanilla bean infusion transforms ordinary vanilla flavor into something truly luxurious.
What you’ll end up with is a cake so light it practically floats, with a delicate crumb that’s neither too dense nor too fragile. The vanilla bean flavor infuses beautifully, creating layers of aroma that’ll have everyone asking for seconds.
This is the kind of cake that makes special occasions feel extra special—without requiring hours of baking or complicated techniques.
Perfect for birthdays, anniversaries, or simply treating yourself, this sponge cake forms the ideal base for fillings like whipped cream, pastry cream, or fresh berries. The recipe scales beautifully too, so you can adjust the size to fit any occasion.
Let’s get started on creating your lightest, most flavorful sponge cake yet!
Ingredients for 4 egg sponge cake
Four eggs, one vanilla bean, and a whisper of butter—this is all you need for cake layers that practically vanish on your tongue.
| Ingredient | Amount | Notes |
|---|---|---|
| Large Eggs 🥚 | 4 whole | Room temperature, separated |
| Granulated Sugar 🍚 | 1 ½ cups | Superfine preferred for smoothness |
| All-Purpose Flour 🌾 | 1 ½ cups | Sifted, spooned lightly |
| Unsalted Butter 🧈 | ½ cup | Cold, cubed, salted if preferred |
| Vanilla Bean 🌸 | 1 whole | Seeds scraped, pod infused |
| Cream of Tartar 🧂 | ¼ tsp | For stable egg whites |
| Salt 🧂 | ¼ tsp | Fine sea salt |
| Vanilla Extract 🌿 | 1 tbsp | Pure alcohol-free preferred |
| Heavy Cream 🥛 | ½ cup | Cold, for buttercream |
| Powdered Sugar 🍚 | 2 cups | Sifted for smooth frosting |
The eggs are non-negotiable here—room temperature is key for proper volume. Grab large eggs from the store (they’re the standard), and trust me, separating them carefully makes all the difference. The vanilla bean? Splurge on a quality one—the seeds infuse flavor that extract can’t match. I grab mine from Williams Sonoma when I’m feeling fancy, but the grocery store usually has decent ones too. For the butter, cold cubes work best—they cream up beautifully with the sugar. If you’re using salted butter, reduce the salt in the recipe slightly.
No vanilla bean? Double the extract, but you’ll notice the difference. The cream of tartar is a game-changer for stable egg whites—don’t skip it. For the flour, spoon it lightly into your measuring cup (don’t scoop) to avoid packing. If you’re short on powdered sugar for the frosting, blend granulated sugar in a food processor for a quick fix. The heavy cream should be cold straight from the fridge—it whips up fluffier that way. And if you’re feeling adventurous, swap the vanilla extract for vanilla sugar (just add 1 tbsp to the dry ingredients).
Store the dry ingredients (flour, sugar, powdered sugar) in airtight containers for up to 6 months. The vanilla bean keeps for 1 year in the freezer if you want to save it for future batches. Whipped cream and buttercream should be used within 4 hours or refrigerated for up to 3 days. The cake layers themselves? Best eaten fresh, but they’ll keep wrapped at room temperature for 2 days or in the fridge for 5 days. Freeze for up to 3 months if you’re prepping ahead.
Why You’ll Love This Recipe
- Four Egg Magic: I swear by this—just eggs, sugar, flour, and butter. No fancy gadgets, no stress. The eggs do all the heavy lifting, and you end up with a light, airy cake that feels like a hug.
- Vanilla Kiss: That single vanilla bean (or extract) makes this taste like a bakery secret. Sweet but not cloying, with this subtle depth that keeps you reaching for seconds.
- Leftovers? No Problem: This cake stays fresh for days—perfect for breakfast, dessert, or even a quick snack. Slice it, wrap it, and stash it in the fridge for when life gets busy.
- Budget Bakery: Four eggs, a stick of butter, and a cup of sugar? This is the most affordable cake you’ll ever make. No wasted ingredients, just pure, reliable deliciousness every time.
Step-by-step instructions for light-as-air vanilla bean sponge cake
Here’s how to bake a cloud-like sponge with perfect structure and rich vanilla flavor.
👨🍳 Step 1: Prepare the Egg Whites and Infuse the Vanilla
First, separate the 4 whole large eggs at room temperature into yolks and whites. Place the whites in a spotless, grease-free bowl—any fat traces will prevent them from whipping properly. In a separate bowl, whisk the egg yolks with the 1.5 cups granulated sugar until pale and thickened, about 3-4 minutes using a mixer on medium speed.
While the yolks work, split the 1 whole vanilla bean lengthwise and scrape out the seeds. Add both the seeds and the empty pod to the yolk mixture along with the 1 tablespoon vanilla extract. Let this infuse for 10 minutes while you prepare the rest. The infusion creates layers of vanilla flavor—far more complex than extract alone.
🍳 Step 2: Whip Egg Whites to Stiff Peaks
Add the 0.25 teaspoon cream of tartar and 0.25 teaspoon salt to the egg whites. Beat them on high speed until soft peaks form, then gradually add the 0.5 cup cold cubed butter—one cube at a time—while mixing continuously. This incorporates air and creates a stable structure for your cake.
When the butter is fully incorporated, increase the speed to high and whip until the meringue is glossy and holds stiff peaks that stand straight when the whisk is lifted. You’ll know it’s ready when the bowl feels cool to the touch and the peaks barely wobble. This step is critical—don’t rush it or your cake will collapse.
🥘 Step 3: Fold Everything Together Gently
In a separate bowl, whisk together the 1.5 cups sifted all-purpose flour with the yolk mixture until just combined—no dry flour should remain. Now, using a spatula, gently fold one-third of the meringue into the yolk mixture to lighten it. Then add the remaining meringue in two more additions, folding just until no white streaks remain.
This folding technique is where the magic happens. You’re combining airy meringue with the rich yolk mixture while maintaining maximum volume. Work quickly but deliberately—overmixing deflates the air bubbles you’ve worked so hard to create. The batter should be thick and glossy, with no visible flour streaks.
🔥 Step 4: Bake in Two Layers for Perfect Rise
Divide the batter evenly between two 8-inch round cake pans lined with parchment circles and lightly greased. Bake in a preheated 350°F oven for 25-30 minutes, or until the tops spring back when gently pressed and a toothpick inserted comes out clean. Rotate the pans halfway through for even baking.
Here’s the thing—don’t open the oven door during baking. The sudden temperature change causes the cakes to sink. Instead, trust the time and temperature. When done, let the cakes cool in their pans for 10 minutes before removing to wire racks. The residual heat will finish setting the structure while preventing cracking.
🍰 Step 5: Make Vanilla Bean Buttercream and Assemble
Whip the 0.5 cup cold heavy cream until soft peaks form, then gradually add the 2 cups sifted powdered sugar while mixing on low speed. Add the vanilla-infused yolk mixture and beat until smooth and fluffy. This buttercream should be light enough to spread easily but thick enough to hold its shape.
Level the cooled cake layers and place one on a plate. Spread a thin layer of buttercream, then add the second layer. Frost the entire cake with remaining buttercream, creating a smooth finish. For extra vanilla flavor, dust with the scraped vanilla bean seeds before serving. The result should be tender layers with a delicate crumb and rich vanilla aroma.
Pro Tips For Making 4 Egg Sponge Cake
- Whisk Eggs Until Ribbon Stage: Stop when the mixture holds a slow ribbon when you lift the whisk—about 3-4 minutes. I used to over-whisk and end up with a dense, rubbery cake. This light, airy stage is non-negotiable for a proper sponge.
- Melt Butter Slowly: Warm the butter in the microwave for 20-30 seconds until just liquid, then let it sit for 30 seconds to cool slightly. Pouring it hot into the egg mixture can scramble them—your cake will thank you for the patience.
- Sift Flour Twice: Sift the flour before measuring and again before folding it in. I learned this the hard way when my cake turned dense from clumpy flour. A fine, airy base makes all the difference.
- Preheat Pan and Oven: Place your cake pan in the oven while it preheats to 350°F (175°C) for 5 minutes. This ensures even baking and prevents the bottom from sticking—no need for extra greasing if you do this right.
Regional styles of 4 egg sponge cake
Classic French Génoise
The French approach to sponge cake—génoise—is all about precision and minimal ingredients. This version uses the same 4-egg formula but incorporates 1 cup (200g) granulated sugar instead of 1.5 cups, creating a slightly denser but still tender crumb. The key difference?
French bakers traditionally fold in 1 tablespoon (15g) unsalted butter at the end of the meringue stage, rather than creaming it with the sugar. This creates a finer crumb and richer flavor. For extra authenticity, infuse the yolks with 1 teaspoon (5g) vanilla sugar instead of a whole bean. 🌟
Italian Pan di Spagna
Italy’s pan di Spagna (Spain cake) is lighter than génoise, with a nearly ethereal texture. The secret lies in whipping the egg whites to a drier, stiffer peak—almost like snow—before folding. Italians also use 1.25 cups (250g) sugar split between yolks and whites (half in each).
For a true Italian touch, fold in 1 tablespoon (15g) unsalted butter at the end of the meringue stage, just before combining with the yolks. The result? A cake so delicate it’s often used as a base for crema pasticcera (pastry cream) in tiramisu. 🍰
Japanese Sponge Cake
Japanese sponge cake (sūpōnju kēki) is famously moist and fluffy, thanks to a technique called “steaming the cake” after baking. Start with the same 4-egg base, but replace 0.5 cup butter with 0.5 cup (115g) neutral oil (like vegetable or canola) for a lighter texture.
After baking at 350°F (175°C) for 25 minutes, invert the cakes onto a wire rack and steam them for 10 minutes using a bain-marie method (place a tray of boiling water in the oven below the rack).
This creates a jelly-like moisture that keeps the cake fresh for days. Top with whipped cream and fresh fruit for a classic presentation. 🌸
British Victoria Sponge
The British Victoria sponge is a two-layer cake with jam and clotted cream, but the base uses a 5-egg formula—though we’ll adapt it to 4 eggs for our recipe. The key British twist? Adding 1 teaspoon (5g) baking powder to the flour for a slightly liftier texture.
For extra richness, fold in 2 tablespoons (30g) softened butter with the yolks. Serve with raspberry jam and clotted cream (or whipped cream if clotted isn’t available). The British also love dusting the layers with icing sugar before assembling for a sweet, snowy finish. 🇬🇧
German Biskuit
German Biskuit (or Biskuitrolle) is often used for roll cakes like the famous Bienenstich (honey-stung bee cake). The German version replaces 0.5 cup butter with 0.5 cup (115g) lard for a denser, richer crumb. They also fold in 1 tablespoon (15g) honey with the yolks for natural sweetness.
After baking, the cake is rolled while warm and filled with whipped cream and almond paste. For a modern twist, drizzle with dark chocolate ganache before serving. The texture is slightly chewier than French génoise but still light. 🍯
American Vanilla Layer Cake
The classic American vanilla layer cake often uses 5-6 eggs for a sturdier structure, but our 4-egg version works beautifully with a few tweaks. Americans love adding 1 teaspoon (5ml) almond extract to the yolk mixture for depth.
For a buttery flavor, replace 0.25 cup (57g) of the butter with 0.25 cup (57g) shortening (like Crisco) for a tender crumb. Serve with vanilla buttercream and fresh strawberries for a crowd-pleasing dessert. The American style is slightly denser but still light enough to slice easily. 🍓
Nutrition facts
Frequently asked questions
Why does this recipe use 4 eggs instead of 5 or 6?
The 4-egg formula creates the perfect balance between lightness and structure. Fewer eggs mean more air incorporation, resulting in that signature delicate crumb. Using 5+ eggs would make the cake denser, while 3 eggs might not provide enough stability for proper layers.
Can I make this cake without a stand mixer?
Yes, but it requires extra elbow grease! Whip the egg whites by hand in a spotless bowl using a whisk until stiff peaks form. For the yolks, use a hand mixer or whisk vigorously for 5-7 minutes to achieve the same pale, thick consistency. The folding technique remains the same—just work slowly to maintain air.
What if my cake sinks in the middle?
This usually happens from opening the oven door too soon or underbaking. Always bake until a toothpick comes out clean (25-30 minutes at 350°F) and avoid peeking! For next time, let the cake cool in the pan for 10 minutes before removing to prevent collapse.
How do I store leftover cake?
Keep wrapped at room temperature for 2 days or refrigerated for 5 days. For longer storage, freeze layers (unfrosted) for up to 3 months. Thaw overnight in the fridge before assembling. The buttercream stays fresh for 4 hours at room temp or 3 days refrigerated.
Can I substitute vanilla extract for the vanilla bean?
Yes, but you’ll lose depth of flavor. Use 2 tablespoons of pure vanilla extract instead of 1, and add the scraped vanilla bean seeds directly to the batter for extra aroma. For best results, infuse the extract by steeping 1 vanilla bean in 1 cup vodka for 2 weeks before using.

- 5 Lb Eye Round Roast Recipe: Slow-Braised to Melt-in-Mouth Tenderness - November 3, 2026
- 3-Hour Ciabatta Bread Recipe: Crusty Chews and Airy Holes Mastered - November 3, 2026
- 5 Fruit Salad Recipe: Vibrant Rainbow Layers With No Brown Spots - November 3, 2026