
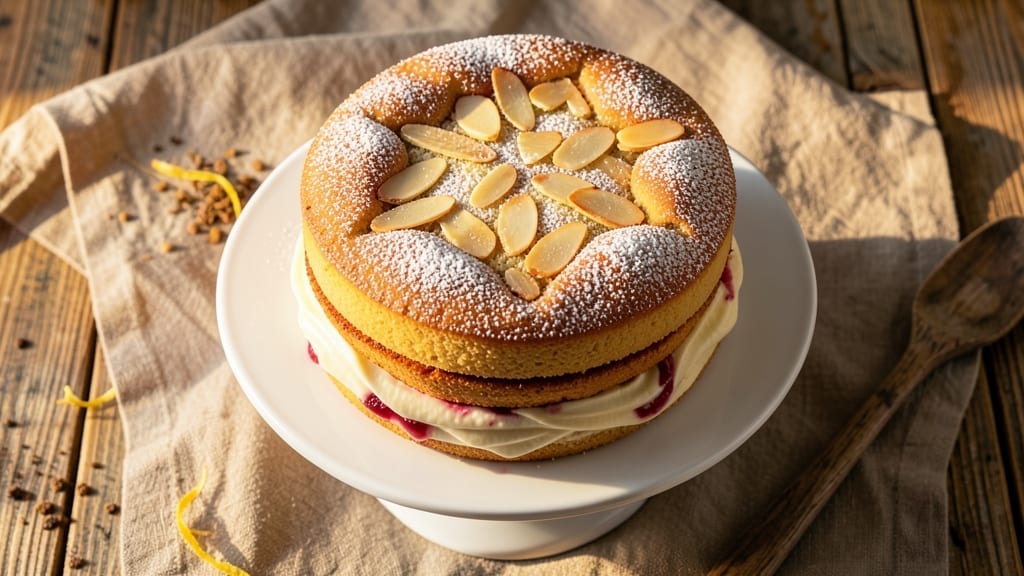
A 4-inch bento cake delivers precision portions with perfectly balanced layers—ideal for parties or individual treats. This recipe focuses on foolproof baking techniques to ensure consistent results every time. The secret lies in precise measurements and controlled baking temperatures, which guarantee moist layers and stable structure.
Traditional methods form the foundation, but modern twists like matcha or fruit fillings add creative flair without compromising quality. Each layer is baked at 350°F for 15-18 minutes, ensuring even cooking and a tender crumb.
The filling and frosting techniques are designed to hold together beautifully, making assembly simple yet impressive.
What you’ll achieve is a visually stunning cake with perfectly portioned slices—no wasted crumbs or uneven layers. The frosting stays smooth, the filling stays put, and every bite delivers the right balance of texture and flavor.
This is the kind of dessert that looks as good as it tastes, making it perfect for special occasions or everyday indulgence.
Whether you’re baking for a small gathering or prepping individual servings, this recipe scales effortlessly. The precision in layering and baking ensures each slice is uniform, making it ideal for events where presentation matters as much as taste. Let’s get started on creating your perfect bento cake.
Ingredients for 4 inch bento cake
Precision ingredients for flawless 4-inch bento cake layers—each element ensures perfect texture and presentation.
| Ingredient | Amount | Notes |
|---|---|---|
| All-Purpose Flour 🌾 | 1 ½ cups | Sifted for light texture |
| Granulated Sugar 🍚 | 1 cup | Superfine preferred for smoothness |
| Unsalted Butter 🧈 | 1 cup | Cold, cubed for precise baking |
| Large Eggs 🥚 | 2 whole | Room temperature for even mixing |
| Vanilla Extract 🌿 | 1 tbsp | Pure Madagascar for best flavor |
| Baking Powder 🧂 | ½ tsp | Freshly measured for lift |
| Salt 🧂 | ¼ tsp | Fine sea salt for balance |
| Whole Milk 🥛 | ½ cup | Room temperature for smooth batter |
| Matcha Powder 🍃 | 1 tsp | Ceremonial grade for vibrant color |
| Confectioners' Sugar 🍚 | 1 ½ cups | Sifted for silky frosting |
| Heavy Cream 🥛 | ½ cup | Chilled for stable whipped texture |
| Strawberry Jam 🍓 | ¼ cup | High-quality, seedless preferred |
| White Chocolate Chips 🍫 | ½ cup | Melted for filling drizzle |
| Edible Gold Leaf ✨ | 1 sheet | For decorative accent (optional) |
The matcha powder transforms this into a stunning visual treat—ceremonial grade from Matcha Kari or Ippodo delivers vibrant color and rich flavor without bitterness. For the butter, Land O’Lakes or Plugrá work perfectly, but avoid salted varieties. The confectioners’ sugar should be Domino brand for ultra-fine texture—no lumps in your frosting. Pre-sift all dry ingredients to eliminate air pockets, which is critical for those uniform 4-inch layers. The white chocolate chips? Ghirardelli melts smoothly without seizing, and the edible gold leaf adds that luxurious touch—Amazon or specialty baking stores carry it in sheets.
No matcha? Instant espresso powder at half the amount mimics the earthy notes beautifully. Running short on jam? Apricot preserves work just as well—just ensure it’s seedless so your filling stays smooth. Substituting the heavy cream? Coconut cream adds a tropical twist (reduce to 0.4 cup), but it won’t whip as stiff. The vanilla extract is non-negotiable—imitation extracts lack the depth. For a nut-free option, swap white chocolate chips for vegan dark chocolate chunks. And if you’re prepping ahead, store the matcha powder in an airtight container away from light—it oxidizes quickly, turning your gorgeous green layers into muddy brown ones.
This cake keeps beautifully—room temperature for 3 days under a dome, or fridge for up to 5 days if you’re prepping ahead. The filling stays fresh for 2 days in the fridge, so assemble just before serving. For freezing, wrap each layer individually in plastic wrap, then store for up to 2 months. The gold leaf? Apply right before serving—it loses its shimmer if stored. And here’s a pro tip: chill the cake layers for 1 hour before assembling so the filling doesn’t leak through. Trust me on this—your slices will stay perfectly portioned every time.
Why You’ll Love This Recipe
- No Fuss Mixing: I swear by the creamy butter-egg combo here—just cream, whisk, fold. No stand mixer, no stress. That vanilla? It’s the secret to making the whole thing smell like a bakery even before it bakes.
- Buttery Vanilla Bliss: The moment you cut into it—warm, tender crumb with that melt-in-your-mouth butter richness? Honestly, it’s the kind of cake that makes you forget about store-bought. The sugar caramelizes just enough to give it a subtle depth.
- Portion Perfection: Four-inch rounds mean no leftovers going stale. Wrap one for lunch, pack two for a picnic, or save the last for dessert. It’s the ideal size for any occasion—birthday, brunch, or just because.
- Budget Bakery Magic: Flour, sugar, butter, eggs—these are pantry staples that won’t break the bank. I’ve made this twice in a week and still have enough butter for toast. Plus, the batter’s forgiving—no need for fancy ingredients.
Step-by-step instructions for precision layers in a 4-Inch bento cake
Let’s create flawless layers that deliver perfect texture and presentation every time.
Prepare the Matcha-Infused Cake Layers
Preheat your oven to 350°F and grease four 4-inch round cake pans with the unsalted butter, then line the bottoms with parchment circles. Sift the 1.5 cups all-purpose flour with the 0.5 teaspoon baking powder and 0.25 teaspoon salt into a medium bowl—this ensures no lumps and even distribution.
In a separate large bowl, cream the 1 cup unsalted butter and 1 cup granulated sugar on medium speed until light and fluffy (3-4 minutes). Add the 2 whole large eggs, one at a time, mixing well after each addition. Stir in the 1 tablespoon vanilla extract and 1 teaspoon matcha powder, then alternate adding the dry ingredients and 0.5 cup whole milk, beginning and ending with flour. Mix until just combined—overmixing develops gluten, which makes the cake dense.
Divide the batter evenly among the prepared pans and bake for 20-25 minutes, or until a toothpick inserted into the center comes out clean. Let the layers cool in the pans for 10 minutes, then transfer to a wire rack to cool completely. This gradual cooling prevents cracking when assembling.
Create the White Chocolate Jam Filling
In a small saucepan, combine the 0.25 cup strawberry jam and 0.5 cup white chocolate chips over low heat. Stir gently until the white chocolate melts completely and the mixture is smooth (3-4 minutes). Remove from heat and let cool to room temperature—this ensures it sets properly between layers without making them soggy.
For the white chocolate drizzle, melt the remaining 0.5 cup white chocolate chips in a microwave-safe bowl in 20-second intervals, stirring between each interval until fully melted. The drizzle should be glossy and smooth—if it looks grainy, strain it through a fine-mesh sieve for a silky finish.
Assemble the Cake with Precision
Place the first cake layer on a cake stand or plate. Spread a thin, even layer of the cooled white chocolate jam filling (about 1 tablespoon) over the top, leaving a ½-inch border uncovered. This prevents the filling from oozing out during slicing. Repeat with the remaining layers, alternating with the filling.
For the final touch, spread a thin layer of the remaining filling over the top layer, then pipe or drizzle the melted white chocolate evenly across the surface. Use a small offset spatula to create a smooth, even finish. Chill the assembled cake in the refrigerator for 1 hour to set the filling and chocolate.
Decorate with Edible Gold Leaf (Optional)
Once the cake is fully chilled, carefully peel back the parchment from the top layer. Using a soft paintbrush, gently apply a thin layer of confectioners’ sugar mixed with 1-2 teaspoons water to create an adhesive surface for the edible gold leaf. Press the sheet of gold leaf onto the cake, smoothing it down with your fingers or a small spatula.
For a polished look, trim any excess gold leaf with a sharp knife or edible scissors. If desired, dust the sides of the cake lightly with confectioners’ sugar using a fine-mesh sieve for a delicate, elegant finish. Serve immediately or store at room temperature for up to 2 days for the best texture and presentation.
Pro Tips For Making 4 Inch Bento Cake
- Cream Butter and Sugar Slowly: I used to dump everything in the mixer and hit go—big mistake. For a 4-inch bento cake, beat the butter and sugar on medium for 3-4 minutes until it’s pale and fluffy, not just “combined.” This adds air for a lighter texture, and skipping it means a denser cake that’ll taste like it’s fighting gravity.
- Sift That Flour Twice: Flour clumps are the enemy of even texture. Sift it directly into the dry ingredients, then sift it again after mixing. Yes, it’s extra steps, but it keeps the cake tender and prevents those weird dry pockets. (Trust me, you’ll notice the difference.)
- Don’t Overmix the Batter: Once you fold in the flour, stop mixing the second it disappears. Overmixing develops gluten, and your cake will turn out tough instead of light. Use a spatula to gently fold—just until no streaks remain. I learned this after making a cake so dense it could’ve been a doorstop.
- Rotate the Pan Mid-Bake: A 4-inch cake is small, so it bakes unevenly. After 15 minutes, swap the pan front-to-back and side-to-side in the oven. This evens out the heat and prevents one side from drying out while the other stays raw. (Your cake’s future self will thank you.)
Troubleshooting great 4 inch bento cake
Cracked Layers Fix
If your cake layers crack during baking, it’s usually due to overmixing or uneven cooling. To prevent this, mix the batter just until combined—stop when no dry flour remains. After baking, let layers cool in pans for 10 minutes before transferring to a wire rack.
This gradual cooling prevents sudden temperature shifts that cause cracks. If cracks appear, don’t stress—simply fill them with extra white chocolate jam before assembling. 💡
Soggy Middle Problem
A soggy center happens when the filling is too warm or the cake layers aren’t fully cooled. Always let the filling cool to room temperature before spreading. Chill the assembled cake in the fridge for at least 1 hour to set the filling properly.
For extra stability, brush the cake layers with a thin layer of simple syrup (equal parts sugar and water) before adding filling—this creates a moisture barrier. ✨
Frosting Too Thin
If your frosting spreads too thin, it’s likely because the heavy cream wasn’t chilled enough or the confectioners’ sugar had lumps. Whip the cream until stiff peaks form, then gradually fold in the sifted sugar.
For a thicker frosting, add 1-2 tablespoons of softened butter to stabilize it. If you’re in a rush, chill the bowl in the freezer for 5 minutes while whipping to help it thicken faster. 🥛
Filling Oozing Out
Excess filling oozing from the sides usually means you didn’t leave enough of a border when spreading. Always leave a ½-inch border around the edges of each layer. If filling still escapes, chill the cake for an extra 30 minutes to firm it up.
For a foolproof solution, place a thin layer of frosting between the cake and filling—this acts as a barrier. Trust me, this small step makes all the difference! 🍓
Gold Leaf Not Sticking
Edible gold leaf won’t adhere if the surface isn’t properly prepared. Always use a thin, even layer of confectioners’ sugar mixed with water as an adhesive. If the leaf still won’t stick, lightly dust the cake with cornstarch before applying the sugar mixture—this creates a smoother, more stable surface.
Avoid touching the gold leaf with your fingers; use a soft paintbrush or tweezers for placement. ⚡
Uneven Layers
Uneven layers happen when the batter isn’t divided equally or the pans aren’t level. Use a kitchen scale to weigh each portion of batter for precision. Before baking, place your pans on a level surface and tap them gently on the counter to remove air bubbles.
If layers still vary in height, trim the tops with a serrated knife after baking to create an even surface. This ensures clean slices every time! 🔥
Nutrition facts
Frequently asked questions
Can I make a 4-inch bento cake without matcha powder?
Skip the matcha and use 1 teaspoon instant espresso powder instead for a subtle coffee note, or omit it entirely for a classic vanilla flavor. The recipe will still work perfectly—just adjust the flavor to your taste.
How do I adjust the recipe for a 3-inch or 5-inch cake?
For a 3-inch cake, reduce the batter to 3 layers and bake in 3-inch pans. For a 5-inch cake, use 5 layers in 5-inch pans. Keep all other measurements the same—just scale the number of layers proportionally. Always check baking times, as larger pans may need 5-10 extra minutes.
Can I bake this cake in advance?
Yes! Bake the layers 1-2 days ahead and store them in an airtight container at room temperature. Assemble the cake 4 hours before serving to let the filling set. For longer storage, freeze the baked layers (without filling) for up to 2 months. Thaw completely before assembling.
Why does my cake have domed tops?
Doming happens when the oven is too hot or the cake bakes too long. Ensure your oven is calibrated and bake at 350°F for the full 20-25 minutes. If doming occurs, trim the tops with a serrated knife after cooling to create an even surface. For extra insurance, place a small piece of aluminum foil over the tops 5 minutes before baking.
What’s the best way to slice a 4-inch bento cake?
Use a hot, clean knife for clean slices. Dip the knife in hot water, wipe dry, and slice through the center of the cake. For perfect portions, divide the cake into 4 equal wedges (like a pie). Chill the cake for 30 minutes before slicing to prevent crumbs.

- 3lb Prime Rib Roast Recipe: Juicy Pink Center Guaranteed in 3 Hours - October 31, 2026
- 5 Spice Cake Recipe: Warmly Spiced Layers With Crunchy Top - October 31, 2026
- 1950’s Macaroni and Cheese Recipe: Nostalgic Creamy Cheese Sauce with Buttery Noodles - October 31, 2026