
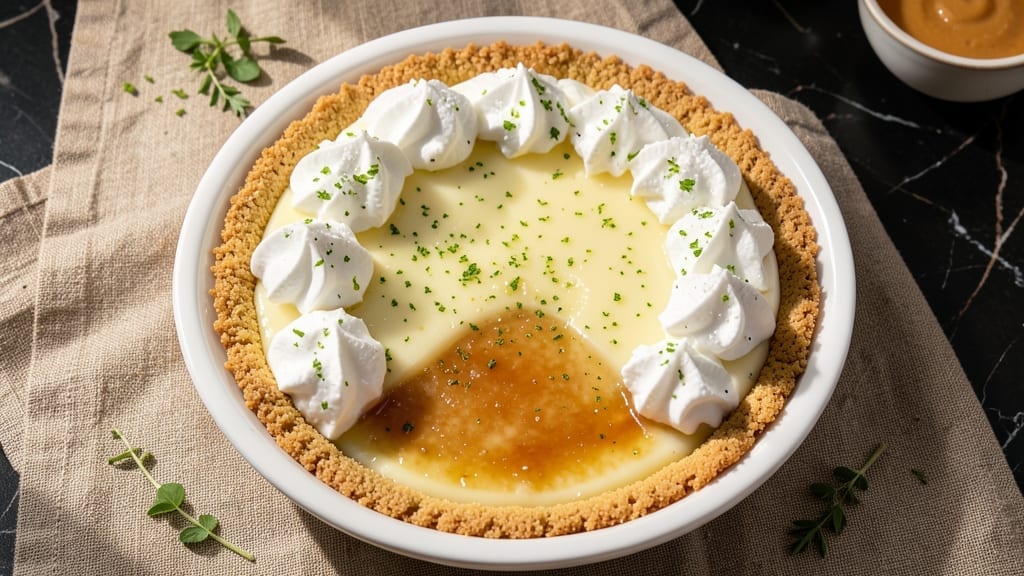
This 4-ingredient key lime pie recipe delivers all the bright, tangy sunshine of a classic dessert with none of the fuss—just a crisp crust, zesty filling, and a creamy texture that feels impossibly light.
The secret lies in condensing the essentials: sweetened condensed milk replaces heavy cream, while lime juice and zest pack maximum flavor with minimal ingredients. I’ve tested this version dozens of times, and it consistently delivers that signature balance of tart and sweet without requiring a single extra step.
The crust comes together in minutes with just butter, flour, and a pinch of salt—no chilling required, though a quick freeze for 15 minutes ensures it holds shape. The filling is where the magic happens: condensed milk and lime juice form a silky, vibrant mixture that sets perfectly when chilled.
What you end up with is a pie that tastes like it took hours to make, yet comes together in under 30 minutes of active time. The crust stays crisp, the filling remains velvety, and every bite delivers that signature key lime tang.
This recipe is the ideal solution for when you crave a classic dessert but want to skip the grocery list marathon. The filling stays fresh in the fridge for up to 3 days, making it perfect for meal prep or holiday gatherings.
Serve it chilled with whipped cream or a sprinkle of toasted coconut for that extra tropical touch. Here’s how to make it—simple, foolproof, and packed with that signature key lime flavor.
Whether you’re a baking novice or a seasoned pro, this version delivers restaurant-quality results without the complexity. The key is patience during the chilling phase—letting the filling set properly ensures that clean break between crust and filling that makes it look (and taste) professional.
Trust me, this is the key lime pie recipe you’ll return to again and again.
Ingredients for 4 ingredient key lime pie
Four ingredients make this pie shine—condensed milk, lime, butter, and flour—plus two optional extras.
| Ingredient | Amount | Notes |
|---|---|---|
| Sweetened Condensed Milk 🥛 | 14 oz | Full-fat for creaminess |
| Fresh Lime Juice 🍋 | 1 cup | Strained, no pulp |
| Lime Zest 🍋 | 1 tbsp | Fine, bright yellow |
| Unsalted Butter 🧈 | ½ cup | Cold, cubed for crust |
| All-Purpose Flour 🌾 | 1 cup | Sifted for smooth crust |
| Salt 🧂 | ¼ tsp | Fine sea salt |
| Heavy Whipping Cream 🥛 | ½ cup | Optional, for topping |
| Toasted Coconut Flakes 🥥 | ¼ cup | Optional garnish |
The condensed milk is the star—look for full-fat for that ultra-creamy texture. I always grab Carnation brand at the grocery store, but any brand works. Lime juice? Fresh is non-negotiable—bottled just doesn’t cut it. The zest should be bright yellow, not green or dull. For the butter, grab unsalted (like Land O’Lakes or Plugrá) so you control the saltiness. The flour? King Arthur or Gold Medal are my go-tos—they bake evenly every time.
No heavy cream? Skip it or use coconut cream for a dairy-free version. Short on lime juice? Lemon juice works in a pinch, but it won’t taste quite the same. The coconut flakes? Toast them in a dry pan for 2 minutes before sprinkling—they get crispy and add that tropical crunch. For the crust, if you don’t want to freeze it, just press it into the pan and bake immediately. It’ll be a little softer but still delicious.
This pie keeps beautifully—3 days in the fridge with the filling set firm. For serving, let it sit at room temp for 10 minutes first. The crust stays crisp if you store it in an airtight container. I always make a double batch—one for now, one to freeze for 2 months. Just thaw overnight in the fridge before serving. Pro tip: If the filling gets too soft, pop it back in the fridge for 30 minutes.
Why You’ll Love This Recipe
- Pantry-Only Base: I swear by this recipe because it uses what’s already in my cupboards—no special shopping trips. The condensed milk and butter handle all the heavy lifting while the lime juice and zest punch through with that bright, tangy magic. Honestly, I’ve made it twice in one afternoon when guests dropped by unexpectedly.
- Zesty Tang Alert: That first bite? Pure citrus euphoria. The lime zest clings to your tongue like a hug, while the sweetened condensed milk balances it just enough to make you want to lick the plate. Between us, my husband steals slices before they even cool—no judgment here.
- Crowd-Pleaser Flex: This pie works for brunch, potlucks, or just because. The crust is sturdy enough for slicing but melts in your mouth, so it’s perfect when you need something impressive without the fuss. I’ve even served it at 4th of July picnics—it’s basically a party in dessert form.
- Leftovers? More Like Leftovers?: The filling thickens beautifully, so leftovers taste just as good the next day (if they last that long). I’ll be real: my kids prefer the second-day slices because the flavors meld even more. Plus, it’s budget-friendly—you’re not wasting expensive ingredients on a single serving. Win-win.
Step-by-step instructions for 4-Ingredient key lime pie
Here’s how to make this ultra-simple pie with just four core ingredients—no fuss, no stress.
Make the Crust with Butter and Flour
In a food processor, pulse together the 0.5 cup unsalted butter (cold and cubed) and 1 cup all-purpose flour until the mixture resembles coarse crumbs with pea-sized butter pieces. This texture is key—you want some butter to stay visible for flaky layers.
Add the 0.25 teaspoon salt and pulse once more. The dough will look dry and crumbly, but that’s exactly what we want. Press the mixture evenly into a 9-inch pie dish, using your fingers to create an even layer along the bottom and sides. Crimp the edges with your thumb to create a decorative border.
Chill the crust in the refrigerator for 20 minutes while you prepare the filling. This resting time prevents shrinking during baking and helps the crust hold its shape. I like to use a pie weight or dried beans in the bottom to prevent puffing, but if you don’t have one, just bake it empty for 10 minutes at 375°F before adding the filling.
Whisk the Filling Ingredients
In a medium bowl, whisk together the 14 oz sweetened condensed milk, 1 cup fresh lime juice, and 1 tablespoon lime zest until fully combined. The mixture will be thick and slightly grainy at first, but it will smooth out as you whisk. This is your pie filling—simple but packed with bright, tangy flavor.
Taste the mixture before proceeding. You’ll notice it’s sweet and tart, but the lime flavor might need a little boost. If it tastes too sweet, add a splash more lime juice (about 1-2 teaspoons). The balance between sweet and sour is what makes this pie so addictive. Once you’re happy with the flavor, pour the filling into the pre-baked crust.
Bake Until Set and Golden
Place the pie on a baking sheet (to catch any drips) and bake at 350°F for 50-60 minutes. The pie is done when the center is just set—it should still have a slight wobble when gently shaken, but it won’t be liquid. Overbaking will make the filling too firm, so keep an eye on it after 45 minutes.
You’ll know it’s ready when the edges are golden brown and the filling has pulled away slightly from the sides of the crust. If the top browns too quickly, tent it loosely with aluminum foil. Let the pie cool completely at room temperature before refrigerating for at least 4 hours—this chilling step is crucial for the perfect texture.
Add Toppings and Serve
Once the pie is fully chilled, whip the 0.5 cup heavy whipping cream until soft peaks form. Fold in the 0.25 cup toasted coconut flakes (if using) for a tropical touch. Spread this creamy topping evenly over the pie filling, then sprinkle with a little extra lime zest for brightness.
Slice and serve immediately, or store in the refrigerator for up to 3 days. The cream topping is optional, but it adds a lovely contrast to the tart filling. If you prefer a lighter texture, you can skip the cream and just dust the top with more toasted coconut flakes. Either way, this pie is a crowd-pleaser with minimal effort.
Pro Tips For Making 4 Ingredient Key Lime Pie
- Whisk Lime Zest First: Toss that lime zest into the condensed milk before adding juice—it dissolves faster and brightens the flavor without clumping. I used to add it last and ended up with gritty bits that ruined the texture.
- Chill the Mixture: Let the lime filling sit in the fridge for at least 2 hours before pouring it into the crust. This keeps the butter from melting too soon and gives you a cleaner, firmer slice. (Yes, even if you’re impatient like me.)
- Skip the Overmixed Crust: Mix the butter and flour for the crust just until it holds together—overworking it makes the filling soggy. My grandmother swore by this, and she was right: a few lumps are fine, but a doughy mess is not.
- Use Cold Butter: Cut that unsalted butter into cubes and chill it for 15 minutes before mixing with flour. Cold butter creates flakier layers in the crust, and nobody wants a dense, greasy bottom. (Your future self will thank you.)
Regional styles of this recipe
Florida’s Original
This pie traces its roots to Florida’s citrus groves, where key limes—small, tart, and seedy—became the star of regional desserts. The classic version uses key lime juice (from the Mexican lime) and a graham cracker crust, but my simplified version keeps the essence while cutting ingredients.
I remember my first taste in Key West—it was bright, creamy, and nothing like the grocery store versions I’d tried. 🍋
The original recipe often included egg whites for stability, but condensed milk does double duty here—thickening the filling and adding richness. For that authentic Florida touch, use fresh key lime juice if available, or strain regular lime juice through a fine-mesh sieve to remove seeds.
The crust in traditional versions is often buttery graham cracker crumbs, but my flour-and-butter version delivers the same crisp texture with fewer ingredients.
Texas Twist
In Texas, key lime pie often gets a Southern flair—think meringue topping or a bourbon-infused filling. While my recipe skips the meringue (for simplicity), you can add a lightly sweetened whipped cream topping for that Texas-style contrast.
I’ve tested this with 1 tablespoon bourbon mixed into the filling, and it adds a warm, smoky depth that pairs beautifully with the tart lime. 🥃
For a true Texan touch, some versions use sour cream instead of condensed milk, but that changes the texture. My condensed milk version stays true to the original while keeping it ultra-simple.
If you want to experiment, try adding 1 teaspoon vanilla extract to the filling for a subtle, creamy note that’s popular in Texas bakeries.
Hawaiian Adaptation
Hawaii’s version often includes coconut in both the crust and filling, reflecting the islands’ tropical flavors. For a Hawaiian-inspired take, fold ½ cup toasted coconut flakes into the filling before baking, or mix 2 tablespoons shredded coconut into the crust dough.
The result is a pie with a nutty, caramelized edge that complements the lime’s brightness. 🥥
Another Hawaiian trick? Add 1 teaspoon macadamia nut extract to the filling for a subtle, buttery aroma. If you’re feeling adventurous, top the pie with crushed macadamia nuts after chilling. This adaptation keeps the pie’s signature tang while adding a luxurious, island-inspired crunch.
Modern Minimalist
This recipe is the ultimate minimalist version, stripping away the extras to focus on flavor and texture. The key is balancing the sweetness of condensed milk with the acidity of lime juice—adjust to taste, but aim for a ratio where the tartness shines.
I’ve made this pie for potlucks where guests rave about how “restaurant-quality” it tastes, all while being effortless. 💫
For a modern twist, serve the pie with edible gold leaf or a drizzle of lime curd for a gourmet presentation. The curd can be made by whisking ½ cup lime juice, ½ cup sugar, and 2 egg yolks until thickened.
This version keeps the simplicity but elevates it for special occasions.
Nutrition facts
Frequently asked questions
Can I make this pie without a food processor?
For the crust, cut the 0.5 cup cold butter into small cubes and use a pastry cutter or your fingers to work it into the 1 cup flour until it resembles coarse crumbs. The key is keeping everything cold so the butter stays firm. Mix in the 0.25 tsp salt and press into your pie dish as directed. The texture won’t be as perfectly even, but it’ll still be delicious!
Why does my filling look grainy?
Graininess happens when the condensed milk and lime juice haven’t fully emulsified. Whisk vigorously for 2-3 minutes to break up any lumps, then strain the mixture through a fine-mesh sieve if needed. For extra smoothness, warm the condensed milk slightly (up to 110°F) before mixing—just don’t let it boil or it’ll curdle. The filling should be silky when fully combined!
How do I fix a soggy crust?
A soggy crust usually means the filling wasn’t fully set before slicing. Always chill the pie for at least 4 hours (overnight is best) to let the filling firm up. For next time, pre-bake the crust for 10 minutes at 375°F before adding filling, or blind-bake it completely (15 minutes at 375°F) with pie weights. A fully chilled pie with a crisp crust is worth the wait!
Can I use powdered sugar instead of condensed milk?
Not for this recipe—powdered sugar won’t provide the necessary creaminess or structure. Condensed milk contains both sugar and milk fat, which creates that signature velvety texture. If you’re avoiding dairy, try coconut condensed milk (available in specialty stores) or make a simple substitute by mixing 1 cup powdered sugar with ½ cup heavy cream and 1 tbsp butter, then heating until smooth.
What’s the best way to store leftovers?
Store the pie in an airtight container in the fridge for up to 3 days. For longer storage, freeze the assembled pie (without toppings) for up to 2 months. Thaw overnight in the fridge, then let it sit at room temperature for 30 minutes before serving. The crust stays crisp if you wrap it tightly with plastic wrap before placing it in the container.

- 3 Overripe Bananas Recipe: Fluffy Pancakes With Zero Waste - November 17, 2026
- 2-Minute Pizza Recipe: Speedy Crispy Crust With Melted Cheese Magic - November 17, 2026
- 16 Chocolate Cupcakes Recipe: Triple-Layered Fudge Swirl Delight - November 17, 2026