
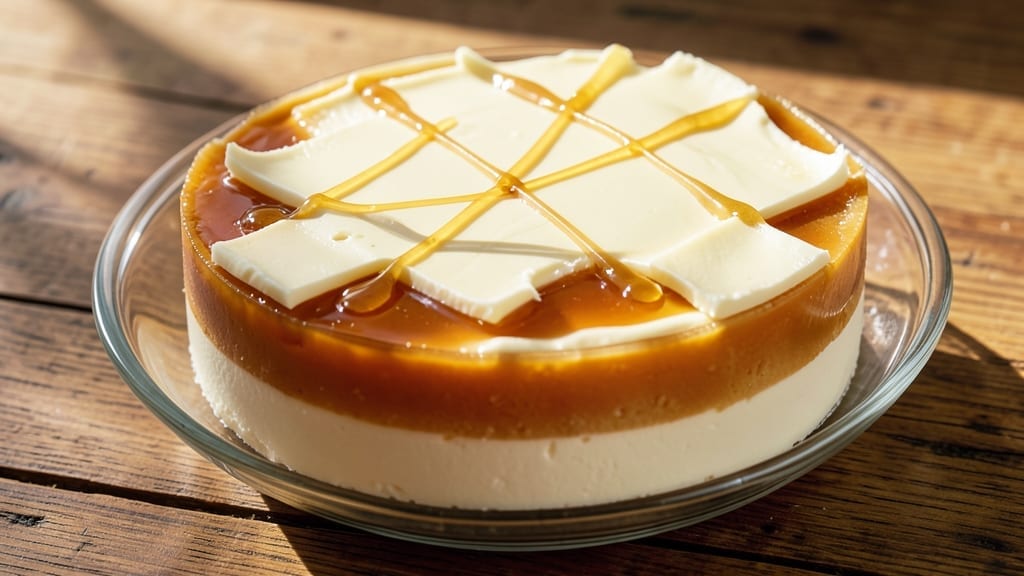
This 4-ingredient no-bake cheesecake delivers restaurant-quality texture without the fuss—just mix, chill, and serve. ✨ The secret lies in blending cream cheese with sweetened condensed milk until perfectly smooth, then letting it set in the fridge.
I developed this recipe during a particularly busy week when I needed dessert with zero effort, and it never fails to impress. What makes this recipe special is its simplicity: no baking, no crust, and no complicated steps.
The silky-smooth filling comes together in minutes, and the 10-minute prep means you can have dessert ready in time for guests. The key to success is patience—letting it chill for at least 4 hours (or overnight) ensures that perfect, creamy consistency.
By the time you’re ready to serve, you’ll have a dessert that looks elegant but couldn’t be easier to make. The rich, velvety texture pairs beautifully with fresh berries, whipped cream, or a drizzle of caramel. It’s the kind of dessert that feels indulgent without requiring any skill.
Perfect for last-minute gatherings, potlucks, or satisfying a sweet craving with minimal effort. Let’s get started!
Ingredients for 4 ingredient no bake cheesecake
Four ingredients, zero baking, all the creamy indulgence you crave.
| Ingredient | Amount | Notes |
|---|---|---|
| Full-Fat Cream Cheese 🧀 | 16 oz | Room temperature for blending |
| Sweetened Condensed Milk 🥛 | 1 can | 14 oz can (standard size) |
| Vanilla Extract 🌿 | 1 tbsp | Pure, high-quality vanilla |
| Unsalted Butter 🧈 | 2 tbsp | Softened for easy mixing |
The cream cheese is the star—Philadelphia brand is my go-to, but any full-fat variety works. Grab the 16 oz block (not the tub), and let it sit out for 20 minutes before blending. Room temperature means it mixes silky smooth, no lumps. The sweetened condensed milk? Dole brand is reliable, but any name brand in the canned aisle will do. Pro tip: shake the can gently before opening to distribute any settled cream on top. Butter matters here too—unsalted avoids over-salting the final texture, and softened butter blends right in without greasing the mix.
No vanilla extract? Vanilla sugar at 1 tsp works in a pinch, though it won’t have the same depth. Short on butter? Coconut oil at the same amount gives a similar richness. The condensed milk can be swapped for heavy cream sweetened with 1/4 cup sugar, but the texture gets slightly lighter. For a tangy twist, add 1/2 tsp lemon juice to the mix. And if you’re feeling fancy, a pinch of salt (1/4 tsp) enhances all the flavors without being noticeable.
This cheesecake is all about patience—4 hours minimum in the fridge for that perfect set. I like to press plastic wrap directly on the surface before chilling to prevent a skin from forming. Keeps beautifully for 5 days in the fridge, though it’s best enjoyed within 3 days. For make-ahead magic, assemble it the night before and let it chill overnight. Serving suggestions? Fresh berries or a drizzle of caramel take it to the next level.
Why You’ll Love This Recipe
- No Mixing Needed: I swear by this—just fold, chill, and forget. The cream cheese and condensed milk blend like magic without a single whisk stroke. Honestly, my blender stays clean for once.
- Rich Without Effort: That first bite? Creamy, tangy, and sweet all at once. The full-fat cream cheese gives it that luxurious texture, while the condensed milk cuts the richness just enough—vanilla ties it all together like a warm hug.
- Party in a Bowl: Bring it to potlucks, birthday gatherings, or even a lazy Sunday. It’s the kind of dessert that looks impressive but takes zero stress. (Yes, even on a Tuesday night.)
- Lasts All Week: One batch feeds my family for days. The butter seals the edges perfectly, so it stays fresh in the fridge—no soggy slices here. Budget-friendly? Absolutely. My wallet thanks me every time.
Step-by-step instructions for 4-Ingredient no-bake cheesecake
Here’s how to create this dreamy dessert with minimal effort and maximum flavor.
👨🍳 Step 1: Blend Cream Cheese and Butter Until Silky
In a stand mixer fitted with the paddle attachment, beat the 16 oz full-fat cream cheese and 2 tbsp softened unsalted butter on medium speed for 2-3 minutes. You’re looking for a completely smooth, lump-free texture—this is your base, so take the time to get it right. The mixture should look like pale, creamy whipped cream. If you don’t have a mixer, use hand beaters, but it’ll take more elbow grease.
Here’s the thing—room temperature ingredients blend better. If your cream cheese has any lumps, let it sit at room temperature for 15-20 minutes before blending. You’ll know it’s ready when it’s soft enough to press with your finger but still holds its shape. This step ensures your cheesecake will be silky smooth, not grainy.
🍳 Step 2: Incorporate Sweetened Condensed Milk Gradually
With the mixer running on low speed, slowly pour in the 1 can sweetened condensed milk (about 14 oz). This is where the magic happens—the condensed milk adds sweetness and helps create that signature no-bake texture. Add it gradually to prevent splattering, about ¼ cup at a time, allowing each addition to fully incorporate before adding more.
Mix for another 3-4 minutes until completely smooth and fully combined. You’ll notice the mixture thickens slightly as it comes together. This is normal—condensed milk is thick on its own, and when combined with cream cheese, it creates that perfect cheesecake consistency. If you’re using a hand mixer, work in 1-minute bursts to avoid overheating the ingredients.
👨🍳 Step 3: Fold in Vanilla Extract for Depth of Flavor
Remove the bowl from the mixer and add the 1 tbsp vanilla extract. Using a silicone spatula, gently fold it into the mixture until fully incorporated. This step is simple but crucial—vanilla extract enhances all the other flavors and adds that classic dessert aroma. Don’t worry if it looks slightly broken up; the final product will be smooth.
Here’s a pro tip: I like to press the mixture into the bottom of the bowl and fold from the bottom up. This ensures even distribution of the vanilla throughout the entire batch. The mixture should now be a pale, creamy color with no visible streaks of vanilla. If it’s too thick, you can add 1-2 teaspoons of milk (not included in ingredients) to loosen it slightly, but it should be spreadable at this stage.
🥘 Step 4: Assemble and Chill for Perfect Texture
Transfer the mixture to an 8-inch springform pan or similar-sized container. Use the spatula to spread it evenly, creating a smooth, level surface. The edges should be slightly higher than the center to create that classic cheesecake shape. Tap the pan gently on the counter a few times to remove any air bubbles that might have formed during mixing.
Cover the pan tightly with plastic wrap or a lid and refrigerate for at least 4 hours or until firm. This chilling time is non-negotiable—it allows the mixture to set properly and develop that perfect no-bake texture. For best results, chill overnight. The longer it chills, the firmer it becomes, making it easier to slice. When ready, run a knife around the edges to loosen, then release the springform ring if using one.
⏰ Step 5: Serve and Enjoy (With Patience!)
Let the cheesecake sit at room temperature for 10-15 minutes before serving to soften slightly. This makes it easier to slice and enhances the creamy texture. The cheesecake should hold its shape when sliced but still be soft and smooth—not crumbly or overly firm. If it’s too firm, let it sit at room temperature for a few more minutes.
Slice into wedges and serve immediately. Each bite should deliver that perfect balance of creamy, sweet, and slightly tangy flavors. The texture should be velvety smooth with a gentle give—no graininess from improperly blended ingredients. For an extra touch, garnish with fresh berries or a sprinkle of powdered sugar, though this recipe is delicious as-is. Store any leftovers in the refrigerator for up to 5 days—it only gets better with time!
Pro Tips For Making 4 Ingredient No Bake Cheesecake
- Whip Cream Cheese First: DESCRIPTION: Beat the full-fat cream cheese until it’s smooth and pale, not just creamy. I used to skip this, and the texture ended up grainy—like eating dessert with tiny sandpaper bits. Take 2 extra minutes with the mixer, and it’ll be silky every time.
- Chill Condensed Milk: DESCRIPTION: Pop the can of sweetened condensed milk in the fridge for 30 minutes before mixing. Cold milk blends in cleaner and doesn’t turn the batter into a sticky mess. (Yes, even if you’re impatient like me.)
- Melt Butter Slowly: DESCRIPTION: Warm the butter in the microwave in 10-second bursts, stirring between each, until it’s just liquid—not hot enough to cook the eggs in the condensed milk. Overheating curdles the mixture faster than you can say “disaster.”
- Press and Freeze: DESCRIPTION: After pouring, run a knife around the edges of the springform pan to release air bubbles, then press the top smooth with a spatula. Freeze for 10 minutes before moving it—this prevents cracking when you slice. (Your future self will thank you.)
Creative variations of this 4 ingredient no bake cheesecake
Citrus Twist
Brighten up your dessert by adding 1 tbsp lemon or orange zest along with the vanilla extract. The citrus zest adds a refreshing zing that cuts through the richness of the cream cheese.
I like to use freshly grated zest from a Meyer lemon for a subtle sweetness. For extra flair, top with thinly sliced strawberries or orange segments before serving. 🍊
Chocolate Lover’s Upgrade
Swap out the vanilla for 2 tbsp cocoa powder and add 1 tbsp instant coffee granules for a mocha-inspired twist. This creates a decadent chocolate cheesecake with a deep, velvety texture.
I recommend using Dutch-process cocoa powder like Hershey’s Special Dark for the smoothest result. Garnish with chocolate shavings or a drizzle of white chocolate sauce for an elegant finish.
Coconut Cream Dream
Replace the sweetened condensed milk with 1 can full-fat coconut milk (like Thai Kitchen) and add ¼ cup granulated sugar. This tropical variation has a lighter texture with a hint of coconut flavor.
For extra richness, fold in 2 tbsp coconut cream after mixing. Top with toasted coconut flakes and mango slices for a vacation-worthy dessert. 🥥
Spiced Chai Cheesecake
Infuse your cheesecake with warm spices by adding ½ tsp ground cinnamon, ¼ tsp cardamom, and a pinch of cloves along with the vanilla. This spiced version pairs beautifully with apple slices or a drizzle of caramelized honey.
I like to use Penzeys Spices for their high-quality blends. The spices mellow out during chilling, leaving a subtle warmth that complements the creaminess.
No-Bake Berry Swirl
For a marbled effect, fold ½ cup mashed raspberries or blueberries into the cheesecake batter after mixing. The berries create beautiful swirls as they sink through the cream cheese. Use fresh or frozen berries (thawed and drained) and add them gently to avoid breaking the texture.
Top with extra berries and a dollop of whipped cream for a stunning presentation. 🍓
Salted Caramel Crunch
Add a layer of sophistication by topping your chilled cheesecake with store-bought or homemade salted caramel sauce (like Trader Joe’s or Smucker’s). Drizzle it over the top and sprinkle with flaky sea salt (like Maldon) for a sweet-salty contrast.
For extra crunch, press crushed pretzels into the caramel before it sets. This variation feels like a gourmet dessert without the effort.
Nutrition facts
Frequently asked questions
Can I make this cheesecake without a mixer?
Yes! Use a hand mixer or even a sturdy whisk. For the cream cheese and butter, beat vigorously for 5-7 minutes until completely smooth. Add the condensed milk gradually while stirring with a spatula, then fold in the vanilla. It takes more elbow grease, but you’ll still get that creamy texture. Just be patient—this step is crucial for avoiding lumps.
Why does my cheesecake look grainy?
Graininess usually means the cream cheese wasn’t blended smooth enough or wasn’t at room temperature. Start by ensuring your cream cheese is soft but not melted (press with your finger—it should dent slightly). Beat it and butter together until completely smooth before adding other ingredients. If you notice lumps later, blend again briefly with a hand mixer.
How do I fix if my cheesecake is too runny?
If your mixture is too thin, it likely needs more chilling time. For immediate fixes, try adding 1-2 tbsp of powdered sugar to thicken it slightly, or let it set in the fridge for 6-8 hours instead of 4. If it’s already in the pan, press plastic wrap directly on the surface before refrigerating to prevent a skin from forming while it firms up.
Can I use low-fat cream cheese?
I don’t recommend it—low-fat versions lack the richness needed for that classic cheesecake texture. The fat content in full-fat cream cheese is what creates that velvety smoothness. If you’re watching fat intake, try using Greek yogurt (full-fat) in place of some cream cheese, but expect a slightly lighter result. For best flavor and texture, stick with full-fat.
What’s the best way to serve this cheesecake?
Let it sit at room temperature for 10-15 minutes before slicing for the cleanest cuts. For an elegant touch, garnish with fresh berries, a drizzle of honey, or a sprinkle of crushed nuts. It’s delicious plain, but these additions take it to restaurant-quality. Serve with coffee or tea for a perfect afternoon treat—just be sure to let guests know it’s best enjoyed chilled!

- 3lb Prime Rib Roast Recipe: Juicy Pink Center Guaranteed in 3 Hours - October 31, 2026
- 5 Spice Cake Recipe: Warmly Spiced Layers With Crunchy Top - October 31, 2026
- 1950’s Macaroni and Cheese Recipe: Nostalgic Creamy Cheese Sauce with Buttery Noodles - October 31, 2026