
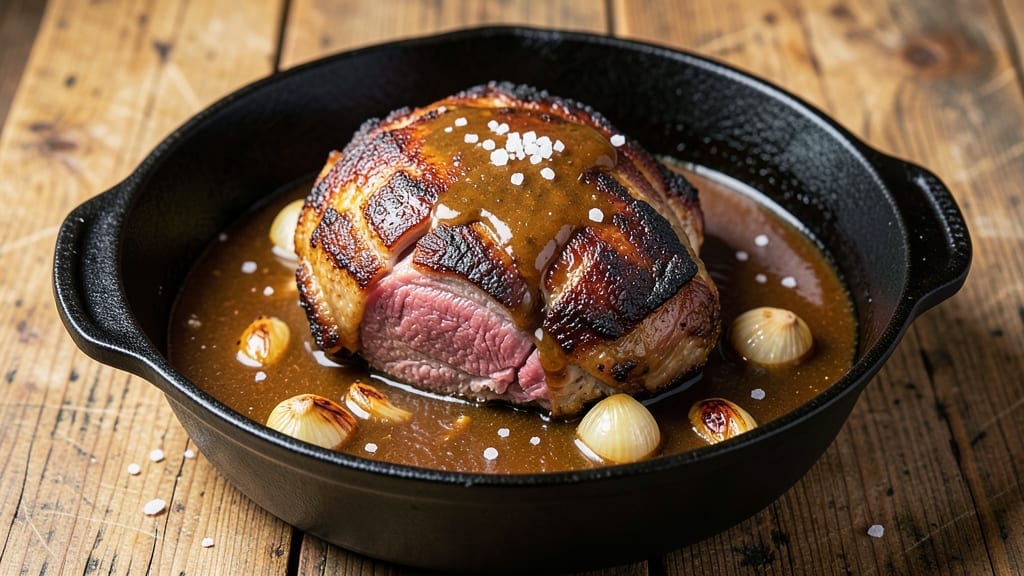
A 4-ingredient pot roast recipe transforms tough cuts of beef into melt-in-your-mouth perfection with minimal effort. The secret lies in slow braising—where tenderizing heat and simple seasonings work together over time, creating a dish that feels indulgent yet requires almost no supervision.
This isn’t your grandmother’s all-day project; it’s a foolproof method that delivers restaurant-quality results in just a few hours.
The magic happens with just four core ingredients: beef chuck roast, beef broth, garlic, and salt. No fancy marinades or complex spice blends—just the essentials that let the beef’s natural richness shine. The key is patience: letting the meat cook low and slow until it practically falls apart.
This approach ensures every bite is juicy, flavorful, and satisfying, without the need for extra fat or heavy sauces.
By the time you’re done, you’ll have a pot roast so tender it’s nearly impossible to resist. The beef will pull apart easily, releasing a deeply flavorful broth that’s perfect for serving over mashed potatoes or crusty bread.
The best part? This recipe scales effortlessly—whether you’re feeding a family or meal prepping for the week.
Ready to simplify your Sunday dinner? This pot roast is the ultimate no-fuss solution for hearty, comforting meals. Let’s get started—your taste buds (and leftovers) will thank you.
Ingredients for 4 ingredient pot roast
Four ingredients, restaurant-quality results—this is your slow-braised shortcut to melt-in-your-mouth pot roast perfection.
| Ingredient | Amount | Notes |
|---|---|---|
| Beef Chuck Roast 🥩 | 3 lb | Well-marbled, bone-in preferred |
| Beef Broth 💧 | 3 cups | Homemade or high-quality store-bought |
| Garlic Cloves 🧄 | 6 cloves | Peeled, smashed slightly |
| Kosher Salt 🧂 | 1 ½ tbsp | Diamond Crystal preferred |
The beef is everything here. Chuck roast with good marbling (that white fat flecks) is non-negotiable—it’s what makes the meat tender. Costco or Whole Foods usually have pre-cut roasts with the perfect fat distribution, but if you’re buying whole, look for a piece with visible marbling throughout. A 3-pound roast feeds 6 generously, but you can scale up or down easily. The key is to pat it dry before cooking—this helps the salt adhere and creates a better crust. Pro tip: ask your butcher to trim any large fat caps if you’re feeling fancy.
No beef broth? Vegetable broth plus 2 tbsp soy sauce works in a pinch, though it won’t have the same depth. Fresh garlic is ideal, but dried garlic powder at half the amount gets you close if you’re in a hurry. The salt is where flavor happens—don’t skimp. Diamond Crystal dissolves more easily than Morton’s, so if you’re using that, add an extra pinch. For extra richness, add 1 tbsp of tomato paste with the garlic, but it’s not required. This dish is so forgiving that even if you forget one ingredient, it’ll still turn out delicious—just slightly different.
This reheats like a dream—actually better the next day as flavors meld. Store in the fridge for 4-5 days in its juices, or freeze portions for 3 months. I like to portion it into containers with some of the broth for easy lunches. The broth itself is amazing—use it for gravy or freeze it for future recipes. For serving, a sprinkle of fresh parsley or a dollop of sour cream takes it to the next level. Make a double batch if you can—leftovers are the best kind.
Why You’ll Love This Recipe
- Four-Ingredient Magic: The name says it all—no fancy prep, no crowded spice rack, just four things you already have. I swear, I’ve made this while scrolling through emails, and it still tastes like I slaved away.
- Salt-Crusted Perfection: That kosher salt isn’t just seasoning—it’s the secret weapon. It forms a crust on the roast, locking in juices while browning like a steakhouse cut. Honestly, the first time I tried it, I thought I’d over-salted… until I tasted it.
- Leftovers That Beg: This roast practically insists you make extra. Shred it for tacos, slice it for sandwiches, or toss it into pasta—it’s the ultimate lazy-day hero. (Yes, even on a Tuesday night.)
- Budget-Friendly Feast: A chuck roast stretches farther than you’d think, and beef broth? That’s the pantry MVP. I’ve fed six people for under $15, and no one complained—because it’s that good.
Step-by-step instructions for 4-Ingredient pot roast
This isn’t your grandmother’s pot roast—just four ingredients transform tough beef into melt-in-your-mouth perfection.
Prep the Roast for Maximum Flavor
Pat the 3 lb beef chuck roast dry with paper towels—this ensures a better sear and crispier edges later. Place it in a large Dutch oven or heavy pot, fat-side up. The bone-in version works best here because it holds its shape better during the long cook and adds extra flavor to the broth.
Sprinkle all 1.5 tbsp kosher salt evenly over the roast, pressing it gently into the meat so it adheres. Don’t worry about being perfect—just distribute it as evenly as possible. The salt will penetrate the meat as it cooks, enhancing every bite. Let the roast sit at room temperature for 30 minutes before cooking to ensure even doneness.
Sear the Roast for Deep Flavor
Preheat your oven to 300°F. Place the Dutch oven on the stovetop over medium-high heat. Add the 6 smashed garlic cloves around the roast—this will infuse the broth with incredible aroma as it cooks. Let the pot heat for 5 minutes to get it properly hot before adding the roast.
Sear the roast for 5 minutes on each side until it develops a deep golden-brown crust. You’re not cooking it through here—just creating that rich, caramelized flavor that will form the base of your sauce. If the roast releases easily from the pot, it’s ready to move to the oven. I like to sear it in the same pot where it will eventually braise, as this locks in all those precious meat juices.
Braise Until Fork-Tender
Pour in the 3 cups beef broth, adding enough to come about halfway up the sides of the roast. The liquid should cover about two-thirds of the roast. Bring the liquid to a gentle simmer over medium heat—you’ll see small bubbles forming at the edges, but it shouldn’t be a rolling boil. This gentle simmer is crucial for tenderizing the meat without making it tough.
Cover the pot tightly with a lid and transfer it to the preheated 300°F oven. Here’s where the magic happens: cook for 3 hours. The low temperature and long cook time break down the connective tissue in the beef, transforming it into fork-tender perfection. After 3 hours, check the internal temperature with a meat thermometer—it should read 195°F to 200°F. If it’s not there yet, return it to the oven for another 30-minute to 1-hour increments until it reaches this temperature.
Rest and Serve with Pan Sauce
Once the roast reaches the perfect temperature and a fork slides through it like butter, remove it from the oven and transfer it to a cutting board. Tent it loosely with aluminum foil and let it rest for 15 minutes. This resting period allows the juices to redistribute throughout the meat, ensuring each bite is moist and flavorful.
While the roast rests, skim any fat that has risen to the surface of the braising liquid. You can save this for another use, but it’s not necessary for this recipe. The remaining liquid should be rich and flavorful—this is your sauce. Slice the roast against the grain into ½-inch thick pieces and serve it directly from the pot, spooning the garlic-infused broth over the top. Each bite should be incredibly tender with layers of beefy flavor and aromatic garlic notes.
Pro Tips For Making 4 Ingredient Pot Roast
- SEAR THE ROAST FIRST: After browning the chuck roast in a hot Dutch oven for 3-4 minutes per side, you’re building flavor foundation that salt and broth alone can’t match. I used to skip this step and wondered why my pot roast tasted more like broth than beef.
- SMASH THE GARLIC: Don’t just toss in whole cloves—they’ll sit like flavorless pebbles. Crush them with the flat side of your knife or smash them with a meat mallet before adding. This releases their oils and spreads their punch evenly through the broth.
- SALT THE MEAT HEAVY: Kosher salt isn’t just for seasoning—it’s your moisture lock. Use 1.5 teaspoons per pound of roast (yes, even if the recipe says less) and let it sit uncovered on a plate for 20 minutes before searing. This guarantees a crust that seals in juices.
- LOW AND SLOW ISN’T LAZY: After browning, cover the pot and cook at 300°F (not simmering) for at least 3 hours—no peeking. I learned this the hard way when I checked too soon and ended up with a tough, watery mess. Patience here makes the difference between fork-tender and chewy.
Perfect pairings for this dish
Classic Side Pairings
This pot roast shines with creamy mashed potatoes—their buttery texture soaks up the rich garlic broth beautifully. I like to make mine with roasted garlic for extra depth, then fold in sour cream for a velvety finish.
For a lighter option, crusty sourdough bread is perfect for mopping up every last drop of that flavorful sauce. 🥔
Vegetable Sides
Roasted carrots and parsnips add natural sweetness that complements the beef’s savory notes. Toss them with olive oil, thyme, and a pinch of salt, then roast at 400°F for 25 minutes until caramelized.
For a fresh contrast, arugula salad with lemon vinaigrette cuts through the richness—just add sliced radishes and toasted walnuts for crunch.
Wine Pairings
A bold Cabernet Sauvignon from Napa Valley stands up to the beef’s richness, with its dark fruit and tannins. For something lighter, a Syrah from the Rhône Valley offers spicy notes that enhance the garlic. Avoid overly oaky whites—they’ll clash with the dish’s hearty flavors. 🍷
Beer Complements
Try a dark ale like Guinness or Samuel Adams Black Lager—their roasted malt flavors mirror the caramelized notes in the pot roast. For a lighter option, a Belgian witbier (like Hoegaarden) adds citrusy brightness that cleanses your palate between bites. Avoid hoppy IPAs—they’ll overpower the dish.
Make-Ahead Serving
Double the recipe and store leftovers in airtight containers with some of the broth for up to 5 days. Reheat gently on the stovetop with a splash of water to prevent drying.
Serve with pickled red onions for a tangy kick—they add a pop of color and acidity that balances the richness. 💫
Nutrition facts
Frequently asked questions
Can I use a different cut of beef instead of chuck roast?
Chuck roast is ideal because its marbling and connective tissue break down beautifully during slow cooking. However, you can use short ribs or brisket—just adjust the cooking time. Short ribs take about 2.5 hours while brisket may need 3.5 hours to reach the same tenderness. Avoid lean cuts like sirloin—they won’t become tender enough with this method.
Why does the recipe say to cook at 300°F instead of higher heat?
The low temperature (300°F) is key to transforming tough beef into melt-in-your-mouth perfection. Higher heat would cook the outside too quickly, sealing in juices before the center tenderizes. This gentle heat breaks down collagen over time, creating a dish that’s fork-tender without drying out. Think of it like a slow dance between heat and meat!
What if I don’t have beef broth? Can I substitute?
Use 3 cups water + 2 tbsp soy sauce for a quick substitute, or vegetable broth + 1 tbsp Worcestershire sauce for extra depth. For the best flavor, add 1 tsp beef bouillon powder to water. The dish will still turn out delicious—just with slightly less richness in the sauce.
How do I know when the pot roast is fully cooked?
Use a meat thermometer to check the internal temperature—it should reach 195°F-200°F (well above the usual 145°F for medium). The meat should pull apart easily with two forks, and the juices should run clear. If it’s not there after 3 hours, add another 30 minutes to 1 hour. Never rely on time alone!
Can I make this in a slow cooker instead of the oven?
Yes! After searing the roast, transfer everything to a slow cooker and cook on low for 8 hours or high for 5-6 hours. The liquid will reduce differently, so you may need to add ½ cup water if it gets too thick. The texture will be slightly different (more saucy) but still incredibly tender and flavorful.

- 3lb Prime Rib Roast Recipe: Juicy Pink Center Guaranteed in 3 Hours - October 31, 2026
- 5 Spice Cake Recipe: Warmly Spiced Layers With Crunchy Top - October 31, 2026
- 1950’s Macaroni and Cheese Recipe: Nostalgic Creamy Cheese Sauce with Buttery Noodles - October 31, 2026