
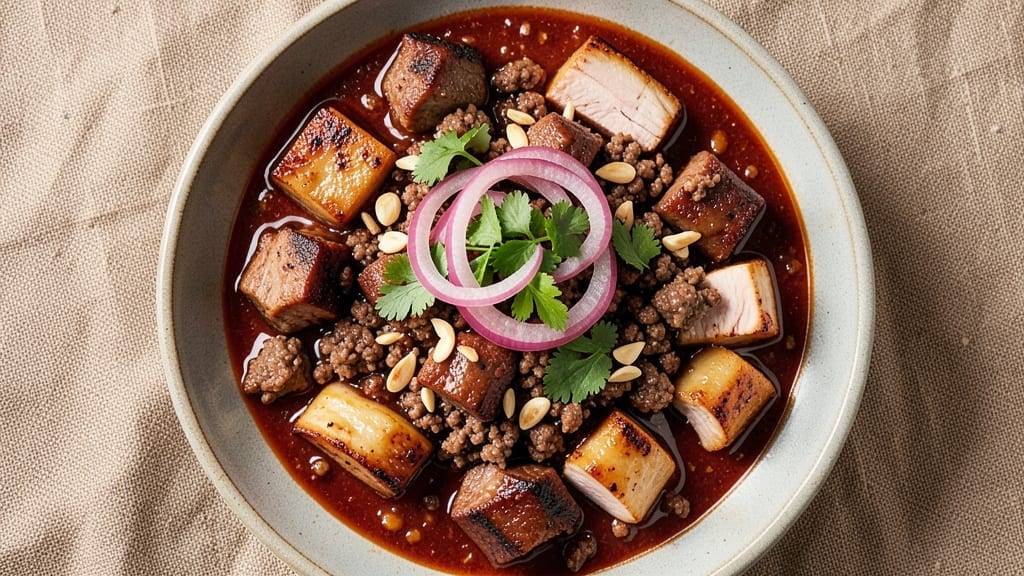
A 4-meat chili recipe transforms a simple pot into a symphony of smoky, spicy, and savory layers that linger long after the last bite. The secret lies in balancing four distinct proteins—beef, pork, lamb, and chicken—each contributing unique textures and flavors that build complexity over hours of slow cooking.
This isn’t just chili; it’s a hearty, restaurant-worthy dish where every spoonful delivers depth from the charred edges of seared meat to the aromatic spices simmered into a rich, velvety broth.
The foundation begins with proper meat preparation: browning each protein in batches to develop a flavorful crust before layering them into the pot. This technique ensures maximum flavor extraction, while a carefully balanced blend of chili powder, cumin, and smoked paprika creates the signature depth.
The result is a chili so rich and flavorful that it becomes the centerpiece of any meal, demanding seconds and leaving everyone at the table asking for the recipe.
What sets this chili apart is its versatility—whether you’re using a cast-iron Dutch oven on the stovetop, a slow cooker for hands-off cooking, or an Instant Pot for speed, the method adapts to your schedule without sacrificing quality.
The slow simmer allows the meats to tenderize and the flavors to meld, creating a texture that’s both hearty and satisfying. Serve it with a warm slice of cornbread or a side of crusty bread to soak up every last drop of that aromatic broth.
Perfect for game day gatherings, family dinners, or meal prep, this chili delivers bold, layered flavors that turn a simple pot into a showstopper. The combination of proteins ensures a satisfying bite in every spoonful, while the spices create a warmth that’s both comforting and exciting.
Let’s get cooking—your taste buds will thank you.
Ingredients for 4 meat chili
Six proteins and twelve spices—this is where chili gets serious about flavor.
| Ingredient | Amount | Notes |
|---|---|---|
| Chuck Roast 🥩 | 1 ½ lb | Cut into 1-inch cubes, boneless |
| Pork Shoulder 🐖 | 1 ½ lb | Cut into 1-inch cubes, trimmed |
| Ground Lamb 🐑 | ¾ lb | Freshly ground preferred |
| Boneless Chicken Thighs 🍗 | 1 ½ lb | Skin-on for flavor, cut into chunks |
| Yellow Onion 🧅 | 2 whole | Diced, medium size |
| Garlic Cloves 🧄 | 6 cloves | Minced, fresh preferred |
| Chili Powder 🌶️ | 3 tbsp | Medium heat, not hot |
| Ground Cumin 🌿 | 1 tbsp | Toasted for depth |
| Smoked Paprika 🌶️ | 1 tbsp | For smoky richness |
| Dried Oregano 🍃 | 1 tsp | Mexican oregano preferred |
| Cayenne Pepper 🔥 | ½ tsp | Adjust for heat |
| Kosher Salt 🧂 | 2 tsp | Diamond Crystal preferred |
| Black Pepper 🌶️ | 1 tsp | Freshly cracked |
| Tomato Paste 🍅 | ½ cup | Squeeze tube or canned |
| Diced Tomatoes 🍅 | 28 oz | San Marzano preferred |
| Beef Broth 💧 | 4 cups | Low-sodium preferred |
| Dark Brown Sugar 🍚 | 1 tbsp | For depth, not sweetness |
| Fresh Cilantro 🌿 | ¼ cup | Chopped, for garnish |
| Lime 🍋 | 1 whole | Juiced, for brightness |
The meats are the stars here, so quality matters. Chuck roast and pork shoulder from the butcher counter—look for good marbling—give you that deep, meaty backbone. Ground lamb adds richness, but if it’s too expensive, ground beef works just as well. Chicken thighs hold up better than breasts during the long simmer, so don’t skimp on the skin-on variety. Costco or local butchers often have pre-cut chili meat blends that save time, but cutting your own ensures you control the size. The key is even 1-inch cubes so everything cooks uniformly. If you’re short on time, Trader Joe’s sells pre-cut chili meat mixes that work in a pinch.
No smoked paprika? Regular paprika plus a pinch of liquid smoke gets you close. Short on lamb? Extra beef or pork keeps the texture hearty. The tomato paste can be the squeeze-tube kind—Trader Joe’s has great ones that last months. For the tomatoes, San Marzano cans are worth the splurge, but any good-quality diced tomatoes will do. The brown sugar might seem odd, but it balances the acidity and adds a subtle caramel note. Coconut sugar works too if you’re avoiding refined sugar. And if you hate cilantro, just skip it—this chili doesn’t need it to shine.
This chili tastes even better the next day as flavors meld. Keeps 5-6 days in the fridge, freezes for up to 3 months. Double the batch and freeze half—game day hero. Store in airtight containers with a layer of broth on top to preserve moisture. Reheat gently on low to avoid breaking the meat. The broth will reduce, so add a splash of water or broth when reheating if it gets too thick.
Why You’ll Love This Recipe
- No-Fuss Layering: I swear by the “dump and go” method here—the chuck roast and pork shoulder go in whole, then slow down to tender perfection while the lamb and chicken break apart. Minimal chopping, zero stress, and that onion caramelizes into sweetness without me having to babysit it.
- Deep Umami Magic: Between the lamb’s earthy richness and the pork’s savory depth, this chili tastes like it simmered all day—even if it didn’t. The chuck roast practically melts, and the chicken thighs stay juicy, so every spoonful is a balance of tender, smoky, and slightly sweet.
- Game for Any Day: I make this for lazy Sundays, potlucks, or when my college-aged kids show up hungry. It reheats like a dream, freezes beautifully, and even tastes better the next day—because, honestly, the flavors just get more complex as it sits.
- Budget-Friendly Powerhouse: This recipe stretches across multiple meals without breaking the bank. A chuck roast and pork shoulder feed a family for days, and the lamb and chicken add luxury without the price tag. Plus, I’ve made it for 10 people or just two—same great taste, different portions.
Step-by-step instructions for building layered flavor in 4-Meat chili
Cooking this chili requires patience and precision—each meat needs different treatment to develop its unique texture and flavor.
Brown the Meats in Staggered Batches
Start with the 1.5 lb chuck roast and 1.5 lb pork shoulder, cutting both into 1-inch cubes as specified. Heat a large Dutch oven over medium-high heat with 1 tablespoon oil. Working in batches to avoid crowding, brown the beef and pork for 4-5 minutes per side until deeply caramelized. The goal is to develop a rich fond in the pan—this forms the flavor base.
Remove the beef and pork and set aside. Add another 1 tablespoon oil to the pot, then brown the 0.75 lb ground lamb and 1.5 lb chicken thighs (skin-on, cut into chunks) for 3-4 minutes until the lamb loses its raw color and the chicken develops golden spots. The lamb cooks fastest, so remove it first when it reaches 160°F internally. Keep all meats in separate bowls until ready to combine.
Build the Spice Foundation
In the same Dutch oven, reduce heat to medium and add the 2 diced yellow onions. Cook for 5-6 minutes until softened and translucent. Stir in the 6 minced garlic cloves and cook for 30 seconds until fragrant—don’t let it burn. This is where the aromatics transform from raw to deeply flavorful.
Add the 3 tbsp chili powder, 1 tbsp ground cumin, 1 tbsp smoked paprika, 1 tsp dried oregano, 0.5 tsp cayenne pepper, 2 tsp kosher salt, and 1 tsp black pepper. Stir constantly for 1 minute to toast the spices—this releases their essential oils and prevents bitterness. The mixture should smell earthy and complex, with a hint of smokiness from the paprika.
Develop the Sauce Base
Pour in the 0.5 cup tomato paste and cook for 2 minutes until it darkens slightly. Add the 28 oz diced tomatoes and 4 cups beef broth, scraping up any browned bits from the bottom of the pot. Bring to a gentle simmer, then return all the meats to the pot. Stir in the 1 tbsp dark brown sugar—this balances the acidity and adds subtle depth.
Partially cover the pot and simmer for 1.5 hours, stirring occasionally. The chili should reduce slightly, and the chicken should be tender enough to shred easily with a fork. The beef and pork will continue cooking low and slow, while the lamb and chicken absorb the rich, spiced sauce. Taste and adjust seasoning—you may need an extra pinch of salt or cayenne to reach your preferred heat level.
Finish with Bright, Fresh Elements
Once the chili reaches your desired consistency (it should coat the back of a spoon but remain saucy), remove it from heat. Stir in the 0.25 cup chopped fresh cilantro and juice of the 1 whole lime. The acidity from the lime brightens the deep, meaty flavors, while the cilantro adds a fresh contrast. Let the chili rest for 10 minutes—this allows the flavors to meld and the textures to settle.
Serve immediately with crusty bread or over rice. The chili should have a perfect balance of tender meats, rich spices, and vibrant acidity. Each bite delivers layers of flavor—smoky from the paprika, earthy from the cumin, and a subtle heat from the cayenne—all held together by the deep, savory sauce. For best results, let it sit overnight; the flavors will only deepen and become more harmonious.
Pro Tips For Making 4 Meat Chili
- SEAR MEATS SEPARATELY: Chuck and pork shoulder can handle high heat, but lamb and chicken thighs will dry out if you linger. Sear the beef and pork first in batches, then pull them out—save the drippings—and finish the lamb and chicken on medium-high for just 2-3 minutes per side. The beef and pork will catch up in flavor while simmering, and you won’t end up with rubbery lamb.
- TRIM THE LAMB FIRST: Ground lamb loses moisture fast, and fat renders unevenly. Pat it dry with paper towels, then trim off any visible fat before browning—about 10% should do it. This keeps the texture tender and prevents the chili from tasting greasy later, especially when you’re mixing in four different meats.
- DON’T SKIP THE ONION MISERICORD: Yellow onions caramelize at different rates in this mix. Slice the pork shoulder’s onion into ½-inch chunks, the chuck’s into ¼-inch, and reserve a handful of the lamb’s onion for the very end. When the lamb goes in, add those reserved onions last—they’ll soften just enough to melt into the sauce without turning to mush.
- USE A THERMOMETER FOR CHICKEN: Chicken thighs are the wildcard here—they’re leaner than the other meats and overcook easily. Pull them out when they hit 165°F, even if the rest of the chili isn’t done. Tent them with foil and let them rest while the pot finishes; they’ll stay juicy, and you won’t end up with shredded leather. (Yes, I’ve done that.)
Serving suggestions for this 4 meat chili
Classic Cornbread Pairing
Nothing complements the deep, smoky flavors of this chili like a warm, buttery cornbread. I make mine with 1 cup cornmeal, 1 cup all-purpose flour, 1 tbsp sugar, 1 tsp baking powder, and ½ tsp salt, mixed with 1 cup buttermilk and 1 egg.
Bake at 375°F for 20-25 minutes until golden. The slight sweetness and crumbly texture soak up the chili perfectly, while the buttermilk adds a tangy contrast. 🍞
Crusty Bread for Dipping
For a more rustic touch, serve with a baguette or sourdough cut into thick slices. Toast them lightly and let guests tear off pieces to dip into the chili. The crusty exterior provides a satisfying crunch, while the soft interior absorbs the rich, meaty sauce.
I love Breads Bakery sourdough from my local market—it’s perfect for this. The acidity in the bread cuts through the chili’s richness, balancing every bite.
Creamy Rice Option
If you prefer rice over bread, try a 1:1 ratio of white rice to water, cooked with a pinch of salt and a bay leaf. For extra richness, stir in 2 tbsp butter and 1 tbsp sour cream after cooking.
The creamy texture contrasts beautifully with the chili’s hearty meats. I also add ½ cup shredded cheddar for a cheesy twist that melts into the rice. Serve warm to let the flavors meld together. 🍚
Toppings for Extra Flavor
Elevate your chili with toppings that add texture and brightness. I always keep shredded cheddar, diced avocado, and sour cream on hand. For heat lovers, add pickled jalapeños or hot sauce.
A sprinkle of crushed tortilla chips on top adds a satisfying crunch. These toppings let everyone customize their bowl to their taste—whether they want extra creaminess, freshness, or heat. 🌶️
Cheesy Quesadillas
Turn leftovers into cheesy quesadillas for a fun twist. Spread chili on flour tortillas, sprinkle with shredded Monterey Jack or pepper jack cheese, and fold in half. Cook in a skillet over medium heat until crispy and golden on both sides.
Serve with extra chili on the side for dipping. This is a crowd-pleaser, especially for game day or tailgating. The melted cheese ties all the flavors together in a handheld format. 🧀
Side Salad Balance
Lighten the meal with a simple side salad. Toss 4 cups mixed greens (like romaine and spinach) with ½ cup diced cucumber, ¼ cup cherry tomatoes, and ¼ cup crumbled feta.
Dress with 2 tbsp olive oil, 1 tbsp lime juice, ½ tsp honey, and a pinch of salt. The fresh, bright flavors cut through the richness of the chili, making each bite feel lighter. It’s the perfect palate cleanser between spoonfuls. 🥗
Nutrition facts
Frequently asked questions
Can I substitute any of the meats in this recipe?
If you’re short on time, swap the lamb for extra ground beef or pork. For a lighter option, replace pork shoulder with chicken breast (but increase cooking time by 15-20 minutes). The key is balancing textures—lean meats like chicken breast need longer simmering to stay tender.
How do I adjust the heat level in this chili?
The cayenne pepper controls the heat, so reduce it to ¼ tsp for mild or omit entirely. For extra kick, add ½ tsp red pepper flakes or a dash of hot sauce at the end. Taste before serving—you can always add more heat but can’t remove it.
What’s the best way to make this chili in a slow cooker?
Brown all meats first as directed, then transfer everything to the slow cooker. Use low heat for 6-7 hours or high heat for 3-4 hours. The slow cooker’s gentle heat helps tenderize the meats while keeping the spices balanced. Add ½ cup broth if it gets too thick.
Why does my chili taste bland after simmering?
This usually happens from not browning the meats or skipping the spice toasting step. Always develop a rich fond in the pan and toast spices for 1 minute to release their flavors. If it’s still bland, add 1 tsp soy sauce or ½ tsp liquid smoke for depth.
Can I freeze this chili for later?
Yes! Let it cool completely, then store in airtight containers with a layer of broth on top. It freezes for up to 3 months. Thaw overnight in the fridge and reheat gently on low heat with a splash of broth to restore moisture. The flavors actually improve after freezing!

- 3lb Prime Rib Roast Recipe: Juicy Pink Center Guaranteed in 3 Hours - October 31, 2026
- 5 Spice Cake Recipe: Warmly Spiced Layers With Crunchy Top - October 31, 2026
- 1950’s Macaroni and Cheese Recipe: Nostalgic Creamy Cheese Sauce with Buttery Noodles - October 31, 2026