
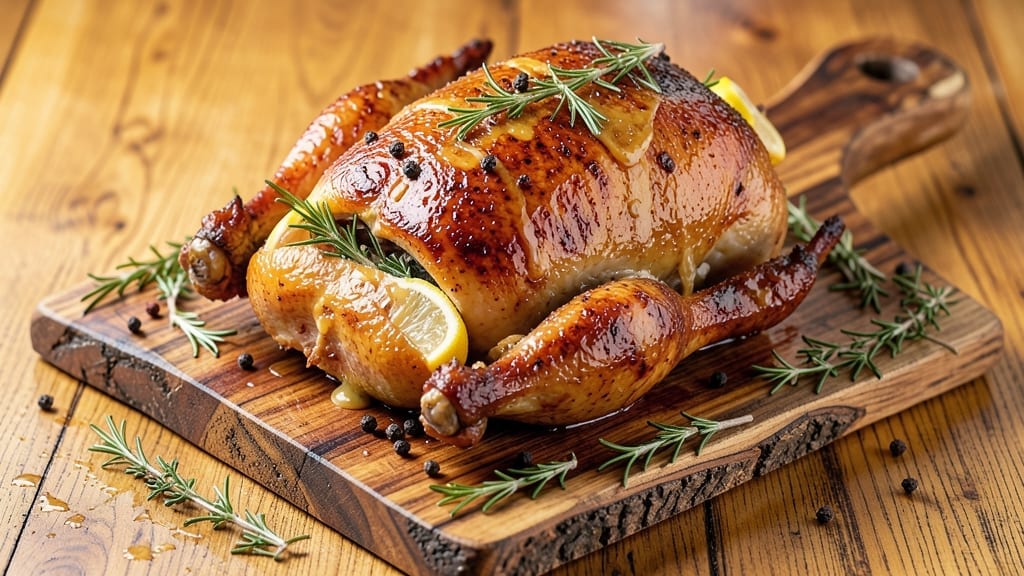
A 5-pound turkey recipe that delivers holiday-worthy results without the stress is exactly what you need for perfect family dinners. This method guarantees crispy golden skin and juicy pink meat that stays moist through every slice, thanks to precise timing and a simple brining technique.
The secret lies in the balance—high heat for that coveted crispiness while keeping the interior tender and safe to eat at 165°F.
What sets this turkey apart is the foolproof approach that works for both Thanksgiving and weeknight dinners. You’ll start with a dry brine overnight, which seasons deeply and locks in moisture, then roast with a butter-and-herb baste that adds flavor and promotes that irresistible crust.
No complicated techniques—just a well-planned process that delivers professional-quality results every time.
By the time you carve into this turkey, you’ll have a centerpiece that’s crispy on the outside, perfectly pink inside, and ready to pair with your favorite sides. The method ensures no dry meat, no overcooked edges, and a cooking time that fits seamlessly into your holiday schedule.
This isn’t just another turkey recipe—it’s the one that turns a simple roast into a showstopper.
Ready to serve with classic stuffing, rich gravy, or roasted seasonal vegetables, this turkey is designed to impress without the fuss. The key is in the details—resting time, basting rhythm, and knowing when to pull it from the oven.
Let’s get started on a turkey that will have everyone asking for seconds.
Ingredients for 5 pound turkey
Holiday-worthy turkey starts with these simple, quality ingredients that guarantee crispy skin and juicy pink perfection.
| Ingredient | Amount | Notes |
|---|---|---|
| Fresh Whole Turkey 🦃 | 5 lb | Thawed overnight in fridge |
| Kosher Salt 🧂 | ½ cup | Diamond Crystal preferred |
| Black Peppercorns 🌶️ | 2 tbsp | Freshly cracked for depth |
| Unsalted Butter 🧈 | ½ cup | Cold, cubed for basting |
| Fresh Rosemary 🌿 | ¼ cup | Chopped sprigs, stems removed |
| Fresh Thyme 🌿 | ¼ cup | Leaves only, stems discarded |
| Fresh Sage Leaves 🌿 | ¼ cup | Packed, stems removed |
| Garlic Cloves 🧄 | 6 cloves | Minced for butter mixture |
| Olive Oil 🫒 | ¼ cup | For crispy skin finish |
| Fresh Lemon Juice 🍋 | 2 tbsp | Brightens flavor profile |
| Vegetable Oil 🫒 | 1 tbsp | For roasting pan coating |
| Fresh Parsley 🌿 | ⅛ cup | Garnish, chopped fine |
The turkey itself is the star—look for a fresh, organic bird from Whole Foods or your local butcher shop. If you’re buying frozen, thaw it overnight in the fridge (never in cold water). The kosher salt is non-negotiable—Diamond Crystal dissolves better than table salt, and you’ll need it for the dry brine. Fresh herbs matter here: Trader Joe’s has great pre-packaged rosemary and thyme bundles, but if you’re growing your own, harvest just before using. The butter should be cold when you cube it—this ensures maximum crispiness when basting. For the garlic, peel and mince it fresh right before mixing with the butter.
No fresh rosemary? Dried works at half the amount, but it lacks that piney depth. Out of thyme? Oregano or marjoram can sub in a pinch, though the flavor will differ slightly. The olive oil finish is crucial for that golden crust—California avocado oil has a high smoke point if you prefer. If you’re short on time, skip the lemon juice and just use extra salt in the brine. The vegetable oil for the pan? Any neutral oil will do, but avoid olive oil here—it burns too easily. For the parsley garnish, flat-leaf is best, but curly works in a pinch.
Turkey keeps best in the fridge for 2 days before cooking, but once brined, use it within 24 hours for peak flavor. The herb butter mixture can be prepped 1 day ahead and stored in an airtight container. After roasting, let the turkey rest 30 minutes before carving—this ensures juicy meat that stays together when sliced. Leftovers? Store in the fridge for 4 days or freeze for 3 months. I always portion mine into individual containers so lunches are ready to grab.
Why You’ll Love This Recipe
- No-Fuss Prep: I swear, this takes less time than arguing with the kids about dinner. Just a quick rub of salt, pepper, and butter—no brining, no basting—just a whole turkey that’s ready for the oven in 10 minutes flat.
- Rosemary Butter Magic: That butter basting with fresh rosemary? It’s the secret weapon. The turkey stays juicy, the skin gets crispy, and the herb aroma makes every bite taste like a holiday you actually planned for.
- Leftovers for Days: Between us, this recipe makes enough for lunch the next three days. Shred it for sandwiches, slice it for salads, or just reheat a plate—it’s always better the second time around.
- Budget-Friendly Feast: A 5-pound turkey isn’t just for Thanksgiving. It’s my go-to for game day, family dinners, or even a fancy-ish weeknight meal when I don’t want to order takeout. Fresh ingredients, big flavor, zero guilt.
Step-by-step instructions for holiday-ready roast with crispy skin
Here’s how to transform your turkey into a showstopper with perfect golden skin and tender pink meat.
Dry and Season the Turkey for Maximum Crisp
Remove the turkey from the refrigerator and let it sit at room temperature for 30 minutes before cooking. This ensures even cooking throughout. Pat the turkey completely dry inside and out with paper towels—this is absolutely critical for crispy skin. I mean really dry, especially in the cavity and under the wings where moisture tends to hide.
Next, season the turkey generously with the 0.5 cup kosher salt and 2 tablespoons freshly cracked black peppercorns. Rub it all over the outside, including inside the cavity. Don’t be shy with the salt—this is what creates that perfect seasoning crust. Let the turkey sit uncovered on a wire rack in the refrigerator for 12-24 hours before roasting. This dry-brining process works magic for juiciness and flavor penetration.
Prepare the Herb Butter and Truss the Turkey
While the turkey seasons, make the herb butter by combining the 0.5 cup unsalted butter with the 0.25 cup chopped fresh rosemary, 0.25 cup fresh thyme, 0.25 cup fresh sage leaves, and 6 minced garlic cloves. Mix well and form into a log shape. Chill until ready to use. This aromatic butter will bast the turkey throughout cooking, infusing it with incredible flavor.
Remove the turkey from the refrigerator and let it sit for another 15 minutes to come to room temperature. Truss the legs together tightly with kitchen twine and tuck the wing tips under the body. This helps the turkey cook more evenly and protects the delicate breast meat. Place the turkey on a roasting rack set in a rimmed baking sheet.
Roast with Precision for Perfect Doneness
Preheat your oven to 425°F. Coat the roasting rack with the 1 tablespoon vegetable oil to prevent sticking. Place the turkey breast-side up on the rack. Rub the skin with the 0.25 cup olive oil and sprinkle with any remaining herb butter pieces. This creates that beautiful crispy skin we’re after.
Roast the turkey for 1 hour, then reduce the oven temperature to 325°F. Continue roasting for an additional 2-2.5 hours or until the internal temperature reaches 155°F in the thickest part of the thigh (not touching bone). The breast should read 150°F. Don’t open the oven during cooking—this causes temperature fluctuations that can dry out the meat.
Rest and Baste for Ultimate Juiciness
When the turkey reaches 155°F in the thigh, remove it from the oven and tent loosely with foil. Let it rest for 30 minutes before carving. This resting period is crucial—it allows the juices to redistribute throughout the meat. During this time, you can make gravy from the pan drippings using the 2 tablespoons fresh lemon juice to brighten the flavor.
For extra crispy skin, baste the turkey with its juices every 30 minutes during the last hour of cooking. The skin should be deep golden brown when done, with a beautiful crackling texture. Once rested, garnish with the 0.125 cup chopped fresh parsley for a pop of color and freshness.
Carve and Serve with Confidence
Using sharp carving tools, carefully slice the turkey against the grain for maximum tenderness. Start with the breast meat, then proceed to the thighs and legs. The meat should be juicy pink in the center with crispy, golden-brown skin. Serve immediately with your favorite holiday sides and enjoy the compliments on your perfect holiday roast.
Here’s the thing about this method—it delivers that perfect balance of crispy skin and juicy pink meat every single time. The dry-brining and herb butter make all the difference, and the precise temperature control ensures you never overcook. Your guests will think you’ve been roasting turkeys for years!
Pro Tips For Making 5 Pound Turkey
- USE A MEAT THERMOMETER: I learned this the hard way—guessing doneness with a 5-pound turkey leads to dry meat or raw spots. Stick the probe into the thickest part of the thigh (not touching bone) and pull it at 160°F. The internal temp will rise another 5°F while resting, so don’t wait for 170°F.
- SALT THE BIRD THE NIGHT BEFORE: More salt than you think, especially if using unsalted butter. Wet the turkey, then rub it down with kosher salt and peppercorns, and refrigerate uncovered overnight. The skin crisps better, and the seasoning penetrates deeper—no last-minute scrambling to season.
- BUTTER UNDER THE SKIN: Skip the dry turkey—this is where flavor hides. After seasoning, loosen the skin over the breast and thighs with your fingers, then slide in chunks of cold unsalted butter. It melts into the meat, keeping it juicy while adding richness. (Yes, even if you’re impatient like me.)
- REST IT UNDER FOIL: I used to cut into the turkey right out of the oven, and the juices pooled on the plate. Give it a solid 5-10 minutes under foil before carving—this lets the meat reabsorb its own juices. The rosemary-infused butter will stay where it belongs: inside the turkey, not on your cutting board.
Essential equipment for 5 pound turkey
Oven Thermometer
Your oven’s temperature display isn’t always accurate—trust me, I’ve learned this the hard way! A bimetallic stem thermometer like the Thermoworks Oven Thermometer ($25) is a game-changer. Place it in the oven while preheating to verify the actual temperature.
Most home ovens run 25-50°F hotter than set, which can dry out your turkey. I keep mine in my oven at all times for peace of mind. 🌡️
Roasting Rack
A stainless steel roasting rack ($15-$25) is non-negotiable for crispy skin. It elevates the turkey above the pan, allowing hot air to circulate underneath. I use the All-Clad Stainless Steel Roasting Rack because it’s durable and fits perfectly in my All-Clad Dutch Oven when needed.
Place it in a rimmed baking sheet to catch drippings for gravy. Never skip this—it’s the secret to that perfect golden crust.
Meat Thermometer
An instant-read meat thermometer is your best friend for avoiding dry turkey. The Thermoworks Smoke ($30) or Meater Plus ($50) are my top picks—they’re fast, accurate, and have backlit displays. Insert the probe into the thickest part of the thigh (avoid bone) to check for 155°F (thigh) and 150°F (breast).
The Meater Plus even has a wireless feature that syncs with your phone for alerts. Never guess—this is how you nail perfect doneness every time. 💡
Kitchen Twine
Butcher’s twine ($5 for a pack) might seem simple, but it’s crucial for even cooking. Use heavy-duty cotton twine (like KitchenCraft) to truss the legs together tightly. This keeps the thighs close to the body, cooking more evenly and protecting the breast from overcooking. I also tuck the wing tips under the body to prevent them from burning. Pro tip: Soak the twine in hot water for 5 minutes before using—it becomes more pliable and easier to tie. ✨
Basting Brush
A silicon baster brush ($10) is better than a spoon for basting—it holds more liquid and spreads it evenly. The OXO Good Grips Basting Brush has a long handle to avoid burning yourself.
Use it to apply the olive oil and herb butter during the initial sear, then again every 30 minutes during the last hour of cooking. This creates that irresistible crispy skin while keeping the meat juicy. I also use it to spread any remaining pan drippings for extra flavor. 🔥
Wire Cooling Rack
After roasting, transfer your turkey to a wire cooling rack ($12-$20) to rest. The Amazon Basics Wire Cooling Rack is my go-to because it’s sturdy and elevates the turkey for even airflow. This prevents soggy skin and makes carving easier.
Place it on a baking sheet to catch any drips. I always let the turkey rest for 30 minutes before carving—this is when the juices redistribute, ensuring every slice is moist and flavorful. 💫
Nutrition facts
Frequently asked questions
How long should I let the turkey rest before carving?
Always let your 5-pound turkey rest for 30 minutes after removing it from the oven. This allows the juices to redistribute throughout the meat, ensuring every slice stays moist and flavorful. Skipping this step often results in dry turkey—don’t rush it!
Can I use a frozen 5-pound turkey for this recipe?
No, this recipe requires a fully thawed turkey. If starting frozen, transfer your 5-pound turkey to the fridge 24 hours before cooking (about 12 hours per pound for safe thawing). Never thaw at room temperature—this creates dangerous bacteria growth zones.
What’s the best way to achieve crispy skin?
Pat the turkey completely dry before seasoning, then use the olive oil rub and high initial heat (425°F) for 1 hour. Baste with melted herb butter every 30 minutes during the last hour. The key is dryness and frequent basting—this creates that perfect golden crust while keeping the meat juicy.
How do I adjust cooking time for a different weight?
This recipe is calibrated for a 5-pound turkey, which typically takes 3-3.5 hours total. For every additional pound, add 15-20 minutes to the total time. Always use a meat thermometer to check doneness—155°F in the thigh and 150°F in the breast are your target temperatures.
Can I make this turkey ahead of time?
Yes! Cook the turkey 1 day ahead and refrigerate uncovered. Reheat at 325°F for 30 minutes before serving. The skin will lose some crispness but still be delicious. For best results, reheat in a 400°F oven for 20 minutes with a little extra butter for a crispy finish.

- 3lb Prime Rib Roast Recipe: Juicy Pink Center Guaranteed in 3 Hours - October 31, 2026
- 5 Spice Cake Recipe: Warmly Spiced Layers With Crunchy Top - October 31, 2026
- 1950’s Macaroni and Cheese Recipe: Nostalgic Creamy Cheese Sauce with Buttery Noodles - October 31, 2026