
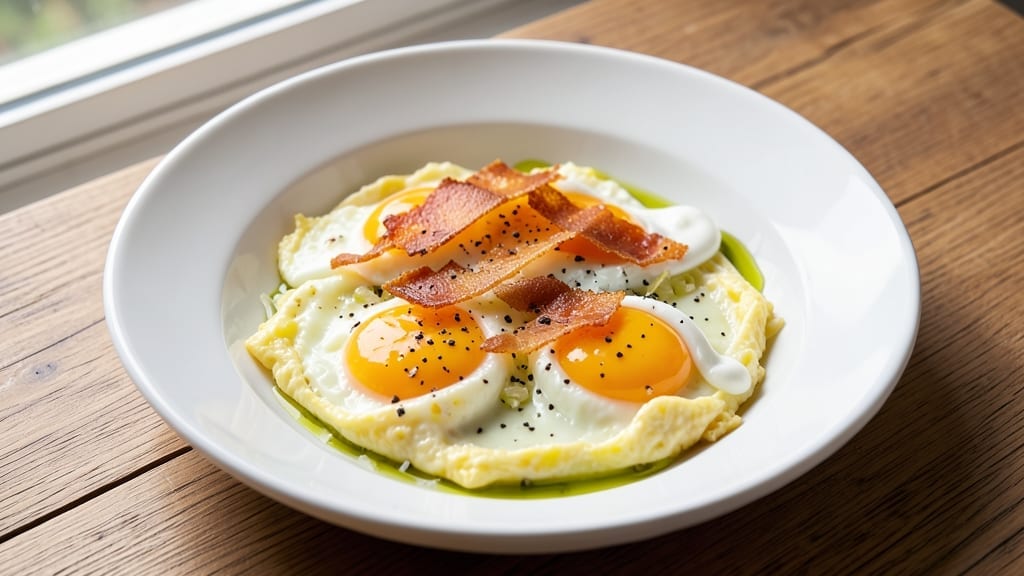
This 4 scrambled eggs recipe delivers restaurant-quality results with silky custard centers and no dry bits—every time. The secret lies in precise heat control and gentle folding, transforming ordinary eggs into a velvety breakfast masterpiece. I’ve perfected this technique after years of trial and error, and it’s become my go-to morning routine.
What sets this method apart is the focus on texture—high heat creates dry eggs, while low heat means undercooked centers. We strike the perfect balance using medium-low heat and constant stirring, ensuring tender curds form without overcooking.
A touch of butter adds richness, while proper seasoning enhances the natural egg flavor without overpowering it.
The result is a plate of scrambled eggs with a creamy, custard-like consistency that melts in your mouth. Each bite delivers that perfect combination of tender texture and rich flavor, making it a breakfast you’ll look forward to. This technique works just as well for brunch or late-night cravings.
Ready to elevate your morning routine? This method is simple enough for weekdays but impressive enough for guests. Let’s get started with the foolproof technique that guarantees perfect scrambled eggs every time.
Ingredients for 4 scrambled eggs
These eight ingredients transform ordinary eggs into restaurant-quality custard every time.
| Ingredient | Amount | Notes |
|---|---|---|
| Large Eggs 🥚 | 4 whole | Freshly cracked for best texture |
| Unsalted Butter 🧈 | 2 tbsp | Cold, cut into small cubes |
| Diamond Crystal Kosher Salt 🧂 | ¼ tsp | Fine grain preferred for even seasoning |
| Freshly Ground Black Pepper 🌶️ | ⅛ tsp | Freshly cracked peppercorns preferred |
| Heavy Whipping Cream 🥛 | 1 tbsp | Full-fat for luxurious texture (optional) |
| Extra-Virgin Olive Oil 🫒 | ½ tsp | For non-stick coating on pan |
| Shallots 🧅 | 1 whole | Finely minced for subtle sweetness |
| Fresh Chives 🌿 | 1 tbsp | Chopped for garnish, stems removed |
The eggs are the star—use large, fresh eggs from the back of the fridge (they’re older and cook more evenly). For butter, European-style like Plugrá melts beautifully without burning, but any unsalted butter works. Shallots add depth without overpowering—substitute 1 tbsp finely diced red onion if you’re in a hurry. The olive oil is non-negotiable for that perfect non-stick surface; avoid flavored oils that can muddy the flavor. I always buy my kosher salt in bulk from Penzeys—it dissolves perfectly and enhances every bite without saltiness.
No heavy cream? Whole milk or half-and-half works in a pinch, but you’ll lose that luxurious silkiness. Freshly ground pepper makes all the difference—pre-ground loses potency fast, so crack your own if possible. The chives are just for garnish, but they add a bright finish that elevates the dish. For extra richness, add 1 tbsp sour cream at the end. If you’re making this for guests, use organic eggs—they have more vibrant yolks. And trust me on the cold butter cubes—they melt slowly, creating steam that keeps the eggs perfectly tender.
Eggs keep best in their carton in the coldest part of your fridge. Use within 3 weeks for peak freshness. The butter should be stored in an airtight container, buttered side up, for up to 6 months. Shallots last 2 weeks in the fridge, while chives stay fresh for 10 days if wrapped in damp paper towels. This recipe reheats beautifully—gentle heat only to avoid drying out. Portion into ramekins for easy grab-and-go breakfasts, or serve immediately for that just-made-from-scratch experience.
Why You’ll Love This Recipe
- Five-Minute Magic: I swear, this is the kind of recipe where you can be pouring your first coffee and have breakfast ready by the time you sit down. Just eggs, butter, cream, and a pinch of salt—no measuring cups, no stress, just melt-in-your-mouth perfection.
- Creamy Luxury: That splash of heavy cream? It turns ordinary scrambled eggs into something restaurant-worthy. The butter makes them rich, the cream keeps them silky, and the pepper? Just enough to wake up your taste buds without overpowering.
- Breakfast Anywhere: Need a quick meal for a lazy Sunday, a post-workout snack, or even a midnight craving? This recipe travels well—pack it in a thermos for work, reheat it in seconds, or serve it straight from the pan. Honestly, it’s my go-to for busy mornings.
- Budget Breakthrough: Four eggs, a stick of butter, and a little cream—that’s it. No fancy ingredients, no waste, and it stretches further than you’d think. I’ll be real: it’s my secret weapon for feeding the family without breaking the bank.
Step-by-step instructions for silky scrambled eggs
Here’s how to achieve cloud-soft, custard-like scrambled eggs with no dry bits—every time.
Prepare the Shallots and Egg Mixture
Start by finely mincing the whole shallot—you want tiny pieces that dissolve into the eggs without texture. I like to use a sharp chef’s knife and rock-chop method for precision. Transfer the minced shallots to a bowl and set aside.
In a separate bowl, crack the 4 whole large eggs directly into the bowl (no shells!). Add the 0.25 teaspoon Diamond Crystal kosher salt and 0.125 teaspoon freshly ground black pepper, then whisk vigorously until the yolks and whites are fully combined. This ensures even seasoning throughout the eggs. Add the minced shallots and whisk again to distribute them evenly.
Heat the Pan and Melt the Butter
Place a non-stick skillet over medium-low heat—this is crucial for gentle cooking. Add the 2 tablespoons unsalted butter, cut into small cubes, and let it melt slowly. You’ll see the butter foam and then settle into a golden liquid. This takes about 2-3 minutes, and patience here prevents burning.
Once the butter is fully melted but not browned, add the 0.5 teaspoon extra-virgin olive oil. The oil helps create a non-stick surface and adds a subtle depth of flavor. Swirl the pan to coat the bottom evenly with the butter-oil mixture. The pan is ready when it looks glossy and the butter has stopped bubbling vigorously.
Cook the Eggs on Low Heat
Pour the egg mixture into the skillet, letting it spread naturally without stirring immediately. The key to silky eggs is low, even heat. Let the eggs sit undisturbed for about 30 seconds until the edges begin to set but the centers remain runny. This creates a soft base that won’t break when you fold.
Using a silicone spatula, gently push the eggs from one side of the pan to the other, tilting the pan slightly to let the uncooked egg flow to the empty space. Repeat this motion continuously for about 1-2 minutes. You’re looking for soft, custard-like curds to form rather than firm, dry clumps. The eggs should still look slightly liquid in the center—this is perfect.
Finish with Cream and Garnish
When the eggs are just about set to your liking—still slightly runny in the center—reduce the heat to the lowest setting. Add the 1 tablespoon heavy whipping cream and gently fold it into the eggs using the silicone spatula. The cream adds luxurious richness and prevents the eggs from becoming dry.
Continue folding for another 30-60 seconds until the eggs are fully cooked but still creamy. Remove the skillet from heat and transfer the eggs to warmed plates. Garnish immediately with the 1 tablespoon chopped fresh chives, stems removed, for a pop of color and freshness. Serve right away while the eggs are still silky and warm.
Master the Timing and Temperature
Here’s the thing—scrambled eggs are all about heat control. If the pan is too hot, the eggs will cook too quickly on the outside while remaining raw inside, or worse, they’ll turn rubbery. If it’s too cool, they’ll never set properly. The ideal temperature is medium-low, where the eggs cook gently and evenly.
I like to use a kitchen thermometer to check the pan temperature—it should stay between 275°F and 300°F throughout cooking. Adjust the heat as needed to maintain this range. The eggs are done when they’re just set but still custard-like, with no dry bits. If you’re unsure, remember: slightly undercooked is better than overcooked—you can always warm them up later if needed.
Pro Tips For Making 4 Scrambled Eggs
- Whisk Like You Mean It: Crack those eggs into a bowl first, then whisk hard for 30 seconds with a fork—no need for a whisk. The foamier the better; this keeps them light and prevents rubbery curds. (Yes, even if you’re impatient like me, resist the urge to skip this.)
- Salt the Butter First: Melt 2 tablespoons unsalted butter in your pan over medium-low, then sprinkle in ½ teaspoon Diamond Crystal salt before adding eggs. This distributes flavor evenly—no clumpy salt bombs in your final bite. (I learned this the hard way after picking out a salt crystal the size of a pea.)
- Pull Heat at 60% Done: Scrambled eggs cook in stages: start with high heat to set the edges, then drop to medium-low once they’re 60% set. The cream will keep them creamy, but lingering too long turns them into a sad, dry mess. (Your future self will thank you for not overcooking.)
- Add Cream Last: Stir in 1 tablespoon heavy whipping cream after the eggs are mostly cooked—about 10 seconds before they’re done. This keeps the texture luscious without making them greasy. (Sounds weird, but it works: the cream steams into the eggs instead of pooling at the bottom.)
Troubleshooting this dish
Overcooked Eggs Fix
If your eggs turn out dry or rubbery, don’t toss them! The secret is to rescue them with 1 tablespoon heavy cream or whole milk. Remove from heat immediately, add the liquid, and fold gently with a spatula.
Let sit off heat for 1-2 minutes to reabsorb moisture. For extra richness, stir in 1 tablespoon sour cream or crème fraîche—this adds creaminess instantly. 💫
Undercooked Centers
When eggs remain too runny in the center, it’s usually from heat that’s too low. The fix is simple: transfer the pan to medium heat and fold the eggs vigorously with a silicone spatula.
Keep moving them until they reach your desired doneness—usually 30-60 seconds. For extra insurance, add a splash of hot water (about 1 tablespoon) to the pan to gently cook through without drying.
Sticking to the Pan
Eggs sticking is almost always a non-stick issue. First, make sure your pan is properly preheated with 2 tablespoons butter melted completely. If they still stick, your pan might need re-seasoning.
For immediate fixes, add 1 tablespoon water to the pan, cover with a lid, and let steam for 1 minute—this loosens the eggs. I’ve also had success using a thin metal spatula to gently pry eggs from the pan while hot.
Uneven Cooking
Uneven cooking happens when heat isn’t distributed properly. Start by ensuring your burner is clean and working correctly. For future attempts, try using a smaller pan (8-inch works best for 4 eggs) to concentrate heat.
If you’re using gas, adjust the flame to medium-low on one side if it’s uneven. For electric stoves, rotate the pan 180 degrees halfway through cooking to ensure even exposure to heat.
Greasy Texture
Greasy scrambled eggs usually mean too much fat was used. The fix is simple: drain excess butter after melting by tilting the pan and spooning out any liquid. For immediate rescue, add 1 tablespoon all-purpose flour to the eggs and fold in—it absorbs excess fat.
Alternatively, sprinkle 1 tablespoon grated Parmesan cheese over the top and fold through to add body without grease. 🌟
Preventing Future Issues
For foolproof results next time, invest in a high-quality non-stick skillet (I recommend Made In or All-Clad) and always use medium-low heat. Crack eggs directly into the bowl—no shells!—and whisk vigorously before cooking.
The key is patience: let eggs sit undisturbed for 30 seconds** after pouring before stirring. And remember, slightly undercooked is better than overcooked—you can always finish them off the heat.
Nutrition facts
Frequently asked questions
Can I make these scrambled eggs without cream?
Skip the heavy cream and use 1 tablespoon whole milk or half-and-half instead—it’ll still add richness while keeping the eggs tender. For a dairy-free option, substitute with 1 tablespoon unsweetened almond milk and reduce the butter to 1 tablespoon to balance the fat content. The texture will be slightly lighter but still delicious.
How do I adjust this recipe for 2 or 6 servings?
For 2 servings, halve all ingredients (2 eggs, 1 tbsp butter, etc.). For 6 servings, multiply by 1.5 (6 eggs, 3 tbsp butter, 1.5 tbsp cream). Use an 8-inch skillet for 4 eggs, 10-inch for 6 eggs, and 6-inch for 2 eggs. Keep heat consistent—medium-low for 4 eggs, slightly lower for 6 to prevent overcooking.
Why are my eggs turning out rubbery?
Rubbery eggs usually mean overcooking or too much stirring. The key is medium-low heat and minimal stirring—only fold gently when curds form. If they’re already rubbery, remove from heat immediately, add 1 tbsp warm water, cover for 1 minute, then fold in 1 tbsp sour cream to restore creaminess. For future attempts, use a non-stick skillet and never let the eggs sit too long without moving.
Can I make these ahead of time?
These eggs are best served immediately, but you can prep components ahead: Whisk eggs with seasonings and store in the fridge for up to 2 days (add shallots right before cooking). For make-ahead breakfasts, cook the eggs al dente (slightly underdone), let cool completely, then reheat in the microwave for 20-30 seconds with a splash of water or milk to restore moisture. Never reheat dry eggs—they’ll turn tough.
What’s the best pan for perfect scrambled eggs?
A non-stick skillet (8-10 inches) is ideal, but a well-seasoned cast iron works too. Avoid stainless steel—it conducts heat unevenly. For best results, use a pan with sloped sides to help fold eggs easily. If your non-stick is old, re-season it by coating with oil and heating empty on medium for 5 minutes. A pan thermometer helps maintain the perfect 275°F-300°F range.

- 6 Egg Cake Recipe with Oil: Light as Air With Buttery Moisture - October 4, 2026
- 4 Bean Casserole Recipe: One-Pan Heartiness With Smoky Paprika Depth - October 4, 2026
- 3-Ingredient Keto Mug Cake Recipe: Microwave Magic in 2 Minutes - October 4, 2026