
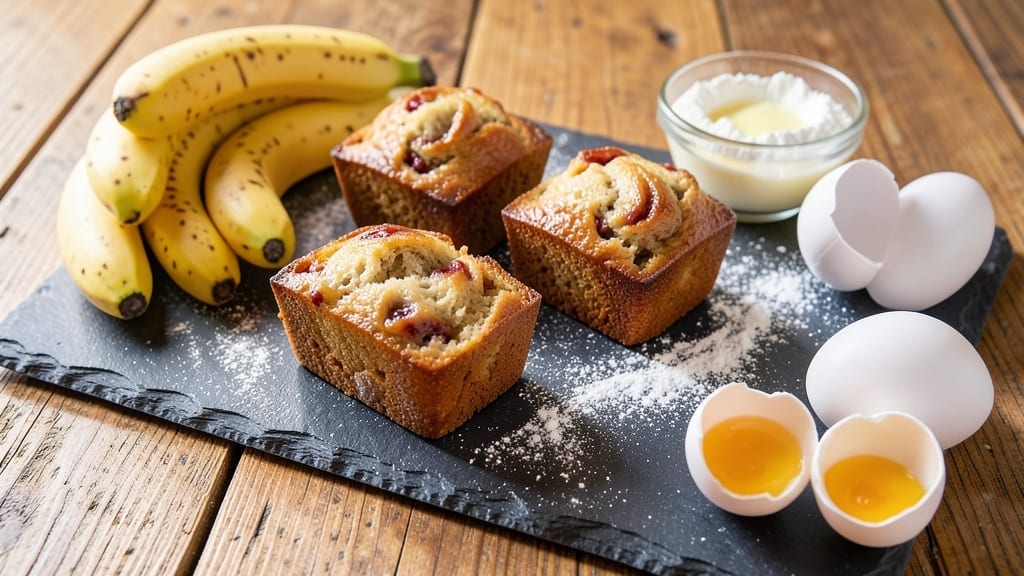
This 4 small banana bread recipe solves the problem of overbaked loaves and perfect slices every time—each mini loaf bakes in 25 minutes with tender crumb and moist centers.
I developed this after years of burning full-sized banana bread, and the secret lies in using 4 mini loaf pans (6×2.5×2.5 inches) that cook faster and distribute heat evenly. The result? Four perfectly portioned loaves ready in under an hour, with no wasted edges or overcooked crusts.
What makes this recipe work is the reverse creaming method—mixing butter and sugar first creates a lighter texture, while ripe bananas (about 4 medium) add natural sweetness without needing extra sugar.
A pinch of cinnamon and nutmeg enhances the classic banana bread flavor, and the addition of walnuts or chocolate chips (optional) gives texture contrast. The recipe scales perfectly for 4 mini loaves, ensuring each one is moist and flavorful.
By the time you pull these from the oven, you’ll have golden, perfectly domed loaves with a tender crumb and just the right amount of caramelization on top.
These mini loaves are ideal for gifts, office treats, or single servings—no one will guess they’re made from the same recipe as a full-sized loaf. The best part? They stay fresh for days, making them perfect for meal prep or sharing.
For extra fluffiness, let the batter rest for 10 minutes before baking, and brush the tops with melted butter while warm. Serve with a dollop of whipped cream or a smear of peanut butter for the ultimate comfort-food experience. Let’s bake these perfect mini loaves!
Ingredients for 4 small banana bread
Four mini loaves packed with ripe bananas and warm spices—no overbaking, just perfect portions every time.
| Ingredient | Amount | Notes |
|---|---|---|
| Unsalted Butter 🧈 | ½ cup | Softened at room temperature |
| Granulated Sugar 🍚 | ¾ cup | Light brown sugar works too |
| Ripe Bananas 🍌 | 4 medium | Mashed thoroughly, spots okay |
| Large Eggs 🥚 | 2 whole | Room temperature preferred |
| All-Purpose Flour 🌾 | 1 ½ cups | Sifted for lighter texture |
| Baking Soda 🧂 | ½ tsp | Freshly opened for best rise |
| Ground Cinnamon 🌿 | 1 tsp | Freshly ground preferred |
| Ground Nutmeg 🌿 | ¼ tsp | Freshly grated nutmeg works too |
| Salt 🧂 | ½ tsp | Fine sea salt preferred |
| Walnuts 🌰 | ½ cup | Chopped, optional but recommended |
| Mini Loaf Pans 🍞 | 4 whole | 6×2.5×2.5 inches each |
| Melted Butter 🧈 | 1 tbsp | For brushing tops |
Ripe bananas are non-negotiable here. Look for ones with brown spots—those are the sweetest. Trader Joe’s and Whole Foods usually have the best quality, but any grocery store works. The walnuts? Toast them first for 2 minutes in a dry pan—that extra crunch makes all the difference. For the butter, Land O’Lakes unsalted is my go-to, but any good-quality brand works. The baking soda needs to be fresh—if it’s been sitting in your pantry for months, toss it and grab a new box.
No walnuts? Chocolate chips or pecans work just as well. Short on bananas? Substitute with 1 cup mashed sweet potato for a moisture boost. The cinnamon and nutmeg are classic, but ginger or cardamom can add a fun twist. For the sugar, light brown adds moisture, but white works fine if that’s what you’ve got. If your mini loaf pans are non-stick, you can skip the butter brush—otherwise, that golden crust is worth the extra minute.
These keep beautifully for 3-4 days at room temperature, wrapped in foil. For longer storage, freeze the baked loaves for up to 3 months. I like to portion them into single-serving bags so they’re ready to grab and go. Reheat in the microwave for 15 seconds to restore that warm-from-the-oven feel. The batter can also be prepped ahead and refrigerated for 24 hours—just let it sit at room temperature for 30 minutes before baking.
Why You’ll Love This Recipe
- No Mixer Needed: The only tools you’ll need are a bowl and a fork—just mash those bananas right in the batter. Honestly, I’ve made this while standing, while sitting, even while pretending to listen to someone ramble about their day. The eggs and butter blend together so smoothly you’ll forget how little effort went in.
- Sweet Spot Balance: That first bite? It’s got this perfect harmony—creamy from the butter, subtle caramel notes from the ripe bananas, and just enough sugar to make it feel like dessert without being cloying. (Yes, even on a Tuesday night.) The flour gives it that tender crumb, but the bananas keep it from being too heavy.
- Portion Control Perfection: Four mini loaves mean you can bake just what you need—one for breakfast, one for a snack, one to stash in the freezer. Between us, I’ve used these for brunch, packed them in lunches, and even gifted one to my neighbor who’s always “too busy” to bake. No waste, no stress.
- Pantry Staple Magic: You’re already using things you’ve got—no fancy ingredients, no last-minute grocery runs. I’ll be real: this recipe saved me when I had three overripe bananas and a drawer full of butter. The eggs add richness without breaking the bank, and the flour? Well, that’s just the glue holding everything together. Reliable, cheap, and always delivers.
Step-by-step instructions for mini banana bread loaves
Here’s how to bake the most perfectly portioned mini banana breads with moist crumb and tender texture.
Prep Ingredients and Preheat Oven
Start by preheating your oven to 350°F. While it heats, prepare all your ingredients. Mash the 4 medium ripe bananas thoroughly with a fork until completely smooth—you should have about 1 cup of mashed banana. I like to press through a fine-mesh sieve to remove any large spots if they’re particularly prominent.
In a separate bowl, cream together the 0.5 cup unsalted butter and 0.75 cup granulated sugar until light and fluffy. This step is crucial for achieving that tender crumb in your mini loaves. Use a hand mixer or stand mixer with the paddle attachment, beating on medium speed for about 3-4 minutes until the mixture is pale and nearly doubled in volume.
Combine Wet Ingredients and Fold in Dry Components
Add the mashed bananas to the butter-sugar mixture and mix until fully combined. In a separate bowl, whisk together the 1.5 cups all-purpose flour, 0.5 teaspoon baking soda, 1 teaspoon ground cinnamon, 0.25 teaspoon ground nutmeg, and 0.5 teaspoon salt. Sift the dry ingredients together for a lighter texture—this prevents dense loaves.
Gently fold the dry ingredients into the wet mixture using a spatula, mixing just until combined. Be careful not to overmix—the batter should have a few lumps remaining. Fold in the 0.5 cup chopped walnuts if using, reserving a few for topping if desired. The batter will be thick but spreadable.
Prepare Pans and Divide Batter
Generously butter the 4 whole mini loaf pans with the 1 tablespoon melted butter, making sure to coat the bottom and sides thoroughly. This ensures easy release and prevents sticking. Divide the batter evenly among the pans, using a spatula to spread it into each pan.
Sprinkle the reserved walnuts over the tops for added texture and visual appeal. Here’s the thing—don’t overfill the pans. The batter should come about ¾ of the way up the sides. Overfilling leads to overflow and messy tops. Place the filled pans on a baking sheet lined with parchment paper for easy transfer.
Bake to Golden Perfection
Bake the mini loaves in the preheated oven for 25-30 minutes, or until a toothpick inserted into the center comes out clean with just a few moist crumbs clinging to it. The tops should be golden brown, and you’ll notice the edges pulling away slightly from the pan.
I know it’s tempting to check early, but resist the urge. The mini size means they cook faster than standard loaves, but they need that full baking time to develop proper texture. If the tops brown too quickly, tent loosely with foil after 15 minutes to prevent over-browning while ensuring even cooking.
Cool and Serve for Maximum Enjoyment
Remove the loaves from the oven and let them cool in the pans for 5 minutes before transferring to a wire rack to cool completely. This brief cooling period in the pan helps set the structure, preventing them from becoming too soft. The cooling process is crucial—they’ll firm up as they cool, making them easier to slice.
Once completely cooled, slice each mini loaf into 6 equal portions for perfect individual servings. Serve warm with a pat of butter or a drizzle of honey for that extra touch of indulgence. These mini loaves keep well at room temperature for 2 days or can be frozen for up to 3 months for convenient snacking.
Pro Tips For Making 4 Small Banana Bread
- MEASURE BUTTER COLD: Take the unsalted butter straight from the fridge—no softening needed. Cut it into small cubes and mix them directly into the dry ingredients. This keeps the texture tender and prevents a greasy loaf. (Yes, it sounds counterintuitive, but it works every time.)
- MASH BANANAS WELL: Skip the blender—use a sturdy fork and really work those ripe bananas until smooth. Lumpy mash means uneven moisture, and that’s how you end up with dense, dry pockets. Aim for a consistency like thick pudding.
- DON’T OVERMIX THE BATTER: Mix just until the flour disappears—maybe 10-12 strokes. Overmixing develops gluten, and your banana bread will turn out tough instead of soft. Stop when the batter looks shaggy, not smooth.
- BAKE UNTIL 205°F: Pull the loaves out when the center hits 205°F (not 212°F). A toothpick test is fine, but don’t trust it alone—banana bread can look done but still be undercooked inside. Underbaking is the #1 reason for gummy texture.
Dietary considerations for these flavors
Gluten-Free Adaptation
Swap the 1.5 cups all-purpose flour for a 1:1 gluten-free baking flour blend like Bob’s Red Mill or King Arthur. These blends contain xanthan gum, which mimics gluten’s binding properties.
For extra moisture, add 1 tablespoon applesauce to the batter. I’ve found that gluten-free mini loaves need 2-3 extra minutes in the oven to fully set. 🌱
Vegan Substitutions
Replace the 0.5 cup butter with 0.5 cup coconut oil or vegan butter, and use 2 flax eggs (2 tbsp ground flaxseed + 6 tbsp water). For the baking soda reaction, add 1 tbsp vinegar to the wet ingredients.
The texture stays moist, but vegan loaves may need 5 extra minutes in the oven. 🥥
Lower Sugar Options
Reduce the 0.75 cup sugar to 0.5 cup and add 0.25 cup mashed dates or 0.25 cup unsweetened applesauce for natural sweetness. The bananas’ natural sugar will compensate, but these loaves may need 1 extra minute in the oven. Sprinkle extra cinnamon on top for warmth. 🍯
Nut-Free Version
Skip the walnuts entirely or substitute with 0.5 cup dried cranberries or 0.5 cup chocolate chips. For texture contrast, fold in 0.25 cup shredded coconut or 0.25 cup oats. The batter will be slightly less dense, but the flavor stays rich and satisfying. 🍫
Dairy-Free Adjustments
Use dairy-free butter (like Miyoko’s) and ensure your baking soda is aluminum-free. For extra richness, stir in 2 tbsp coconut cream with the wet ingredients. The texture remains tender, but these loaves may need 1 extra minute to firm up. 🥥
Nutrition facts
Frequently asked questions
Why use mini loaf pans for banana bread?
Mini loaf pans (6×2.5×2.5 inches) create perfect portions and bake faster than standard pans, preventing overcooking. Each 25-minute bake yields golden, tender loaves without the risk of dry edges. Plus, they’re ideal for gifts or single servings!
Can I substitute sweet potatoes for bananas?
Yes! Use 1 cup mashed cooked sweet potato instead of bananas for a moist, slightly earthy flavor. Reduce the sugar to 0.5 cup since sweet potatoes are naturally sweeter. The texture stays tender but may need 1 extra minute in the oven.
How do I store or freeze these mini loaves?
Wrap cooled loaves tightly in plastic wrap or foil—they stay fresh at room temperature for 3-4 days. For longer storage, freeze for up to 3 months. Thaw overnight in the fridge or reheat frozen slices in the microwave for 10-15 seconds for warm, gooey texture.
What if my mini loaves turn out dense?
Overmixing or underbaking usually causes density. Sift dry ingredients and fold gently into wet mix—stop when just combined. Also, ensure your oven is fully preheated to 350°F and bake until a toothpick comes out with moist crumbs (not wet batter).
Can I make these without nuts?
Skip walnuts and add 0.5 cup chocolate chips or 0.25 cup shredded coconut instead. For extra texture, fold in 0.25 cup oats. The batter will be slightly less dense, but the flavor remains rich and satisfying.

- 3lb Prime Rib Roast Recipe: Juicy Pink Center Guaranteed in 3 Hours - October 31, 2026
- 5 Spice Cake Recipe: Warmly Spiced Layers With Crunchy Top - October 31, 2026
- 1950’s Macaroni and Cheese Recipe: Nostalgic Creamy Cheese Sauce with Buttery Noodles - October 31, 2026