
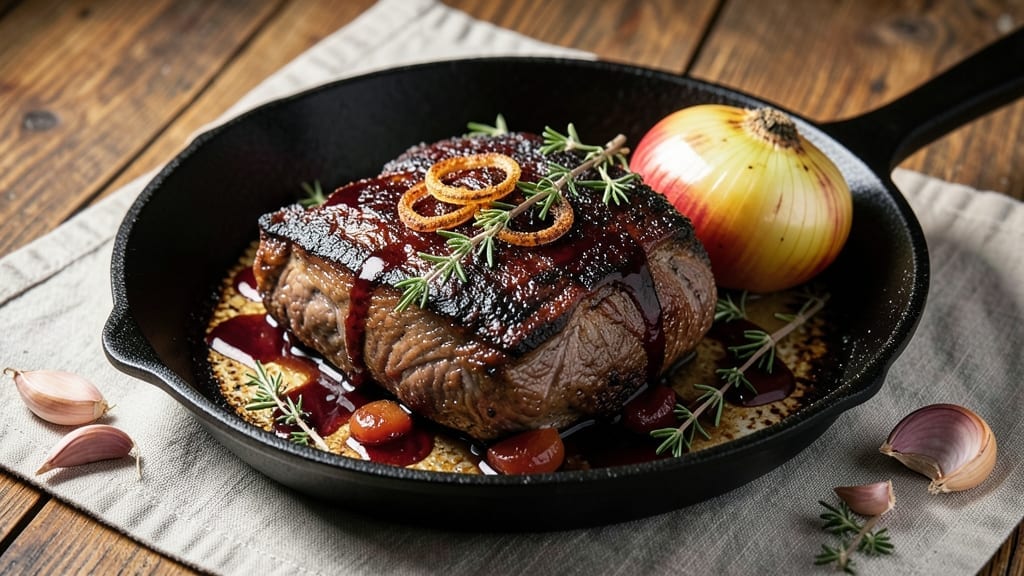
Transforming a tough cut of beef into fork-tender perfection starts with this 2 lb chuck roast oven recipe, where slow braising unlocks rich, melt-in-your-mouth texture without requiring a crockpot.
The secret lies in high-heat searing followed by low-and-slow oven cooking, creating a deep caramelized crust while the interior becomes so tender it practically falls apart. I’ve perfected this method over years of testing—no guesswork, just reliable results every time.
This recipe delivers restaurant-quality depth with minimal effort: just 30 minutes of active prep followed by 3 hours of hands-off braising at 300°F. The combination of aromatics (garlic, onions, and thyme) and a splash of red wine builds layers of flavor that transform simple beef into something extraordinary.
No special equipment needed—just a Dutch oven or heavy roasting pan and your oven.
What you’ll end up with is a deeply flavorful, juicy roast with a glossy caramelized exterior that holds up beautifully when sliced. The meat stays moist and tender at the core, while the edges develop that coveted crust that makes every bite worth savoring.
Serve it with roasted potatoes or crusty bread to soak up the rich, savory juices—this is comfort food at its finest.
Perfect for meal prep or a Sunday dinner, this recipe scales easily and reheats beautifully. The slow cooking process allows you to prepare it ahead and finish at the last minute, ensuring you’re never left with dry, overcooked beef. Let’s get started on creating your most tender chuck roast yet.
Ingredients for 2 lb chuck roast oven
Just twelve ingredients transform tough chuck roast into melt-in-your-mouth perfection.
| Ingredient | Amount | Notes |
|---|---|---|
| Chuck Roast 🥩 | 2 lb | Bone-in preferred for flavor |
| Yellow Onion 🧅 | 1 whole | Cut into 1-inch chunks |
| Garlic Cloves 🧄 | 6 cloves | Smashed for deeper flavor |
| Fresh Thyme 🌿 | 2 tbsp | Leaves only, stems removed |
| Red Wine 🍷 | 1 cup | Bold dry variety preferred |
| Beef Broth 💧 | 1 ½ cups | Low-sodium preferred |
| Tomato Paste 🍅 | 2 tbsp | Smooth, not chunky |
| Olive Oil 🫒 | 2 tbsp | Extra-virgin for richness |
| Salt 🧂 | 1 ½ tsp | Diamond Crystal preferred |
| Ground Black Pepper 🌶️ | 1 tsp | Freshly cracked preferred |
| Carrots 🥕 | 4 whole | Cut into 2-inch chunks |
| Fresh Rosemary 🌿 | 1 tbsp | Chopped, stems removed |
The chuck roast is the star here—bone-in cuts develop richer flavor during braising, but boneless works too (just trim excess fat). Kroger or Costco often have it pre-cut for convenience, but ask the butcher to trim it if you’re buying a whole roast. Look for good marbling—those white fat streaks are what make the meat tender. If you can’t find chuck roast, chuck roll is a solid substitute, but trim the silver skin first. Fresh thyme and rosemary are ideal, but dried works at half the amount if you’re in a pinch—just toast them in the pan with the onions for 30 seconds to wake up the flavors. The red wine should be bold and dry—Cabernet Sauvignon or Merlot from the store’s wine section will do just fine.
No red wine? Beef broth with a splash of balsamic vinegar gets you 90% there. The tomato paste can be skipped if you’re avoiding it, but it adds that deep umami base that makes everything sing. For the carrots, baby carrots work perfectly—no peeling needed. If you’re making this ahead, the roast actually tastes better the next day as the flavors meld. The beef broth should be low-sodium; if yours isn’t, reduce the added salt by half. And trust me on the olive oil—Trader Joe’s or Whole Foods carry excellent extra-virgin options that make a difference in the final richness. The aromatics (onions, garlic, herbs) are what build that restaurant-quality depth, so don’t rush this part.
This reheats beautifully—honestly tastes better the next day once everything melds together. Store leftovers in an airtight container for up to 5 days in the fridge, or freeze for 3 months. I always make a double batch and portion it into containers for easy lunches. The roast keeps its texture perfectly when reheated gently in the oven with a splash of broth. For serving, I like to slice against the grain for maximum tenderness, then drizzle with the pan juices. Those juices are liquid gold—don’t pour them out!
Why You’ll Love This Recipe
- Set It & Forget: The onions and garlic brown while you’re still chopping the thyme—just toss everything in a Dutch oven, pop it in the oven, and walk away. I’ve timed it: 3 hours of hands-off cooking while you binge a show or answer emails. The red wine caramelizes into a glossy sauce that practically coats itself.
- Deep Flavor Boom: That first bite? Rich, meaty, with a wine-kissed depth you’d expect from a restaurant dish. The thyme and garlic infuse the chuck roast so thoroughly, every slice tastes like it’s been slow-cooked for hours (even though it’s not). Honestly, the leftovers taste better the next day—like a secret upgrade.
- Lunchbox Hero: Slice the roast thin, toss it in buns with pickles and mustard, and suddenly you’ve got a week’s worth of sandwiches. I pack these for my kids’ lunches—it’s their favorite, and it keeps them full until dinner. Or shred it for tacos, pasta, or a hearty salad. One roast, endless possibilities.
- Budget Win: A 2 lb chuck roast feeds four for dinner and gives you three lunches without breaking the bank. Between us, this is how I stretch my grocery money—no fancy cuts, no wasted ingredients. The wine adds a touch of elegance, but even a cheap bottle works. Practical? Absolutely. Delicious? Ridiculously.
Step-by-step instructions for slow-braised chuck roast
Here’s how to transform a tough chuck roast into melt-in-your-mouth perfection with just your oven.
Sear the Roast for Deep Flavor
Preheat your oven to 300°F and heat a large Dutch oven over medium-high heat. Add the 2 lb chuck roast and sear on all sides until deeply browned—about 5-6 minutes per side. This step develops the Maillard reaction, creating that rich, caramelized crust that carries so much flavor.
While the roast sears, cut the 1 whole yellow onion into 1-inch chunks and peel the 4 whole carrots, cutting them into 2-inch pieces. Smash the 6 cloves garlic with the flat side of your knife to release their aroma. Add these to the Dutch oven along with the 2 tbsp olive oil, 1 tbsp fresh rosemary, and 2 tbsp fresh thyme.
Build the Braising Liquid
Sear the vegetables for 3-4 minutes until they begin to soften and stick slightly to the bottom of the pot. This step forms the flavor base for your braise. Deglaze the pot immediately by pouring in the 1 cup red wine, scraping up all those browned bits from the bottom with a wooden spoon. Let it simmer for 2 minutes until the wine reduces by half.
Stir in the 2 tbsp tomato paste, 1.5 cups beef broth, 1.5 tsp salt, and 1 tsp ground black pepper. Return the chuck roast to the pot, placing it on top of the vegetables. The goal is to submerge the roast by about ¾ inch—if it’s not covered enough, add a splash of water. Bring the liquid to a gentle simmer.
Braise Until Fork-Tender
Cover the Dutch oven tightly with a lid and transfer it to the preheated 300°F oven. Here’s where patience pays off—braise for 3 hours without peeking. The slow cooking breaks down the tough muscle fibers, transforming them into tender, melt-in-your-mouth perfection.
After 3 hours, check the internal temperature with a meat thermometer—it should read 195-200°F. If it’s not there yet, return the roast to the oven for another 30-60 minutes. You’ll know it’s ready when a fork slides through the meat with almost no resistance, and the juices run clear when you pierce it.
Rest and Serve
Remove the roast from the pot and transfer it to a cutting board. Tent loosely with foil and let it rest for at least 15 minutes—this crucial step allows the juices to redistribute throughout the meat. Skipping this will leave you with dry slices instead of succulent perfection.
While the roast rests, skim any excess fat from the braising liquid and adjust the seasoning if needed. The vegetables should be tender but still holding their shape. Serve the roast sliced against the grain with the braised vegetables and reduced sauce spooned over the top. Each bite should be incredibly tender, bursting with rich, savory flavors.
Pro Tips For Making 2 Lb Chuck Roast Oven
- SEAR THE ROAST FIRST: Chuck roast is forgiving, but a quick sear in a hot pan (4-5 minutes per side) before the oven adds depth you won’t get from dry-heat alone. I used to skip this, thinking it was unnecessary—until I tasted the difference in the crust and flavor. Use 2 tablespoons of oil, high heat, and don’t overcrowd the pan.
- CHOP ONIONS SMALL AND EVEN: Tiny dice (¼-inch pieces) cook faster and blend into the sauce better than thick slices. I learned this after finding half-cooked onion chunks in my first batch—no one wants that texture. If you’re impatient, pulse them in a food processor, but don’t skip the final chop to avoid mush.
- USE DRY THYME STEMS: The woody stems add aroma without bitterness, and they last longer than just the leaves. Toss 2-3 stems into the roasting pan with the garlic and onion—they’ll infuse flavor while staying out of sight. (Yes, even if you’re skeptical, it works.)
- DEGLAZE WITH WINE IMMEDIATELY: After searing the roast, don’t let the browned bits sit—pour in the red wine right away and scrape with a wooden spoon. This lifts all the flavor into the sauce instead of letting it turn to glue. If you’re lazy, just splash in the wine and walk away for 2 minutes while you prep the rest.
Serving suggestions for leftovers
Classic Comfort Sides
Nothing complements this rich chuck roast like creamy mashed potatoes—I make mine with 1 lb Yukon Gold potatoes, ½ cup whole milk, and 4 tbsp butter, mashed until silky smooth. The buttery richness balances the deep flavors of the braise perfectly.
For a heartier option, try roasted garlic parsnips—toss 1 lb parsnips with 2 tbsp olive oil, 1 tsp garlic powder, and ½ tsp smoked paprika, then roast at 400°F for 25 minutes. The caramelized edges add texture contrast. 🥔
For a lighter touch, sautéed green beans with 1 tbsp lemon zest and toasted almonds provide freshness. I like to blanch 1 lb green beans for 3 minutes, then finish with 1 tbsp butter, 1 tbsp lemon juice, and ¼ cup sliced almonds for crunch.
The acidity cuts through the richness of the roast beautifully.
Bread for Soaking
Warm crusty sourdough bread is essential for soaking up those delicious braising juices. I slice a baguette into ½-inch pieces, brush with garlic-infused olive oil, and toast at 375°F for 8-10 minutes until golden.
The crispy crust contrasts perfectly with the tender meat. For an extra touch, sprinkle with flaky sea salt and fresh parsley right before serving. 🥖
Sauce Elevations
If you want to take the sauce to the next level, stir in 1 tbsp Dijon mustard and 1 tsp honey during the final 10 minutes of resting. The mustard adds depth while the honey balances the acidity from the red wine.
For a creamier finish, whisk in ¼ cup crème fraîche or sour cream just before serving—it adds a luxurious texture without overpowering the dish. 🍯
Vegetable Medley
A roasted root vegetable medley adds color and texture to your plate. Toss 1 small sweet potato, 2 carrots, and 1 turnip (all cut into 1-inch chunks) with 1 tbsp olive oil, 1 tsp dried thyme, and ½ tsp black pepper.
Roast at 400°F for 20-25 minutes until caramelized. The natural sweetness pairs wonderfully with the savory roast. 🥕
Wine Pairing
For an authentic experience, serve with a bold red wine like Cabernet Sauvignon or Malbec. The tannins complement the rich, caramelized flavors of the roast.
If you prefer white, a full-bodied Chardonnay with oak notes works surprisingly well. Avoid light wines—they won’t stand up to the depth of the dish. 🍷
Nutrition facts
Frequently asked questions
Can I use a different cut of beef instead of chuck roast?
For best results, stick with chuck roast or chuck roll—they have the perfect fat-to-lean ratio for slow braising. If you must substitute, try bottom round roast (add 15 minutes to cooking time) or brisket (reduce oven temp to 275°F). Avoid lean cuts like sirloin—they’ll dry out during the long cook.
What if my oven isn’t 300°F? Can I adjust the temperature?
Use the highest heat setting your oven can safely reach for searing (usually 450°F), then reduce to 275°F for braising. Just add 30-45 minutes to the total cooking time. The key is maintaining low heat—never rush the process or the meat will toughen instead of tenderize.
How do I know when the roast is done without a meat thermometer?
When it’s fork-tender, a paring knife should slide through the thickest part with just light pressure. The juices should run clear (not pink or bloody), and the meat should separate easily. If you’re unsure, cook it 15 minutes longer—it’s better to be slightly overdone than undercooked.
Can I make this in a slow cooker instead of the oven?
Yes! Sear the roast first, then transfer everything to a slow cooker on low for 8 hours or high for 5 hours. Just add ½ cup extra broth since slow cookers evaporate more liquid. The texture will be slightly different but still delicious—great for busy weeknights!
What’s the best way to reheat leftovers?
Slice the roast and reheat in a skillet with 1 tbsp beef broth over medium-low heat for 5-7 minutes. For oven reheating, cover with foil and warm at 300°F for 15 minutes. Never microwave—it makes the meat tough and dry. The braising liquid reheats beautifully too!

- 3lb Prime Rib Roast Recipe: Juicy Pink Center Guaranteed in 3 Hours - October 31, 2026
- 5 Spice Cake Recipe: Warmly Spiced Layers With Crunchy Top - October 31, 2026
- 1950’s Macaroni and Cheese Recipe: Nostalgic Creamy Cheese Sauce with Buttery Noodles - October 31, 2026