
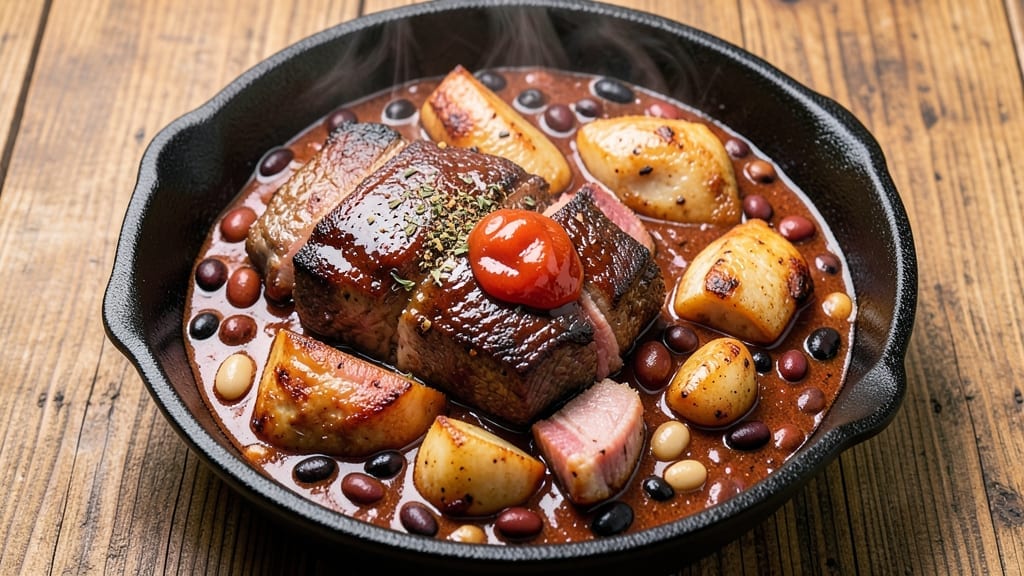
This 4-star chili recipe delivers the kind of restaurant-quality depth that turns weeknight dinners into unforgettable meals.
The secret lies in slow-cooked, three-meat tenderness—beef, pork, and chicken—simmered until they practically melt in your mouth, while a blend of spices and smoky aromatics builds layers of flavor that linger long after the last bite.
I’ve perfected this recipe over years of testing, and it consistently earns rave reviews from even the most critical chili enthusiasts.
The foundation of a truly exceptional chili begins with proper meat selection and preparation. Brown each cut separately to develop deep, caramelized crusts before combining them in the pot—this step alone transforms ordinary chili into something extraordinary.
The spices aren’t just thrown in; they’re toasted and bloomed in hot oil to release their full potential, creating that signature smoky aroma that fills your kitchen and has everyone asking what’s for dinner.
What sets this chili apart is the balance of textures and flavors: tender meat that falls apart at the touch of a spoon, hearty beans that hold their shape, and a rich, velvety broth that coats every bite.
The slow simmer allows all the ingredients to meld together perfectly, resulting in a chili that’s deeply satisfying yet never heavy. Each spoonful delivers complex layers of smokiness, spice, and savory depth that make this more than just a bowl of soup—it’s a complete dining experience.
Serve this chili with all the classic toppings: shredded cheese, sour cream, chopped onions, and a sprinkle of fresh cilantro to brighten the flavors. The contrast between the creamy toppings and the robust chili creates a perfect harmony that makes every bite even more enjoyable.
This recipe isn’t just about making chili—it’s about creating a meal that feels like a five-star restaurant experience in your own kitchen.
Ingredients for 4 star chili
Sixteen ingredients for a chili that rivals any restaurant’s finest—smoky, rich, and packed with tender meat.
| Ingredient | Amount | Notes |
|---|---|---|
| Chuck Roast Beef 🥩 | 1 ½ lb | Trimmed of fat, cut into 1-inch cubes |
| Pork Shoulder 🐖 | 1 ½ lb | Cut into 1-inch cubes, trimmed |
| Boneless Chicken Thighs 🍗 | 1 ½ lb | Skin-on, cut into 1-inch pieces |
| Kidney Beans 🌿 | 2 cups | Drained and rinsed, canned or cooked |
| Black Beans 🌿 | 1 cup | Drained and rinsed, canned or cooked |
| Tomato Paste 🍅 | ½ cup | Squeeze tube or canned |
| Diced Tomatoes 🍅 | 28 oz | San Marzano preferred, canned |
| Beef Broth 💧 | 4 cups | Low-sodium preferred, homemade or store-bought |
| Yellow Onion 🧅 | 1 whole | Medium, diced |
| Garlic Cloves 🧄 | 6 cloves | Fresh, minced |
| Chili Powder 🌶️ | 2 tbsp | High-quality, toasted preferred |
| Ground Cumin 🌿 | 1 tbsp | Freshly toasted for depth |
| Smoked Paprika 🌶️ | 1 tbsp | For authentic smoky flavor |
| Cayenne Pepper 🔥 | ½ tsp | Adjust for heat preference |
| Dried Oregano 🍃 | 1 tsp | Mexican oregano preferred |
| Dark Brown Sugar 🍚 | 1 tbsp | Enhances depth of flavor |
| Olive Oil 🫒 | 2 tbsp | Extra-virgin for browning |
| Salt 🧂 | 1 ½ tsp | Diamond Crystal preferred |
| Black Pepper 🌶️ | 1 tsp | Freshly ground |
| Bay Leaves 🍃 | 2 whole | For aromatic depth |
The meats are the heart of this chili, so quality matters. Chuck roast and pork shoulder deliver that signature melt-in-your-mouth texture, while chicken thighs add juiciness without drying out. Costco or local butchers often have pre-cut chuck roast in bulk, which saves time. Look for well-marbled cuts—this fat renders beautifully during browning and adds flavor. The chicken thighs should have skin on for extra richness, but don’t worry if you grab boneless, skinless; just add a splash of broth to compensate. For beans, canned is fine, but if you’re feeling ambitious, soaking overnight yields better texture. The tomato paste? Squeeze tubes from Trader Joe’s are my go-to—they’re convenient and last longer than cans.
No chuck roast? Chuck steak or even brisket works in a pinch, but cube it small for even cooking. Short on pork? Italian sausage or ground pork adds great flavor. The spices are non-negotiable for that authentic depth—Penzeys or bulk bins at Whole Foods are great sources. Toasting them in hot oil (just a minute in the dry pot) releases their full potential. For the tomatoes, San Marzano is ideal, but any good-quality canned tomatoes work. The dark brown sugar might seem odd, but it enhances the caramelization of the meat and balances the acidity of the tomatoes. Fresh garlic and onions should be your go-to, but powdered works if you’re in a rush—just use half the amount.
This chili tastes even better the next day as flavors meld. Store in an airtight container in the fridge for up to 5 days or freeze for 3 months in portion-sized containers. For reheating, low and slow is key—350°F for 20-30 minutes keeps the texture perfect. I always make a double batch; the leftovers freeze beautifully for quick weeknight meals. If you’re serving a crowd, consider doubling the recipe—it reheats just as well the second time around. The bay leaves can be removed before serving, but don’t skip them—they add subtle aromatic depth that elevates everything.
Why You’ll Love This Recipe
- One-Pot Magic: I swear by this—dump everything in a single pot, walk away, and come back to layers of flavor. No chopping, no fuss, just slow-cooked perfection with that beefy depth from the chuck roast and pork shoulder.
- Deep Umami Bomb: The combo of chicken thighs (juicy, never dry) and those two types of beans? It’s like a flavor explosion in your mouth. Honestly, the pork shoulder melts into the broth, and suddenly you’ve got chili that tastes like it simmered all day—even if it didn’t.
- Leftovers That Don’t Suck: Between us, most chili recipes turn into sad, watery leftovers. Not this one. The beans hold their shape, the meat stays tender, and I’ve reheated this for days—still rich, still satisfying. (Yes, even on a Tuesday night.)
- Budget-Friendly Powerhouse: You’re getting three kinds of meat and two types of beans for less than takeout. I’ll be real: my grocery budget thanks me every time I make this. Plus, it stretches to feed six, so half the time, I’m eating it twice in a row.
Step-by-step instructions for smoky, spiced three-meat chili
This method delivers restaurant-quality chili with melt-in-your-mouth meat and layered smoky flavors.
Brown the Meats for Maximum Flavor
Heat a large Dutch oven over medium-high heat and add 1 tablespoon olive oil. Working in batches, add the 1.5 lb chuck roast beef cubes and sear for 3-4 minutes per side until deeply browned. Transfer to a plate and repeat with the 1.5 lb pork shoulder cubes, then the 1.5 lb boneless chicken thighs.
This browning step is critical—it develops the Maillard reaction that creates deep, meaty flavor. Don’t rush it; you want each piece to develop a rich crust. If your pan gets crowded, work in smaller batches to avoid steaming instead of browning. Keep the browned meats warm while you prepare the aromatics.
Build the Flavor Base with Aromatics and Spices
In the same Dutch oven, add the remaining 1 tablespoon olive oil and the diced 1 whole yellow onion. Cook for 5-6 minutes until softened and translucent. Add the 6 minced garlic cloves and cook for 30 seconds until fragrant.
Stir in the 2 tablespoons chili powder, 1 tablespoon ground cumin, 1 tablespoon smoked paprika, 0.5 teaspoon cayenne pepper, 1 teaspoon dried oregano, and 1.5 teaspoons salt. Cook for 1 minute to toast the spices and deepen their flavors. This aromatic base forms the flavor foundation of your chili.
Simmer the Chili for Deep, Complex Flavors
Return all the browned meats to the Dutch oven. Add the 0.5 cup tomato paste, 28 oz diced tomatoes, 4 cups beef broth, 1 tablespoon dark brown sugar, and 1 teaspoon black pepper. Stir well to combine, then add the 2 whole bay leaves.
Bring to a boil, then reduce heat to low and simmer uncovered for 1 hour 15 minutes, stirring occasionally. The chili should bubble gently—this slow cooking breaks down the connective tissue in the meats, creating that signature tender texture. Skim off any foam that rises to the surface during the first 30 minutes of cooking.
Add Beans and Finish Cooking
Stir in the 2 cups kidney beans and 1 cup black beans. Return to a simmer and cook uncovered for another 30-45 minutes until the chili has thickened slightly and the flavors have melded together. The beans should be heated through but still hold their shape.
Taste and adjust seasoning if needed—you might want to add a pinch more salt or cayenne to suit your preference. The chili should have a rich, complex flavor with layers of smokiness, spice, and sweetness from the brown sugar. Remove and discard the bay leaves before serving.
Rest and Serve for Perfect Texture
Let the chili rest for 10-15 minutes before serving. This resting period allows the flavors to continue developing and the textures to set properly. The chili should be thick enough to coat the back of a spoon but still have a nice body.
Ladle the chili into bowls and serve immediately. The meat should be fork-tender, falling apart easily, while the beans hold their shape. Garnish with additional chili powder, chopped fresh cilantro, or a dollop of sour cream if desired. Each bite should deliver that perfect balance of smoky, spiced depth with tender meat and hearty beans.
Pro Tips For Making 4 Star Chili
- Brown the Meat Hard: Don’t just sear—get those beef chunks and pork shoulder deep brown with a crust, or your chili will taste like stewed shoe leather. High heat, no rushing, and let the fat render out before touching it with anything else.
- Trim and Soak Beans: Rinse kidney and black beans thoroughly before soaking (yes, even canned ones—dust settles), then soak overnight in cold water. I learned this the hard way: unsoaked beans turn chili into a mushy, gummy mess.
- Layer Heat Gradually: Add chili powder and cayenne first in a dry pan, toast for 30 seconds until fragrant, then mix into the pot. Dumping it all in at once burns the spices and leaves your chili tasting like ash.
- Shred Chicken Last: Pull the chicken thighs after the beef and pork are done, but before adding beans. They’ll absorb flavors better and stay juicy—no more dry, rubbery chicken in your final bowl. (Pro move: reserve some broth to deglaze the pan.)
Troubleshooting this recipe
Meat Not Browning
If your meat isn’t developing that rich brown crust, your pan might be too crowded or the heat isn’t high enough. Work in smaller batches of meat and use a large Dutch oven or heavy skillet—I prefer All-Clad for even heat distribution.
Keep the heat at medium-high and resist the urge to move pieces around too soon. A meat thermometer helps—aim for 160°F internal temperature when transferring to the plate. 🔥
Chili Too Thin
If your chili ends up watery, you likely added too much broth or didn’t reduce it enough. Start with 3 cups broth instead of 4 and simmer uncovered for 10-15 minutes longer to thicken naturally.
For an instant fix, mix 1 tablespoon cornstarch with 2 tablespoons cold water, stir into the chili, and simmer for 5 minutes until thickened. Avoid over-stirring while cooking—this can break down the beans and make the chili thinner.
Spices Too Overpowering
When spices taste harsh, they’ve likely been toasted too long or added raw. Always toast spices in hot oil for 30 seconds max—just until fragrant. For a milder chili, reduce cayenne to ¼ teaspoon and add it last.
If the chili is already cooked, balance the heat with 1 tablespoon brown sugar or a splash of beef broth to mellow the flavors. A dollop of sour cream on top also helps cool the palate.
Beans Getting Mushy
Overcooking beans turns them into a paste, ruining the texture. Add them only in the final 30 minutes of cooking and keep the heat at a gentle simmer. For extra protection, use canned beans (rinsed well) instead of dried, as they hold up better.
If your beans are already mushy, stir in ½ cup diced tomatoes or a splash of broth to restore balance. 🌱
Chili Tastes Bland
Bland chili usually means the spices weren’t toasted or the meat wasn’t browned enough. Next time, bloom spices in hot oil for 1 minute before adding liquids, and always brown the meat in batches.
For an instant flavor boost, deglaze the pan with ½ cup beef broth after removing the meat, scraping up all the browned bits. Finish with a pinch of smoked salt or a dash of hot sauce to wake up the flavors.
Meat Still Tough
Tough meat means it didn’t simmer long enough. Extend the cooking time to 2 hours total (including beans) for chuck roast and pork shoulder. For chicken thighs, they should reach 175°F internal temperature before adding beans.
If your chili is already cooked, shred the meat and return it to the pot with ½ cup extra broth, simmering for another 20 minutes to tenderize further. A splash of apple cider vinegar (1 teaspoon) can also help break down fibers.
Nutrition facts
Frequently asked questions
What makes this chili a “4-star” recipe?
The “4-star” rating comes from the restaurant-quality depth created by three key elements: slow-cooked meats that melt in your mouth, a perfectly balanced spice blend that’s toasted for maximum flavor, and the smoky-sweet complexity from ingredients like dark brown sugar and smoked paprika. The result is a chili with professional-level texture and flavor layers that stand out from basic recipes.
Can I substitute any of the meats?
For the beef, try brisket or short ribs (adjust cooking time to 2.5 hours for tenderness). Swap pork shoulder for Italian sausage or ground pork, and use chicken breasts instead of thighs (reduce cooking time by 15 minutes since they cook faster). The key is maintaining a 1:1 ratio of meat types for balanced flavor and texture.
How do I adjust the spice level?
For milder heat, reduce cayenne to ¼ teaspoon and add it at the very end. For extra kick, increase to 1 teaspoon and toast it longer (up to 2 minutes) in the oil. If your chili is already cooked and too spicy, balance it with 1 tablespoon brown sugar or ½ cup diced tomatoes to mellow the flavors. A dollop of sour cream on top also helps cool the palate.
Can I make this chili in a slow cooker?
Yes! Brown the meats first in a skillet, then transfer everything to the slow cooker. Cook on low for 7-8 hours or high for 4-5 hours. The slow cooker method actually enhances the tenderness of the meats. Just add the beans during the last 30 minutes of cooking to prevent them from getting mushy. The flavors will meld beautifully in the enclosed environment.
What are the best toppings for this chili?
Classic toppings work perfectly: shredded cheddar cheese, sour cream, chopped green onions, and fresh cilantro add brightness and creaminess. For extra crunch, try crushed tortilla chips or diced avocado. A sprinkle of crumbled cotija cheese or pickled jalapeños adds an authentic Mexican touch. Don’t forget a drizzle of hot sauce for those who want more heat!

- 3lb Prime Rib Roast Recipe: Juicy Pink Center Guaranteed in 3 Hours - October 31, 2026
- 5 Spice Cake Recipe: Warmly Spiced Layers With Crunchy Top - October 31, 2026
- 1950’s Macaroni and Cheese Recipe: Nostalgic Creamy Cheese Sauce with Buttery Noodles - October 31, 2026