
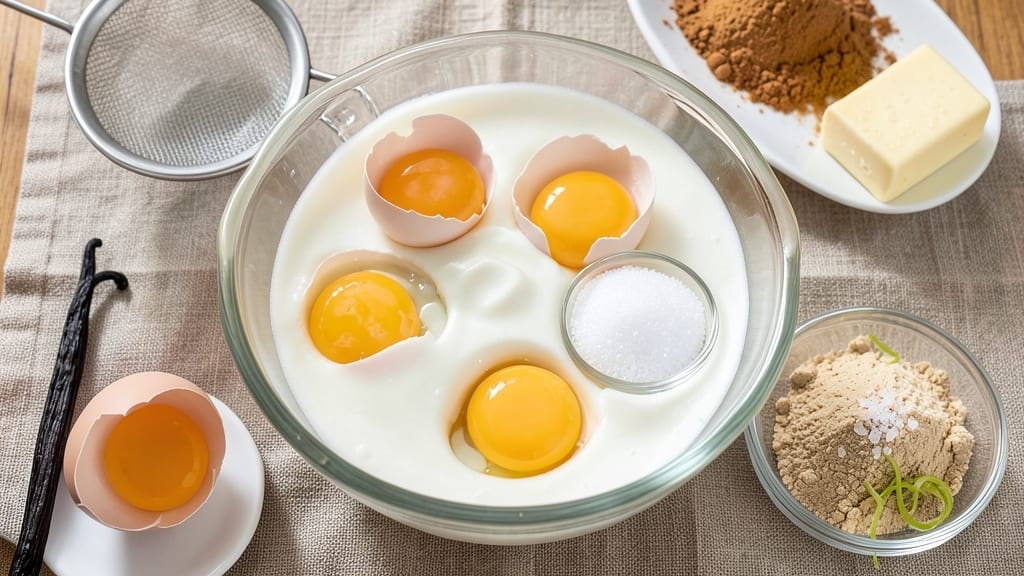
A 5-egg sponge cake delivers the lightest, airiest layers you’ve ever tasted, with a vanilla bean swirl that takes it from simple to extraordinary.
This recipe is all about precision—whisking eggs to ribbons, folding in flour gently, and baking at the perfect temperature to create a cake so tender it practically dissolves on your tongue. I’ve perfected this method over years of baking, and the secret lies in patience and technique, not shortcuts.
What sets this sponge cake apart is its foolproof structure: no butter, no oil, just eggs, sugar, and flour combined with care. The five eggs provide the lift, while the vanilla bean infuses every layer with aromatic depth.
Baking at 350°F for 30-35 minutes ensures even rise and golden edges without overcooking. The result? A cake that’s delicate yet sturdy enough to hold layers of filling or frosting without collapsing.
Once baked, the cake transforms into cloud-like layers that separate effortlessly, ready for your favorite filling—vanilla cream, chocolate ganache, or fresh berries. The vanilla bean swirl adds a luxurious touch, making this cake perfect for celebrations or an indulgent weekend treat.
With minimal ingredients and straightforward steps, this recipe proves that the best desserts often require the least fuss.
For those who love to customize, you can experiment with citrus zest in the batter or add a hint of almond extract for depth. Serve it fresh from the oven, chilled, or at room temperature—each way offers a different experience.
Let’s get started on creating a cake that will impress even the most discerning dessert lovers.
Ingredients for 5 egg sponge cake
Five eggs, one vanilla bean, and patience create the lightest sponge cake you’ll ever bake.
| Ingredient | Amount | Notes |
|---|---|---|
| Large Eggs 🥚 | 5 whole | Room temperature, separated |
| Granulated Sugar 🍚 | 1 ½ cups | Superfine preferred for smoothness |
| All-Purpose Flour 🌾 | 1 ½ cups | Sifted, spooned lightly |
| Vanilla Bean 🌿 | 1 whole | Scraped seeds plus pod |
| Unsalted Butter 🧈 | ¼ cup | Melted, cooled slightly |
| Salt 🧂 | ¼ tsp | Fine sea salt preferred |
| Vanilla Extract 🍯 | ½ tsp | Pure vanilla for depth |
| Lemon Zest 🍋 | 1 tsp | Organic preferred, no pith |
| Powdered Sugar 🍚 | 1 cup | For dusting layers |
| Heavy Cream 🥛 | ½ cup | Whipped for filling (optional) |
The eggs are non-negotiable here—room temperature is key for proper whisking. Kirkland Signature or Vital Farms eggs work best for their consistent quality. If you can’t find vanilla beans, Madagascar or Bourbon varieties from Williams Sonoma are my go-tos—they’re worth the splurge for that authentic aroma. Superfine sugar dissolves faster, but regular granulated works if pulsed in a food processor. The butter? Land O’Lakes European Style melts beautifully without graininess. For the flour, Bob’s Red Mill is my trusty brand—it’s finely milled and consistent.
No vanilla bean? Double the vanilla extract and add a pinch of almond extract for depth. Short on eggs? Use aquafaba (chickpea brine) at 3 tbsp per missing egg, but it won’t be as light. The lemon zest can be swapped for orange zest if you prefer. For the powdered sugar, Domino is fine, but Wholesome Sweeteners has a smoother texture. The whipped cream filling is optional—if you skip it, a light dusting of powdered sugar and fresh berries makes this cake feel just as special. Pre-sifted flour? Measure it directly from the bag to avoid compaction.
Egg whites hold their stiffness for about 2 hours at room temperature, so plan ahead. Store dry ingredients (flour, sugar, powdered sugar) in airtight containers for up to 6 months. The vanilla bean pod can be frozen for 1 year—just remove it before adding to recipes. Once baked, the cake keeps 3 days at room temperature covered loosely with plastic, or 5 days refrigerated. Freeze layers for up to 3 months between parchment paper. The secret to serving? Let it cool completely before assembling—patience prevents collapse.
Why You’ll Love This Recipe
- No Mixer Needed: I swear by this recipe on days when I forget to take my stand mixer out of storage. Five eggs and a whisk? That’s all you need for light, airy layers—no electric help required.
- Butter + Vanilla Magic: That split vanilla bean and cold butter make this cake taste like a bakery secret. Rich but not heavy, with a whisper of floral sweetness that lingers.
- Double-Duty Cake: Slice it fresh for breakfast with berries, or bake extra layers to freeze for later. It’s my go-to for impromptu desserts or a quick coffee cake—no one ever guesses it’s this simple.
- Budget Baking Wins: Five eggs give you maximum volume for minimal cost, and the sugar-butter ratio stretches far. Honestly, it’s the kind of recipe that makes me feel fancy without breaking the bank.
Step-by-step instructions for light-as-air vanilla bean sponge cake
This method delivers perfectly fluffy layers with a delicate vanilla swirl—every step matters for that signature texture.
Separate Eggs and Whip Meringues to Stiff Peaks
Place the 5 whole Large Eggs in a cold bowl and separate them carefully, keeping yolks and whites in separate containers. I like to use a fine-mesh strainer for this—it catches any stray bits of yolk that could prevent proper whipping. Add the 1 tsp Lemon Zest and 0.25 tsp Salt to the whites and beat them on medium-high speed until soft peaks form.
Gradually add the 1.5 cups Granulated Sugar while continuing to whip. Increase speed to high and whip until the meringue is glossy and forms stiff peaks that hold their shape when the whisk is lifted. This step is crucial—under-whipped meringue leads to dense cake. You’ll know it’s ready when the bowl feels cool to the touch and the meringue leaves a trail when you lift the whisk.
Whisk Yolk Mixture and Fold into Meringue
In a separate bowl, whisk together the egg yolks, 0.25 cup Unsalted Butter (melted and cooled slightly), 0.5 tsp Vanilla Extract, and the scraped seeds from the 1 whole Vanilla Bean. Add the 1.5 cups All-Purpose Flour (sifted) and mix gently until just combined—don’t overmix or you’ll develop gluten and ruin that light-as-air texture.
With a silicone spatula, gently fold one-third of the meringue into the yolk mixture to lighten it. Then fold in the remaining meringue in two additions, being careful to cut through the center and gently turn the bowl to incorporate without deflating the air bubbles. The batter should be thick but still hold its shape when lifted with the spatula.
Bake in Two Layers for Even Rise
Preheat your oven to 350°F and line two 8-inch round cake pans with parchment paper. Divide the batter evenly between the pans, spreading it smoothly with an offset spatula. Bake for 25-30 minutes until the tops spring back when gently touched and a toothpick inserted comes out clean.
I always rotate the pans halfway through baking to ensure even browning. Let the cakes cool in the pans for 10 minutes before transferring to a wire rack to cool completely. This gradual cooling prevents cracking as the cakes shrink slightly. The layers should be light, tender, and just slightly domed in the center.
Layer with Vanilla Cream Filling
Whip the 0.5 cup Heavy Cream to soft peaks and fold in 1 cup Powdered Sugar until smooth. For the vanilla swirl, place one cake layer on a serving plate and spread half of the cream mixture evenly. Place the second layer on top and gently press down.
To create the swirl, pipe the remaining cream mixture around the edges of the cake, then use a small offset spatula to gently drag it toward the center in a circular motion. Dust the top and sides with additional Powdered Sugar for a professional finish. Serve immediately or refrigerate for up to 2 hours before serving for the best texture.
Pro Tips For Making 5 Egg Sponge Cake
- Whisk Eggs Until Cold: I learned this the hard way—stop beating the egg-sugar mix when it’s just pale and still cold to the touch. Room-temp eggs? Skip the extra 5 minutes of whisking. The moment it warms, you’ve overworked the proteins, and that cake turns dense instead of light. Trust the chill.
- Melt Butter Slowly: Unsalted butter in this recipe isn’t just fat—it’s flavor. Melt it over low heat until it’s just liquid (no browning) and let it cool to room temp before adding to the eggs. Hot butter shocks the eggs and can curdle the batter. Patience here makes the difference between “good” and “wow.”
- Sift Flour Twice: Yes, even if the recipe doesn’t say it. After mixing eggs, sugar, and butter, sift the flour again right before folding it in. The first sift removes lumps, but the second aerates it—more surface area means better gluten control. Your cake will rise higher and stay tender longer. (I know, it’s extra work, but it’s worth it.)
- Bake at 325°F, Not 350°F: This isn’t a “bake fast” cake—it’s a delicate one. If your oven runs hot (like mine does), start at 325°F and don’t open the door for the first 20 minutes. The center should spring back slowly when pressed, not bounce like a trampoline. Overbaking dries it out; underbaking leaves it gummy. The middle ground is where magic happens.
Essential equipment for this recipe
Stand Mixer Essentials
Your stand mixer is the MVP for this recipe—I swear by my KitchenAid Artisan Series with the flat beater and whisk attachments. The whisk attachment is non-negotiable for achieving those stiff meringue peaks without overworking the eggs.
If you’re on a budget, the Cuisinart SM-50 delivers similar results for half the price. Just make sure your bowl is chilled before starting—room temperature bowls can cause the egg whites to lose volume faster. 💛
Precision Scales
For the light-as-air texture, accuracy matters—especially with the 1.5 cups flour and 1.5 cups sugar. A digital kitchen scale like the OXO Good Grips ensures you hit those measurements precisely. I weigh my flour in grams (about 180g) and sugar (about 300g) for consistency.
Spooning flour directly from the bag into your measuring cup can add 20-30g extra, leading to a dense cake. Pro tip: Use the spoon-and-level method for measuring flour to avoid compaction.
Offset Spatula
A high-quality offset spatula (I use Misono’s 6-inch) is your best friend for spreading batter evenly and creating the vanilla swirl. The flexible head helps you glide through the batter without tearing the layers.
For assembling, a small offset spatula (about 3-inch) works perfectly for dragging the cream into that signature spiral. If you don’t have one, a butter knife in a pinch—but it won’t be as precise.
Vanilla Bean Scraper
Extracting every last bit of flavor from your vanilla bean is key. A small paring knife works, but a dedicated vanilla bean scraper (like Sur La Table’s) ensures you get all the seeds without damaging the pod.
Save the pod—it can be frozen for up to 1 year and reused in future recipes. For the vanilla swirl, I also use a microplane to zest the bean’s outer layer for extra aroma in the batter. 🌿
Cake Pans with Cooling Rack
Invest in two 8-inch round cake pans with removable bottoms (I love Wilton’s non-stick pans). They ensure even baking and make it easier to release the cakes without tearing. Pair them with a cooling rack—I use OXO’s Good Grips—to prevent soggy bottoms.Pro tip: Place the pans on the middle rack of your oven for even heat distribution. If your oven runs hot, reduce the temperature to 340°F to avoid overbrowning.
Mixing Bowls Set
A nested mixing bowl set (like Pyrex’s 5-piece) keeps your workspace organized. Use the largest bowl for whipping egg whites—it gives them room to expand. The medium bowl works for the yolk mixture, and the smallest bowl can hold your vanilla bean and butter while you prep.
I also keep a small glass bowl nearby to scrape down any stray batter from the sides during folding. This prevents gluten development and keeps the texture light. ⚡
Nutrition facts
Frequently asked questions
Why does this sponge cake use 5 eggs instead of 3 or 4?
The extra eggs create a lighter, more stable structure that holds its shape beautifully when layered. Five eggs provide enough protein and fat to create a tender yet sturdy crumb that won’t collapse with fillings. This is especially important for a vanilla swirl cake where the layers need to stay intact. Fewer eggs would make the cake too delicate for stacking.
Can I substitute vanilla extract for the vanilla bean?
Yes, but you’ll lose some depth of flavor. Use 1 teaspoon pure vanilla extract plus a pinch of almond extract for complexity. For the swirl filling, add a splash of vanilla bean paste if you have it. The bean’s seeds and pod add aromatic notes that extract can’t fully replicate. If you’re on a budget, Madagascar vanilla works best for this recipe.
How do I tell when the cake is fully baked?
Look for three key signs: the top should spring back when gently touched, a toothpick inserted should come out clean, and the edges should pull slightly away from the pan. Overbaking is easy with sponge cakes—30-35 minutes at 350°F is the sweet spot. If you’re unsure, err on the side of underbaking slightly; you can always put it back in for 2-3 minutes.
Why does my cake have tunnels or cracks?
Most likely, your egg whites weren’t whipped to stiff peaks or you overmixed the batter. For perfect texture, whip whites until they hold their shape when the whisk is lifted, and fold gently in three additions. Also ensure your eggs are room temperature—cold eggs won’t whip properly. If cracks appear, they’re usually cosmetic and don’t affect taste, but tunnels suggest under-whipped meringue.
Can I make this cake in a single layer instead of two?
Use a 9-inch round pan and bake for 35-40 minutes at 350°F. The single layer will be slightly denser but still light and tender. For presentation, dust with powdered sugar and add fresh berries or a light whipped cream topping. This works especially well for individual servings or when you don’t need layers for fillings.

- 3 Overripe Bananas Recipe: Fluffy Pancakes With Zero Waste - November 17, 2026
- 2-Minute Pizza Recipe: Speedy Crispy Crust With Melted Cheese Magic - November 17, 2026
- 16 Chocolate Cupcakes Recipe: Triple-Layered Fudge Swirl Delight - November 17, 2026