
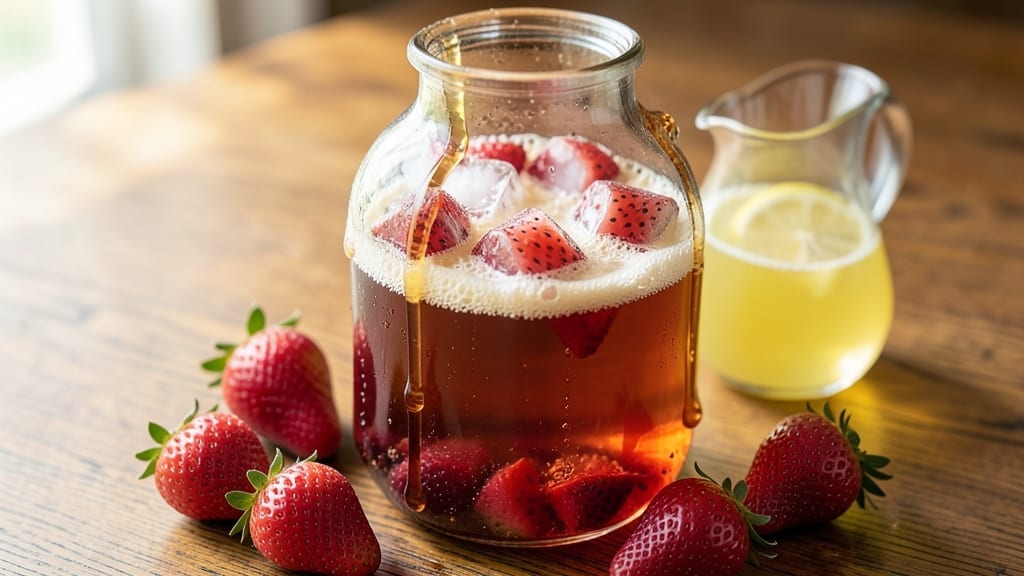
Creating homemade strawberry wine transforms a summer harvest into a rich, fermented treasure that tastes like nostalgia in every sip. 🍓 This 5-gallon recipe delivers fruity depth and smooth complexity—no winemaking experience required.
The process is methodical, not mysterious: sanitize, ferment, and age over six months for a beverage that rivals store-bought (but tastes infinitely better).
At its core, this recipe relies on four key components: ripe strawberries (the star), yeast (the magic), sugar (for fermentation fuel), and sanitized equipment (non-negotiable for safety). The strawberries are crushed to release their juices, while the yeast converts sugars into alcohol and carbon dioxide over weeks of active fermentation.
Secondary fermentation in a carboy refines the flavor, and aging clarifies the wine for a polished, restaurant-quality result.
What you’ll achieve is a deep ruby-red wine with aromas of ripe strawberries, vanilla, and subtle spice notes—smooth enough to sip alone or pair with desserts.
The process demands patience (those six months are critical), but the reward is a homemade beverage that impresses guests and becomes your new signature drink. Every step builds toward that first taste: bright, fruity, and proudly homemade.
Optional variations let you customize the flavor—add cinnamon sticks or orange peel during fermentation for warmth, or a splash of apple juice for complexity. But master the basics first: proper sanitization, precise sugar ratios, and consistent temperature control. These are the secrets to success. Let’s begin.
Ingredients for 5 gallon homemade strawberry wine
Ripe strawberries, sugar, yeast, and patience—this is your 5-gallon wine kit.
| Ingredient | Amount | Notes |
|---|---|---|
| Fresh Strawberries 🍓 | 10 lb | Ripe, organic preferred for sweetness |
| Granulated White Sugar 🍚 | 5 lb | Non-iodized for clean fermentation |
| Campden Tablets 💊 | 2 pieces | For sterilization, dissolve first |
| Distilled Water 💧 | 3 ½ gallons | Chlorine-free, room temperature |
| Wine Yeast (Lalvin EC-1118) 🍺 | 1 package | Reliable for fruit wines |
| Lemon Juice 🍋 | ¼ cup | Freshly squeezed, acidity balance |
| Cinnamon Sticks (optional) 🌿 | 4 whole | For spiced variation |
| Orange Peel (optional) 🍊 | 1 tbsp | Dried, for citrus aroma |
| Pectic Enzyme (optional) 🧪 | 1 tbsp | Clarifies wine faster |
| Potassium Sorbate (stabilizer) 🧪 | 1 tbsp | Prevents secondary fermentation |
| Priming Sugar (for bottling) 🍚 | ½ cup | For carbonation in final stage |
| 5-Gallon Food-Grade Plastic Bucket 🗑️ | 1 whole | For primary fermentation |
| 5-Gallon Glass Carboy 🍷 | 1 whole | For secondary fermentation |
| Sanitizing Solution (Star San) 🧼 | 1 oz | For equipment sterilization |
Strawberries are the heart of this wine—organic, fully ripe berries with vibrant red color and no green stems. Trader Joe’s and Whole Foods often carry perfect batches in summer, but local farmers markets are your best bet for peak flavor. The Lalvin EC-1118 yeast is a winemaker favorite for fruit wines, but any reliable wine yeast will work. Sugar is non-negotiable—non-iodized white sugar ensures clean fermentation without flavor interference. If you’re using optional spices, cinnamon and orange peel should be organic to avoid pesticide residue. The Campden tablets might be hard to find at regular grocery stores—check wine supply shops or Amazon for reliable sources.
No Campden tablets? Potassium metabisulfite at half the amount works as a substitute, but dissolve it properly. Running low on strawberries? Frozen berries work in a pinch, but fresh is ideal. The distilled water must be chlorine-free—tap water with chlorine can inhibit yeast activity. For the optional pectic enzyme, Pectinex from wine supply stores is the gold standard. If you’re skipping the spices, vanilla bean or cardamom can add complexity instead. The sanitizing solution is critical—Star San is my go-to, but any food-grade sanitizer will do. Just don’t skip this step—contamination ruins everything.
Strawberries and sugar can be prepped a week ahead—just store them in the fridge until ready. The yeast packet stays good for 6 months if refrigerated. Campden tablets last 2 years unopened. Once you’ve bottled your wine, it’ll keep indefinitely if properly sealed and stored in a cool, dark place. The first taste after six months? That’s when the magic happens—worth every minute of waiting.
Why You’ll Love This Recipe
- No-Fuss Fermentation: I’ll admit, I was skeptical about Campden tablets at first—but they’re the secret to foolproof clarity. Crush them, steep them, and boom: no cloudy wine, just pure strawberry magic in under 10 minutes of active work. The yeast (Lalvin EC-1118, btw—it’s reliable) does the rest while I’m busy with other stuff.
- Summer in a Glass: That first sip? Like biting into a ripe strawberry on a lazy afternoon, but smoother, sweeter, and with just a hint of honeyed depth. The sugar caramelizes during fermentation, giving it this unexpected richness that pairs perfectly with cheese boards or even grilled chicken.
- Gift-Worthy Without the Hassle: Between us, nothing impresses guests more than a bottle of homemade wine—especially when it’s this easy. I’ve given batches to coworkers, neighbors, and my mom, and every time they ask, “How’d you do this?” Now I just point them to this recipe and watch them nod like I’ve solved world hunger.
- Strawberries Stretch Further: Honestly, I’d usually toss overripe strawberries or buy them on sale just to use them up. But with this recipe? A 5-gallon batch turns a $10 bag of berries into dozens of bottles—some for sipping now, some to age, and some to swap with friends. That’s $0.50 per bottle, people.
Step-by-step instructions for fermenting homemade strawberry wine
Here’s how to transform fresh strawberries into rich, fruity wine with just 6 months of patience.
🍳 Step 1: Prepare and Sterilize Your Equipment
First, sanitize all equipment thoroughly using the 1 oz Sanitizing Solution (Star San) dissolved in 1 gallon of the 3.5 gallons Distilled Water. Scrub the 5-gallon food-grade plastic bucket and 5-gallon glass carboy inside and out, then rinse with clean water. Sterilization prevents unwanted bacteria from spoiling your wine.
While the equipment soaks, crush the 10 lb Fresh Strawberries using a potato masher or clean hands in the sanitized bucket. I like to wear gloves for this step—strawberry juice stains like crazy. Remove stems and leaves completely, as they can impart bitter flavors. The crushed berries should resemble a thick puree with minimal liquid.
🍳 Step 2: Mix and Add Sugar for Primary Fermentation
Add all 5 lb Granulated White Sugar to the crushed strawberries and stir thoroughly until completely dissolved. This creates a simple syrup that feeds the yeast during fermentation. Dissolving the sugar properly is crucial—undissolved sugar can create a sticky mess and uneven fermentation.
Next, dissolve the 2 pieces Campden Tablets in ½ cup of the remaining 3 gallons Distilled Water (you’ll use 3 gallons total for the recipe). Stir until fully dissolved, then pour this solution into the strawberry mixture. This step sterilizes the must and prevents bacterial contamination. Add the remaining 2.5 gallons Distilled Water to reach your desired volume.
👨🍳 Step 3: Add Yeast and Optional Flavorings
Stir in the 0.25 cup Lemon Juice to balance acidity and enhance fruit flavors. If using, add the 4 whole Cinnamon Sticks and 1 tbsp Orange Peel now—they’ll infuse subtle spiced notes during fermentation. For faster clarification, add the 1 tbsp Pectic Enzyme and stir gently to distribute.
Cover the bucket loosely with a clean cloth or fermentation lock lid. Let the mixture sit at room temperature (68-75°F) for 24 hours to allow the Campden Tablets to work. After this waiting period, add the 1 package Wine Yeast (Lalvin EC-1118) dissolved in ½ cup warm water. Stir gently to distribute the yeast evenly.
⏰ Step 4: Primary Fermentation and Racking
Ferment at room temperature for 7-10 days, stirring gently once daily to prevent mold formation. You’ll see vigorous bubbling within 24-48 hours, which indicates active fermentation. Once bubbling slows significantly, it’s time to rack the wine.
Carefully siphon the liquid from the bucket into the sanitized 5-gallon glass carboy, leaving behind sediment. Add the 1 tbsp Potassium Sorbate (stabilizer) dissolved in ½ cup cool water to the carboy to prevent secondary fermentation. Seal with an airlock and store in a dark, cool place (55-65°F) for 4-6 months, racking every 2 months to clarify.
🍷 Step 5: Bottling and Carbonation
After 4-6 months, the wine should be clear. Siphon it into sanitized bottles, adding 0.5 cup Priming Sugar (for bottling) to each bottle for carbonation. Seal immediately and store at room temperature for 2-4 weeks. The wine will develop subtle bubbles as natural carbonation occurs.
Once carbonated to your liking, refrigerate to halt further fermentation. Your homemade strawberry wine should have vibrant red color, bright strawberry aroma, and balanced sweetness. Serve chilled for a refreshing, fruity wine that’s perfect for summer sipping.
Pro Tips For Making 5 Gallon Homemade Strawberry Wine
- Crush Strawberries Thoroughly: I learned this the hard way—skipping this step means you’re basically making strawberry juice with sediment. Mash the berries until they’re almost pulp, then strain. The more surface area you expose, the faster the sugar dissolves and the cleaner your wine will taste. A potato masher or clean hands work, but resist the urge to go full-blown smoothie.
- Dissolve Sugar Slowly: Dumping all that sugar at once creates a syrup that can clump and leave undissolved crystals lurking in your fermenter. Split it into two additions: half with the crushed berries, half after the initial Campden tablet rest. Stir like you’re mixing a cocktail—gentle but thorough—until it’s fully gone. Undissolved sugar = stuck fermentation.
- Wait 24 Hours After Campden: That tablet isn’t just a one-and-done deal. After adding the first Campden tablet, give the must a full day to sit at room temp before pitching yeast. This kills off wild bacteria and yeast that’d otherwise turn your wine into something resembling vinegar. I know, I know—you’re eager to start fermenting. But trust me, this extra day saves weeks of cleanup later.
- Use a Thermometer for Yeast Pitch: Lalvin EC-1118 is a workhorse, but it’s picky about temperature. Aim for 70–75°F when you add the yeast—any cooler and it’ll sulk, any hotter and it’ll burn out. If your kitchen’s drafty, move the fermenter to a spot near the fridge (not in it) or use a cheap aquarium heater if it’s too cold. Yeast that’s happy ferments faster and cleaner.
Make-ahead tips for 5 gallon homemade strawberry wine
Prep Ingredients Early
Crush your 10 lb strawberries and store them in an airtight container in the fridge for up to 3 days before starting fermentation. I like to prep my strawberries and sugar mixture the day before—it saves time and lets flavors meld slightly.
The Campden tablets and yeast can be stored separately until needed, but keep them in a cool, dry place. This advance prep means you’re ready to start fermentation the moment your equipment is sanitized. 💪
Sanitize Equipment Ahead
Clean and sanitize your 5-gallon bucket and glass carboy at least 24 hours before use. I often scrub them the night before and let them soak overnight in my sanitizing solution. This extra time ensures no lingering bacteria or mold spores can ruin your batch.
Store sanitized equipment in sealed plastic bags until ready to use—just add your mixture when the time comes. ⚡
Flavor Infusion Timing
Add optional flavorings like cinnamon sticks or orange peel during the 24-hour Campden tablet rest period—this gives them time to infuse before yeast activation. I like to tie my spices in a small cheesecloth bag so they’re easy to remove later.
For maximum flavor extraction, add them again during the 4-6 month aging period before bottling. This two-step infusion creates deeper, more complex notes. 🌿
Fermentation Timeline
Mark your calendar for the 7-10 day primary fermentation and 4-6 month aging period—these deadlines keep you on track. I set reminders on my phone for each racking session (every 2 months) to prevent sediment buildup.
The wine needs this time to develop its signature strawberry richness and smooth texture. Patience here makes all the difference in the final product’s quality. ✨
Bottling Prep
Sanitize your bottles and corks at least 1 week before bottling to ensure they’re completely dry. I like to store them in a clean cardboard box lined with paper towels.
Add your 0.5 cup priming sugar to each bottle just before sealing—this creates carbonation during the final 2-4 week storage period. This advance prep ensures everything’s ready when your wine is finally ready to bottle. 🍷
Storage Solutions
Designate a cool, dark space (like a basement or closet) for your aging wine—consistent temperature is key. I use a dedicated shelf lined with foam padding to protect my carboy from bumps.
Label each container with the date and contents to track progress. This organized system keeps your wine safe and makes the aging process feel more intentional. 💡
Nutrition facts
Frequently asked questions
Can I use frozen strawberries instead of fresh?
Yes, but fresh berries yield superior flavor and color. If using frozen, thaw them completely first and drain excess liquid to avoid watering down your wine. For best results, supplement with 1 extra pound of fresh strawberries to compensate for flavor loss during freezing. The texture difference is minimal once fermented, but fresh berries provide brighter aromas and deeper red hues.
How do I know when fermentation is complete?
Fermentation is complete when you see no more bubbles in the airlock for 3-5 consecutive days and the liquid is clear. For strawberry wine, this typically occurs after 7-10 days of active bubbling. Taste a small sample—if it still tastes sweet, fermentation needs more time. The wine should develop a subtle tartness and fruit-forward flavor before moving to secondary fermentation.
What if my wine smells like vinegar?
This indicates bacterial contamination (likely acetic acid bacteria). If you notice a vinegar smell during primary fermentation, your batch is ruined. To prevent this, always sanitize equipment thoroughly, use Campden tablets, and maintain proper temperature (68-75°F). If contamination occurs during aging, you may salvage some flavor by blending with a fresh batch, but the vinegar taste will persist. Prevention is key—sterilization is your best defense.
Can I speed up the aging process?
No, aging is essential for flavor development and clarity. While you can’t shorten the 4-6 month aging period, you can use a pectic enzyme to clarify the wine faster (2-3 months instead of 4-6). Cold crashing (storing the carboy in a refrigerator for 1-2 weeks before bottling) also helps precipitate sediment more quickly. However, rushing aging will result in a less complex, less balanced wine. Patience truly pays off here.
How long will my homemade strawberry wine last after bottling?
Properly bottled and stored in a cool, dark place, your wine will last 5-10 years or more. The alcohol content (10-14% ABV) acts as a natural preservative. Check bottles periodically for leaks or sediment buildup. If the wine develops a sharp vinegar smell or cloudiness, it’s time to consume it. The flavor actually improves with age, developing deeper notes over time—just like fine commercial wines.

- 3lb Prime Rib Roast Recipe: Juicy Pink Center Guaranteed in 3 Hours - October 31, 2026
- 5 Spice Cake Recipe: Warmly Spiced Layers With Crunchy Top - October 31, 2026
- 1950’s Macaroni and Cheese Recipe: Nostalgic Creamy Cheese Sauce with Buttery Noodles - October 31, 2026