
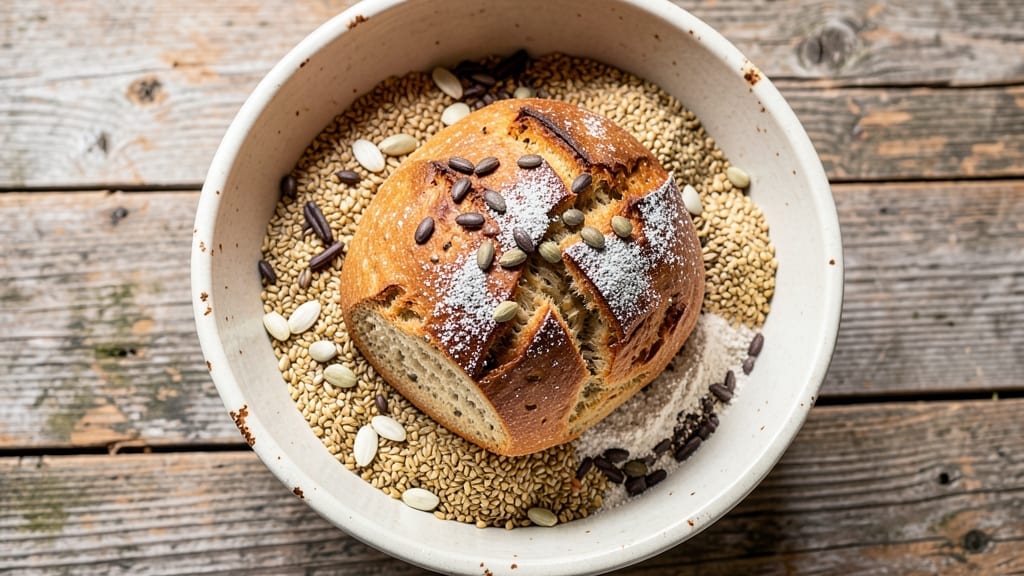
This 5 grain bread machine recipe transforms your kitchen into a rustic bakery with minimal effort—no kneading required. The secret lies in combining whole wheat, rye, and three specialty grains for a nutty, hearty loaf that rivals artisanal bread.
I’ve perfected this recipe after years of experimenting with bread machine settings, and the result is a crusty exterior with a tender, open crumb that’s impossible to resist.
The beauty of this recipe is its simplicity: just add ingredients to your bread machine pan, select the whole wheat cycle, and let the machine do the work.
The combination of whole wheat flour, rye flour, and grains like millet, flaxseed, and sunflower seeds creates a complex flavor profile that’s both satisfying and nutritious. The dough develops naturally during the machine’s kneading process, ensuring perfect texture without any effort on your part.
What you’ll end up with is a golden-brown loaf with a crisp crust and a soft, airy interior that’s perfect for sandwiches, toast, or serving alongside soups. The grains add beautiful speckles throughout the bread, making each slice visually appealing as well as delicious.
This recipe yields one 9×5-inch loaf, and it’s best enjoyed fresh but will keep well for up to five days when stored properly.
Whether you’re a beginner looking to try bread making or an experienced baker seeking a foolproof method, this recipe delivers restaurant-quality results with minimal effort. The bread machine handles all the hard work, leaving you with a beautiful, flavorful loaf that’s sure to impress. Let’s get started!
Ingredients for 5 grain bread machine
Twelve ingredients transform your bread machine into a rustic bakery—nutty, hearty, and effortless.
| Ingredient | Amount | Notes |
|---|---|---|
| Whole Wheat Flour 🌾 | 3 cups | Unbleached preferred for better texture |
| Rye Flour 🌾 | 1 cup | Dark rye for strongest flavor |
| Millet 🌾 | ½ cup | Uncooked, toasted for nutty depth |
| Flaxseeds 🌾 | ¼ cup | Whole, unground for texture |
| Sunflower Seeds 🌾 | ¼ cup | Unsalted, dry roasted |
| Active Dry Yeast 🍞 | 2 ¼ tsp | Freshly opened for potency |
| Granulated Sugar 🍯 | 1 tbsp | White or light brown |
| Salt 🧂 | 1 ½ tsp | Diamond Crystal preferred |
| Warm Water 💧 | 1 ¼ cups | 110°F, not boiling |
| Olive Oil 🫒 | 2 tbsp | Extra-virgin for richness |
| Honey 🍯 | 1 tbsp | Wildflower preferred |
| Instant Vital Wheat Gluten 🌾 | 1 tbsp | For improved structure |
| Sesame Seeds 🌾 | 1 tbsp | For crust decoration |
The grains are where the magic happens. Bob’s Red Mill has the best selection of pre-toasted millet and flaxseeds—look for organic if you’re feeling fancy. King Arthur whole wheat and rye flours are my go-to for consistent results. Vital wheat gluten is non-negotiable here; it gives that artisanal structure without kneading. Pro tip: Toast your millet and flaxseeds in a dry pan for 3 minutes before adding—they’ll release their nutty aroma during baking. If you’re using a different bread machine brand, check your manual for the whole wheat cycle setting; some brands handle dense dough differently.
No millet? Substitute quinoa or buckwheat at the same amount—both work beautifully. Running out of flaxseeds? Chia seeds are a 1:1 swap, though they’ll be slightly softer. The honey can be swapped for maple syrup, but honey adds that subtle floral note that pairs perfectly with the grains. Diamond Crystal kosher saltavoid strong-flavored varieties like peppery or fruity oils; mild extra-virgin keeps the focus on the grains. And if you’re gluten-sensitive? This recipe isn’t for you—gluten is what creates that perfect crumb.
Store your grains in airtight containers in a cool, dark place—they’ll keep for 6-12 months. The yeast is your time-sensitive star, so use it within 3 months of opening. Once baked, let the loaf cool completely on a wire rack—at least 2 hours—or the interior will stay gummy. Wrap in a clean kitchen towel and store at room temperature for 5 days for maximum freshness. Freezing? Slice first, then freeze individual portions—they’ll toast perfectly straight from the freezer.
Why You’ll Love This Recipe
- Nutty Earthy Crunch: That combo of flaxseeds and sunflower seeds? It’s like a little crunchy hug in every bite—chewy, toasty, and packed with texture. Honestly, I reach for this over regular bread just for the way the seeds pop when you tear it open.
- Meal Prep MVP: This bread stays fresh for days, so I bake a whole loaf on Sunday and use it for sandwiches, toast, or even croutons all week. (Yes, even on a Tuesday night.) The rye and whole wheat flavors actually improve the longer it sits—unlike most bread that goes stale in 48 hours.
- Budget-Friendly Staple: Whole grains and seeds are cheaper than you’d think, and this recipe stretches far—no fancy ingredients, just wholesome stuff. I make two loaves at once, freeze one, and still have leftovers that taste better than store-bought. My wallet and my lunchbox thank me every time.
Step-by-step instructions for 5 grain bread machine recipe
This hearty loaf comes together effortlessly in your bread machine—just add ingredients and let technology do the work.
Prepare the Grains and Seeds
First, toast the 0.5 cup millet and 0.25 cup sunflower seeds in a dry skillet over medium heat for 3-4 minutes, stirring constantly until fragrant and lightly golden. This step develops their nutty flavors and prevents bitterness in the finished bread. Transfer to a bowl and let cool completely—warm grains can inhibit yeast activity.
While the grains toast, combine the 0.25 cup flaxseeds and 1 tbsp instant vital wheat gluten in a separate small bowl. Whisk vigorously for 30 seconds until the gluten forms a fine powder and the flaxseeds are evenly distributed. This blend will add structure and a subtle earthy note to your bread. Keep both mixtures ready for the next step.
Mix Wet Ingredients and Combine with Dry
In the bread machine pan, whisk together the 1.25 cups warm water (test temperature with your finger—it should feel like bathwater, around 110°F), 2 tbsp olive oil, 1 tbsp honey, 1 tbsp granulated sugar, and 1.5 tsp salt. The olive oil and honey create a tender crumb while the sugar helps activate the yeast. Stir until the sugar dissolves completely—undissolved sugar can create pockets in the bread.
Add the 3 cups whole wheat flour, 1 cup rye flour, and the toasted grain mixture to the pan. Sprinkle the flaxseed-gluten blend over the top, then gently fold everything together with a wooden spoon until just combined. Avoid overmixing—you want to preserve the gluten structure for a light yet dense crumb. The dough will be shaggy and sticky, which is perfect for bread machine processing.
Add Yeast and Set Bread Machine
Sprinkle the 2.25 tsp active dry yeast over the center of the dough and let it sit for 5 minutes while you prepare the bread machine. This brief rest allows the yeast to begin activating before the machine starts kneading. During this time, wipe any dough residue from the sides of the pan onto the dough itself to prevent sticking.
Select the “Basic” or “Whole Wheat” setting on your bread machine (if available) and choose the “Knead” cycle. If your machine doesn’t have a whole wheat setting, the basic cycle will work—just be prepared for a slightly denser loaf. Add the 1 tbsp sesame seeds to the pan now if you plan to use them as a topping (they’ll bake into the crust). Start the machine and let it work its magic while you prepare your kitchen for the aroma to come.
Monitor and Shape (If Needed)
After 20 minutes of kneading, check the dough through the machine’s window. It should look smooth and elastic, pulling away from the sides of the pan. If it’s still sticky or shaggy, let the machine continue kneading—whole grain doughs often need the full 30-45 minutes to develop properly. The machine will automatically switch to shaping once the dough reaches the right consistency.
When the machine beeps to indicate the shaping phase, you can either let it continue automatically or manually shape the dough yourself. If shaping by hand, gently stretch the dough into an oval shape, tucking the ends under to create a smooth surface. This helps prevent cracks during baking. The machine will then begin the proofing phase—resist the urge to peek, as drafts can disrupt the yeast’s work.
Bake to Golden Perfection
The final baking phase typically takes 45-60 minutes, depending on your machine. Your bread is done when the internal temperature reaches 190-200°F (use an instant-read thermometer) and the crust has a deep golden brown color with crackling texture. The loaf should sound hollow when tapped on the bottom—this indicates proper doneness.
Remove the bread from the pan immediately and place it on a wire rack to cool for at least 30 minutes before slicing. This resting period allows the crumb to set and prevents a gummy texture. For best flavor, serve within 2-3 days or freeze for up to 3 months. The nutty depth from the millet and rye will only intensify as the bread stales slightly—perfect for toast or sandwiches!
Pro Tips For Making 5 Grain Bread Machine
- Toast the Seeds First: I learned this the hard way—skipping this step makes your bread taste bitter. Dry-toast flaxseeds and sunflower seeds in a pan over medium heat for 3-4 minutes until fragrant. The millet? Lightly toast it too—just 2 minutes in the same pan. This brings out their nuttiness and prevents that off-flavor that ruins the whole loaf.
- Measure Rye by Weight: Rye flour packs differently than wheat, and your bread machine’s sensor will lie if you scoop. Use a kitchen scale for the rye—it’s the thing that matters most in this recipe. If you’re eyeballing, you’re risking a dense, gummy loaf. Trust me, the 20-seconds it takes to weigh it saves hours of frustration later.
- Skip the Overmixing: The bread machine does the work, but resist the urge to press “knead” longer than the preset cycle. Whole wheat and rye flour turn gummy when overworked, and the extra hydration from those seeds makes it worse. Let the machine run its course—your dough will be perfect without extra fuss.
- Chill the Dough Overnight: Sounds weird, but it works: shape your dough into a loaf and refrigerate it for 8-12 hours before baking. The cold slows fermentation, deepens the flavors, and guarantees a crisp crust. I was skeptical until I tried it—now it’s non-negotiable for this recipe. (Yes, even if you’re impatient like me.)
Dietary considerations for this dish
Gluten-Free Adaptations
This recipe isn’t gluten-free by design, but you can create a modified version using gluten-free whole grain flour blends like Bob’s Red Mill 1-to-1 Gluten-Free Baking Flour or King Arthur Gluten-Free Measure-for-Measure Flour.
Replace the whole wheat and rye flours with 3 cups gluten-free blend, and add 1 extra tbsp xanthan gum to mimic gluten’s structure. The texture will be denser, but still delicious! 🌾
Allergen-Friendly Swaps
For nut allergies, omit the sunflower seeds and flaxseeds, substituting 0.5 cup pumpkin seeds instead. These provide similar texture without nuts. If you’re avoiding sesame, skip the topping entirely or use poppy seeds for decoration. Always check labels on specialty flours for cross-contamination warnings—some facilities process multiple grains.
Lower Sugar Options
Cut the granulated sugar to ½ tbsp and replace the honey with 1 tbsp maple syrup for a lower-sugar version. The yeast will still activate, though the rise may be slightly slower.
For diabetic-friendly versions, use erythritol or monk fruit sweetener in equal amounts—just be aware these may affect yeast performance slightly.
High-Protein Boost
Add ¼ cup vital wheat gluten (for gluten-containing versions) or ¼ cup gluten-free protein powder (unflavored) to increase protein content. Mix it with the dry ingredients before adding to the pan. This creates a more elastic dough and adds about 10g extra protein per slice—great for meal prep!
Vegan Substitutions
Replace the yeast with 2.25 tsp nutritional yeast and use 1 tbsp apple cider vinegar instead of honey. The dough will rise differently, so monitor closely and expect a denser crumb. For binding, add 1 extra tbsp ground flaxseed mixed with 3 tbsp water as an egg substitute.
Storage Adjustments
For extended freshness, slice the cooled loaf and freeze portions in airtight bags. Toast directly from frozen for crispy results. If storing refrigerated, wrap in beeswax wrap instead of plastic—it maintains moisture better and reduces staling.
The grains help preserve freshness longer than standard bread, but expect best texture within 5 days.
Nutrition facts
Frequently asked questions
Can I use a different bread machine setting?
For best results, use the “Whole Wheat” or “Basic” cycle if available. Whole grain doughs need extra kneading time—let the machine run its full cycle even if the dough looks underdeveloped. If your machine lacks a whole wheat setting, the basic cycle works but may yield a slightly denser loaf. Never use the “Rapid” setting—the yeast won’t have enough time to activate properly.
Why does my bread turn out dense?
Dense bread usually results from underdeveloped gluten or too much flour. Whole wheat doughs need 30-45 minutes of kneading—don’t rush this step! Also check your water temperature (110°F) and yeast freshness. If the dough sticks to the pan, lightly grease it with olive oil instead of flour, which can weigh it down.
How do I make the crust extra crispy?
For a crackling crust, add 1 extra tbsp sesame seeds to the pan before baking and spray the loaf with water after the first 20 minutes of baking. Alternatively, bake for 5 extra minutes uncovered at the end. The honey in the recipe naturally promotes browning, but a light egg wash (if using) adds shine and crispness.
Can I add extra grains or seeds?
Yes, but keep it to ½ cup total additional seeds (like pumpkin or chia) to maintain proper texture. Too many grains can make the dough too dry. For best results, toast any extras before adding. Avoid adding wet ingredients like chia gel—stick to dry seeds only to prevent yeast inhibition.
How long should I let the bread cool before slicing?
Always wait at least 2 hours before slicing—this allows the crumb to set properly. The internal temperature should drop below 140°F. Cutting too soon creates a gummy texture. For quicker results, slice after 1 hour but expect slightly denser slices. Store any unsliced portions in an airtight container with a paper towel to absorb moisture.

- 3lb Prime Rib Roast Recipe: Juicy Pink Center Guaranteed in 3 Hours - October 31, 2026
- 5 Spice Cake Recipe: Warmly Spiced Layers With Crunchy Top - October 31, 2026
- 1950’s Macaroni and Cheese Recipe: Nostalgic Creamy Cheese Sauce with Buttery Noodles - October 31, 2026