
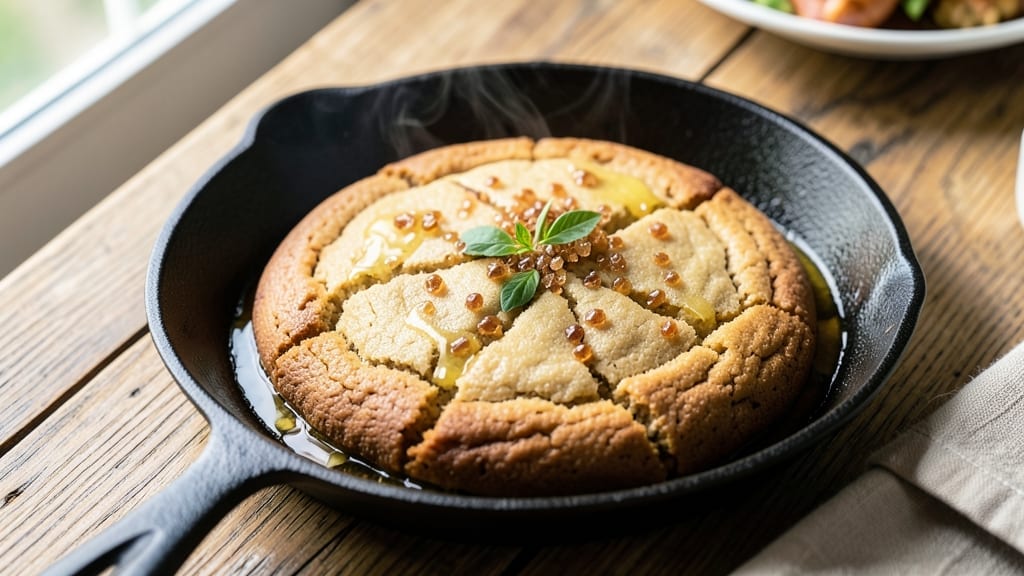
Mastering a 5-inch skillet cookie recipe transforms ordinary baking into a showstopping dessert experience—where crispy edges meet gooey centers in every bite. The secret lies in the cast-iron skillet, which creates the perfect caramelized crust while keeping the inside soft and warm.
I’ve tested countless variations, and this method delivers restaurant-quality results with minimal effort. The process is simpler than it sounds: mix your dough, press it into a well-seasoned skillet, and bake until the edges turn golden and the center stays tender. No fancy equipment needed—just patience and a well-heated oven.
The skillet’s heat retention ensures even baking, eliminating the guesswork of traditional cookie sheets. What you’ll end up with is a cookie that’s crispy around the edges, still warm and gooey in the center, and perfectly portioned for sharing.
The aroma alone will have everyone gathering in the kitchen, waiting for their slice. This isn’t just a cookie—it’s a dessert experience. Serve warm with a scoop of vanilla ice cream or a drizzle of melted chocolate for the ultimate indulgence. Let’s get started on creating these crowd-pleasing skillet cookies.
Ingredients for 5 inch skillet cookie
Pantry staples plus a few specialty touches—this skillet cookie recipe delivers restaurant-quality results.
| Ingredient | Amount | Notes |
|---|---|---|
| Unsalted Butter 🧈 | ¾ cup | Cold, cubed for even baking |
| Light Brown Sugar 🍚 | ¾ cup | Packed, no substitutions |
| Granulated Sugar 🍚 | ½ cup | For crispy edges |
| Large Eggs 🥚 | 2 whole | Room temperature preferred |
| Vanilla Extract 🍯 | 2 tsp | Pure, high-quality extract |
| All-Purpose Flour 🌾 | 1 ½ cups | Sifted, no substitutions |
| Baking Soda 🧂 | ½ tsp | Freshly measured |
| Diamond Crystal Kosher Salt 🧂 | ½ tsp | Fine grain preferred |
| Chocolate Chips 🍫 | 1 ½ cups | Semi-sweet, 60% cacao |
| Mini Chocolate Chips 🍫 | ½ cup | For extra texture |
| Toasted Walnuts 🥜 | ½ cup | Chopped, lightly toasted |
| Vanilla Ice Cream 🍦 | 1 cup | For serving, optional |
| Melted Chocolate 🍫 | ¼ cup | For drizzling, optional |
The butter and sugars are the foundation here—use high-quality unsalted butter (like Land O’Lakes or Plugrá) for that rich flavor. Light brown sugar gives the caramelized edges, while granulated keeps the centers tender. King Arthur or Bob’s Red Mill flour is ideal for texture—avoid pre-sifted. For chocolate, Ghirardelli semi-sweet chips melt perfectly, but any 60% cacao works. Walnuts should be toasted in a dry skillet for 3-4 minutes until fragrant. Pro tip: measure your flour by spooning it into the cup and leveling—don’t scoop directly from the bag, or you’ll end up with dense cookies.
No vanilla extract? Vanilla bean paste works too, though it’s pricier. Short on chocolate chips? White chocolate chips or butterscotch chips add a nice twist—just reduce by 1/4 cup to balance sweetness. The ice cream and melted chocolate are optional but make these feel like a true indulgence. Ben & Jerry’s vanilla is my go-to, but any good-quality brand works. For the melted chocolate, Ghirardelli baking bars melt smoothly. If you’re feeling adventurous, swap the walnuts for pecans or hazelnuts—just toast them first. And if you’re making these ahead, store the dough in the fridge for up to 48 hours for even better flavor development.
This dough keeps in the fridge for 3 days if you want to prep ahead—just let it sit at room temperature for 30 minutes before baking. The baked cookies reheat beautifully: wrap them in foil and warm in a 200°F oven for 5-10 minutes to restore that gooey center. For serving, I like to drizzle the melted chocolate in a zigzag pattern—use a fork or squeeze bottle for clean lines. These cookies are best enjoyed warm, but they’ll still taste amazing at room temperature for 2 days. Freeze any leftovers for up to 3 months—just thaw at room temperature before reheating.
Why You’ll Love This Recipe
- One-Bowl Magic: I swear by this—just cream butter and sugars, toss in eggs and vanilla, and you’re done. No sifting, no measuring cups of flour (because this dough is that forgiving), and honestly? My counter stays cleaner than my kitchen’s ever seen.
- Butter-Sugar Bliss: That perfect chewy center with a crisp edge? All thanks to brown sugar’s caramel magic and cold butter cutting through like a dream. (Yes, even on a Tuesday night.) The vanilla? It’s not just flavoring—it’s the secret handshake that makes these taste homemade.
- Party in a Pan: These are my go-to for holidays, potlucks, or when I need dessert without the fuss. Bake them in a skillet, let them cool, and boom—you’ve got a crowd-pleaser that looks impressive but took less time than deciding what to watch on Netflix.
- Budget Bites: I make these all year because they’re cheap, filling, and the leftovers? Even better. Store them in an airtight container, and they’ll stay soft for days—no freezer required. (My wallet thanks me every time.) Plus, you’re using pantry staples, not some fancy ingredient list.
Step-by-step instructions for 5-Inch skillet cookies
Here’s how to make these warm, gooey skillet cookies with perfect edges every time.
Cream the Butter and Sugars Together
In a stand mixer fitted with the paddle attachment, combine the 0.75 cup unsalted butter (cold, cubed) with the 0.75 cup packed light brown sugar and 0.5 cup granulated sugar. Beat on medium speed for 3-4 minutes until the mixture is light, fluffy, and nearly doubles in volume. You’ll see the color lighten slightly—this is your signal that air has been incorporated properly, which creates that signature crackly top.
The reason we use cold butter here is to maintain structure while still achieving that perfect creamy texture. If your butter starts to melt too quickly, reduce the mixer speed to low for the last minute. You want the mixture to be smooth but not greasy—it should hold its shape when you lift the paddle.
Add Eggs and Vanilla for Richness
With the mixer still running on low speed, add the 2 whole large eggs one at a time, allowing each to fully incorporate before adding the next. After the eggs are combined, add the 2 teaspoons vanilla extract and mix for an additional 10 seconds. The mixture will look slightly curdled at first, but don’t worry—this will smooth out once we add the dry ingredients.
Here’s the thing—room temperature eggs blend more smoothly, but if yours are straight from the fridge, let them sit at room temperature for 10 minutes before using. The vanilla extract should be pure, not imitation, for that authentic flavor. Give everything a quick taste at this stage—you should detect sweetness with a hint of buttery richness.
Fold in Dry Ingredients and Mix Just Until Combined
In a separate bowl, whisk together the 1.5 cups all-purpose flour, 0.5 teaspoon baking soda, and 0.5 teaspoon Diamond Crystal kosher salt. Gradually add this mixture to the wet ingredients, mixing on low speed for 30-45 seconds until just combined. You should still see small streaks of flour—overmixing develops gluten, which makes cookies tough instead of chewy.
Remove the bowl from the mixer and gently fold in the 1.5 cups chocolate chips, 0.5 cup mini chocolate chips, and 0.5 cup toasted walnuts using a silicone spatula. Be careful not to overmix—this preserves the texture we’ve worked so hard to achieve. The dough should be thick and slightly sticky but manageable. If it’s too stiff, let it sit at room temperature for 5 minutes to soften.
Press Dough into Skillet and Bake
Preheat your oven to 350°F and place a 5-inch skillet in the oven to preheat as well. Once the oven is fully preheated, remove the skillet and press half of the dough evenly into the bottom, creating a ¼-inch thick layer. Use your fingers or the back of a spoon to spread it out to the edges—this ensures even baking and that perfect skillet shape.
Bake for 12-15 minutes until the edges are golden brown and the center still looks slightly underdone. The edges should pull away from the skillet just a bit when you gently tug, but the middle should still have a soft, gooey texture. If you’re unsure, check at the 12-minute mark—underbaking is better than overbaking with these cookies.
Top and Serve Immediately
Remove the skillet from the oven and immediately top the warm cookie with 1 cup vanilla ice cream. Let it sit for 1-2 minutes to soften slightly, then drizzle with 0.25 cup melted chocolate for that classic skillet cookie finish. Serve straight from the skillet while still warm—this is when the cookie is at its peak texture, with crispy edges and a gooey center that melts into the ice cream.
For the best experience, eat these cookies within 15 minutes of baking. The contrast between the warm cookie, cold ice cream, and melted chocolate is what makes this dessert truly special. If you’re making a second cookie, repeat the process with the remaining dough—these skillets hold just enough for one serving at a time.
Pro Tips For Making 5 Inch Skillet Cookie
- Cream Butter Slowly: I learned this the hard way—whipping cold butter into the sugars too fast just makes a greasy mess. Let the butter sit at room temp for 30 minutes first, then mix on medium-low until the color changes from pale to a buttery beige. Rushing this step means your cookies won’t hold their shape or have that perfect chewy center.
- Measure Brown Sugar Wet: Packing brown sugar into the cup? Skip it. Spoon it in loosely, then level it off—don’t tap the bowl. Wet your measuring cup first if it’s stubborn, but don’t overdo it or you’ll dilute the dough. The right moisture balance keeps these skillet cookies from spreading into a sad pancake.
- Rotate the Skillet: Your first cookie might look perfect, but the second one? Often lopsided. After 8–10 minutes, give the skillet a quarter-turn to even out the heat. I used to ignore this, and half my cookies ended up with a thick edge and a thin, burnt center. A quick pivot fixes that every time.
- Test with a Toothpick Twice: One check isn’t enough—wait until the edges pull away from the pan, then let it cool 2 minutes before testing again. The toothpick should come out with one moist crumb, not wet batter. Overbaking turns these into hockey pucks, and underbaking means a gummy middle. The second test is non-negotiable.
Serving suggestions for this 5 inch skillet cookie
Ice Cream Pairings
Vanilla ice cream is my top choice for these skillet cookies—its creamy texture contrasts perfectly with the crispy edges and gooey center. I recommend Ben & Jerry’s vanilla or Häagen-Dazs vanilla bean for that rich, authentic flavor.
For a lighter option, try Breyer’s vanilla light to balance the richness of the cookie. 🍦
Chocolate Drizzle Options
Melted chocolate is a must for that classic skillet cookie finish. I use Ghirardelli baking bars (60% cacao) for the best balance of sweetness and depth.
For a white chocolate twist, melt Ghirardelli white chocolate chips—they add a creamy contrast. Drizzle while the cookie is still warm for the best texture.
Warm Cookie Presentation
Serve these straight from the skillet for maximum impact—place the skillet on a wooden board or slate for rustic appeal. Add a dusting of powdered sugar or crushed amaretti cookies for extra flair.
The warm cookie, cold ice cream, and melted chocolate create a sensory experience that’s hard to beat. 🌟
Make-Ahead Serving Tips
If baking ahead, store the cookies at room temperature for up to 2 days in an airtight container. Reheat in a 200°F oven for 5-10 minutes to restore that gooey center.
For a party, serve in individual skillets—it’s a fun, interactive way to enjoy these cookies. Just add ice cream at the table!
Seasonal Variations
Swap the vanilla ice cream for peanut butter cups in summer or pumpkin spice ice cream in fall. In winter, try chocolate peppermint ice cream with crushed candy canes on top. The key is balancing flavors—always keep the cookie’s buttery richness in mind. 🍂
Portion Control
These cookies are perfect for sharing—cut into wedges with a pizza cutter for easy serving. For a single-serving option, bake the dough in a 4-inch skillet instead. A small scoop of ice cream and a drizzle of chocolate make a satisfying treat that won’t leave you overstuffed. 🍴
Nutrition facts
Frequently asked questions
Can I use a different sized skillet for this recipe?
The 5-inch skillet is ideal for single servings, but you can scale up with a 9-inch skillet by doubling the dough and adjusting baking time to 15-18 minutes. For smaller portions, a 4-inch skillet works with half the dough and 10-12 minutes in the oven. Just ensure the dough thickness stays at ¼-inch for even baking.
Why does my skillet cookie spread too much?
Overmixing the dough or using too much flour develops gluten, causing spreading. Keep mixing to just combined and measure flour by spooning/leveling. Also, ensure your skillet is properly preheated—cold pans cause uneven baking. If the dough feels too sticky, chill it for 30 minutes before pressing into the skillet.
How do I know when the cookie is fully baked?
The edges should be golden brown and pull away slightly from the skillet when gently tugged. The center should still look soft and slightly underbaked—this is key for that gooey texture. Use a toothpick: it should come out with a few moist crumbs, not completely clean.
Can I make these cookies without a cast-iron skillet?
Yes! Use a well-seasoned carbon steel or ceramic skillet for similar results. Avoid nonstick—it won’t create the same caramelized edges. If you don’t have any skillets, press the dough into a parchment-lined 5-inch round cake pan and bake for 12-14 minutes. The texture will be slightly different but still delicious.
What’s the best way to store leftover skillet cookies?
Cool completely, then store in an airtight container at room temperature for up to 2 days. For longer storage, freeze the baked cookies (without ice cream) for 3 months. To reheat, wrap in foil and warm in a 200°F oven for 5-7 minutes—just until the edges soften again.

- 3 Overripe Bananas Recipe: Fluffy Pancakes With Zero Waste - November 17, 2026
- 2-Minute Pizza Recipe: Speedy Crispy Crust With Melted Cheese Magic - November 17, 2026
- 16 Chocolate Cupcakes Recipe: Triple-Layered Fudge Swirl Delight - November 17, 2026