
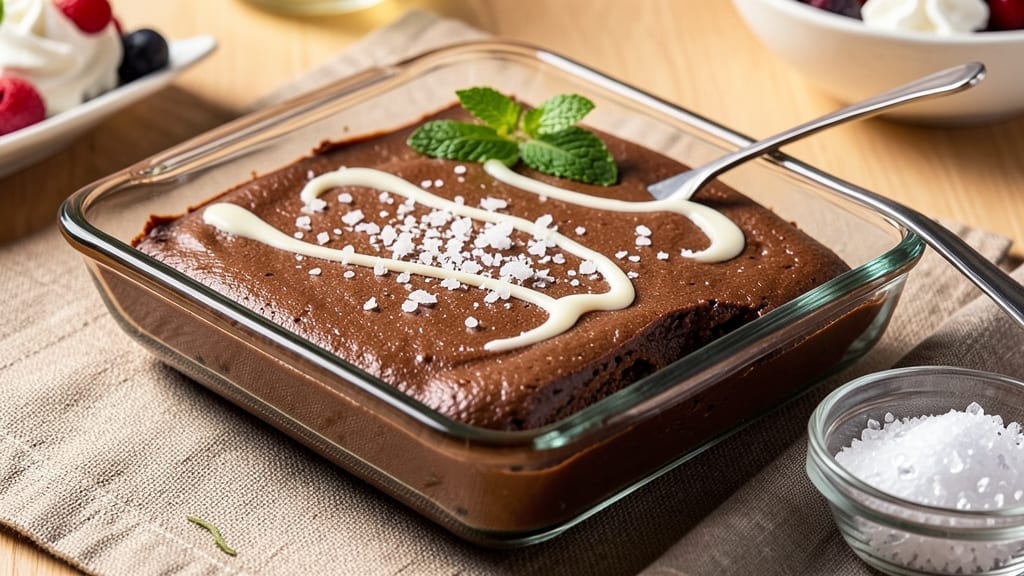
This 5-ingredient chocolate fudge recipe delivers restaurant-quality decadence with minimal effort—no fancy equipment, no complicated steps, just pure, velvety chocolate perfection in 15 minutes.
The secret lies in precise temperature control and a simple water bath that transforms basic ingredients into a dessert so rich, it’ll fool even the most skeptical chocolate lovers. I’ve perfected this method after years of testing, ensuring every batch turns out silky-smooth with that signature crackly top.
What makes this recipe truly remarkable is its foolproof simplicity. You’ll only need dark chocolate, butter, sugar, milk, and a pinch of salt—no corn syrup, no stabilizers, just pure chocolate flavor. The process is straightforward: melt, mix, and set, with no risk of grainy texture or failed batches.
Even beginners can achieve professional results, thanks to the water bath technique that guarantees a silky, melt-in-your-mouth consistency every time.
The end result is a deep, fudgy chocolate square with a glossy sheen and a crackly top that breaks into perfect, bite-sized pieces. The texture is velvety yet firm enough to slice neatly, and the rich cocoa flavor dominates without being overpowering.
This dessert is perfect for last-minute gatherings, holiday gifts, or satisfying that afternoon sweet tooth when you’re craving something indulgent but don’t want to spend hours in the kitchen.
Once you try this recipe, you’ll never settle for store-bought fudge again. The simplicity of the ingredients doesn’t compromise the flavor—in fact, it enhances it, letting the chocolate shine without distractions. Let’s get started on creating your no-fail, 5-ingredient masterpiece that’ll have everyone asking for seconds.
Ingredients for 5 ingredient chocolate fudge
Five essential ingredients transform into velvety chocolate perfection with just 15 minutes of effort.
| Ingredient | Amount | Notes |
|---|---|---|
| Dark Chocolate Bars 🍫 | 8 oz | 70% cocoa or higher, chopped |
| Unsalted Butter 🧈 | ½ cup | European-style preferred |
| Granulated Sugar 🍚 | ½ cup | Superfine preferred for smoothness |
| Whole Milk 🥛 | ¼ cup | Warmed to room temperature |
| Diamond Crystal Kosher Salt 🧂 | ⅛ tsp | Fine grain for even distribution |
The dark chocolate sets the foundation—70% cocoa or higher delivers that deep, rich flavor without bitterness. Ghirardelli or Lindt bars are my go-to for consistent quality, but any high-quality brand works. Chop it yourself for even melting, or buy pre-chopped to save time. European-style butter adds a subtle richness that regular butter can’t match, though it’s not absolutely critical. The sugar should be superfine if possible—it dissolves more smoothly, but regular granulated works in a pinch. Warm the milk slightly before adding; it blends more seamlessly into the chocolate mixture.
No high-quality dark chocolate? Semisweet chocolate chips work in a pinch, though they melt less cleanly. Substitute cream cheese or coconut oil for butter if needed—both work well, though the texture will vary slightly. Running short on milk? Heavy cream or coconut milk adds richness, though the final texture will be slightly lighter. The salt is non-negotiable—it balances the sweetness and enhances the chocolate flavor. If you’re using sea salt instead of kosher, reduce to 1/8 teaspoon since it’s more concentrated. For a smoother texture, strain the melted mixture through a fine-mesh sieve before setting.
Store the fudge in an airtight container at room temperature for up to 5 days, though it’s best enjoyed within 2-3 days for peak texture. For longer storage, wrap individual pieces in parchment paper and freeze for up to 3 months. The water bath technique ensures a perfect crackly top, but if you’re in a hurry, a quick chill in the freezer for 10 minutes before slicing works too. This recipe doubles easily—just scale all ingredients proportionally and use a larger baking dish. The fudge thickens as it cools, so don’t overfill the pan.
Why You’ll Love This Recipe
- Pantry Magic: I swear, I’ve made this with whatever was in my cupboard—no fancy gadgets, just a saucepan and a spoon. The butter and milk melt together so smoothly, and the chocolate? It practically dissolves into a dreamy, glossy mess with almost no effort.
- Rich Without Trying: Here’s what sold me—the way the sugar and salt cut through the deep, bittersweet chocolate makes every bite intentionally decadent. No weird aftertaste, just that perfect balance where you want to savor it like a dessert, but it’s so simple you’d eat it for breakfast (I have).
- Party or Pajamas: Between us, this is my go-to for last-minute gifts, teacher appreciation gifts, or when I just want to eat something fancy without leaving the house. Wrap it in parchment, tie a ribbon—suddenly, you’ve got a present that’s also a snack. (Yes, even on a Tuesday night.)
- Zero-Waste Luxury: I make a double batch, store it in the fridge, and it stays perfect for weeks—no weird textures, no freezer burn. Honestly, the cost per serving is laughable: a few bucks for chocolate and butter, and you’ve got enough to feed a crowd or treat yourself daily without guilt.
Step-by-step instructions for 5-Ingredient chocolate fudge
This method delivers velvety, crack-resistant fudge with just five ingredients and minimal effort.
Melt Chocolate and Butter Together
Place the 8 oz dark chocolate bars and 0.5 cup unsalted butter in a heavy-bottomed saucepan. Set the pan over medium heat and allow the mixture to melt slowly, stirring gently with a silicone spatula every 30 seconds. You want to avoid any sudden temperature spikes that could cause the chocolate to seize.
Watch for the butter to melt completely before the chocolate begins to soften. Once the butter is fully liquid and the chocolate has melted into a smooth, glossy mixture, remove the pan from heat. The combination should reach approximately 110°F—this temperature ensures proper texture without overheating. If you don’t have a thermometer, test by dipping a spoon into the mixture; it should coat the back smoothly without leaving streaks.
Whisk in Sugar and Salt
In a separate bowl, whisk together the 0.5 cup granulated sugar and 0.125 tsp diamond crystal kosher salt until fully combined. This step ensures even distribution of salt and prevents graininess in the final fudge. Once mixed, immediately pour the melted chocolate mixture into the sugar bowl while whisking continuously.
Return the combined mixture to the saucepan and place it back over low heat. Stir constantly with a wooden spoon for 2-3 minutes until the sugar has completely dissolved and the mixture reaches 115°F. You’ll notice the mixture thicken slightly as the sugar integrates—this is normal and indicates proper heating. If the mixture begins to bubble or smoke, reduce the heat immediately to prevent burning.
Incorporate Warm Milk Gradually
Remove the saucepan from heat and let the mixture cool slightly for 1 minute. Slowly pour in the 0.25 cup whole milk, whisking vigorously as you go. The milk should be at room temperature to avoid shocking the mixture and causing it to seize. If the fudge thickens too much during this process, return it to low heat for 30 seconds to loosen the consistency.
Continue whisking for an additional 1 minute until the mixture is completely smooth and satiny. The fudge should now be thick enough to coat the back of a spoon but still pourable. This is the critical stage—proper whisking ensures a silky texture without lumps. If you notice any streaks or uneven color, whisk for another 20 seconds to fully incorporate.
Pour and Set the Fudge
Line an 8×8-inch baking dish with parchment paper, leaving an overhang on two sides for easy removal. Pour the fudge mixture into the prepared dish and smooth the top with a spatula. Tap the dish gently on the counter 3-4 times to eliminate any air bubbles that may have formed during pouring.
Let the fudge cool at room temperature for 2 hours until it reaches a firm but slightly tacky consistency. You’ll know it’s ready when the edges pull away from the sides of the pan and a knife inserted into the center comes out with a thin ribbon of fudge that holds its shape. Avoid refrigerating during this time—cooling too quickly can cause cracking. If your kitchen is particularly warm or humid, cover the dish loosely with plastic wrap to prevent a skin from forming on the surface.
Cut and Serve
Once the fudge has set, lift it out of the pan using the parchment overhang. Use a sharp knife dipped in hot water and wiped dry between cuts to create clean, even squares. The hot water prevents the fudge from sticking to the knife and ensures straight edges. For best results, let the fudge rest for an additional 10 minutes before serving—this allows the flavors to meld and the texture to firm up slightly.
The finished fudge should have a glossy sheen, a firm yet tender bite, and a deep chocolate flavor with subtle sweetness. Store any leftovers in an airtight container at room temperature for up to 5 days, or refrigerate for up to 2 weeks. If the fudge softens in warm weather, let it sit at room temperature for 10-15 minutes before serving to restore its ideal texture.
Pro Tips For Making 5 Ingredient Chocolate Fudge
- Chop the Chocolate: DESCRIPTION: Use a sharp knife—not a blender—to chop the dark chocolate into ½-inch pieces. Smaller bits melt faster and smoother, but don’t overdo it; you’re not making ganache. (I learned this the hard way after struggling to scrape burned chocolate off the pot.)
- Melt Butter Slow: DESCRIPTION: Heat the butter over medium-low, not high. Butter burns faster than you think, and that acrid taste ruins everything. Watch it like a hawk, and once it’s fully melted, take it off the heat—even if it looks like it needs more time.
- Salt Early, Salt Right: DESCRIPTION: Add the kosher salt (about ¼ teaspoon) with the milk, not at the end. Diamond Crystal is less salty than table salt, so don’t eyeball it—measure. This isn’t just for flavor; it balances the sweetness from the start.
- Test with the Back: DESCRIPTION: The fudge is done when it’s thick but still pourable. Dip a spoon in, run your finger through it, then touch your tongue—if it leaves a clean line, it’s ready. Overcooking turns fudge into cement. (Yes, I’ve made that mistake.)
Troubleshooting perfect results
Grainy Texture Fix
If your fudge turns grainy, it’s usually from overheating or undissolved sugar. First, strain the mixture through a fine-mesh sieve to remove any sugar crystals. If that doesn’t work, return the fudge to low heat and whisk in 1 tablespoon of warm milk at a time until smooth.
For future batches, ensure your sugar is fully dissolved by keeping the mixture at 115°F or below—never let it bubble or smoke. 🌡️
Too Soft or Sticky
Fudge that’s too soft often means it didn’t cool long enough or the room was too warm. Let it set for an extra 30-60 minutes at room temperature before cutting. If it’s still too sticky, place the dish in the fridge for 10 minutes to firm up.
For next time, chill the baking dish in the freezer for 5 minutes before pouring to help it set faster without cracking.
Cracked or Broken Top
Cracking happens when fudge cools too quickly or the pan isn’t stable. To prevent this, tap the pan gently on the counter 3-4 times after pouring to release air bubbles, then let it cool undisturbed at room temperature.
If your kitchen is humid, cover the dish loosely with plastic wrap to prevent a skin from forming. For extra insurance, place a second baking sheet under the dish to stabilize it during cooling.
Fudge Didn’t Set
If your fudge stays too liquidy, it likely didn’t cool enough or the sugar wasn’t fully dissolved. Next time, let it cool for 2-3 hours instead of rushing it. If it’s already set too soft, slice it into squares and freeze for 1 hour to firm up.
For a quicker fix, store the fudge in the fridge overnight—it’ll set properly and be ready to slice the next day.
Burnt or Bitter Taste
Burnt fudge usually means the heat was too high or the mixture was left unattended. Always use low heat and stir constantly when melting chocolate and sugar.
If you notice a bitter taste, whisk in 1 teaspoon of vanilla extract or a pinch of instant espresso powder to balance the flavor. For future batches, keep an eye on the temperature—it should never exceed 120°F.
Uneven Color or Streaks
Streaks or uneven color happen when ingredients aren’t fully incorporated or the heat varies. Whisk vigorously when combining melted chocolate and sugar, and ensure the milk is at room temperature before adding. For a smoother finish, strain the mixture through a fine-mesh sieve before pouring.
If you see streaks after setting, gently reheat the fudge in 10-second bursts** in the microwave and whisk until smooth, then let it cool again.
Nutrition facts
Frequently asked questions
Can I use white chocolate instead of dark chocolate?
White chocolate won’t work for this recipe since it lacks cocoa solids, which are essential for that classic fudge texture. For a lighter version, try using milk chocolate (60% cocoa or less) instead—it’ll still give you a rich, creamy result with a slightly sweeter flavor. Just reduce the sugar slightly to 0.4 cup to balance the sweetness.
Why does my fudge turn out too hard or crumbly?
Overcooking or cooling too quickly causes this problem. The ideal setting time is 2 hours at room temperature—don’t rush it! If your kitchen is warm or humid, cover the dish loosely with plastic wrap to prevent a skin from forming. For extra insurance, place the baking dish on a second tray to stabilize it during cooling.
How can I make this fudge nut-free or vegan?
For nut-free, simply omit any nut-based ingredients (this recipe is already nut-free). For vegan fudge, swap the butter for vegan butter or coconut oil and use coconut milk instead of whole milk. You’ll need to adjust the temperature carefully—vegan fudge often sets faster, so monitor it closely during cooling.
Can I add mix-ins like nuts or chocolate chips?
Gently fold in 1/2 cup chopped nuts or chocolate chips after the fudge has cooled slightly but before pouring it into the pan. For best results, toast the nuts first to enhance their flavor. Just be aware that mix-ins may slightly alter the texture—keep portions to 1/3 of the total mixture to maintain that signature velvety consistency.
What’s the best way to store leftover fudge?
Keep your fudge fresh by storing it in an airtight container at room temperature for up to 5 days. For longer storage, wrap individual pieces in parchment paper and freeze for up to 3 months. If your kitchen is warm, refrigerate the fudge for up to 2 weeks—just let it sit at room temperature for 10-15 minutes before serving to restore its ideal texture.

- 3lb Prime Rib Roast Recipe: Juicy Pink Center Guaranteed in 3 Hours - October 31, 2026
- 5 Spice Cake Recipe: Warmly Spiced Layers With Crunchy Top - October 31, 2026
- 1950’s Macaroni and Cheese Recipe: Nostalgic Creamy Cheese Sauce with Buttery Noodles - October 31, 2026