
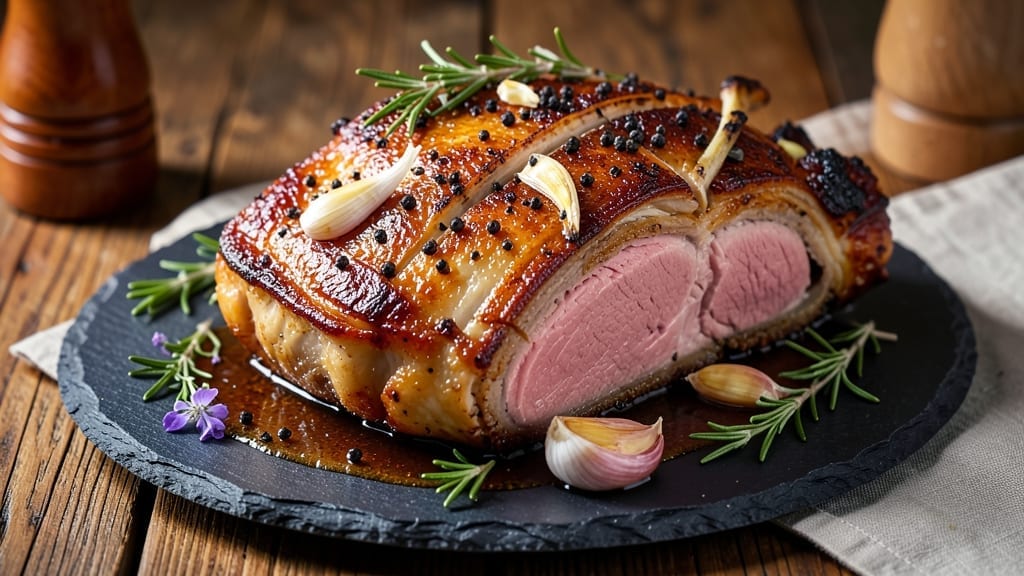
A 5 lb bone-in beef rib roast transforms into a showstopping centerpiece when cooked low and slow to achieve that perfect balance of juicy interior and caramelized crust.
The bone-in cut delivers unmatched flavor and tenderness, making it worth every effort—especially when you master the reverse searing technique that guarantees restaurant-quality results. This recipe is designed for those who appreciate the reward of patience in the kitchen, where time and temperature work together to create melt-in-your-mouth perfection.
The secret lies in the method: starting at a low temperature (225°F) to slowly render fat and even out the internal temperature, then finishing with a high-heat sear to develop that coveted caramelized crust.
This approach ensures the roast stays juicy from edge to edge, with a deep, savory flavor that comes from the bone and rendered fat. The process is straightforward once you understand the key steps—seasoning generously, monitoring internal temperature, and letting the roast rest before carving.
By the time you’re done, you’ll have a roast that’s so tender it practically falls apart, with a crust that’s rich and caramelized from the rendered fat. Each slice reveals layers of flavor—from the pink, buttery center to the deeply browned exterior.
The aroma alone will have everyone gathering at the table, and the taste? That’s the kind of meal that makes cooking feel like an art form rather than a chore.
Serve with classic sides like roasted garlic mashed potatoes or a crisp green salad to balance the richness, and pair with a bold red wine like Cabernet Sauvignon or Syrah.
This roast is the kind of dish that turns a simple dinner into a memorable feast—one that will have your guests asking for the recipe. Let’s get started on creating your perfect roast.
Ingredients for 5 lb beef rib roast bone in
The secret to juicy beef roast with a caramelized crust starts with these quality ingredients.
| Ingredient | Amount | Notes |
|---|---|---|
| Bone-In Beef Rib Roast 🥩 | 5 lb | Center-cut, well-marbled |
| Kosher Salt 🧂 | 2 tbsp | Diamond Crystal preferred |
| Freshly Ground Black Pepper 🌶️ | 1 ½ tbsp | Coarse grind for texture |
| Garlic Cloves 🧄 | 6 cloves | Smashed for deeper flavor |
| Fresh Rosemary 🌿 | ½ cup | Chopped sprigs, not dried |
| Fresh Thyme 🌿 | ¼ cup | Leaves only, stems removed |
| Extra-Virgin Olive Oil 🫒 | ¼ cup | For crust development |
| Yellow Onion 🧅 | 1 whole | Thinly sliced for aromatics |
| Red Wine 🍷 | ½ cup | Bold, dry variety like Cabernet |
| Beef Bone Broth 🍲 | 1 cup | Homemade or high-quality store-bought |
| Unsalted Butter 🧈 | ½ cup | Cold for finishing sear |
| Fresh Parsley 🌿 | ¼ cup | Chopped, for garnish |
The roast is everything here—bone-in, center-cut rib with good marbling is non-negotiable. Costco or Whole Foods usually have the best selection, but ask your butcher to trim excess fat if it’s too thick. Look for a roast with a nice even cap of fat on top—this renders down during cooking to create that coveted crust. If you’re buying online, Snake River Farms ships excellent cuts. The garlic and herbs should be fresh—smell them first. If they don’t have that bright, aromatic punch, skip them. For the olive oil, California brands like Corto or Lucini make a noticeable difference in flavor.
No red wine? Beef broth plus a splash of balsamic vinegar works in a pinch, but you’ll lose some depth. Fresh herbs? Dried works at one-third the amount, but trust me on the fresh stuff—it makes all the difference. The onion can be any color, but yellow or red add nice sweetness. For the butter, Plugrá or Land O’Lakes unsalted are reliable choices. If you’re prepping ahead, you can season the roast up to 24 hours early—just keep it uncovered in the fridge so it dries out slightly for better crust formation. The bone broth should be rich and flavorful—homemade is ideal, but store-bought like Pacific Foods works too.
This roast reheats beautifully—350°F for 20-30 minutes with a splash of broth. Keeps 3-4 days in the fridge, but honestly, it’s best eaten fresh. For leftovers, slice against the grain and store in an airtight container. The crust gets even more flavorful the next day as the rendered fat continues to develop. Freeze portions for up to 3 months—just thaw in the fridge overnight before reheating. The aroma alone will have everyone gathering at the table, so plan accordingly.
Why You’ll Love This Recipe
- I’ll be real: I make this on purpose to have sandwiches all week. Thinly sliced with mustard and pickles, it’s my go-to lunch. And because it’s budget-friendly (bone-in is cheaper than boneless), I can feed my family well without breaking the bank—or my willpower.
- Foolproof Seasoning: Between us, this roast couldn’t be simpler to season—just kosher salt, cracked black pepper, and smashed garlic cloves tucked into the crevices. The rosemary sprigs? I let them poke through the fat like little flavor flags. No measuring cups, no guesswork—just instinct and a sharp knife.
- Crispy-Creamy Magic: That bone-in secret? It renders into pure, buttery richness while the outside develops a caramelized crust you’ll want to eat with a spoon. Honestly, the first time I sliced into it, my husband actually said, “You’re a genius,” and I nearly burned the kitchen.
- Sunday Supper Star: Here’s what sold me—this roast is the centerpiece that makes everything around it feel special. Serve it with roasted potatoes and a simple green salad for a meal that feels fancy but takes less time than ordering takeout. (Yes, even on a Tuesday night.)
Step-by-step instructions for perfectly cooked beef rib roast
Here’s how to transform a tough cut into melt-in-your-mouth perfection with a caramelized crust.
Prepare the Roast for Maximum Flavor
Remove the 5 lb bone-in beef rib roast from the refrigerator and let it sit at room temperature for 30 minutes before cooking. This ensures even cooking throughout. While it warms, trim any excess fat from the surface, leaving about ¼ inch for flavor and moisture protection.
In a small bowl, combine the 2 tbsp kosher salt and 1.5 tbsp freshly ground black pepper. Generously rub this mixture all over the roast, including inside any cavities. The salt will penetrate the meat and enhance its natural flavors while helping to develop that coveted caramelized crust.
Next, create a simple herb paste by combining the 0.5 cup fresh rosemary, 0.25 cup fresh thyme, 6 smashed garlic cloves, and 0.25 cup extra-virgin olive oil in a food processor. Pulse until finely chopped but not completely puréed. Spread this herb mixture evenly over the salted roast, pressing it gently into the surface. This step infuses the meat with aromatic flavors that will develop beautifully during the slow cook.
Sear for Depth of Flavor and Crust
Preheat your oven to 450°F. Heat a large oven-safe skillet over medium-high heat and add the roast, bone-side down. Sear for 10 minutes until a deep golden crust forms on the bottom. You’ll see the meat release easily from the pan when it’s ready to flip.
Carefully flip the roast and sear the other side for another 8-10 minutes until it develops a similar golden crust. The high heat helps create a flavorful crust while the bone-side sear adds richness to the cooking liquid. Remove the skillet from the heat and let it cool for 2 minutes before proceeding.
Build the Flavor Base and Slow Roast
Add the 1 whole yellow onion, sliced into thin rounds, to the skillet and cook for 2 minutes until softened. Pour in the 0.5 cup red wine and scrape up any browned bits from the bottom of the pan. These bits, called fond, are packed with flavor that will infuse into your roast.
Transfer the skillet to the preheated oven and roast for 2 hours at 450°F. After this initial cooking time, reduce the oven temperature to 300°F. The roast is now ready for the low-and-slow phase that will make it incredibly tender.
Finish with Moisture and Resting
After 2 hours at 300°F, check the internal temperature using a meat thermometer. The roast should reach an internal temperature of 195-200°F in the thickest part of the meat. If it hasn’t reached this temperature yet, continue cooking for another 30-60 minutes.
Once the roast is perfectly cooked, remove it from the oven and let it rest on a cutting board for 30 minutes. This resting period is crucial for redistributing the juices throughout the meat. During this time, you can make a simple pan sauce by adding the 1 cup beef bone broth and 0.5 cup unsalted butter to the skillet and simmering for 5 minutes until slightly thickened.
Carve and Serve with Garnish
After resting, slice the roast against the grain into ½-inch thick slices. The meat should be fork-tender with a beautifully caramelized crust. Spoon the pan sauce over the sliced roast and garnish with 0.25 cup chopped fresh parsley for a pop of color and freshness.
Serve immediately with your favorite sides. The roast should be incredibly juicy with a rich, caramelized crust that adds depth to every bite. This method transforms a tough cut into a showstopping centerpiece that will impress even the most discerning guests.
Pro Tips For Making 5 Lb Beef Rib Roast Bone In
- SEAR THE FAT SIDE DOWN: That rib roast has a thick fat cap—don’t ignore it. Sear the meat fat-side down first for 10-12 minutes on high heat until the fat renders and the meat develops a deep crust. I used to rush this, and the roast never got that rich, caramelized flavor everyone talks about.
- SALT THE GARLIC CLOVES: Whole garlic cloves? Toss them in kosher salt before smashing them into the meat. The salt draws out moisture, making them easier to crush and preventing them from burning while roasting. (Yes, even if you’re impatient like me—this actually changes the outcome.)
- DON’T SKIP THE REST: That 5-pound roast needs a solid 20-30 minutes under foil before slicing—no exceptions. The meat will tighten up as it cools, and cutting it too soon means dry slices. I learned this the hard way after serving a family dinner where the first few slices were chewy.
- USE A MEAT THERMOMETER: Bone-in rib roasts are tricky—visual cues fail. Aim for 130°F internal temp (medium-rare) and pull it when the probe hits that number. The residual heat will carry it to 135°F, giving you perfect doneness without overcooking. (Your future self will thank you.)
Essential equipment for this dish
Precision Thermometer
You absolutely need a meat thermometer with a probe—no guessing games here. I swear by the ThermoWorks Smoke for its accuracy and durability, but the Thermoworks Thin Probe works too.
These thermometers give you real-time readings so you can hit that 195-200°F internal temperature without overcooking. A cheap dial thermometer just won’t cut it for this roast—you need precision. 🌡️
Oven-Safe Skillet
An oven-safe skillet is your secret weapon for building flavor. I use a 12-inch Lodge cast iron skillet because it handles high heat beautifully and retains heat like a champ. If you don’t have cast iron, a stainless steel skillet (like All-Clad) works too.
Just make sure it’s oven-safe up to 450°F—this is where you’ll sear and then roast the meat. The skillet’s ability to go from stovetop to oven seamlessly is a game-changer.
High-Quality Butcher Paper
For the low-and-slow phase, you’ll want pink butcher paper (not aluminum foil) to wrap the roast. It’s breathable enough to let moisture escape while trapping heat, which helps break down collagen for tenderness. Maple Leaf Farms makes a great brand, or any butcher supply store will carry it.
Avoid foil—it can steam the meat and make the crust soggy. The paper also lets you see the beautiful caramelization developing.
Food Processor
A food processor is essential for making the herb paste. I use a Cuisinart Mini-Prep Plus because it’s compact but powerful enough to chop herbs finely without turning them into paste.
If you don’t have one, a sharp chef’s knife and cutting board work, but the food processor ensures even distribution of flavors. The key is to pulse just until the herbs are finely chopped—not puréed—so they stick to the meat beautifully. 🌿
Heavy-Duty Cutting Board
After all that cooking, you’ll need a large, stable cutting board for carving. I recommend a 12×18-inch hardwood board (like those from John Boos) because it won’t warp and gives you plenty of space to work.
A small or wobbly board makes slicing difficult, especially when you’re dealing with a 5 lb roast. Trust me, you don’t want to struggle with a flimsy board when you’re ready to serve.
Resting Rack
A resting rack (like the OXO Good Grips) is optional but makes resting the roast so much easier. It elevates the meat off the cutting board, allowing air to circulate and preventing soggy slices. If you don’t have one, a wire cooling rack works too.
Just prop it up on something stable—like a baking sheet—and let that roast rest undisturbed for 30 minutes. Patience here is key to juicy slices every time. 💪
Nutrition facts
Frequently asked questions
Why does this recipe call for a bone-in roast instead of boneless?
The bone adds incredible flavor and moisture during cooking. As the roast cooks low and slow, the bone infuses the meat with rich, gelatinous juices that keep it incredibly tender. Plus, the bone helps regulate internal temperature more evenly than boneless cuts. You’ll get a deeper, more complex flavor profile that’s worth the extra effort!
Can I cook this roast without the reverse sear method?
Technically yes, but you’ll miss out on the perfect balance of juicy interior and caramelized crust. Cooking at 300°F for several hours breaks down collagen for tenderness, while the high-heat sear at the end creates that coveted crust. For best results, stick with the method—but if you’re short on time, cook at 325°F until it reaches 135°F internal, then sear briefly in a hot pan.
How do I know when the roast is done if I don’t have a meat thermometer?
While a thermometer is ideal, you can use the “touch test” method: press the meat gently with tongs. If it feels very firm (like pressing your thumb against your palm), it needs more time. When it feels slightly springy (like pressing your thumb against your fingertips), it’s likely done. For a 5 lb roast, this usually takes 4-5 hours total cooking time. Still, a thermometer gives you 195-200°F precision for perfect results.
What’s the best way to reheat leftovers?
Slice the roast against the grain and reheat in a skillet over medium-low heat with a splash of beef broth for 5-7 minutes, or until warmed through. Avoid microwaving—it makes the meat tough. For larger portions, cover with foil and bake at 300°F for 20-30 minutes until heated evenly. The crust may not be as crispy, but the flavor stays rich and juicy!
Can I substitute red wine with something else in the recipe?
Yes! If you don’t have red wine, use 1 cup beef broth plus 1 tbsp balsamic vinegar for depth, or ½ cup apple cider for a sweeter note. Avoid water—it lacks the acidity and flavor that helps develop the crust. The wine adds complexity, but these substitutes work in a pinch. Just taste and adjust seasoning before serving.

- 6 Egg Cake Recipe with Oil: Light as Air With Buttery Moisture - October 4, 2026
- 4 Bean Casserole Recipe: One-Pan Heartiness With Smoky Paprika Depth - October 4, 2026
- 3-Ingredient Keto Mug Cake Recipe: Microwave Magic in 2 Minutes - October 4, 2026