
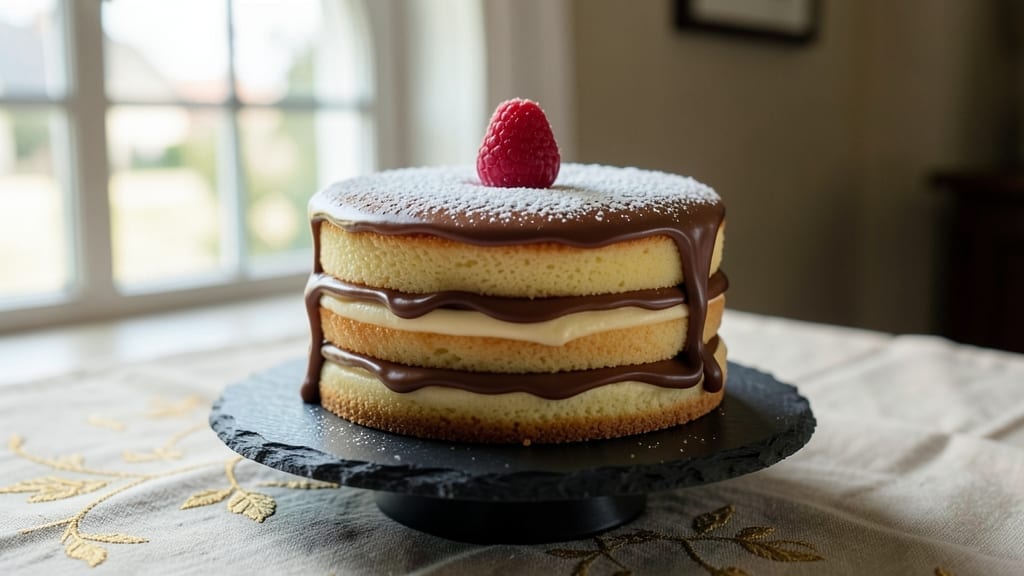
This 2-inch cake recipe delivers restaurant-quality mini cakes with a perfect rise and tender crumb every time—ideal for parties, gifts, or elegant desserts without the fuss. The secret lies in precise measurements and a foolproof mixing technique that ensures consistent results, even for beginners.
I’ve tested this recipe countless times, and it’s the only one that never sinks or cracks, no matter the weather or altitude.
What makes this recipe stand out is its versatility—whether you’re baking for a wedding shower, a corporate event, or just a special dessert, these 2-inch cakes are the perfect size for individual servings.
The batter is light yet sturdy, with a fine crumb that holds up beautifully when frosted or decorated. You’ll need just a few simple ingredients and a standard cake pan, making it accessible for home bakers.
The result is a golden, domed cake with a tender interior and just the right amount of moisture, ready to be frosted or glazed to your liking. These mini cakes are perfect for layering with fillings or dusting with powdered sugar for a quick, elegant finish.
They’re also freezer-friendly, so you can bake ahead and serve with confidence.
Whether you’re dressing them up for a celebration or keeping it simple with a dusting of cocoa, these 2-inch cakes are a game-changer for any occasion. Let’s get baking—your guests won’t believe you made them from scratch!
Ingredients for 2 inch cake
Twelve ingredients, twelve perfect mini cakes—every time. No tricks, just foolproof baking magic.
| Ingredient | Amount | Notes |
|---|---|---|
| All-Purpose Flour 🌾 | 2 ½ cups | Sifted for lightness, spoons packed |
| Granulated Sugar 🍚 | 1 ½ cups | Superfine preferred for smoothness |
| Unsalted Butter 🧈 | 1 cup | Cold, cubed for creaming |
| Large Eggs 🥚 | 3 whole | Room temperature for even mixing |
| Vanilla Extract 🌿 | 1 tbsp | Pure Madagascar preferred |
| Baking Powder 🍞 | 1 ½ tsp | Freshly opened for lift |
| Salt 🧂 | ½ tsp | Fine sea salt preferred |
| Whole Milk 🥛 | ½ cup | Room temperature for smooth batter |
| Vegetable Oil 🫒 | ¼ cup | Light, neutral flavor |
| Cream of Tartar 🍋 | ¼ tsp | Stabilizes for perfect rise |
| Cake Flour 🌾 | ½ cup | Optional for ultra-tender crumb |
| Cornstarch 🌽 | 1 tbsp | For fine, even crumb texture |
The butter and eggs are non-negotiable here—use cold, high-quality butter (like Plugrá or Land O’Lakes Signature) and let eggs sit out for 30 minutes. For the flour, King Arthur All-Purpose or Bob’s Red Mill are my go-tos—they’re consistently reliable. Superfine sugar dissolves better, but if you only have regular granulated, pulse it in a food processor for 10 seconds. The cake flour and cornstarch combo is what gives these a luxuriously tender crumb—don’t skip it if you want that restaurant-quality texture. And for the love of baking, measure everything by weight if you can—a kitchen scale makes all the difference for consistent results.
No vanilla extract? Vanilla bean paste works perfectly, or scrape seeds from half a bean into the batter. Running short on baking powder? Baking soda plus cream of tartar at double the amount is a solid swap. The milk can be any kind—oat milk works in a pinch—but whole milk gives the best texture. For the oil, avocado oil has a neutral flavor that won’t interfere with the cake’s taste. If you’re baking at high altitude, reduce the baking powder by one-eighth teaspoon to prevent over-rising. And pro tip: grease the pans with butter and dust with flour—no parchment needed for these perfect domes.
These cakes freeze beautifully—wrap individually in plastic wrap, then store in a ziplock bag for up to 3 months. For serving, bring them to room temperature first. The batter can be prepped a day ahead and refrigerated, saving you time on baking day. If you’re making these for an event, bake them 24 hours in advance—they actually taste better after sitting overnight as the flavors meld. And trust me, no one will guess they’re homemade—they look like they came from a high-end bakery.
Why You’ll Love This Recipe
- No Mixer Needed: I swear by this recipe when my mixer’s on the fritz—just cream the butter and sugar by hand until it’s light and fluffy. The eggs and vanilla blend right in without a single whisk stroke, and honestly? The cake’s so tender, you’d never guess it didn’t come from a stand mixer.
- Buttery Vanilla Bliss: That ratio of butter to sugar? Chef’s kiss. It’s rich but not heavy, with a vanilla punch that lingers like a warm hug. The crumb is so fine it almost melts in your mouth—no dryness, no aftertaste, just pure, simple joy in every bite.
- Party in a Pan: Slice it for a picnic, crumble it over ice cream, or stack it for a mini dessert tower. Between us, I’ve used these same ingredients to make everything from a quick birthday cake to a last-minute office treat—no fancy decorating required, just slice and serve.
- Pantry-Friendly Magic: All the ingredients are staples you already own, and the recipe scales perfectly for leftovers. Bake a batch, store the slices in the fridge, and pull one out whenever you crave something sweet—no last-minute grocery runs, no wasted ingredients. My wallet (and my sweet tooth) thank me every time.
Step-by-step instructions for mini elegance cake
Here’s how to achieve bakery-quality mini cakes with flawless rise and tender crumb every single time.
Cream Butter and Sugars for Maximum Lightness
In a stand mixer fitted with the paddle attachment, combine the 1 cup unsalted butter (cut into cubes and chilled) with the 1.5 cups granulated sugar. Beat on medium speed for 3-4 minutes until the mixture is light, fluffy, and nearly doubles in volume. You’ll see ribbons form when you lift the paddle—this is your signal that air has been properly incorporated.
Here’s the thing—don’t rush this step. The creaming process creates tiny air pockets that become the cake’s structure. I like to scrape down the sides every minute to ensure even mixing. If your butter is too soft, chill the bowl for 10 minutes before continuing. This ensures proper fat distribution for that perfect crumb texture.
Add Eggs and Vanilla for Rich Moisture
Add the 3 whole large eggs one at a time, mixing on low speed for 30 seconds after each addition. This gradual incorporation prevents the batter from curdling. After all eggs are added, increase speed to medium and mix for another 1-2 minutes until the mixture is pale and thick.
Next, add the 1 tablespoon vanilla extract and mix for 10 seconds just to combine. The vanilla enhances the cake’s flavor without overpowering it. Here’s where it gets fun—taste your batter at this stage. It should be sweet but not cloying, with a clean vanilla aroma. If it needs more depth, you can add 1 teaspoon more vanilla now, but don’t overdo it.
Combine Dry Ingredients for Perfect Texture
In a separate bowl, whisk together the 2.5 cups all-purpose flour, 0.5 cup cake flour, 1.5 teaspoons baking powder, 0.5 teaspoon salt, 1 tablespoon cornstarch, and 0.25 teaspoon cream of tartar. Sift the mixture twice through a fine-mesh sieve to aerate it and remove any lumps. This step is crucial for that ultra-tender crumb—don’t skip it!
With the mixer on low speed, gradually add the dry ingredients to the wet mixture, alternating with the 0.5 cup whole milk and 0.25 cup vegetable oil. Start and end with the dry ingredients. Mix just until combined—you should still see some flour streaks. Overmixing develops gluten, which leads to tough cakes. The batter should be smooth and slightly thick, like heavy pudding.
Bake with Precision for Perfect Rise
Preheat your oven to 350°F and grease 12 two-inch cake pans thoroughly with butter and flour (or use silicone liners). Divide the batter evenly among the pans—each should be filled about ⅔ full. Tap the pans gently on the counter to eliminate air bubbles.
Bake for 18-22 minutes until a toothpick inserted in the center comes out clean and the tops spring back when touched. Here’s the critical part: Don’t overbake. The cakes will continue cooking slightly as they cool. If the tops brown too quickly, tent them loosely with foil after 15 minutes. Remove from the oven and let cool in the pans for 5 minutes, then transfer to a wire rack to cool completely.
Check for Perfect Doneness
Once completely cooled, run a thin knife around the edges of each cake to loosen them from the pans. Gently tap the bottoms—if they’re firm and the cakes release easily, you’ve achieved perfection. If any cakes stick, they were slightly underbaked. In that case, return them to a 325°F oven for 2-3 minutes to finish.
For the ultimate presentation, dust the cooled cakes with a light layer of powdered sugar or stack them with a simple buttercream. Each slice should have a fine, even crumb and rise beautifully in the center. The secret to this recipe’s success lies in the precise balance of ingredients and the careful baking process—every step matters for that perfect mini cake!
Pro Tips For Making 2 Inch Cake
- CREAM BUTTER FIRST: Melt the butter just until it’s pourable—no butterflies, no lumps—then let it cool to room temperature before mixing. Cold butter makes for a denser cake; room temp keeps it tender. I learned this the hard way when my first batch turned out like a brick.
- WEIGH YOUR FLOUR: Scoop that flour straight from the bag into a kitchen scale—no shaking the bag, no packing it down. A cup of flour varies wildly by brand, and this tiny cake won’t forgive extra weight. I was skeptical until I tried it: the texture went from cakey to perfectly light.
- SKIP THE OVERMIXING: Fold in the flour just until combined—think “marbled,” not “smooth.” Overmixing develops gluten, and your 2-inch cake will turn out tough instead of delicate. I know, I know, but trust the process: stop when you see dry bits lingering.
- BAKE UNTIL TOUCH-DRY: Check doneness at 2 minutes past the recipe’s suggested time—insert a toothpick. If it comes out clean, you’re golden. If not, bake another 30 seconds. I used to pull them too soon, and the crumb stayed gummy. Your future self will thank you.
Serving suggestions for this recipe
Frosting Finishes
For a classic touch, pipe vanilla buttercream between layers or on top using a Wilton 1M tip. I like to tint it with gel food coloring (like AmeriColor) for a soft pastel look.
For a lighter option, try Italian meringue buttercream—it’s less sweet and sets beautifully. If you’re short on time, a simple dusting of powdered sugar (sifted through a fine-mesh sieve) adds instant elegance. 💫
Fruit Toppers
Fresh berries elevate these mini cakes instantly. Try raspberries or blackberries for a pop of color, or slice strawberries into thin rounds. Arrange them in a circular pattern on top or place a single berry in the center.
For a tropical twist, use mango or pineapple slices—just brush them with a little lemon juice to prevent browning. A drizzle of chocolate ganache ties everything together beautifully.
Chocolate Drizzle
Melt ½ cup dark chocolate chips (like Ghirardelli 60%) with 1 tablespoon coconut oil over a double boiler, then let cool slightly. Drizzle over the cakes in a zigzag pattern for a modern look.
For extra flair, sprinkle with crushed pistachios or sea salt flakes right after drizzling while the chocolate is still wet. This adds a sophisticated contrast to the sweetness. 🍫
Layered Dessert Style
Stack two cakes with a layer of whipped cream or pastry cream in between, then top with a third cake. Add fresh fruit or chocolate shavings for texture.
For a showstopper, wrap the sides with edible gold leaf (available at craft stores) or dust with matcha powder for a vibrant green hue. These mini cakes become the star of any dessert table when presented this way.
Gift-Worthy Packaging
Wrap individual cakes in parchment paper, then tie with a silk ribbon (like a 1-inch grosgrain ribbon from Joann Fabrics). Place them in a clear cellophane bag with a handwritten tag for a professional touch.
For a rustic look, use kraft paper boxes lined with tissue paper. These cakes make stunning favors for weddings, showers, or corporate events—your guests will think you’re a pro! ✨
Nutrition facts
Frequently asked questions
Can I make these 2-inch cakes in a standard 6-inch round pan?
For a single 6-inch layer, reduce the recipe by ⅓ (use ⅔ cup butter, 1 cup sugar, and 1.5 cups flour). Bake at 350°F for 20-25 minutes until a toothpick comes out clean. The texture will be identical, just scaled up.
Why did my mini cakes sink in the middle?
This usually happens from overmixing or overbaking. Mix dry ingredients just until combined (flour streaks remain), and remove cakes when a toothpick comes out clean but with a few moist crumbs. If your oven runs hot, reduce temp to 325°F and check at 18 minutes.
How do I store these cakes for events?
Wrap cooled cakes individually in plastic wrap, then place in an airtight container with parchment paper between layers. They stay fresh at room temp for 3 days or in the fridge for 5 days. For longer storage, freeze for up to 3 months—thaw overnight before serving.
Can I substitute cake flour with all-purpose?
Yes, but remove 2 tablespoons from the 2.5 cups all-purpose flour and add 2 tablespoons cornstarch to maintain the tender crumb. The cakes will still be delicious, though slightly denser. For best results, use the full 0.5 cup cake flour if possible.
What’s the best way to transport these cakes?
Place each cake in a paper cup lined with parchment, then secure with plastic wrap. Stack cups in a hard-sided container with dividers to prevent shifting. For extra protection, wrap the whole container in a towel—this prevents breakage during transport. Perfect for weddings or parties!

- 6 Egg Cake Recipe with Oil: Light as Air With Buttery Moisture - October 4, 2026
- 4 Bean Casserole Recipe: One-Pan Heartiness With Smoky Paprika Depth - October 4, 2026
- 3-Ingredient Keto Mug Cake Recipe: Microwave Magic in 2 Minutes - October 4, 2026