
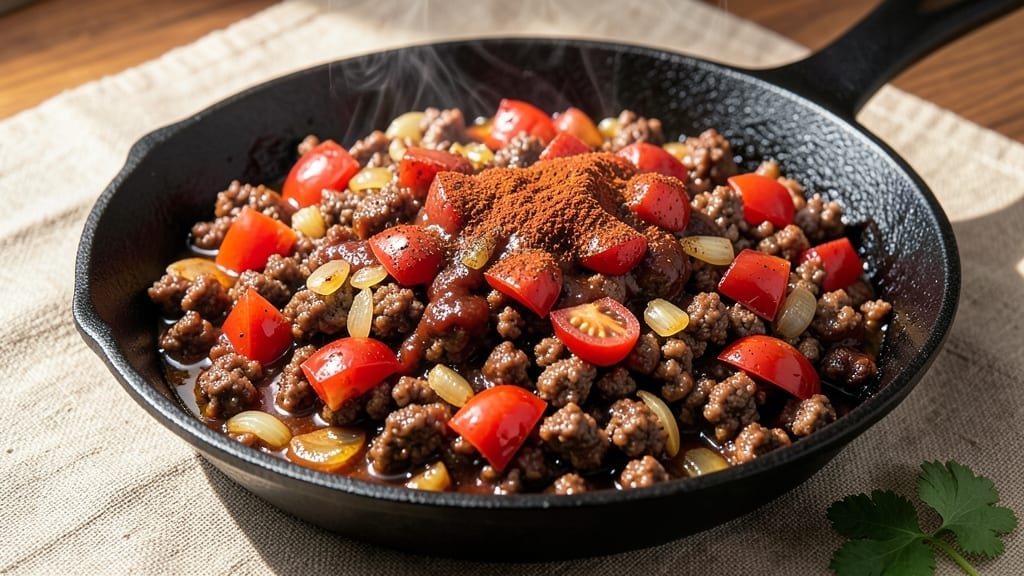
Cooking with 5 lbs of ground beef just got easier with this one-pan chili that transforms a simple protein into a hearty meal for a crowd. The secret lies in slow-cooked depth—browning the beef perfectly before simmering it with spices, beans, and tomatoes until every bite is rich and satisfying.
This isn’t just a recipe; it’s a foolproof way to turn raw ingredients into a restaurant-quality dish without the fuss.
The beauty of this chili is its versatility—adjust the spices for Mexican flavors with cumin and chili powder, or lean into Italian-inspired twists with oregano and red wine. Browning the beef in batches ensures a deep, caramelized crust, while simmering low and slow keeps the meat tender and flavorful.
No fancy techniques, just simple steps that deliver big results.
By the time you serve it, you’ll have a pot of smoky, aromatic chili with perfectly seasoned beef that melts in your mouth. The sides—crusty bread, shredded cheese, or sour cream—are just the cherry on top.
This recipe isn’t just about feeding a crowd; it’s about creating a meal that feels like a hug in a bowl.
Perfect for game day, family gatherings, or meal prep, this chili scales effortlessly and tastes even better the next day. Let’s get cooking—your taste buds will thank you.
Ingredients for 5 lb ground beef
Five pounds of beef, a handful of pantry staples, and this one-pan chili becomes your crowd-pleaser.
| Ingredient | Amount | Notes |
|---|---|---|
| Ground Beef (80/20) 🥩 | 5 lb | Lean but flavorful for browning |
| Yellow Onion 🧅 | 2 whole | Diced into small pieces |
| Garlic Cloves 🧄 | 6 cloves | Minced for deep flavor |
| Diced Tomatoes (46 oz can) 🍅 | 2 cans | San Marzano preferred |
| Tomato Paste 🍅 | ½ cup | Smooth texture for depth |
| Chili Powder 🌶️ | 2 tbsp | Medium heat preferred |
| Ground Cumin 🌿 | 1 tbsp | Toasted for warmth |
| Smoked Paprika 🌶️ | 1 tbsp | For smoky aroma |
| Black Beans (15 oz can) 🌱 | 2 cans | Drained and rinsed |
| Kidney Beans (15 oz can) 🌱 | 1 can | Drained and rinsed |
| Beef Broth 💧 | 3 cups | Low-sodium preferred |
| Red Wine (optional) 🍷 | ½ cup | Dry, bold variety |
| Salt 🧂 | 1 ½ tsp | Adjust to taste |
| Black Pepper 🌶️ | 1 tsp | Freshly ground |
| Bay Leaves 🍃 | 2 whole | Removed before serving |
The beef is non-negotiable here—80/20 fat ratio for that perfect caramelized crust. Costco or Walmart usually have it pre-packaged in 3-lb chunks, so grab two bags. If you’re feeling fancy, ask the butcher to grind it fresh. The onions? Yellow, not red—they’ve got more sweetness to balance the heat. Garlic? Six cloves might sound like a lot, but trust me, it’s worth it for that deep, aromatic base. For the tomatoes, San Marzano cans from Trader Joe’s are my go-to—they’re sweet and meaty, not watery.
No chili powder? Mix 1 tbsp smoked paprika + 1 tsp cayenne for a quick swap. Running low on beans? Lentils or pinto beans work in a pinch, just adjust the liquid. The red wine is optional but adds a restaurant-quality depth—use whatever bold red you’ve got open. If you skip it, add an extra splash of beef broth. The tomato paste? Don’t skip it—it’s what ties all the flavors together. And if you’re making this ahead, the flavors actually get better overnight, so plan to cook it the night before.
This chili reheats like a dream—3-4 days in the fridge, 3 months frozen. I like to portion it into quart-sized containers so I can grab and go. The beef will get even more tender as it sits, so if you’re serving it right away, let it rest for 10 minutes off the heat. Leftovers? Even better the next day. Freeze extras in ziplock bags with a thin layer of broth to keep it moist. And if you’ve got extra cheese, now’s the time to shred some on top—just don’t put it in the fridge with the chili, or it’ll get soggy.
Why You’ll Love This Recipe
- No-Chop Nightmare: I swear by this—just dice that onion roughly, no fancy slices. The 80/20 beef browns fast, and the garlic? Toss it in whole, smash it with the spatula when it’s golden. That’s it. No stress, no tears.
- Tomato-Paste Magic: Between us, that one little can of tomato paste is what makes this actually rich. It thickens the sauce just right, and when you mix in those diced tomatoes? Instant depth—like a hug from a slow-cooked meal, but in 30 minutes.
- Leftovers That Beg: This recipe makes way more than you’ll eat in one sitting. Freeze half for lazy nights, or reheat the rest for tacos, nachos, or even stuffed peppers. My kids fight over the portions—proof it’s reliable.
- Budget Crowd-Pleaser: Five pounds of beef stretches to feed six, and the rest of the ingredients? Cheap staples. You’re looking at $20 for a meal that’ll have your whole family saying, “Make this again.” No takeout guilt, just pure satisfaction.
Step-by-step instructions for one-pan chili that feeds a crowd
Here’s how to turn 5 pounds of ground beef into a hearty chili that brings everyone to the table.
Brown the Ground Beef Thoroughly
Heat a large Dutch oven or heavy pot over medium-high heat. Add the 5 lb ground beef (80/20) and break it apart with a wooden spoon, keeping it moving to prevent sticking. You want to cook it until it’s deep brown and mostly cooked through—about 8-10 minutes. This step is crucial because it develops deep flavor through the Maillard reaction.
Once the beef is browned, drain most of the fat but leave about 2 tablespoons in the pot. This fat will help create a rich sauce. If you’re using the 0.5 cup red wine (optional), add it now and let it simmer for 2 minutes to cook off the alcohol. The wine adds a nice depth of flavor that pairs perfectly with the spices.
Sauté Onions and Garlic for Flavor Foundation
Add the 2 whole yellow onion (diced) to the pot and cook for 5 minutes until softened and starting to caramelize. The onions should turn a light golden color—this sweetness will balance the heat of the chili. Then add the 6 cloves garlic (minced) and cook for another 30 seconds until fragrant.
Here’s where it gets good—stir in the 2 tbsp chili powder, 1 tbsp ground cumin, and 1 tbsp smoked paprika. Cook the spices for 1 minute so they release their aromas and mingle with the beef and onions. This step ensures every bite will be packed with warm, smoky flavor.
Build the Chili Base with Tomatoes and Broth
Add the 2 cans diced tomatoes (46 oz can), 0.5 cup tomato paste, 3 cups beef broth, 1.5 tsp salt, and 1 tsp black pepper to the pot. Stir everything together, scraping up any browned bits from the bottom of the pot. These bits are packed with flavor, so don’t miss this step.
Bring the mixture to a boil, then reduce heat to medium-low and let it simmer for 30 minutes. This initial simmer gives the flavors time to meld together. Add the 2 whole bay leaves now—they’ll infuse subtle herbal notes into the chili.
Add Beans and Simmer to Perfection
After the initial 30-minute simmer, stir in the 2 cans black beans (15 oz can, drained and rinsed) and 1 can kidney beans (15 oz can, drained and rinsed). These beans add hearty texture and fiber to balance the richness of the beef. Let the chili simmer uncovered for another 1-1.5 hours on low heat. The longer it simmers, the deeper the flavors become.
Taste the chili and adjust seasoning if needed. I usually add a pinch more salt or a dash of chili powder to taste. The chili is done when it’s thick and flavorful—you should see a rich, glossy sauce coating the beans and beef. The beans should be heated through and tender.
Rest and Serve with Confidence
Remove the 2 whole bay leaves before serving. Let the chili rest for 10 minutes off the heat—this allows the flavors to settle and the sauce to thicken slightly. Serve the chili hot in bowls, garnished with extra chili powder or chopped fresh cilantro if you like.
This chili makes 10 generous servings, perfect for feeding a crowd. The leftovers actually taste even better the next day as the flavors continue to develop. Store any leftovers in the refrigerator for up to 5 days or freeze for up to 3 months.
Pro Tips For Making 5 Lb Ground Beef
- Break the Beef in Chunks: Don’t just dump the 5 lbs of ground beef into one big pile—split it into 2-3 smaller batches before browning. I learned this the hard way: trying to cook all 5 lbs at once on one pan turns your kitchen into a sauna and leaves you with unevenly cooked meat. Two 2.5 lb batches (or three 1.5 lb batches) brown faster and more evenly, and you won’t end up with a greasy, soggy mess.
- Salt the Beef Before Browning: Toss the ground beef with a generous pinch of salt (about 1 teaspoon per pound) before you even think about cooking it. The salt draws out moisture, which helps create a better crust when you brown it—plus, it keeps the meat from getting greasy later. I used to skip this, and my chili or sauce always ended up tasting flat until I started salting early.
- Sear the Onion First: Don’t just dump chopped onions into the pan with the raw beef—sauté them until they’re soft and golden (about 5-7 minutes) before adding anything else. This step builds flavor and prevents your dish from tasting raw. If you’re in a hurry, crank the heat a little higher, but watch it like a hawk—burnt onions ruin everything.
- Stir in Tomato Paste Last: Wait until the onions are fully cooked and the beef is browned before adding the tomato paste—this ensures it cooks through evenly without turning bitter. I was skeptical until I tried it: the paste blends smoothly and deepens the flavor instead of clumping or tasting raw. Just a splash of water or broth helps it dissolve faster if it sticks.
Pro cooking tips for this dish
Batch Browning Magic
Never cook all 5 lbs of ground beef at once—it’ll steam instead of brown. Divide it into 3 equal portions and cook in batches over medium-high heat in a 12-inch cast iron skillet or Dutch oven. Use a wooden spoon to break it apart aggressively for maximum surface area.
The first batch should take 8-10 minutes to reach 160°F internal temperature—remove it to a plate and repeat with the remaining batches. This creates a deep, caramelized crust that’s the flavor foundation of your chili. 🔥
Spice Toasting Trick
Before adding the spices to your chili, toast them dry in the pot for 1 minute over medium heat. This releases their essential oils and intensifies their flavors.
I like to toast 2 tbsp chili powder, 1 tbsp cumin, and 1 tbsp smoked paprika together—it fills your kitchen with an amazing aroma. Just be careful not to burn them, or they’ll turn bitter. This simple step transforms ordinary spices into flavor powerhouses. ✨
Fat Management
After browning the beef, drain most of the fat—but leave 2-3 tablespoons in the pot. This residual fat creates a rich, velvety sauce that coats every ingredient.
If you end up with too much fat, pour it into a small saucepan and render it down over low heat, then whisk it back into the chili at the end.
I’ve also found that a fat separator funnel (like the OXO Good Grips) makes this process effortless when reheating leftovers. 💡
Low-and-Slow Simmering
Resist the urge to rush the simmering process. After adding all ingredients, maintain a gentle bubble—not a rolling boil—on the back burner. Use a meat thermometer to monitor the internal temperature of the beef.
It should reach 195-200°F after 1.5-2 hours of simmering, which ensures the meat is fork-tender. I like to set a timer for 1 hour, then check—this prevents overcooking while guaranteeing perfect texture. 🕒
Bean Prep Shortcut
Save time by using no-salt-added canned beans and rinsing them thoroughly. For extra flavor, heat the beans in the chili pot with a splash of broth for 5 minutes before adding them to the main pot.
This helps them absorb the chili’s rich flavors more effectively. Pro tip: If you’re short on time, use pre-cooked beans from the store—just drain and rinse them first. 🌱
Flavor Boost Finishes
Before serving, stir in a splash of beef broth or red wine (if using) to brighten the chili. For a smoky finish, top each bowl with a pinch of smoked paprika or a dollop of sour cream.
I also love adding a sprinkle of fresh cilantro or green onions** for a pop of color. These final touches elevate the dish from good to unforgettable. 💛
Nutrition facts
Frequently asked questions
Can I use leaner ground beef (like 90/10) for this recipe?
While you can use 90/10 ground beef, I strongly recommend sticking with 80/20 fat ratio for this recipe. The extra fat creates that rich, caramelized crust during browning and adds depth to the sauce. If you must use leaner beef, add 1 extra tablespoon of oil to the pot when browning to compensate for the lost fat. The texture will be slightly different but still delicious!
How do I adjust this recipe for fewer servings?
This recipe scales beautifully! For 5 servings, reduce the beef to 2.5 lbs and halve all other ingredients (except spices—keep them the same amount). For 8 servings, use 4 lbs of beef and adjust accordingly. The cooking times remain the same since the proportions stay consistent. Just make sure your pot isn’t too large—you want the chili to simmer properly without being watery.
What if I don’t have a Dutch oven? Can I use a regular pot?
Any heavy-bottomed pot with a lid will work—think large stainless steel pot or even a deep cast iron skillet. The key is using medium-low heat during simmering to prevent burning. If your pot is nonstick, use medium heat instead to avoid damaging the coating. Just be patient and let the chili develop its flavors slowly over time.
Can I make this chili in a slow cooker instead?
Yes, but with a few adjustments! Brown the beef first in a skillet, then transfer everything to your slow cooker. Cook on low for 6-7 hours or high for 3-4 hours. The slow cooker will give you tender beef, but you might need to add ½ cup extra broth since it won’t reduce as much. The flavors will develop beautifully, though the texture will be slightly softer than stovetop simmering.
Why does my chili taste bland after simmering?
Bland chili usually means one of three things: not enough browning, insufficient salt, or rushing the simmering. First, make sure you browned the beef thoroughly—it should be deep brown, not gray. Second, taste as you go and add salt gradually (remember, beans already contain some sodium). Finally, simmer uncovered for the full 1.5-2 hours—this lets the liquid reduce and flavors concentrate. If it’s still bland, finish with a splash of red wine or vinegar and fresh herbs.

- 6 Egg Cake Recipe with Oil: Light as Air With Buttery Moisture - October 4, 2026
- 4 Bean Casserole Recipe: One-Pan Heartiness With Smoky Paprika Depth - October 4, 2026
- 3-Ingredient Keto Mug Cake Recipe: Microwave Magic in 2 Minutes - October 4, 2026