
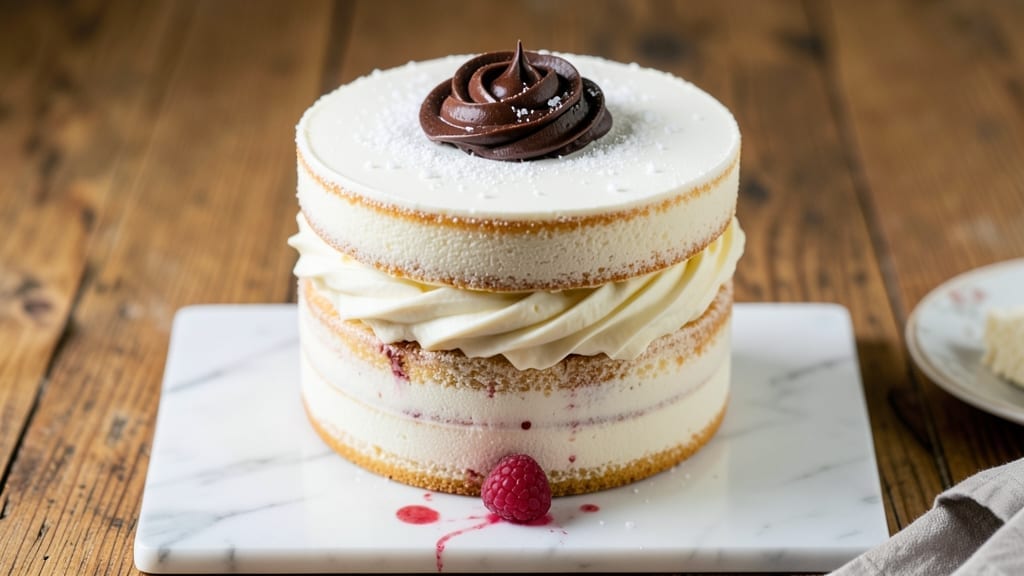
Baking a 3-layer white cake from scratch delivers the kind of showstopping dessert that feels like a professional bakery creation—without the fuss. The secret lies in a light, airy batter that bakes up with just the right height and a velvety buttercream that holds every layer perfectly.
I’ve perfected this recipe over years of trial and error, ensuring each slice is as tender as it is elegant, with a finish that’s crisp enough to hold a single raspberry or flower.
What sets this cake apart is the balance of technique and simplicity: three layers baked at precise temperatures, cooled properly, and filled with a smooth, stable buttercream that won’t slide.
The cake itself is a study in texture—fluffy yet sturdy, with a fine crumb that melts in your mouth while still supporting the weight of the frosting.
No special equipment is needed, just patience and a few key steps to avoid common pitfalls like sinking layers or overly dense cake.
By the time you’re done, you’ll have a cake that’s golden at the edges, perfectly domed, and topped with a glossy buttercream that’s smooth enough to spread like silk.
The layers stay distinct, the frosting holds its shape, and every bite delivers that perfect contrast of tender cake and rich, creamy filling. This is the kind of dessert that makes guests ask for seconds—and makes you feel like a baking pro. The best part?
This recipe scales beautifully for celebrations, and the techniques translate to other cakes too. Let’s get started on creating your masterpiece.
Ingredients for 3 layer white cake recipe from scratch
Pantry staples meet pastry magic for a cake that’s light, golden, and perfect for celebrations.
| Ingredient | Amount | Notes |
|---|---|---|
| All-Purpose Flour 🌾 | 3 cups | Sifted for lightness (plus extra for dusting) |
| Granulated Sugar 🍚 | 2 cups | Superfine preferred for silky texture |
| Unsalted Butter 🧈 | 1 ½ cups | Room temperature, full-fat for richness |
| Large Eggs 🥚 | 6 whole | Room temperature, separated carefully |
| Vanilla Extract 🌿 | 2 tsp | Pure Madagascar bourbon preferred |
| Baking Powder 🍞 | 1 ½ tsp | Freshly measured for lift |
| Salt 🧂 | ½ tsp | Fine sea salt for balance |
| Milk 🥛 | 1 cup | Room temperature, whole milk preferred |
| Lemon Zest 🍋 | 1 tbsp | Freshly grated, bright flavor |
| Parchment Paper 📄 | 3 sheets | For cake pan liners |
| Powdered Sugar 🍚 | 4 cups | For buttercream (sifted) |
| Heavy Cream 🥛 | 1 cup | Cold for stable buttercream |
| Vanilla Bean Paste 🌿 | 1 tbsp | For deeper vanilla flavor |
| Buttercream Stabilizer 🍞 | 1 tsp | Optional (cornstarch or meringue powder) |
The flour is non-negotiable here—King Arthur or Gold Medal brands are my go-tos for their protein balance. Room-temperature butter is key; if it’s cold, microwave it 20 seconds to soften. Eggs should be separated carefully—room temperature eggs whip up fluffier. For the vanilla, Madagascar bourbon extract adds depth, but imitation works in a pinch. The lemon zest brightens the whole cake, so use freshly grated—no dried substitutes. Milk should be room temp too; cold milk can sink the batter. Pro tip: Weigh your flour if you can—it’s more accurate than scooping.
No vanilla extract? Vanilla sugar or seeds from a split vanilla bean work beautifully. Running short on powdered sugar? Process granulated sugar in a food processor for a quick substitute. The buttercream stabilizer is optional but worth it for weddings or hot climates—meringue powder is my favorite. For the cake layers, bake until golden but still slightly springy—overbaking dries them out. And if you’re nervous about doming, tap the pans on the counter before baking to settle the batter. Trust me, it helps.
Store the cake layers airtight at room temperature for up to 3 days, or freeze the assembled cake for 3 months. The buttercream keeps 5 days refrigerated—just bring it to room temp before using. For transport, assemble the cake a day ahead; it sets up better overnight. And if you’re feeling fancy, dust with powdered sugar right before serving—it adds that bakery finish. Leftovers? They’re rare, but if they happen, toast them lightly for a delicious twist.
Why You’ll Love This Recipe
- No Fussy Steps: I swear, this cake only asks for four things you already own: flour, sugar, butter, and eggs. No weird ratios to memorize—just cream the butter and sugar until it’s light, fold in the eggs one at a time, and let the vanilla work its magic. Honestly, it’s the kind of recipe that makes you feel like a baker without the stress.
- Vanilla Buttercream Bliss: That rich, velvety buttercream layer? Pure comfort. The buttercream here isn’t sweet to the point of cloying—it’s balanced, with just enough vanilla to make every bite taste like a hug. And the way it melts into the tender cake? Chef’s kiss. (Yes, even if you’re not a baker.)
- Birthday to Brunch: This cake isn’t just for celebrations—it’s my go-to for potlucks, office treats, or when I need a fancy-ish breakfast. Split it into cupcakes for a last-minute dessert, or stack it with fresh berries for a weekend brunch. The layers hold up like a champ, so you’re not stuck scrambling for a serving platter.
- Pantry Staple Magic: Between us, this recipe is my secret weapon for using up random butter and sugar before they go stale. The eggs add structure, but the flour? It’s just there to make it work—no fancy substitutions needed. And leftovers? They disappear faster than I can say “second slice.”
Step-by-step instructions for 3 layer white cake
Here’s how to bake layers that rise high and stay moist, plus silky buttercream that holds its shape.
Prepare Cake Pans and Mix Dry Ingredients
Preheat your oven to 350°F and grease three 8-inch round cake pans with butter, then line the bottoms with the parchment paper. Sift together the 3 cups all-purpose flour, 1.5 teaspoons baking powder, and 0.5 teaspoon salt into a medium bowl. Set aside—this ensures no lumps in your batter and guarantees a light, airy texture.
I like to sift the dry ingredients directly into the mixing bowl where the wet ingredients will go. This prevents flour clouds when you add them later. Give the bowl a quick shake to distribute everything evenly before moving to the next step.
Cream Butter and Sugar Until Light and Fluffy
In a stand mixer fitted with the paddle attachment, beat the 1.5 cups unsalted butter and 2 cups granulated sugar on medium speed for 4-5 minutes until the mixture is pale, thick, and nearly triples in volume. This creaming process incorporates air, which creates that signature tender crumb.
Here’s the thing—don’t rush this step. You’ll know it’s ready when you lift the paddle and see ribbons form that slowly dissolve back into the mixture. If you skip this, your cake will be dense instead of light and fluffy.
Add Eggs and Alternate with Milk
Add the 6 whole large eggs, one at a time, mixing well after each addition. After the last egg, add the 2 teaspoons vanilla extract and 1 tablespoon lemon zest, mixing until combined. With the mixer on low speed, add about ⅓ of the milk first, then alternate adding the remaining milk with the dry ingredients in three additions.
I always start and end with the dry ingredients to ensure even distribution. Mix just until combined after each addition—overmixing develops gluten and makes the cake tough. The batter should be smooth and slightly thick, like heavy pudding.
Bake Layers Until Golden and Springy
Divide the batter evenly among the prepared pans. Tap each pan gently on the counter to remove any air bubbles, then bake for 25-30 minutes, or until a toothpick inserted into the center comes out clean and the tops spring back when touched. Rotate the pans halfway through baking for even browning.
Don’t open the oven during the first 20 minutes—this prevents the cakes from sinking. When done, let them cool in the pans for 10 minutes, then transfer to a wire rack to cool completely. This gradual cooling prevents cracking as they shrink.
Make the Buttercream and Assemble
In a stand mixer, beat the 1 cup cold heavy cream until soft peaks form. In a separate bowl, beat the 1.5 cups unsalted butter until smooth, then gradually add the 4 cups powdered sugar, 1 tablespoon vanilla bean paste, and 1 teaspoon buttercream stabilizer if using. Mix until light and fluffy.
Gently fold the whipped cream into the butter mixture until fully combined. This creates a stable buttercream that won’t melt too quickly. Level each cooled cake layer and place the first layer on a cake stand or plate. Spread a thin layer of buttercream, then add the second layer, repeating the process for the final layer. Cover the entire cake with buttercream and smooth the sides with an offset spatula.
Pro Tips For Making 3 Layer White Cake Recipe From Scratch
- Cream Butter Until Pale: DESCRIPTION: That butter should look like wet sand, not melted ice cream—beat it with sugar until it’s light and fluffy, about 3-5 minutes. I used to rush this, and the cake turned out dense. Trust the process; your layers will thank you.
- Room-Temp Eggs Matter: DESCRIPTION: Pull those eggs out of the fridge 30 minutes before using—room temperature eggs whip up faster and hold more air. Cold eggs? They’ll fight you, and your cake might collapse. (Yes, even if you’re impatient like me.)
- Don’t Overmix the Batter: DESCRIPTION: Stop folding in the flour as soon as it’s just combined—no streaks, no dry bits, but don’t overwork it. Overmixing = tough layers. Think “gentle but thorough,” not “beat it into submission.”
- Rotate Pans Mid-Bake: DESCRIPTION: Swap the cake pans from top to bottom halfway through baking—this evens out heat and prevents one side from drying out. I learned this after one batch where the top layer was underdone and the bottom was cakey. (Your oven’s hot spots are sneaky.)
Creative variations of this dish
Classic Vanilla Twist
For a nostalgic touch, infuse the buttercream with ½ cup warm milk and 1 vanilla bean, split and scraped, before whipping. Let it steep for 15 minutes, then strain out the bean. This deepens the vanilla flavor without overpowering the cake’s delicate crumb.
I’ve found that Madagascar bourbon vanilla extract adds a subtle caramel note that pairs beautifully with the lemon zest in the cake layers. 💛
Citrus Zest Variations
Swap the lemon zest for orange or lime to brighten the flavor profile. For a tropical twist, use 1 tbsp lime zest and add ½ cup pineapple juice to the batter.
If you prefer a more subtle citrus note, reduce the zest to ½ tbsp and add 1 tsp citrus extract (like orange or lemon) for a balanced burst. Always use freshly grated zest—dried zest lacks the vibrant punch.
Chocolate-Dipped Layers
For a decadent twist, dip the top of each cake layer in melted dark chocolate (use 6 oz 70% cacao) before assembling. Let the chocolate set for 5 minutes before adding the buttercream.
This adds a rich contrast to the light cake and makes the layers look stunning. Pair it with a raspberry filling between the layers for a modern fusion. 🍫
Spiced Buttercream
Transform the buttercream into a cozy spiced version by adding 1 tsp ground cinnamon, ½ tsp cardamom, and ¼ tsp nutmeg to the powdered sugar mixture. For warmth, fold in 2 tbsp caramelized onion jam (simmer ½ cup onions with 2 tbsp brown sugar until soft).
This works beautifully for fall weddings or holiday desserts. The spices complement the cake’s brightness without overpowering it.
Fruit-Filled Layers
Replace one buttercream layer with raspberry, strawberry, or mango jam for a fruity surprise. Use 1 cup jam, warmed slightly to spread easily, and pipe a border around the edges before adding the next cake layer.
For extra flair, top with fresh berries or a drizzle of reduced fruit syrup. This keeps the cake moist and adds a pop of color. I love using homemade jam for a restaurant-quality touch.
Gluten-Free Adaptation
To make this cake gluten-free, replace the 3 cups all-purpose flour with a 1:1 gluten-free baking flour blend (like King Arthur Measure for Measure). Add ½ tsp xanthan gum to improve structure.
Reduce the milk to ½ cup to balance the extra moisture in gluten-free flours. The texture will be slightly denser, but the cake will still hold its shape beautifully. 🌱
Nutrition facts
Frequently asked questions
Can I bake this cake in a different-sized pan?
Yes, but adjust the baking time and oven temperature accordingly. For 6-inch pans, bake at 325°F for 20-25 minutes, while 10-inch pans need 375°F for 30-35 minutes. The key is to use the same batter volume per pan—divide the total batter by the number of pans. Always check doneness with a toothpick, as smaller cakes may bake faster.
Why did my cake layers sink in the middle?
This usually happens from opening the oven too soon or underbaking. Always wait until the first 20 minutes have passed before checking, and bake until a toothpick comes out clean. Another culprit? Overmixing the batter—stop mixing as soon as the dry ingredients are just combined. For extra insurance, chill the batter for 30 minutes before baking.
How do I level the cake layers for even frosting?
Use a serrated knife or cake leveler for clean, straight cuts. Place the cake on a plate, mark the highest points with a toothpick, then slice just above those marks. For a pro finish, dust the knife with flour between cuts to prevent sticking. Leveling ensures your frosting looks smooth and professional—no uneven tops!
Can I make this cake ahead of time?
Bake the layers 1 day ahead and store them wrapped in plastic at room temperature. Assemble the cake 4-6 hours before serving to let the frosting set. For long-term storage, freeze the fully assembled cake (unfrosted or with a thin layer) for up to 3 months. Thaw overnight in the fridge before serving.
What’s the secret to smooth buttercream?
Cold ingredients are key! Chill the buttercream for 30 minutes between mixing stages, and use cold heavy cream for whipping. Beat the butter until completely smooth before adding powdered sugar, and sift the sugar to avoid lumps. For extra stability, add 1 tsp meringue powder or ½ tsp cornstarch to the sugar mixture.

- 6 Egg Cake Recipe with Oil: Light as Air With Buttery Moisture - October 4, 2026
- 4 Bean Casserole Recipe: One-Pan Heartiness With Smoky Paprika Depth - October 4, 2026
- 3-Ingredient Keto Mug Cake Recipe: Microwave Magic in 2 Minutes - October 4, 2026