
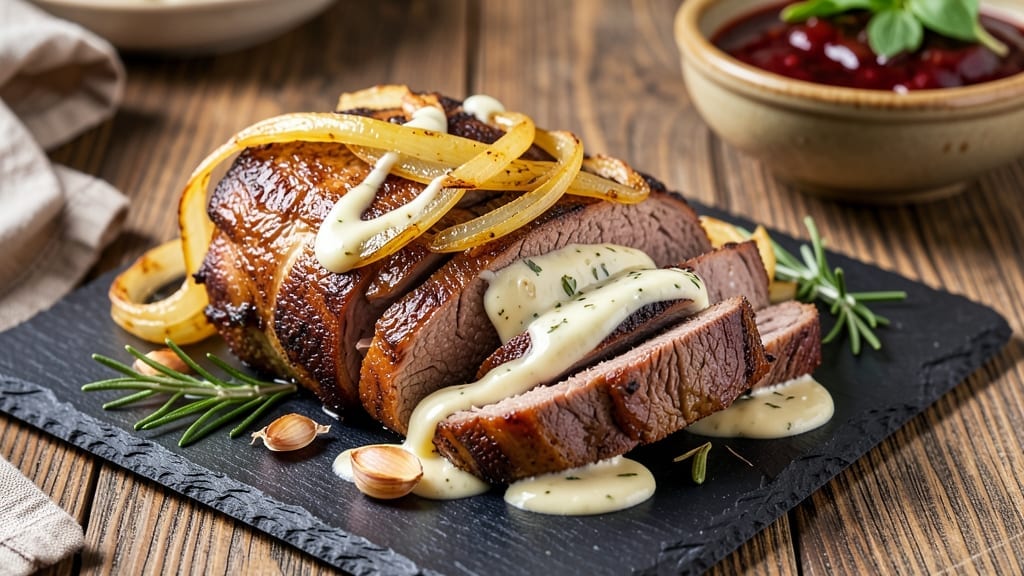
A 5 lb roast beef recipe that delivers fork-tender, juicy perfection starts with the right cut and a slow-cooking approach that transforms tough meat into melt-in-your-mouth slices. 🔥 The secret lies in low-and-slow cooking followed by a quick sear to create a flavorful crust, ensuring every bite is moist and packed with rich beefy flavor.
This method guarantees restaurant-quality results at home, with minimal effort once you master the timing and temperature.
The process begins with a simple yet effective seasoning blend—just salt, pepper, and garlic powder—that lets the natural flavors of the beef shine through. Cooking at a steady 275°F for hours allows the collagen to break down, turning connective tissue into gelatin that keeps the meat incredibly tender.
The key is patience; rushing this step will leave you with dry, tough beef instead of the succulent slices you crave.
By the time you finish, you’ll have a perfectly cooked roast with a golden-brown crust and a center that’s so tender it nearly falls apart. The resting period is crucial—letting the meat rest for at least 20 minutes ensures the juices redistribute, so every slice stays moist.
Slicing against the grain guarantees each bite is as tender as possible, making this the ultimate centerpiece for any dinner table.
Pair your roast with classic sides like roasted root vegetables, creamy mashed potatoes, or a rich au jus for dipping. The leftovers reheat beautifully, too, making this a meal that feeds a crowd and satisfies for days. Here’s how to achieve that juicy, tender roast every time.
Ingredients for 5 lb roast beef
Five pounds of beef plus a handful of pantry staples—this is your ticket to restaurant-quality roast.
| Ingredient | Amount | Notes |
|---|---|---|
| Chuck Roast Beef 🥩 | 5 lb | Center-cut for even cooking |
| Kosher Salt 🧂 | 1 ½ tbsp | Diamond Crystal preferred |
| Freshly Ground Black Pepper 🌶️ | 1 tbsp | Coarse grind for texture |
| Garlic Powder 🧄 | 1 tbsp | Freshly ground preferred |
| Unsalted Butter 🧈 | 4 tbsp | Cold, cubed for searing |
| Yellow Onion 🧅 | 1 whole | Large, sliced for garnish |
| Fresh Rosemary 🌿 | 1 tbsp | Chopped, for aroma |
| Fresh Thyme 🌿 | 1 tbsp | Leaves only, chopped |
| Beef Broth 🍲 | 1 cup | Low-sodium preferred |
| Olive Oil 🫒 | 2 tbsp | For pan searing |
| Flour 🌾 | 2 tbsp | All-purpose, for coating |
The chuck roast is non-negotiable here—center-cut delivers the best texture. Costco or Whole Foods usually carry it pre-trimmed, but if you’re buying a whole roast, trim excess fat for cleaner slices. Look for good marbling (those white streaks of fat) to ensure juiciness. The garlic powder should be freshly ground—pre-ground loses flavor fast. For the herbs, fresh is ideal, but dried will work at half the amount if you’re in a pinch. The beef broth? Low-sodium is key—you don’t want to over-salt your roast.
No chuck roast? Bottom round or brisket works in a bind, but expect slightly different textures. Swapping the fresh herbs for dried? Use one-third the amount—they’re more concentrated. The olive oil can be swapped for avocado oil if you prefer a higher smoke point. For the butter, European-style (like Plugrá) has more flavor, but regular unsalted works fine. The flour is just for dusting—skip it if you’re using a non-stick roasting pan. And if you’re worried about the roast drying out, add an extra splash of broth during cooking.
Let the roast sit at room temperature for 30 minutes before cooking—this ensures even doneness. The leftovers reheat beautifully; wrap tightly and refrigerate for up to 5 days. For freezing, portion into individual slices and store for up to 3 months. The crust from the sear? Save those scraps—they’re perfect for gravy or au jus. And if you’re feeding a crowd, double the herb amounts—it makes all the difference.
Why You’ll Love This Recipe
- Foolproof Prep: I swear by this—just season the chuck roast with salt, pepper, and garlic powder, then let the oven do the heavy lifting. No fancy searing or basting required, and the butter basting at the end? Five minutes of work.
- Rich, Deep Satisfaction: That chuck roast transforms into melt-in-your-mouth perfection with a crusty exterior and tender interior. The garlic powder and butter create this warm, savory depth that makes every bite feel like a hug—especially after a long week.
- Leftovers That Shine: Between us, this recipe makes so much food—enough for dinner and lunch the next day without feeling like a chore. Slice it thin for sandwiches, or cube it for tacos; it’s always better the second time around.
- Budget-Friendly Feast: A 5-pound chuck roast feeds a crowd without breaking the bank, and the ingredients? Salt, pepper, garlic powder—stuff I already have. Honestly, it’s my go-to for game days, family dinners, or when I need to impress guests without stressing.
Step-by-step instructions for perfectly slow-cooked roast beef
Here’s the foolproof method I use to transform a tough chuck roast into melt-in-your-mouth perfection.
🔥 Step 1: Sear the Roast for Maximum Flavor
Pat the 5 lb chuck roast beef completely dry with paper towels—this is non-negotiable for crispy edges. Heat 2 tbsp olive oil in a large Dutch oven over medium-high heat until shimmering. Place the roast in the pan and sear for 4-5 minutes per side until deeply browned.
Don’t rush this step. You want that beautiful Maillard reaction creating flavor compounds. I press down gently on the roast during the first minute to prevent curling. Once browned, remove the roast and set it aside on a plate.
👨🍳 Step 2: Build the Herb Butter and Sear Aromatics
In the same Dutch oven, reduce heat to medium and add the 4 tbsp unsalted butter, letting it melt completely. Stir in 1 tbsp garlic powder, 1 tbsp chopped fresh rosemary, and 1 tbsp chopped fresh thyme, cooking for 1 minute until fragrant.
Add the 1 whole yellow onion, sliced into even pieces, and cook for 5-6 minutes until golden brown. This step develops the base flavors that will infuse the roast during cooking. The onions should be soft but still hold their shape.
🥘 Step 3: Create the Flour Slurry and Deglaze
Sprinkle the 2 tbsp flour evenly over the onion mixture and stir vigorously for 1 minute to cook off the raw flour taste. Slowly pour in the 1 cup beef broth, scraping up all those delicious browned bits from the bottom of the pan.
Bring the mixture to a gentle simmer, then return the roast to the Dutch oven. The liquid should come about halfway up the sides of the roast. Cover tightly with a lid and transfer to a 325°F preheated oven.
⏰ Step 4: Slow Cook to Fork-Tender Perfection
Cook the roast for 3 to 3½ hours until the internal temperature reaches 200-203°F on a meat thermometer. This low-and-slow approach breaks down the tough connective tissue, transforming the chuck roast into tender, juicy beef.
Here’s the thing—I check the temperature at the 2-hour mark and then every 30 minutes after that. The roast is done when it’s fork-tender and the juices run clear. If you don’t have a meat thermometer, you can use the finger test: press your finger into the meat—it should feel like butter.
🔪 Step 5: Rest and Slice for Maximum Juiciness
Remove the roast from the oven and transfer it to a cutting board. Tent loosely with foil and let it rest for 20-30 minutes. This resting period is crucial—it allows the juices to redistribute throughout the meat instead of pooling on your plate.
Slice the roast against the grain into ¼-inch thick slices. The finished product should be fork-tender with a beautiful crust on the outside and juicy, flavorful meat on the inside. Serve with the pan juices spooned over the top for that restaurant-quality experience.
Pro Tips For Making 5 Lb Roast Beef
- SEAR HARD BEFORE BRAISING: Chuck roast needs that dark crust to lock in flavor, so don’t be shy with the heat. After salting and peppering, sear it in a hot Dutch oven for 4-5 minutes per side until it’s deep brown—almost black in spots. I used to rush this, and the meat always tasted bland afterward.
- SALT THE MEAT 24 HOURS EARLY: Kosher salt needs time to work its magic. Sprinkle it generously (about 1.5 teaspoons per pound) and let the roast sit uncovered in the fridge overnight. This keeps it juicy and lets the seasoning penetrate deeply—no last-minute guessing.
- SKIP THE CROWDED PAN: If you’re adding onions or garlic to the pot, do it after the roast comes out. Cooking them with the meat steams the roast instead of browning it, which makes the dish taste dull. Save the veggies for the gravy—trust me, it’s worth it.
- REST UNDER FOIL: After pulling the roast from the oven, tent it loosely with foil and let it sit for 20-30 minutes. This keeps it warm while the juices redistribute—cutting into it too soon sends all that flavor pooling onto your plate instead of staying inside. (Yes, even if you’re impatient like me.)
Troubleshooting this dish
Dry Roast Problem
If your roast turns out dry, the issue is usually cooking too fast or not enough moisture. First, never skip the slow cook—rushing to 350°F or higher dries out the meat. Instead, stick to 275-300°F for 3-4 hours until internal temp hits 200°F.
I also recommend adding ½ cup extra beef broth halfway through cooking to keep the pan juices rich and the meat moist. 💧
Uneven Cooking
Uneven doneness often happens when the roast isn’t properly center-cut or the oven temperature fluctuates. Always use a meat thermometer to check the thickest part—avoid guessing! If your oven runs hot, lower the temp to 250°F and add 15-20 minutes to the cook time.
For extra insurance, place the roast on a wire rack in a roasting pan to allow heat circulation on all sides.
Tough Texture
Tough beef means the connective tissue didn’t break down enough. The fix? Low and slow is non-negotiable—aim for 200-203°F internal temp, not 160°F (medium-rare).
If you’re short on time, try the “Texas Crutch”: wrap the roast in butcher paper at 165°F and return it to the oven until it reaches 203°F. This forces moisture back into the meat and tenderizes it.
Bland Flavor
Bland roast usually means insufficient browning or weak seasoning. Always sear the roast until deeply browned before slow cooking—this builds flavor. For extra depth, add a garlic clove smashed onto the meat during searing or use smoked paprika (½ tsp) in the herb butter.
I also like finishing with a pat of cold butter while resting to lock in flavor and moisture. 🌶️
Pan Juices Too Thin
Thin pan juices happen when the roast doesn’t release enough collagen. To fix this, deglaze aggressively with beef broth after searing, and simmer uncovered for the last 15 minutes of cooking to reduce the liquid slightly.
For richer juices, add 1 tbsp tomato paste to the pan before adding broth—it adds depth without overpowering. Save any scraps from the roast to make a quick gravy using the reduced pan juices.
Overcooked Exterior
If the outside burns before the inside cooks, your oven is too hot or the roast is too close to the heat source. Move the roast to the middle rack and reduce oven temp by 25°F.
For a crispy crust without overcooking, finish with a broiler for 2-3 minutes at the end—just watch it closely! I also recommend tenting loosely with foil** during the last hour to prevent drying.
Nutrition facts
Frequently asked questions
What’s the best cut of beef for a 5 lb roast?
A center-cut chuck roast is ideal for this recipe—it’s flavorful, affordable, and becomes incredibly tender when cooked low-and-slow. The center cut ensures even cooking, while the chuck’s natural fat content keeps the meat juicy. Avoid flank steak or sirloin; they’re too lean and won’t benefit from the slow cooking process.
How do I know when the roast is fully cooked?
Use a meat thermometer to check the internal temperature—it should reach 200-203°F for fork-tender perfection. The roast is done when it’s fork-tender and the juices run clear. If you don’t have a thermometer, press your finger into the meat; it should feel like butter. Never rely on time alone—every oven varies!
Can I cook this roast in a slow cooker?
Yes! Sear the roast first, then transfer it to your slow cooker with the onions, herbs, and broth. Cook on low for 8-10 hours until tender. For extra flavor, add 1 cup beef broth halfway through. The texture will be similar to oven-cooked, but slightly more tender. Just be sure to rest it before slicing.
Why is resting the roast so important?
Resting for 20-30 minutes after cooking lets the juices redistribute throughout the meat instead of pooling on your plate. This keeps each slice moist and flavorful. If you skip resting, you’ll end up with dry slices that lose all that delicious juice. The crust will stay intact while the meat stays juicy—worth the wait!
What are the best sides to serve with this roast?
Classic pairings include creamy mashed potatoes, roasted root vegetables (carrots, parsnips, potatoes), or a fresh green salad. For extra indulgence, serve with homemade au jus made from the pan drippings. The rich beef flavor pairs beautifully with earthy vegetables and buttery sides—think of it as a complete Sunday dinner!

- 3lb Prime Rib Roast Recipe: Juicy Pink Center Guaranteed in 3 Hours - October 31, 2026
- 5 Spice Cake Recipe: Warmly Spiced Layers With Crunchy Top - October 31, 2026
- 1950’s Macaroni and Cheese Recipe: Nostalgic Creamy Cheese Sauce with Buttery Noodles - October 31, 2026