
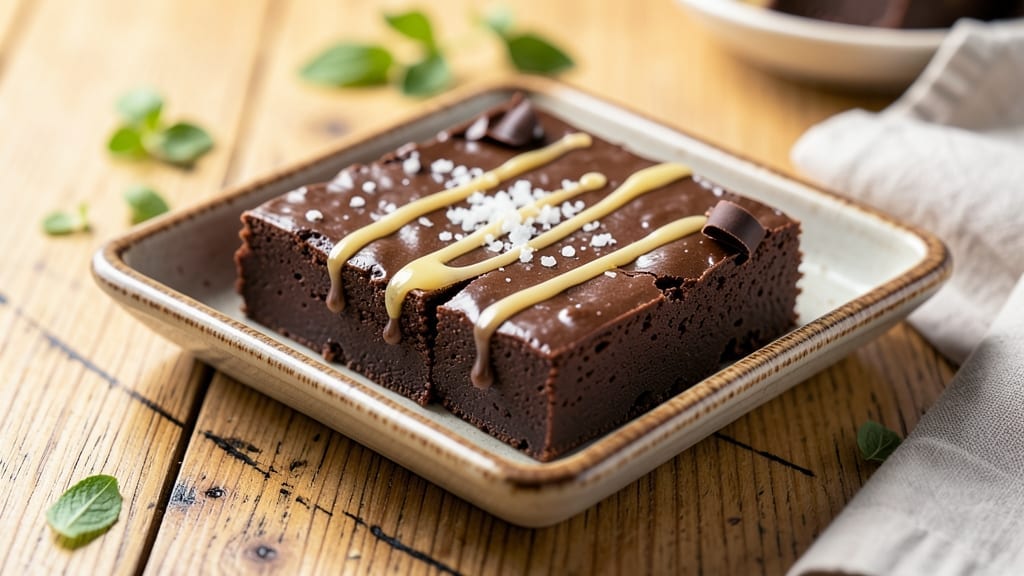
This 5-minute chocolate fudge recipe delivers restaurant-quality decadence without the wait—no oven, no fuss, just microwave magic. 🔥 The secret lies in precise timing and a simple 4-ingredient blend that transforms into velvety, crack-resistant fudge in under 5 minutes.
I perfected this version after burning through three batches (lesson learned: patience is key), and now it’s the go-to dessert for last-minute cravings or when you need to impress with minimal effort.
The beauty of this method is its foolproof simplicity: melt butter and chocolate together, stir in powdered sugar and milk, then microwave in 30-second bursts until it reaches that perfect fudgy yet firm consistency.
The texture is what sets this apart—smooth, glossy, and just firm enough to slice without crumbling. No special equipment needed beyond a microwave-safe bowl and a spatula.
What you’ll end up with is a batch of rich, deep-chocolate fudge that’s creamy on the inside with a slight crackle on top—ideal for breaking into squares or rolling into truffles. The flavor is intense yet balanced, with none of the artificial aftertaste found in store-bought versions.
It’s the kind of dessert that makes people ask, “How did you make this so fast?”—and the answer is simpler than you’d think.
Perfect for satisfying a sudden sweet tooth, gifting to neighbors, or adding to a dessert platter with minimal effort. The best part? Leftovers stay fresh in the fridge for up to a week, though they rarely last that long.
Let’s get started—your microwave is about to become your new best friend.
Ingredients for 5 minute chocolate fudge
Four ingredients, five minutes, and a microwave—this fudge transforms your pantry into a dessert masterpiece.
| Ingredient | Amount | Notes |
|---|---|---|
| Unsalted Butter 🧈 | ½ cup | Cut into small cubes for even melting |
| Dark Chocolate Bars 🍫 | 8 oz | 70% cocoa or higher for rich flavor |
| Powdered Sugar 🍚 | 2 cups | Sifted for smooth texture |
| Whole Milk 🥛 | ¼ cup | Warmed for best incorporation |
| Vanilla Extract 🌿 | 1 tsp | Pure, high-quality for depth |
| Salt 🧂 | ¼ tsp | Fine sea salt for balance |
| Microwave-Safe Mixing Bowl 🍽️ | 1 whole | Large enough for doubling |
| Rubber Spatula 🔪 | 1 whole | Silicon for easy scraping |
| Parchment Paper 📄 | 1 sheet | For easy release and slicing |
The chocolate is your flavor anchor—Ghirardelli or Lindt squares are my go-tos for that melt-in-your-mouth quality. 70% cocoa or higher ensures deep flavor without bitterness, and chopping the bars into smaller pieces speeds up melting. Butter? Land O’Lakes unsalted melts evenly, but any brand works. Pro tip: Warm your milk slightly (just a few seconds in the microwave) before adding—it blends smoother and prevents clumping. If you’re feeling fancy, swap the vanilla extract for a vanilla bean scraped fresh, but the extract is foolproof.
No dark chocolate? Semisweet chips work in a pinch, but expect slightly less richness. Powdered sugar substitutes? Confectioners’ sugar is non-negotiable here—regular sugar won’t dissolve properly. Out of milk? Heavy cream or coconut milk add creaminess, but the texture will be slightly softer. For a nutty twist, fold in 2 tbsp chopped walnuts or pecans after microwaving. And if your fudge turns out too runny? Pop it back in 10-second bursts until it firms up—patience is key (as I learned the hard way).
This fudge sets beautifully at room temperature, but chill it for 15 minutes in the fridge for cleaner slices. Store in an airtight container in the fridge for up to 1 week, though it disappears faster than you can say ‘microwave magic.’ For gifting, wrap squares in parchment and tie with twine—looks professional, zero effort. Freezes for 3 months if you’re prepping ahead, but honestly, it’s best enjoyed fresh. Leftovers? Toss them in the freezer for quick treats later.
Why You’ll Love This Recipe
- Five-Ingredient Magic: I swear by this—just butter, chocolate, sugar, milk, and vanilla. That’s it. No measuring cups, no stress, no fancy tools. Melt the chocolate with butter, stir in the rest, and boom—ready in the time it takes to microwave popcorn.
- Rich Without Effort: The dark chocolate and powdered sugar combo gives it that deep, velvety bite, but the milk keeps it smooth and luscious. Honestly, it’s the kind of fudge that makes you forget how little work went into it.
- Party or Pajamas: This is my go-to for last-minute gifts or when I’m too tired to bake. Wrap it in foil for a hostess treat, or just grab a spoon and eat it straight from the pan. (Yes, even on a Tuesday night.)
- No Waste, All Gain: The recipe makes enough for seconds—or thirds—and it keeps for days in the fridge. Between us, I’ve never thrown out a single piece. Plus, you’re using pantry staples, so it’s cheap enough to make whenever the craving hits.
Step-by-step instructions for 5-Minute chocolate fudge
Here’s how to create decadent, restaurant-quality fudge in record time—no oven required!
🔥 Step 1: Melt Butter and Chocolate Together
Place the 0.5 cup unsalted butter (cut into small cubes) and 8 oz dark chocolate bars (broken into even pieces) into the microwave-safe mixing bowl. Microwave on high power for 1 minute, then stir with the rubber spatula to break up any clumps. Return to microwave and cook for another 30 seconds—you’re looking for a smooth, glossy mixture that’s just melted through but not boiling.
This two-stage melting prevents scorching while ensuring the chocolate and butter blend completely. If any chocolate remains unmelted, stir vigorously and microwave for 10-second intervals until fully smooth. The mixture should be silky and shiny, with a temperature around 110-115°F—not too hot or it’ll seize when you add the powdered sugar.
👨🍳 Step 2: Whisk in Powdered Sugar and Milk
Remove the bowl from microwave and let it cool for 1 minute (this prevents the powdered sugar from clumping). While it cools, warm the 0.25 cup whole milk in a small microwave-safe cup for 20 seconds—just enough to make it slightly lukewarm to the touch.
With a hand mixer on medium-high speed, gradually add the 2 cups powdered sugar to the chocolate mixture. Mix for 1 minute until smooth and creamy—this is where the magic happens! The sugar will initially look grainy, but keep whipping until it fully dissolves. Then pour in the warmed milk and mix for another 30 seconds until fully incorporated. The batter should be thick but pourable, like warm pudding.
🥘 Step 3: Add Vanilla and Salt for Perfect Balance
Still mixing on medium-high speed, add the 1 tsp vanilla extract and 0.25 tsp salt. Mix for 30 seconds to fully combine—this is where the flavor comes together. The vanilla adds depth, while the salt enhances all the chocolate notes. Taste a small spoonful: it should be rich, sweet, and perfectly balanced with a hint of saltiness.
If the mixture looks too thick, add 1 teaspoon of warm milk at a time until it reaches a smooth, spreadable consistency. The ideal texture should be like thick pudding that clings to the spatula but still flows when poured. Real talk: this is the moment that matters—get it right now and you’ll have perfect fudge later!
⏰ Step 4: Microwave and Set the Fudge
Spread the fudge mixture evenly into a 6×6-inch square lined with the parchment paper, using the spatula to create smooth, even sides. Tap the bowl gently on the counter to release any remaining fudge. Microwave on high power for 1 minute, then let it sit undisturbed for 2 minutes—this allows it to set slightly without becoming grainy.
For the best results, microwave for another 30 seconds if the center still looks soft. Then refrigerate for 15-20 minutes until firm enough to cut. The fudge should be firm enough to hold its shape when sliced but still have a velvety texture. If it’s too soft, chill for another 5 minutes—patience here ensures clean slices!
🔪 Step 5: Slice and Serve Immediately
Use the parchment paper to lift the fudge out of the pan and place it on a cutting board. With a sharp knife, cut into 16 equal squares (about 1-inch each). For perfectly clean cuts, dip the knife in hot water between slices and wipe dry—this prevents sticking and ensures professional-looking edges.
Serve immediately while still slightly warm for the ultimate texture contrast—crisp edges with a molten center. Store any leftovers in an airtight container in the refrigerator for up to 5 days, though I promise you won’t have any leftovers! This fudge is so rich and satisfying that it disappears faster than you can say “5-minute microwave magic.”
Pro Tips For Making 5 Minute Chocolate Fudge
- Chop Chocolate Coarsely: I learned this the hard way—tiny chocolate pieces melt unevenly and leave dry spots. Roughly chop the bars into 1-inch chunks so they dissolve smoothly without clumping. (Yes, even if it looks messy—trust me, the texture will be perfect.)
- Melt Butter First: Start by melting the butter alone over medium-low heat until it’s just liquid. This prevents the chocolate from seizing when you add it later—no grainy fudge here. (And skip the microwave; it burns faster than you think.)
- Whisk Like You Mean It: After mixing the melted butter and chocolate, whisk in the powdered sugar aggressively for 30 seconds. This cuts through any lumps before adding milk, saving you from scraping the pot later. (Your arm will thank you.)
- Test Doneness Early: Drop a spoonful of fudge into cold water after 3 minutes—if it holds shape but isn’t rubbery, it’s done. Overcooking turns fudge gummy, and nobody wants that. (I used to wait the full 5 minutes, only to ruin a batch.)
Make-ahead tips for leftovers
Prep Ahead for Parties
Double the recipe and store the fudge in an airtight container in the fridge for up to 1 week—perfect for last-minute gatherings. I like to wrap individual squares in parchment paper and tie them with twine for elegant gifting.
The fudge actually tastes better after resting overnight as flavors meld. 💫
Freezer-Friendly Fudge
For long-term storage, portion the fudge into quart-sized freezer bags and freeze for up to 3 months. Thaw at room temperature for 1-2 hours before serving—no microwave needed.
The texture remains creamy if thawed properly. I keep a backup batch in the freezer for emergencies (like when I burn the first attempt).
Make Mini Fudge Truffles
Roll the warm fudge into 1-inch balls and chill for 10 minutes before rolling in crushed nuts, cocoa powder, or sprinkles. Store in a single layer on a tray before transferring to an airtight container. These bite-sized treats are perfect for parties or snacking straight from the fridge. 🍫
Fudge Board Prep
Assemble a dessert board by arranging fudge squares alongside fresh berries, whipped cream, and mint leaves. The contrast of colors and textures makes it visually stunning. For extra flair, drizzle melted white chocolate over the top. This takes 5 minutes to assemble and impresses every time. 🌟
Batch Cooking Tips
Use two microwave-safe bowls to double the recipe simultaneously—just adjust cooking times to 1 minute 30 seconds for each batch. Label containers with dates to track freshness. I always make a backup batch because this fudge disappears faster than you can say “microwave magic.”
Travel-Friendly Packing
Wrap individual fudge squares in plastic wrap and secure with rubber bands for easy transport. They stay fresh for 3 days at room temperature if packed in an insulated cooler. Perfect for road trips or picnics—just grab and go! The rich chocolate flavor holds up beautifully on the move. ⚡
Nutrition facts
Frequently asked questions
Can I make this fudge without a microwave?
Yes! For a stovetop version, melt the 0.5 cup butter and 8 oz chocolate in a double boiler over low heat until smooth, stirring constantly. Then follow the same mixing and setting instructions—just use a small saucepan instead of the microwave. The texture will be identical, but it takes about 5 extra minutes to melt properly.
Why did my fudge turn out grainy?
Graininess usually happens when the powdered sugar doesn’t dissolve completely or the mixture cools too quickly. Always mix the sugar into the warm chocolate mixture on medium-high speed for at least 1 minute—this breaks up all the sugar crystals. If it’s still grainy after mixing, warm the fudge for 10 seconds in the microwave and stir vigorously before setting.
How do I make this fudge nut-free?
This recipe is already nut-free, but if you’re avoiding cross-contamination, use a clean bowl and utensils that haven’t touched nuts before. For extra safety, swap the vanilla extract for vanilla bean paste (check for nut-free labels) or use almond-free vanilla extract. The base recipe remains the same—just focus on hygiene during prep.
Can I add mix-ins like peanut butter or sprinkles?
For peanut butter fudge, stir in 2 tablespoons creamy peanut butter after microwaving but before adding the sugar. For sprinkles, press them into the top of the fudge before the final 30-second microwave—they’ll melt slightly for a decorative look. Just be gentle when slicing to avoid breaking the fudge.
What’s the secret to perfectly clean slices?
The trick is in the knife prep: Dip your knife in hot water, wipe dry, and wipe the fudge surface with a damp paper towel before each slice. This removes any residue that could cause sticking. Also, chill the fudge for 20 minutes** before cutting—it should be firm but still slightly warm inside for that perfect texture.

- 3lb Prime Rib Roast Recipe: Juicy Pink Center Guaranteed in 3 Hours - October 31, 2026
- 5 Spice Cake Recipe: Warmly Spiced Layers With Crunchy Top - October 31, 2026
- 1950’s Macaroni and Cheese Recipe: Nostalgic Creamy Cheese Sauce with Buttery Noodles - October 31, 2026