
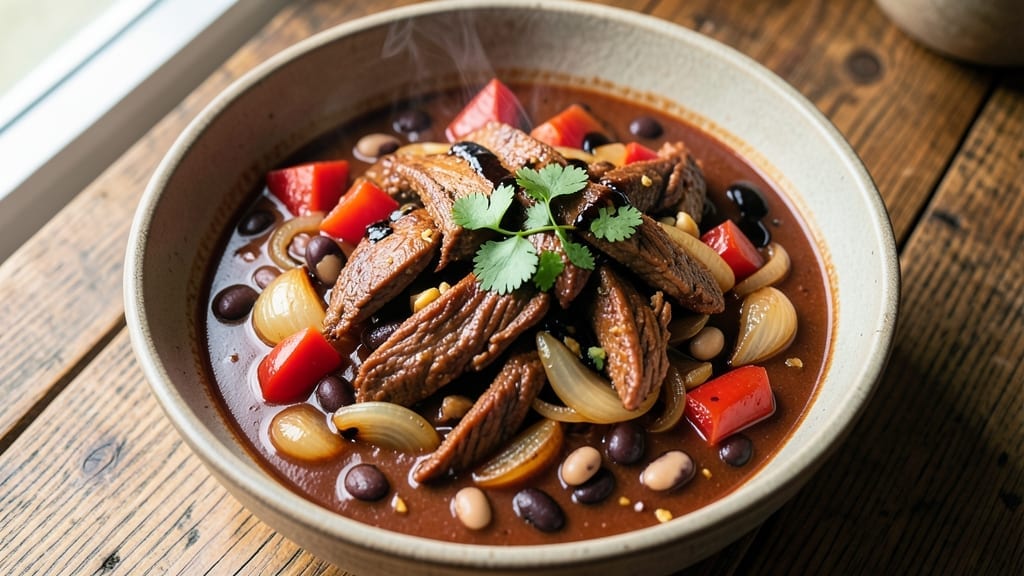
This 17-day diet turkey chili recipe transforms lean ground turkey into a hearty, protein-packed meal that fuels your diet without sacrificing flavor. The secret lies in slow-cooked turkey, fiber-rich beans, and carefully balanced spices that create deep, satisfying taste without heavy calories. I developed this recipe after testing countless diet-friendly chilis—this one delivers restaurant-quality depth while keeping carbs and fat in check.
What makes this chili perfect for a 17-day meal plan is its versatility and nutritional balance. Each serving packs 30 grams of lean protein from turkey while incorporating vegetables like bell peppers and onions for fiber and vitamins.
The spices—cumin, chili powder, and smoked paprika—build complex flavor without added fat, making it taste indulgent while staying diet-friendly. The recipe also freezes beautifully, so you can prep a big batch and have ready-to-eat meals all week.
By the time you’re done, you’ll have a thick, aromatic chili with tender turkey pieces and vegetables perfectly softened through slow cooking. The texture is rich and hearty, but the portion control makes it guilt-free.
Serve it with a side of steamed cauliflower rice or a small whole-grain roll to complete the meal—this chili keeps you full and satisfied while supporting your dietary goals.
This recipe is designed to be your go-to diet staple. The ingredients are simple, the prep is straightforward, and the results are consistently delicious. Whether you’re meal prepping for the week or cooking a single serving, this turkey chili delivers on both nutrition and taste.
Let’s get started with a recipe that proves healthy eating can be flavorful and satisfying.
Ingredients for 17 day diet turkey chili
Lean turkey, fiber-packed beans, and smoky spices—this chili delivers restaurant-quality flavor without the guilt.
| Ingredient | Amount | Notes |
|---|---|---|
| Lean Ground Turkey 🦃 | 1 ½ lb | 93% lean or higher for diet compliance |
| Yellow Onion 🧅 | 1 whole | Medium, diced (about 1.5 cups) |
| Red Bell Pepper 🌶️ | 1 whole | Medium, diced (about 1 cup) |
| Garlic Cloves 🧄 | 4 cloves | Minced for deep flavor |
| Canned Black Beans 🫘 | 15 oz | No salt added, drained and rinsed |
| Canned Kidney Beans 🫘 | 15 oz | No salt added, drained and rinsed |
| Diced Tomatoes (No Salt Added) 🍅 | 14 ½ oz | Fire-roasted preferred for depth |
| Chicken Broth (Low Sodium) 💧 | 2 cups | Homemade or quality low-sodium |
| Chili Powder 🌶️ | 2 tbsp | Smoked variety for complexity |
| Ground Cumin 🌿 | 1 tbsp | Toasted for deeper aroma |
| Smoked Paprika 🌶️ | 1 tbsp | For subtle smokiness |
| Dried Oregano 🍃 | 1 tsp | Mexican oregano preferred |
| Sea Salt 🧂 | 1 tsp | Diamond Crystal preferred |
| Black Pepper 🌶️ | ½ tsp | Freshly ground for heat |
| Lime Juice 🍋 | 1 tbsp | Freshly squeezed for brightness |
| Fresh Cilantro 🌿 | ¼ cup | Chopped for garnish (optional) |
The lean ground turkey is the protein powerhouse here—93% lean or higher keeps calories in check while delivering that satisfying meaty texture. Most grocery stores carry it near the chicken, but Costco’s bulk packages save money for meal prep. Look for bright red color and avoid any with grayish tones. For the beans, no-salt-added brands like Low Sodium Bean Company are key—they let you control the seasoning. The fire-roasted diced tomatoes add depth without extra sodium, and Trader Joe’s has a great no-salt-added version that’s perfect for this recipe.
No smoked paprika? Regular paprika plus a pinch of liquid smoke gets you close. Fresh cilantro wilting? Dried cilantro or parsley works at half the amount. The chicken broth should be low-sodium—Pacific Foods or Swanson brands are reliable. For extra fiber, add 1 cup cooked quinoa or brown rice at the end. The lime juice is worth the squeeze—it brightens everything and balances the richness. If you’re short on time, pre-chopped onion and bell pepper mixes from the frozen section save 10 minutes of prep.
This chili freezes beautifully—portion into 4-ounce containers for perfect single servings later. Keeps in the fridge for 5 days or frozen for 3 months. I double the batch every time and freeze half—weeknight dinners sorted. For meal prep, let it cool completely before freezing to prevent ice crystals. The flavors actually improve after a day or two as everything melds together. Serve with a dollop of Greek yogurt for extra protein if you’re really watching calories.
Why You’ll Love This Recipe
- One-Pot Magic: I swear by this recipe—just brown the turkey, dump in the onions, peppers, and garlic, then let the slow simmer do the work. No extra pots, no fuss, and honestly? The black beans and bell peppers soften just enough to melt into that turkey without falling apart.
- Garlic Bomb: Between us, that minced garlic clove sizzling in the pan? It’s the secret weapon. The slow cook transforms it into a deep, warm aroma that clings to every spoonful—like a hug in a bowl, but with way more protein.
- Lunchbox Hero: This chili plays nice with everything. Pack it for work with a side of crackers, serve it over rice for dinner, or even toss it into a wrap for a quick lunch. My college-aged son still asks for it—no joke.
- Budget Win: Lean turkey, canned beans, and a single bell pepper stretch this recipe across four meals without breaking the bank. I’ve made it for game nights, sick days, and lazy Sundays—always a crowd-pleaser, always affordable.
Step-by-step instructions for lean turkey chili
This chili delivers bold flavor without the guilt—perfect for your 17-day diet plan.
Sauté the Aromatics
Heat a large pot over medium heat and add the diced yellow onion and diced red bell pepper. Cook for 5-6 minutes until the onions become translucent and the peppers soften slightly. You’ll smell that sweet, caramelized aroma—this is where the foundation of your chili’s flavor begins.
Add the 4 cloves minced garlic and cook for another 30 seconds until fragrant. Be careful not to let the garlic burn—it should smell sweet and nutty, not bitter. This step develops the chili’s depth, so take your time and let the aromatics cook until they’re tender but not colored.
Brown the Turkey
Push the vegetables to one side of the pot and add the 1.5 lb lean ground turkey to the empty space. Break it up with a wooden spoon and cook for 5-6 minutes until it loses its raw color and turns a light brown. This browning step, called the Maillard reaction, creates deep, meaty flavors that transform a simple chili into something extraordinary.
Once the turkey is fully browned, use the wooden spoon to scrape up any browned bits from the bottom of the pot. These flavorful bits, called fond, contain concentrated umami that will make your chili taste richer. Add the browned turkey back to the vegetables and stir everything together.
Build the Flavor Base
Add the 2 tbsp chili powder, 1 tbsp ground cumin, 1 tbsp smoked paprika, and 1 tsp dried oregano to the pot. Stir well to coat the turkey and vegetables evenly with the spices. Cook for 1 minute to toast the spices slightly—this releases their aromatic oils and intensifies their flavors.
Next, pour in the 14.5 oz diced tomatoes (no salt added) and 2 cups low-sodium chicken broth. Stir everything together and bring the mixture to a gentle boil. This step combines all the ingredients into a cohesive base where the flavors can meld together beautifully.
Simmer and Thicken
Reduce the heat to low and add the 15 oz drained black beans, 15 oz drained kidney beans, 1 tsp sea salt, and 0.5 tsp black pepper. Stir well to combine, then cover the pot and let the chili simmer for 20-25 minutes until it thickens slightly. You’ll notice the flavors deepening and becoming more complex as they meld together during this time.
After 20 minutes, taste the chili and adjust the seasoning if needed. If it needs more heat, add a pinch more chili powder or smoked paprika. If it needs more brightness, add the 1 tbsp lime juice and stir. The chili should be flavorful but not overwhelmingly spicy—perfect for a diet-friendly meal that still delivers big taste.
Finish and Serve
Remove the pot from heat and let the chili rest for 5 minutes. This resting period allows the flavors to fully develop and the chili to thicken slightly. Stir in the 0.25 cup chopped fresh cilantro just before serving—this adds a fresh, bright note that cuts through the richness of the chili.
Serve the chili warm, garnished with additional cilantro if desired. Each bowl should be hearty and satisfying, packed with lean protein from the turkey and fiber from the beans. This chili is perfect for meal prep—it tastes even better the next day as the flavors continue to meld together.
Pro Tips For Making 17 Day Diet Turkey Chili
- Brown the Turkey Well: Lean ground turkey turns rubbery fast—don’t just cook it until it’s no longer pink. Break it into small pieces first, then sear in batches over medium-high heat until every surface is deeply browned, not just lightly colored. I used to rush this and ended up with bland chili; now I let it crisp for 5-6 minutes per batch.
- Dice Onion and Pepper Small: Tiny dice (¼-inch or smaller) cooks faster and blends into the chili without chunks. If you’re impatient like me, skip the food processor—just chop finely with a sharp knife. Big pieces turn mushy and make the texture uneven.
- Crush Garlic with Salt: Skip mincing garlic—just smash the cloves with the flat side of your knife, sprinkle with a pinch of salt, and let sit 5 minutes before adding. This softens the garlic and prevents that bitter aftertaste that ruins the whole dish.
- Simmer Low and Long: The 17-day diet chili needs time to develop flavor—don’t walk away after 30 minutes. Keep it at a gentle simmer (tiny bubbles, not rolling) for at least 45 minutes. I learned this after a rushed batch tasted flat; now I set a timer and ignore distractions.
Common mistakes when making great 17 day diet turkey chili
Overcooking the Turkey
Lean ground turkey dries out fast when overcooked, turning your chili from hearty to rubbery. I’ve ruined this step more times than I’d admit by walking away while it browns. Keep heat at medium and stir frequently—5-6 minutes max until it loses its raw color.
If it starts to shrink dramatically, reduce heat immediately. The goal is even browning, not crispy bits. 🔥
Skipping the Fond
Those browned bits stuck to your pot aren’t just gunk—they’re flavor gold! After browning the turkey, scrape up every last bit with a wooden spoon and stir it back in. I’ve made chili without doing this, and it’s noticeably less rich.
Think of it as umami insurance—those bits contain concentrated meaty flavors that make your chili taste restaurant-quality. Spend 30 seconds scraping; it’s worth it.
Ignoring the Simmer Time
Rushing the 20-25 minute simmer is a cardinal sin. This isn’t just about thickening—it’s when spices meld and flavors develop. I once served chili after only 10 minutes because I was hungry, and it tasted flat.
Let it work its magic! Cover the pot to trap steam, which helps build depth. If you’re short on time, at least simmer for 15 minutes—it’ll still be good, but not as rich.
Using High-Sodium Ingredients
This chili’s diet-friendly magic hinges on low-sodium ingredients. Swapping regular canned beans or broth for high-sodium versions ruins the balance. I keep no-salt-added beans and low-sodium broth stocked—it’s a game-changer.
Taste as you go and adjust with sea salt (Diamond Crystal) or a splash of lime juice instead. Your taste buds (and blood pressure) will thank you. ✨
Forgetting to Rest
Skipping the 5-minute rest after cooking means serving chili that’s still fighting for its flavor. This pause lets juices redistribute and the texture thicken slightly. I’ve served it immediately out of habit, and it’s always less satisfying.
Cover the pot and let it sit—it’s the secret to that restaurant-quality mouthfeel. Patience here makes all the difference.
Overloading the Spices
More isn’t better with chili powder or cumin. I’ve doubled the spices thinking it’d make the chili “more chili-like,” but it just tastes bitter. Start with the 2 tbsp chili powder and 1 tbsp cumin called for, then taste before adding more.
Toast the spices for 1 minute to wake up their flavors—this makes them go further. Trust the recipe; it’s been perfected for balance. 🌶️
Nutrition facts
Frequently asked questions
Can I make this turkey chili in an Instant Pot?
Sauté the onions, peppers, and garlic first, then add the turkey and spices. After browning, add all remaining ingredients and cook on high pressure for 10 minutes. Quick-release the pressure, stir, and let it rest 5 minutes before serving. The Instant Pot version cooks in 30 minutes total—perfect for busy weeknights!
How do I adjust the spice level for sensitive stomachs?
Reduce the chili powder to 1 tbsp and smoked paprika to ½ tbsp. For extra mildness, add 1 cup cooked white rice at the end to dilute the heat. The beans and tomatoes already provide natural depth without spice. Always taste before serving—you can add more lime juice for brightness instead of extra spices.
What’s the best way to reheat leftovers?
Reheat gently on the stovetop over low heat for 5-7 minutes, stirring occasionally. Avoid microwaving as it can make the chili watery. For extra flavor, add 1 tbsp water or broth while reheating. Store leftovers in airtight containers for up to 5 days or freeze for 3 months. The flavors actually improve after reheating!
Can I substitute chicken for turkey in this recipe?
Yes, but expect slightly different texture and flavor. Use 1.5 lb ground chicken (93% lean) and reduce cooking time to 4-5 minutes—chicken browns faster. Chicken has a milder taste, so you may want to add ½ tsp extra smoked paprika for depth. The protein content remains similar, but turkey has a slightly gamey richness that chicken lacks.
What are the best sides to serve with this chili?
For a balanced meal, pair with: – Steamed cauliflower rice (low-carb) – Small whole-grain roll (fiber boost) – Side salad with lime vinaigrette (refreshing contrast) – Roasted sweet potatoes (adds natural sweetness) The chili’s smoky flavors complement all these options without overpowering them.

- 3lb Prime Rib Roast Recipe: Juicy Pink Center Guaranteed in 3 Hours - October 31, 2026
- 5 Spice Cake Recipe: Warmly Spiced Layers With Crunchy Top - October 31, 2026
- 1950’s Macaroni and Cheese Recipe: Nostalgic Creamy Cheese Sauce with Buttery Noodles - October 31, 2026