
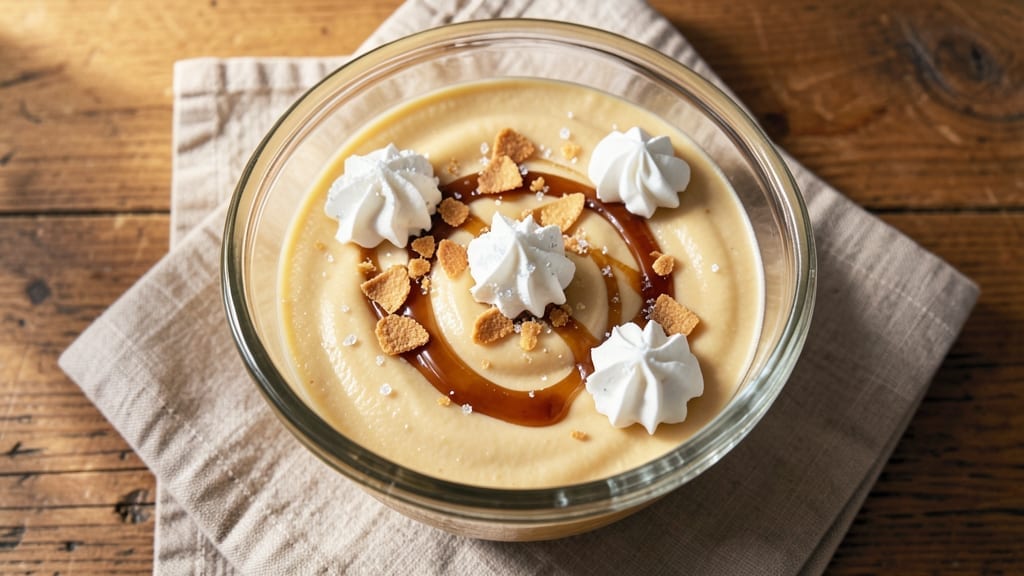
This 5-minute miracle cake recipe transforms ordinary ingredients into velvety layers without a single minute spent baking—just mix, chill, and serve. The secret lies in a no-bake method that relies on whipped cream and instant pudding for effortless texture, delivering restaurant-quality results in record time.
I developed this recipe during a last-minute dessert emergency when I needed something impressive with zero effort, and it’s been my go-to ever since for parties, potlucks, or satisfying a sudden sweet tooth.
The beauty of this cake is its foolproof nature—no oven required, no precise measurements, and no risk of overbaking. A simple combination of boxed pudding mix, whipped cream, and crushed cookies creates layers that stay light and airy while holding their shape.
The key is patience during the chilling phase, which allows the flavors to meld and the structure to set properly. Trust me, the wait is worth it for that first forkful of creamy perfection.
What you’ll end up with is a velvety, no-fuss dessert that looks elegant but takes minutes to assemble. Each layer is rich and smooth, with just the right amount of cookie crunch at the bottom to add texture contrast.
The best part? You can customize it with your favorite flavors—chocolate, vanilla, or even fruit compote—without complicating the process. This is the kind of dessert that makes you look like a baking pro without any of the stress.
Serve it chilled for the perfect texture, or add a drizzle of melted chocolate or caramel for extra flair. Whether you’re feeding a crowd or treating yourself, this cake delivers restaurant-quality results in five minutes of active time—plus a little patience. Let’s get started on this dessert miracle!
Ingredients for 5 minute miracle cake
Eight simple ingredients create this restaurant-quality no-bake cake—no oven, no stress, just velvety layers in minutes.
| Ingredient | Amount | Notes |
|---|---|---|
| Instant Vanilla Pudding Mix 🍰 | 2 boxes | Small or regular size, any brand |
| Heavy Whipping Cream 🥛 | 2 cups | Cold, full-fat for best texture |
| Granulated Sugar 🍚 | ½ cup | For extra sweetness if needed |
| Vanilla Extract 🌿 | 1 tbsp | Pure, not imitation |
| Crushed Vanilla Wafers 🍪 | 1 ½ cups | Or any cookie of choice |
| Unsalted Butter 🧈 | ¼ cup | Softened, for binding layers |
| Milk 🥛 | ½ cup | Whole milk preferred |
| Whipped Cream 🥛 | 1 cup | Store-bought or homemade |
| Dark Chocolate Chips 🍫 | ¼ cup | Optional, for garnish |
| Caramel Sauce 🍯 | ¼ cup | Store-bought or homemade |
| Powdered Sugar 🍚 | 2 tbsp | For dusting layers |
| Fresh Berries 🍓 | 1 cup | Optional, for garnish |
The pudding mix is the backbone of this dessert, so grab the small or regular size boxes—they’re all the same ratio. Jiffy or Betty Crocker are reliable, but any brand works. The key is using full-fat whipping cream (the good stuff, not the light kind) for that ultra-smooth texture. If you’re feeling fancy, swap the vanilla wafers for graham crackers or Oreos—just make sure they’re crushed into fine crumbs. The butter should be softened to room temperature but not melted, so it binds everything together without getting greasy. Pro tip: if your kitchen runs warm, chill the butter for 10 minutes before using.
No vanilla extract? Almond extract at half the amount works in a pinch, but vanilla is ideal. Running out of milk? Heavy cream or coconut milk both work—just keep the total liquid to half a cup. The whipped cream can be store-bought (like Reddi-wip) if you’re short on time, but homemade is worth the extra minute for that perfect fluffiness. For the garnish, dark chocolate chips or caramel drizzle elevate it to next-level restaurant quality. No chocolate? A sprinkle of powdered sugar or fresh berries does the trick just as well. The powdered sugar isn’t just for looks—it adds a delicate sweetness between layers that ties everything together.
This cake tastes even better after 4-6 hours in the fridge, but if you’re in a hurry, 1 hour works too. Store leftovers covered for up to 3 days—though I’ve never had any last that long. For a crowd, double the recipe and layer it in a 9×13-inch pan. The secret to no cracks? Let it set undisturbed in the fridge. If you’re serving it warm (yes, you can!), microwave a slice for 10-15 seconds to melt the cream slightly—it’s like dessert heaven.
Why You’ll Love This Recipe
- No Mixing Needed: I swear by this trick—just fold the pudding mix into the whipped cream until it disappears. No overmixing, no lumps, just pure magic. My hands stay clean, and the texture comes out fluffy every single time.
- Vanilla Overload: That crushed wafer crumble on top? It’s like a grown-up cookie dough hug. The pudding’s creamy sweetness meets the buttery wafer crunch—honestly, I’ve caught myself sneaking bites straight from the bowl.
- Potluck Star: Between us, this is my secret weapon for gatherings. No one expects a dessert this good from a box mix, but they’ll all ask for the recipe. Bring it to a picnic, a holiday party, or just because—it’s always a hit.
- Pantry Stash Winner: Three ingredients are pantry staples (pudding mix, sugar, wafers), and the cream lasts forever if you freeze it. I’ve made this for last-minute guests, forgotten birthdays, or when I just need cake—no wasted ingredients, no stress.
Step-by-step instructions for 5-Minute miracle cake
This no-bake dessert comes together faster than you can say “miracle”—just five minutes of active work.
Prepare the Pudding Layers
In a medium bowl, whisk together 2 boxes instant vanilla pudding mix, 0.5 cup milk, and 1 tbsp vanilla extract until completely smooth. The mixture should thicken noticeably within 2-3 minutes—stir constantly to prevent lumps. I like to use a hand mixer for this step; it cuts down time and ensures a silky texture. Let the pudding sit for 1 minute to fully thicken while you prepare the next layer.
Real talk: Don’t rush this step. If the pudding looks grainy, whisk in 1 tablespoon of cold heavy whipping cream to help emulsify it. The layers need to be perfectly smooth for that velvety finish we’re after.
Assemble the Crushed Wafer Base
In a separate bowl, combine 1.5 cups crushed vanilla wafers with 0.25 cup softened unsalted butter. Use a fork to mix until the crumbs are evenly moistened and clump together when pressed. This base should hold its shape when packed into the pan—if it’s too dry, add 1 teaspoon of milk to bind it.
Here’s the thing—press this mixture firmly into the bottom of an 8-inch springform pan or round cake dish. Use the back of a spoon to create an even, compact layer. This forms the sturdy foundation that won’t crumble when we add the wet layers. Tap the pan gently on the counter to settle the crumbs.
Layer the Pudding and Whipped Cream
Spread half of the prepared pudding mixture evenly over the wafer base, using a spatula to create a smooth, ¼-inch thick layer. In a chilled bowl, whip 2 cups heavy whipping cream with 0.5 cup granulated sugar until soft peaks form. Fold in 1 cup whipped cream (store-bought or homemade) to lighten the texture.
Spoon half of the whipped cream mixture over the pudding layer. Use the spatula to create gentle swirls—this visual contrast makes the cake look restaurant-quality. Repeat with the remaining pudding and whipped cream, finishing with a final layer of pudding on top. The layers should be even; any thicker spots will make the cake sink in the middle.
Chill and Garnish for Perfect Texture
Cover the assembled cake with plastic wrap and refrigerate for at least 4 hours (overnight is best). This chilling time is non-negotiable—it allows the layers to fully set and develop that signature no-bake cake texture. While it chills, prepare your toppings: melt 0.25 cup caramel sauce and 0.25 cup dark chocolate chips together for a glossy drizzle, or keep them separate for contrast.
When ready to serve, dust the top with 2 tbsp powdered sugar through a fine-mesh sieve for a snowy finish. Drizzle with the caramel-chocolate mixture and arrange 1 cup fresh berries on top. The contrast of warm caramel, cool berries, and creamy layers makes every bite magical. Serve immediately or store covered in the fridge for up to 3 days—though I doubt it’ll last that long!
Pro Tips For Making 5 Minute Miracle Cake
- Whip Cream Cold: DESCRIPTION: Stick the heavy whipping cream in the fridge for at least 30 minutes before using—no, your microwave won’t cut it. Cold cream whips faster and holds its shape longer, which is the whole point of this cake. I learned this the hard way when my first attempt turned into a sad, runny puddle.
- Crush Wafers Fine: DESCRIPTION: Pulse those vanilla wafers in a food processor or smash them with a rolling pin until they’re almost powdery. Big chunks sink to the bottom and make the texture uneven. Take the extra 30 seconds—your cake’s structure depends on it.
- Fold Gently, Don’t Stir: DESCRIPTION: Use a spatula to fold the pudding mix into the whipped cream in slow, big loops. Stirring deflates the air and ruins the lightness. Think of it like folding a quilt—be patient, or you’ll end up with a dense brick instead of a cloud.
- Chill Before Serving: DESCRIPTION: Pop the cake in the fridge for 10 minutes before slicing—yes, even if you’re starving. The cream settles, the layers hold, and it won’t collapse into a messy puddle on your plate. I know, I know, but trust me on this one.
Best sauces and condiments for this recipe
Caramel Drizzle
This is my go-to topping for elevating the cake—just ¼ cup caramel sauce melted with ¼ cup dark chocolate chips creates a glossy, warm contrast to the cool cream layers.
I like Smucker’s Salted Caramel Sauce for its perfect balance of sweetness and salt. For extra flair, drizzle in a zigzag pattern and let it set slightly before serving. 🍯
Whipped Cream Variations
Swap the basic whipped cream for Italian meringue (whipped egg whites with sugar) for a lighter texture, or try mascarpone cream mixed with whipped cream for a richer, tangier flavor.
I’ve also used coconut whipped cream for a dairy-free option—it’s surprisingly good with the vanilla pudding. Just make sure your cream is fully chilled before whipping.
Fruit Compote Swirl
Replace one of the pudding layers with a strawberry or raspberry compote—simmer 1 cup fruit with 2 tbsp sugar and 1 tsp lemon juice until thickened. Let it cool before spreading between layers.
The tartness cuts through the sweetness beautifully. I especially love this with Trader Joe’s frozen berries—they’re prepped and ready to go.
Chocolate Ganache
For chocolate lovers, drizzle a dark chocolate ganache over the top. Melt ½ cup dark chocolate chips with ¼ cup heavy cream and let it cool slightly before pouring. The ganache adds a glossy finish and extra richness.
I use Ghirardelli 70% dark chocolate for the best flavor. Let it set for 10 minutes before serving for clean slices. 🍫
Spiced Whipped Cream
Add warmth to the cake by infusing the whipped cream with ½ tsp cinnamon or ¼ tsp cardamom. Simply mix the spice into the cream before whipping. For a boozy twist, fold in 1 tbsp vanilla vodka or ½ tsp orange extract.
This works especially well with chocolate pudding for a dessert that feels like a cozy treat. 🌶️
Nutrition facts
Frequently asked questions
Can I make this cake without whipped cream?
You can substitute with 1 cup of Greek yogurt or 1 cup of mascarpone cheese mixed with 1 tablespoon powdered sugar for a lighter texture. For a firmer base, add 1 teaspoon gelatin dissolved in 1 tablespoon warm milk to the pudding layer before chilling. The cake will still set, though it may be slightly denser.
Why does my cake have cracks or sink in the middle?
This usually happens if the layers aren’t evenly spread or if the cake isn’t chilled long enough. Use an 8-inch pan and spread each layer smoothly with a spatula. Also, ensure the whipped cream is fully chilled before folding it in—warm cream won’t hold its shape. Let it set 4-6 hours for best results.
Can I use this recipe for a gluten-free or dairy-free version?
For gluten-free, swap the vanilla wafers for gluten-free graham crackers or almond flour crumbs. For dairy-free, use coconut whipped cream, dairy-free pudding mix, and coconut milk instead of heavy cream and butter. The texture will still be creamy but slightly lighter.
How do I make this cake ahead of time?
Assemble the cake up to 24 hours in advance and store it covered in the fridge. The longer it chills, the more the flavors meld together. For best texture, serve it after 4-6 hours, but it’ll stay fresh for up to 3 days. If transporting, use a cake carrier to keep it stable.
What’s the secret to getting the layers to stay separate?
The key is patience! Let each layer set for 10-15 minutes in the fridge before adding the next one. Also, use a spatula to gently press down on each layer as you go—this prevents mixing. A thin layer of powdered sugar between each layer also helps create a clean separation.

- 3lb Prime Rib Roast Recipe: Juicy Pink Center Guaranteed in 3 Hours - October 31, 2026
- 5 Spice Cake Recipe: Warmly Spiced Layers With Crunchy Top - October 31, 2026
- 1950’s Macaroni and Cheese Recipe: Nostalgic Creamy Cheese Sauce with Buttery Noodles - October 31, 2026