
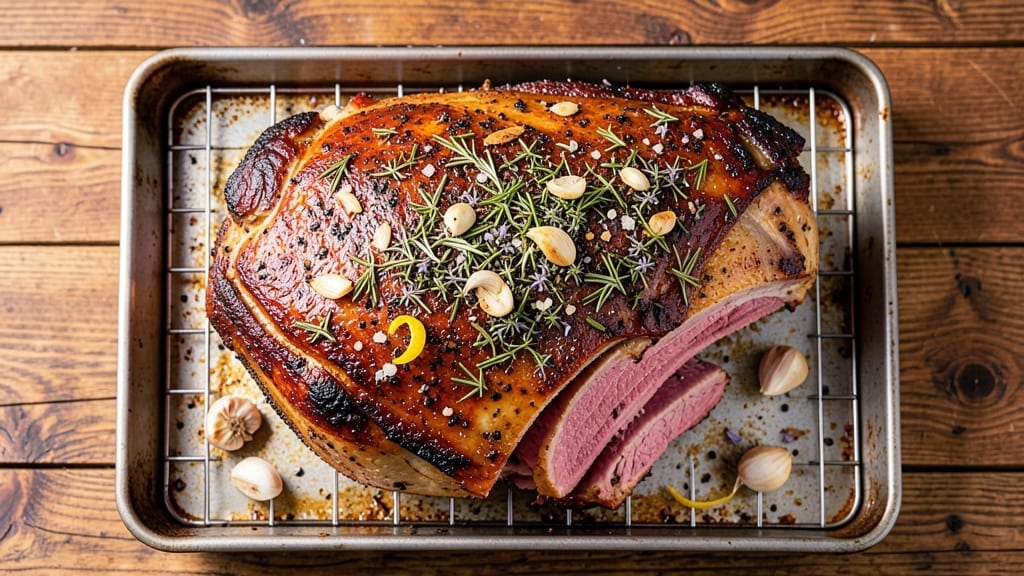
A 5-pound bone-in rib roast cooked to perfection delivers melt-in-your-mouth tenderness with a caramelized crust that crackles at every bite. This recipe transforms a simple cut into a showstopping centerpiece by combining traditional dry-brining with precise slow-roasting techniques.
The bone acts as a natural thermometer, ensuring even cooking while infusing the meat with rich, savory depth.
Professional chefs rely on this method because it guarantees a juicy interior while developing that coveted crust through controlled searing. The slow roast builds layers of flavor, while the final high-heat sear creates the perfect contrast between tender meat and crispy edges.
Resting time is critical—skipping this step means losing precious juices that would otherwise make every slice irresistible.
Whether you’re feeding a family or hosting a dinner party, this roast delivers restaurant-quality results at home. The bone-in version stays moist longer, and the rich, beefy aroma will fill your kitchen long before the timer goes off.
Pair it with classic sides like roasted potatoes or a bold red wine to complete the experience.
For those who prefer flexibility, this recipe accommodates medium-rare, medium, or well-done preferences without sacrificing texture. The key lies in accurate temperature monitoring and proper resting—details that separate home cooks from true roast masters. Let’s get started on creating your most impressive roast yet.
Ingredients for 5 pound bone in rib roast
Six ingredients plus a few pantry staples—this is all you need for a showstopping roast.
| Ingredient | Amount | Notes |
|---|---|---|
| Bone-In Rib Roast 🥩 | 5 lb | Center-cut, 1 to 1.5 inches thick |
| Kosher Salt 🧂 | ½ cup | Diamond Crystal preferred, coarse grain |
| Freshly Ground Black Pepper 🌶️ | 2 tbsp | Freshly cracked from whole beans |
| Garlic Cloves 🧄 | 8 cloves | Smashed, skin-on, for dry brine |
| Fresh Rosemary 🌿 | ¼ cup | Chopped, stems removed, fresh preferred |
| Fresh Thyme 🌿 | ¼ cup | Leaves only, stems removed |
| Extra-Virgin Olive Oil 🫒 | ¼ cup | High-quality, fruity variety |
| Yellow Onion 🧅 | 1 whole | Cut into 8 wedges, skin-on |
| Red Wine 🍷 | 1 cup | Bold, dry variety like Cabernet Sauvignon |
| Beef Tallow or Duck Fat 🧈 | 2 tbsp | For high-heat sear, optional but recommended |
| Unsalted Butter 🧈 | ½ cup | Cold, cubed, for basting |
| Fresh Parsley 🌿 | ⅛ cup | Chopped, for garnish |
The bone-in rib roast is where the magic happens—look for a center-cut with a 1 to 1.5-inch thick cap of fat. Costco and Whole Foods carry excellent cuts, but any quality butcher will have what you need. The bone isn’t just for flavor—it acts as a natural thermometer, keeping the meat moist while infusing that rich, savory depth. If your roast has a thick fat cap, trim it to about ¼-inch for even cooking. The herbs? Fresh is non-negotiable here—dried just won’t cut it for the aromatic punch this roast deserves.
No red wine? Beef stock with a splash of balsamic vinegar works in a pinch, but the acidity helps tenderize the meat. The garlic and onion wedges in the dry brine are optional but worth it—they infuse the meat with layers of flavor while keeping it juicy. Short on rosemary or thyme? Swap in fresh sage or marjoram at the same amount. The olive oil is for the dry brine, but if you’re skipping that step, just use the butter and tallow for searing. Pro tip: toast your spices in a dry pan for 30 seconds before using—they’ll sing with flavor.
This roast is all about patience—rest it for at least 30 minutes before slicing, or you’ll lose those precious juices. Wrap it loosely in foil and let it sit at room temperature while you prep the table. The leftovers? Reheat slowly in the oven with a splash of beef broth to keep them moist. Keeps for 4 days in the fridge or 3 months frozen. Slice against the grain for maximum tenderness—every bite should feel like a reward.
Why You’ll Love This Recipe
- Foolproof Seasoning: I swear by this method—just salt and pepper the roast generously the night before, then a quick spritz with olive oil and crushed garlic cloves before the oven. No fancy rubs, no guesswork, just that perfect balance of bold and simple.
- Crispy Bone, Juicy Meat: That bone-in magic? It renders down into rich, golden cracklings while the meat stays impossibly tender—like a buttery, herb-infused hug in every bite. Honestly, the contrast makes even the simplest sides taste better.
- Sunday Dinner Ready: Slice it thin for a crowd, serve it thick for a family feast, or repurpose the leftovers into hash or sandwiches. Between us, this is the one roast that works for game day, holiday tables, or lazy Sundays when you’re too tired to overthink dinner.
- Leftovers That Don’t Suck: Most roasts turn dry by day two, but this? It stays juicy enough to reheat for lunch or toss into pasta the next night. I’ll be real—my kids actually ask for it, and that’s saying something after a week of chicken nuggets.
Step-by-step instructions for slow-roasted bone-in rib roast
Perfecting this roast takes patience, but the results—juicy, tender meat with a caramelized crust—are worth every minute.
Prepare the Dry Brine Overnight
Place the 5 lb bone-in rib roast in a large roasting pan or shallow dish. In a small bowl, combine the 0.5 cup kosher salt, 2 tbsp freshly ground black pepper, 8 smashed garlic cloves, 0.25 cup chopped fresh rosemary, and 0.25 cup chopped fresh thyme. Rub this mixture all over the roast, pressing it into the meat so it adheres evenly. The salt will draw out moisture, which then reabsorbs, creating a more concentrated flavor and juicier interior.
Cover the pan loosely with plastic wrap and refrigerate for at least 12 hours (I prefer 24 hours for maximum tenderness). This dry brine is non-negotiable—it transforms tough, gamey beef into melt-in-your-mouth perfection. Don’t skip it, even if you’re eager to cook. The roast will look dry at first, but trust the process.
Sear for Color and Flavor
Remove the roast from the fridge and let it sit at room temperature for 1 hour before cooking. Preheat your oven to 450°F and place an oven-safe skillet or cast-iron pan over high heat. Add 2 tbsp beef tallow or duck fat and swirl to coat the pan. Once the fat is shimmering, carefully place the roast fat-side down and sear for 8-10 minutes until the fat renders and the exterior develops a deep golden-brown crust. Flip the roast and sear the other side for another 6-8 minutes. This step isn’t just for show—it locks in juices and builds layers of flavor.
If the roast starts to smoke excessively, reduce the heat slightly. You want a deep, rich crust, not burnt edges. Once seared, transfer the roast to a cutting board and let it rest for 10 minutes while you prepare the aromatics.
Build the Aromatic Base
In the same skillet (no need to clean it—those browned bits are flavor gold), add 1 whole yellow onion, cut into wedges, and cook for 5-6 minutes until caramelized. Pour in 1 cup red wine and scrape up any stuck bits from the bottom of the pan. Let the wine simmer for 3-4 minutes until reduced by half. This reduction intensifies the wine’s flavor and creates a glossy sauce to baste the roast later. Remove the pan from heat and set aside.
While the wine reduces, mix the 0.5 cup unsalted butter with the 0.25 cup extra-virgin olive oil in a small bowl. This butter-oil blend will be used to baste the roast during roasting, ensuring a moist, flavorful exterior.
Slow-Roast to Perfection
Return the seared roast to the oven-safe skillet and place it in the preheated 450°F oven for 20 minutes. This high-heat blast jumpstarts the cooking process and sets the stage for the slow roast. After 20 minutes, reduce the oven temperature to 275°F and continue roasting for 2.5 to 3 hours, or until the internal temperature reaches 195-200°F (use a meat thermometer inserted into the thickest part of the roast, avoiding the bone).
Every 30 minutes, baste the roast with the butter-oil blend and spoon some of the reduced wine mixture over it. This keeps the meat moist and infuses it with deep, savory flavors. The roast is done when it’s fork-tender and pulls apart easily. If the crust starts to darken too quickly, tent it loosely with foil to prevent over-browning.
Rest and Serve
Once the roast reaches the target temperature, remove it from the oven and transfer it to a cutting board. Tent it loosely with foil and let it rest for at least 30 minutes (I wait 45 minutes for maximum juiciness). This resting period allows the juices to redistribute throughout the meat, ensuring every slice is succulent and flavorful. If you skip this step, you’ll end up with dry, disappointing meat.
Slice the roast against the grain into ½-inch thick pieces and serve immediately, garnished with 0.125 cup chopped fresh parsley. The result should be a roast with a deep, caramelized crust, tender meat that falls apart with a fork, and a rich, herby aroma that fills your kitchen. Pair it with roasted vegetables or a simple green salad to let the roast shine.
Pro Tips For Making 5 Pound Bone In Rib Roast
- Sear Until Black: Start with a screaming-hot pan—cast iron if you’ve got it—and leave the roast undisturbed for 4-5 minutes per side. I learned this the hard way: rushing the sear means a pale crust that won’t hold up to slicing. Let it get dark, even charred in spots, before you even think about moving it.
- Salt the Night Before: Generously coat the roast with kosher salt and refrigerate uncovered for 12-24 hours. This isn’t just about seasoning—it’s about drawing out moisture so the crust forms properly. (Yes, it’ll look weirdly glistening, but trust the process.) Skip this, and your roast will steam instead of sear.
- Garlic Under the Skin: Slip 6-8 garlic cloves under the roast’s membrane before roasting—no need to smash them. They’ll infuse the meat without burning, and you avoid the mess of minced garlic sticking to your hands. My grandmother swore by this, and she was right: the flavor is deeper than just sprinkling on top.
- Low and Slow Finish: After searing, crank the oven to 400°F for 15 minutes, then drop to 275°F until the internal temp hits 120°F. I used to panic and overcook it—now I rely on a meat thermometer. The low temp keeps the bone-in roast juicy while the initial high heat ensures a crust worth slicing into.
Troubleshooting this dish
Uneven Cooking Fix
If your roast cooks unevenly—especially if the edges brown too quickly—the issue is likely airflow or temperature fluctuations. Place the roast on a wire rack inside a roasting pan to allow heat to circulate evenly around all sides.
If your oven runs hot, try lowering the temperature by 25°F (e.g., 250°F instead of 275°F) and extending the cook time by 30-45 minutes. A meat thermometer is non-negotiable here—insert it into the thickest part of the roast, avoiding the bone, to monitor accuracy. 🌡️
Preventing Dry Meat
Overcooking is the #1 cause of dry rib roast. Pull it out when the internal temp hits 195-200°F—this ensures tenderness without drying. If your roast feels dry after resting, it likely cooked past 205°F.
For future attempts, reduce oven temp to 250°F and baste more frequently with the butter-oil blend every 20 minutes instead of 30. A spritz of beef broth during roasting also adds moisture.
Crust Too Dark?
A deep, dark crust is ideal, but if it turns charred or burnt, you’re either searing too long or roasting at too high a temperature. For searing: 8-10 minutes max per side at high heat (fat should shimmer but not smoke excessively).
During roasting, tent the roast loosely with foil if the crust darkens too quickly. If your oven runs hot, reduce temp by 25°F and extend time by 15-20 minutes. A dark crust ≠ burnt meat—just monitor closely!
Thermometer Issues
If your thermometer reads inconsistent temps, it might be calibrated incorrectly or placed in the wrong spot. For accuracy, insert the probe into the thickest part of the roast, away from fat and bone, and wait 30 seconds for a stable reading.
I recommend the ThermoWorks Smoke for reliability—it’s built for high-heat cooking. If your roast feels cold in the center but reads done, it’s likely stuck in the “stall” (a natural pause in cooking). Patience is key—let it cook until it reaches 200°F before resting.
Bone Not Cooking Evenly
The bone can create hot spots, causing uneven doneness. If one side cooks faster, rotate the roast 90 degrees halfway through cooking so the bone doesn’t block heat. For extra insurance, trim excess fat to ¼-inch before searing—this helps heat penetrate more evenly.
If the bone side overcooks, sear it last (after the other sides) to minimize direct heat exposure. 💡
Leftovers Too Tough?
Reheating roast beef incorrectly can turn tender meat into chewy disappointment. Always reheat slowly—wrap slices in foil with 1 tbsp beef broth per serving and bake at 300°F for 15-20 minutes. Microwaving is a no-go—it dries out the meat.
For extra juiciness, add a splash of red wine (from your original pan) while reheating. Store leftovers in an airtight container and consume within 4 days for best texture.
Nutrition facts
Frequently asked questions
How long should I let a 5-pound bone-in rib roast rest before slicing?
Always rest the roast for at least 30 minutes (I recommend 45 minutes for maximum juiciness) before slicing. This crucial step allows the juices to redistribute throughout the meat, preventing dry slices. Tent it loosely with foil while resting to keep it warm but not steamed.
Can I cook this roast without a meat thermometer?
While possible, I strongly recommend using one for perfect results. Without it, you risk overcooking—especially with bone-in roasts. A meat thermometer should read 195-200°F in the thickest part (avoiding bone) for ideal tenderness. If you don’t have one, use the finger test: press gently—if it feels like 170°F (slight resistance), it’s close to done.
What’s the best way to reheat leftovers without drying them out?
Always reheat slowly in the oven to preserve moisture. Wrap slices in foil with 1 tbsp beef broth per serving and bake at 300°F for 15-20 minutes. For extra flavor, add a splash of the original red wine reduction. Microwaving is a no-go—it turns meat tough and dry. Leftovers keep well for 4 days in an airtight container.
Should I trim the fat cap before cooking?
Trim the fat cap to about ¼-inch for even cooking, but leave some fat—it renders during cooking and adds flavor. If your roast has an extremely thick fat cap (over ½-inch), trimming helps prevent uneven browning. Just don’t remove all the fat, as it keeps the meat moist during cooking. The bone-in version benefits from this fat layer more than boneless cuts.
What wine pairs best with this rib roast?
A bold red wine like Cabernet Sauvignon or Malbec complements the rich beef flavors perfectly. For white wine lovers, try a full-bodied Chardonnay with oak notes. The red wine used in the recipe (like Cabernet) works beautifully too! Avoid light wines—they won’t stand up to the roast’s intensity. Beer pairings? A dark ale or stout adds great contrast.

- 3lb Prime Rib Roast Recipe: Juicy Pink Center Guaranteed in 3 Hours - October 31, 2026
- 5 Spice Cake Recipe: Warmly Spiced Layers With Crunchy Top - October 31, 2026
- 1950’s Macaroni and Cheese Recipe: Nostalgic Creamy Cheese Sauce with Buttery Noodles - October 31, 2026