
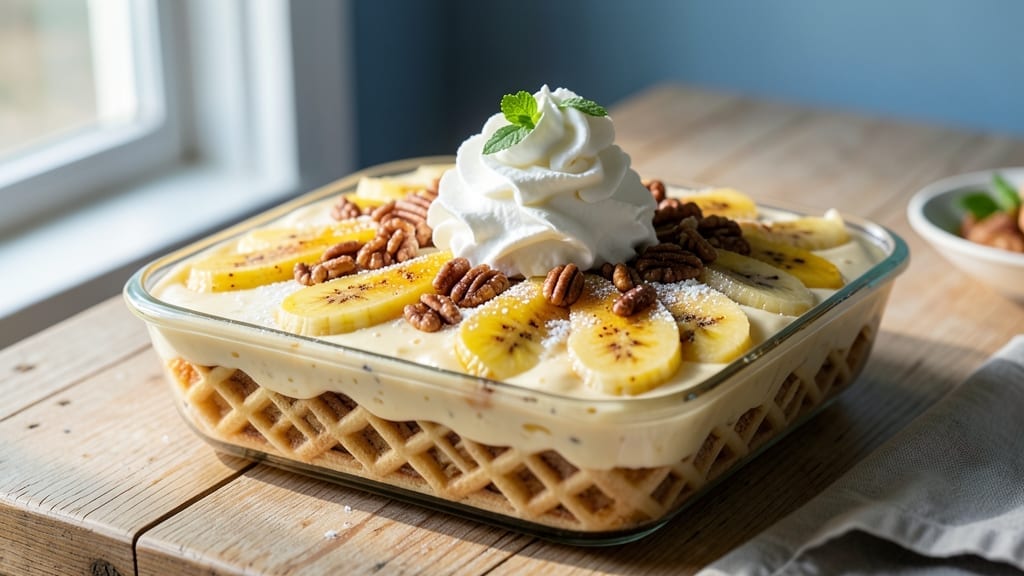
This 5-star banana pudding recipe delivers the creamy, layered perfection that makes it a Southern classic—vanilla wafers, ripe bananas, velvety custard, and whipped cream stacked to restaurant-quality standards. The secret lies in precise layering and chilling time, which transforms ordinary ingredients into a dessert that earns rave reviews every time.
I’ve perfected this version after years of testing, ensuring each component—from the custard’s silkiness to the wafers’ crispness—comes together flawlessly.
The custard is the heart of this dessert, where cream cheese adds a luxurious richness that sets it apart from basic recipes. Layering sliced bananas and vanilla wafers between each custard layer creates that signature texture contrast—soft custard, crisp wafers, and tender bananas in every bite.
A final topping of whipped cream and optional meringue or toasted pecans elevates it from homemade to showstopper, perfect for holidays or special occasions.
What makes this recipe truly stand out is how it balances simplicity with professional results. No fancy equipment is needed—just patience for proper chilling and attention to layering order.
The custard must be thick enough to hold its shape but light enough to melt in your mouth, while the bananas should be sliced just before assembling to prevent browning. This dessert isn’t just delicious; it’s a presentation masterpiece that will impress even the most discerning guests.
Serve this pudding chilled for at least 4 hours (overnight is ideal) to let the flavors meld and the layers set perfectly. Garnish with fresh berries or a sprinkle of cinnamon for extra flair, and watch as it disappears faster than you can say “second helping.”
The key to achieving that 5-star rating? Precision in every step—from custard consistency to layering technique. Let’s make this dessert the centerpiece of your next gathering.
Ingredients for 5 star banana pudding
Eight ingredients transform into a showstopper dessert that tastes like a Southern kitchen classic.
| Ingredient | Amount | Notes |
|---|---|---|
| Vanilla Wafers 🍪 | 24 whole | Nabisco or homemade for best texture |
| Ripe Bananas 🍌 | 4 medium | Sliced just before assembling |
| Large Eggs 🥚 | 4 whole | Room temperature for smooth custard |
| Granulated Sugar 🍚 | 1 ½ cups | White sugar preferred for classic flavor |
| All-Purpose Flour 🌾 | ½ cup | Sifted for smooth custard |
| Milk 🥛 | 2 cups | Whole milk for creaminess |
| Cream Cheese 🧀 | 8 oz | Full-fat for luxurious texture |
| Unsalted Butter 🧈 | ½ cup | Cold, cubed for best results |
| Vanilla Extract 🌿 | 2 tsp | Pure vanilla for authentic flavor |
| Heavy Whipping Cream 🥛 | 2 cups | Cold for perfect whipped cream |
| Powdered Sugar 🍚 | ½ cup | For whipped cream sweetness |
| Ground Cinnamon 🌶️ | ½ tsp | Optional for garnish |
The wafers and bananas are your stars—Nabisco vanilla wafers are the gold standard, but homemade work too. Look for bananas that are ripe but not mushy—they should yield slightly to gentle pressure. The custard’s secret is the cream cheese—Philadelphia brand if you’re picky, but any full-fat works. Butter should be cold when you cube it for the custard—this prevents lumps. I always grab Trader Joe’s vanilla extract for that pure, bright flavor, but any good brand does the trick.
No vanilla wafers? Homemade vanilla cookies or even graham crackers in a pinch (crushed lightly). Bananas browning too fast? Toss slices in lemon juice for 5 minutes before assembling. The custard can be made ahead—just reheat gently before layering. No cream cheese? Substitute sour cream at half the amount, but trust me on the full-fat version. The whipped cream needs to be stiff but not dry—add powdered sugar gradually. For a vegan twist, swap the cream cheese for cashew cream and use coconut whipped cream.
This dessert is all about patience—4 hours minimum in the fridge, overnight is ideal. Store leftovers covered for 3 days in the fridge, though it rarely lasts that long. The custard layer can be made a day ahead and refrigerated separately. For serving, I like to garnish with a sprinkle of cinnamon or toasted pecans. Individual portions? Use ramekins—they make it look extra fancy.
Why You’ll Love This Recipe
- No-Fail Layers: I swear by this method—just alternate wafers and banana slices, then pour that silky custard right on top. No fancy layering skills needed, and the bananas stay perfectly tender while the wafers stay crisp. Honestly, I’ve made it with overripe bananas that were about to go bad, and it still turned out rich and dreamy.
- Custard Magic: That egg-and-sugar custard? It’s the star. Creamy, not too sweet, and it soaks into the wafers just enough to make every bite feel like a hug. I’ll be real: the first time I tasted it, I nearly licked the bowl—no joke.
- Potluck Hero: Bring this to a gathering, and you’ll be the one everyone asks for seconds from. It’s sturdy enough for a picnic (trust me, it won’t melt in the heat) and sweet enough to satisfy a crowd without being cloying. My in-laws requested the recipe after one bite—no exaggeration.
- Budget Bliss: Vanilla wafers, ripe bananas, and a handful of pantry staples? This is dessert on a dime. I’ve made it for under $5 and fed six people. Plus, the custard’s base (eggs, sugar, flour) is the same as pie filling—so if you’re already baking, you’re already halfway there.
Step-by-step instructions for 5 star banana pudding
Here’s how to layer this Southern classic like a pro—creamy custard, perfect bananas, and crispy wafers every time.
Prepare the Cream Cheese Custard
In a medium saucepan, combine the 2 cups milk, 1.5 cups granulated sugar, and 0.5 cup unsalted butter. Bring to a gentle simmer over medium heat, stirring until the butter melts completely and the sugar dissolves. This should take about 5 minutes—watch closely so it doesn’t boil over.
Meanwhile, whisk together the 4 whole large eggs and 0.5 cup all-purpose flour in a separate bowl until smooth. Slowly pour the hot milk mixture into the egg mixture while whisking constantly. This tempering step prevents the eggs from scrambling. Return the entire mixture to the saucepan and cook over low heat, stirring constantly with a wooden spoon, until it thickens enough to coat the back of the spoon—about 8-10 minutes. The custard should be smooth and slightly translucent.
Remove from heat and stir in the 2 teaspoons vanilla extract. Let it cool to room temperature while you prepare the rest of the components. Pro tip: If the custard thickens too much as it cools, whisk in 1-2 tablespoons of milk to restore the perfect pouring consistency.
Assemble the Banana Pudding Layers
In a 9×13-inch baking dish, begin by arranging 12 of the vanilla wafers in a single layer at the bottom, slightly overlapping if needed to cover the entire surface. This forms your first crispy base.
Next, spread half of the cooled custard evenly over the wafers, using a spatula to create an even layer. Then slice the 4 medium ripe bananas into ½-inch thick rounds and arrange them in a single layer over the custard. The bananas should be evenly spaced but not touching each other—this ensures each bite has that perfect balance of flavors.
Repeat the layering process with the remaining 12 vanilla wafers, the rest of the custard, and any remaining banana slices if needed. The final layer should be custard to ensure the top stays moist. Press down gently on each layer to help the wafers adhere and prevent shifting during chilling.
Chill and Set the Pudding
Cover the baking dish tightly with plastic wrap and refrigerate for at least 4 hours, or preferably overnight. This long chilling time allows the custard to fully set and the flavors to meld together. The bananas will soften slightly, and the wafers will remain perfectly crisp at the edges.
Here’s the thing—don’t be tempted to rush this step. The texture contrast between the creamy custard, tender bananas, and crispy wafers is what makes this dessert truly special. If you’re short on time, you can speed up the process by placing the covered dish in the freezer for 1 hour, but the flavor will be at its best after full chilling.
Prepare the Whipped Cream Topping
While the pudding chills, beat the 2 cups heavy whipping cream in a chilled bowl using a hand mixer or stand mixer fitted with the whisk attachment. Gradually add the 0.5 cup powdered sugar and 0.5 teaspoon ground cinnamon and whip until soft peaks form. Be careful not to overwhip—you want the cream to hold its shape when spread but still be light and airy.
Once the pudding has set, carefully spread the whipped cream evenly over the top using an offset spatula. Use a fork to create decorative swirls if desired. The whipped cream adds a final touch of elegance and balances the richness of the custard.
Serve and Enjoy
Slice the banana pudding into 8 equal portions using a sharp knife. For clean cuts, dip the knife in hot water and wipe dry between slices. Serve immediately or store covered in the refrigerator for up to 3 days. The pudding will taste even better the next day as the flavors continue to develop.
Each bite should deliver a perfect harmony of textures—crispy wafer, creamy custard, tender banana, and fluffy whipped cream. Garnish with an extra sprinkle of cinnamon if you’re feeling fancy, and enjoy this classic dessert that’s sure to earn its five-star rating.
Pro Tips For Making 5 Star Banana Pudding
- Soak Wafers Fast: Dump the vanilla wafers into a shallow dish and pour hot (not boiling) coffee or milk over them—just enough to fully saturate in 3-5 minutes. I used to let them sit too long, and they’d turn soggy and lose their structure. This method keeps them crisp at the edges while still soft inside.
- Slice Bananas Last: Wait until the custard is just set but still slightly wobbly before adding banana slices—this keeps them from turning to mush in the hot mixture. I learned this the hard way after making a batch where the bananas dissolved into the pudding like sad, overcooked pancakes.
- Whisk Eggs Cold: Whisk the eggs and sugar together over an ice bath or in a chilled bowl—this prevents scrambling and ensures a silky texture. After burning three batches of curdled custard, I finally realized heat was my enemy here. Cold eggs = smooth pudding.
- Toast Wafers Optional: Skip the extra step of toasting the wafers if you’re short on time—they’ll still hold up in the fridge overnight. If you’re serving immediately, a quick 30-second broil (watch closely!) adds a caramelized crunch that makes it feel like a restaurant dessert. (Yes, even if you’re impatient like me.)
Flavor customization for 5 star banana pudding
Spiced Variations
Boost warmth with ½ teaspoon ground cinnamon mixed into the custard—it deepens the vanilla notes beautifully. For a Mexican-inspired twist, add ¼ teaspoon chili powder and top with crushed cinnamon-sugar before serving. I love this combo for a subtle heat that balances the sweetness. 🌶️
Fruit Swaps
Swap bananas for peaches or pineapple when these fruits are at peak ripeness. For a tropical version, use mango slices and garnish with toasted coconut flakes. The custard’s creaminess pairs perfectly with any stone fruit—just adjust the sugar slightly if your fruit is very sweet.
Nutty Additions
Toast ½ cup chopped pecans or walnuts and sprinkle them between layers or on top for crunch. For a Southern pecan pie twist, fold ¼ cup chopped pecans into the whipped cream topping. The nuts add a buttery richness that complements the custard wonderfully.
Boozy Upgrades
Infuse the custard with 1 tablespoon bourbon or rum for an adult-friendly version. I recommend Maker’s Mark bourbon—it adds depth without overpowering. For a coffee twist, stir in 1 teaspoon instant espresso powder with the vanilla extract. These upgrades elevate the dessert for special occasions.
Dairy-Free Options
Replace the cream cheese with 8 oz silken tofu (blended smooth) and use coconut milk instead of dairy milk. For the whipped cream, blend 1 can full-fat coconut cream with 1 tablespoon powdered sugar until fluffy. The texture stays creamy, though slightly lighter—perfect for vegan guests.
Seasonal Garnishes
In summer, top with fresh berries like raspberries or blackberries. For fall, add caramelized apples and a sprinkle of pumpkin pie spice. In winter, a dusting of cocoa powder or crushed candy canes (for holidays) adds festive flair.
These garnishes make the dessert feel seasonal without changing the core recipe.
Nutrition facts
Frequently asked questions
Can I make this banana pudding ahead of time?
The custard can be prepared 1 day ahead and stored in the fridge. Assemble the entire pudding 4-6 hours before serving for perfect texture. For best flavor, let it sit at room temperature for 30 minutes before serving to soften slightly. The longer it chills, the better the flavors meld together!
What’s the secret to keeping the vanilla wafers crispy?
Use Nabisco vanilla wafers (or homemade) and press them gently into each custard layer. Chill the pudding at least 4 hours—this prevents sogginess. For extra crunch, toast the wafers lightly in the oven for 2-3 minutes before assembling. The key is proper layering and patience!
Can I substitute the cream cheese custard?
For a lighter version, use sour cream (half the amount) or Greek yogurt. For extra richness, try mascarpone cheese blended with 1 cup heavy cream. The custard must still be thick enough to hold its shape when chilled—test consistency before layering.
How do I fix runny custard?
If your custard is too thin, mix 1 tablespoon cornstarch with 1 tablespoon cold milk, then stir into the hot custard. Cook for 2 more minutes until thickened. For prevention, always cook the custard until it coats the back of a spoon and let it cool completely before assembling.
What’s the best way to serve individual portions?
Use ramekins or small glass bowls for elegant individual servings. Layer 3 wafers, ½ cup custard, 2 banana slices, and repeat. Top with whipped cream and garnish with a sprinkle of cinnamon or crushed nuts. Serve with a spoon for easy scooping!

- 3lb Prime Rib Roast Recipe: Juicy Pink Center Guaranteed in 3 Hours - October 31, 2026
- 5 Spice Cake Recipe: Warmly Spiced Layers With Crunchy Top - October 31, 2026
- 1950’s Macaroni and Cheese Recipe: Nostalgic Creamy Cheese Sauce with Buttery Noodles - October 31, 2026