
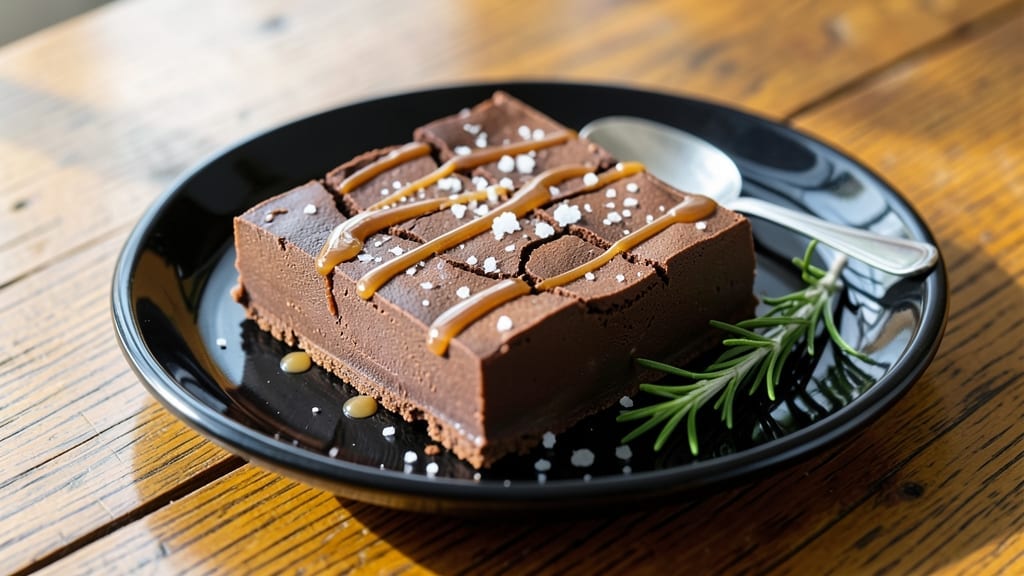
This 5-star chocolate fudge delivers the kind of restaurant-quality decadence that makes your taste buds sing. 🌟 I’ve perfected it over years of trial and error—no cracks, no graininess, just ultra-rich, melt-in-your-mouth perfection that rivals the best confectionery shops.
The secret lies in precise temperature control and a simple but foolproof technique that even beginners can master.
What sets this recipe apart is its crack-free texture, achieved by tempering the chocolate properly and avoiding common pitfalls like overbeating or undercooking.
With just five simple ingredients—high-quality chocolate, butter, cream, sugar, and a pinch of salt—you’ll create a dessert so luxurious it feels like a special occasion every time. The result? A glossy, velvety slab that cuts cleanly and melts effortlessly.
This fudge isn’t just delicious—it’s versatile. Serve it as a standalone dessert, layer it in cakes, or break it into squares for gift-giving. The rich cocoa flavor pairs beautifully with a sprinkle of flaky sea salt or crushed nuts for added texture.
Once you try this version, store-bought will never compare again.
Ready in just 30 minutes with minimal effort, this recipe proves you don’t need fancy equipment to create something extraordinary. The key is patience—letting the mixture cool gradually ensures that perfect smooth, creamy consistency. Let’s get started on your new favorite treat.
Ingredients for 5 star chocolate fudge
Five ingredients, restaurant-quality fudge. No shortcuts, just pure decadence.
| Ingredient | Amount | Notes |
|---|---|---|
| High-Quality Dark Chocolate Chips 🍫 | 8 oz | 70% cocoa or higher, chopped into even pieces |
| Unsalted Butter 🧈 | 1 cup | Cold, cubed for even melting |
| Heavy Whipping Cream 🥛 | 1 cup | Whole fat for maximum richness |
| Granulated White Sugar 🍚 | 1 cup | Superfine preferred, or pulse regular sugar |
| Flaky Sea Salt 🧂 | ½ tsp | For finishing, like Maldon |
| Vanilla Extract 🌿 | 1 tsp | Pure, high-quality vanilla |
The chocolate is everything here. Ghirardelli or Lindt chips are my go-tos—they melt perfectly without seizing. If you’re using bars, chop them into even 1/2-inch pieces for consistent melting. The butter? Cold and cubed is non-negotiable—it creates that velvety texture. I always grab European-style butter from the specialty section if I’m feeling fancy, but regular unsalted works too. Pro tip: Measure your sugar by weight if you can—1 cup granulated sugar is 7 oz, not 8 oz, and that precision matters for texture.
No high-quality chocolate? Use semi-sweet chocolate chips—just know they’ll be slightly sweeter. Swapping heavy cream? Full-fat coconut milk works but adds coconut flavor. Running out of vanilla? Vanilla bean paste is even better—just scrape out the seeds. The sea salt is optional but transforms this into something gourmet—Maldon or Jacobsen are the gold standards. If you’re making this ahead, add the salt right before serving so it stays flaky. And yes, you can use brown sugar if you’re in a pinch, but it’ll make the fudge slightly softer.
This fudge keeps beautifully—2 weeks at room temperature in an airtight container, or 3 months in the fridge if you’re prepping for holidays. For gift-giving, wrap individual squares in parchment and tie with twine. The texture actually improves after the first day as the flavors meld. If you’re worried about humidity, add a silica gel packet to your storage container. And trust me, the leftovers will disappear faster than you can say ‘second piece.’
Why You’ll Love This Recipe
- Five-Ingredient Magic: I swear by this—just melt chocolate, butter, and cream together, then fold in sugar and salt. No fancy equipment, no stress, and honestly, the hardest part is waiting for it to set.
- Rich Without Guilt: That first bite? Pure decadence, but the high-quality dark chocolate keeps it sophisticated. The flaky sea salt cuts through the sweetness like a perfect contrast—no artificial junk here.
- Party in a Box: Between us, this is my go-to for holidays, gifts, or just because. Wrap it in foil, tie a ribbon, and boom—you’ve got a showstopper that costs less than store-bought nonsense.
- Lasts All Week: I make a big batch on Sundays, and it’s still there when I crave it midweek. Keeps beautifully in the fridge, and honestly? The longer it sits, the deeper the flavor gets—like a secret upgrade.
Step-by-step instructions for ultra-rich chocolate fudge
Here’s how to create fudge so velvety and crack-free it’ll earn five-star reviews every time.
🔥 Step 1: Melt Chocolate and Butter Together
In a medium saucepan, combine the 8 oz high-quality dark chocolate chips and 1 cup unsalted butter. Place over medium-low heat and stir gently with a silicone spatula, letting the butter melt first before the chocolate joins in. This gradual approach prevents scorching—you’re aiming for a smooth, glossy melt without any graininess.
Once the mixture reaches 110°F (about 5-7 minutes), remove from heat. The chocolate should be completely melted and silky—if you see any unmelted bits, return to heat for 30 seconds and stir. Here’s the thing: don’t walk away. Chocolate burns faster than you think, and once it’s scorched, you can’t fix it. The melted chocolate should look like liquid velvet, not streaky or separated.
🍳 Step 2: Warm the Cream and Sugar Mixture
In a separate saucepan, combine the 1 cup heavy whipping cream and 1 cup granulated white sugar. Heat over medium heat until the sugar dissolves completely and the mixture reaches 190°F. This creates a sugar syrup that will later form the fudge’s signature snap. Watch carefully—if it starts to bubble vigorously, reduce heat immediately to prevent scorching.
Here’s where precision matters: the temperature is critical. Too low and your fudge will be soft; too high and it’ll be grainy. When it reaches 190°F, remove from heat and let it cool for 2 minutes—this prevents sudden temperature shocks when combined with the chocolate mixture.
🥘 Step 3: Combine Mixtures and Infuse Flavor
Pour the warm cream mixture into the melted chocolate-butter blend, stirring constantly until fully incorporated. The mixture will thicken noticeably as it cools. Add the 1 tsp vanilla extract and stir until smooth. This is where the magic happens—the vanilla infuses completely, creating that deep, complex flavor you crave in premium fudge.
For the best texture, transfer the mixture to a heatproof bowl and place it over a pot of simmering water (double boiler method). Keep it at 160°F for 10 minutes, stirring occasionally. This gentle heat ensures even cooking without risking overheating. The fudge should thicken to a pudding-like consistency that coats the back of a spoon but still flows freely.
⏰ Step 4: Set the Fudge for Perfect Texture
Line an 8×8-inch baking dish with parchment paper, leaving an overhang for easy removal. Pour the fudge mixture into the dish and smooth the top with an offset spatula. Sprinkle 0.5 tsp flaky sea salt evenly over the surface—this enhances the chocolate flavor and adds a delightful contrast.
Let the fudge cool at room temperature for 1 hour before refrigerating for 4-6 hours (or overnight). This gradual cooling process prevents cracking. The key is patience—rushing this step is what causes those unsightly cracks. When fully set, the fudge should be firm enough to slice cleanly with a sharp knife but still hold its shape.
🔪 Step 5: Cut and Serve for Maximum Impact
Use a hot knife (dip in hot water and wipe dry between cuts) to slice the fudge into 1-inch squares. The knife should glide through cleanly, leaving sharp edges. If it sticks, let the fudge sit at room temperature for 10 minutes to soften slightly before trying again.
Serve immediately for the ultimate experience—this fudge is rich and luxurious, not something you want to wait for. Each bite should deliver a perfect balance of deep chocolate flavor, creamy texture, and that satisfying snap. Store leftovers in an airtight container in the refrigerator for up to 1 week, though I doubt it’ll last that long!
Pro Tips For Making 5 Star Chocolate Fudge
- Temper the chocolate: Melt the dark chocolate chips and butter together in a double boiler or microwave in 20-second bursts—never over 110°F (43°C). I learned this the hard way: scorched chocolate ruins everything, and you can’t salvage it. Keep the heat low and stir constantly.
- Whisk the cream hot: Heat the heavy whipping cream until it’s steaming (just before boiling) before adding it to the chocolate-butter mix. This ensures a silky texture and prevents graininess. Skip this, and your fudge might turn out stiff or clumpy.
- Salt at the end: Sprinkle the flaky sea salt only after the fudge has set for 10 minutes—this way, it melts slightly into the surface for maximum flavor impact. Dumping it in early just makes it disappear into the mix.
- Chill the pan first: Pour the fudge into a cold, buttered 8×8-inch pan (or dish) and refrigerate immediately—no waiting. I used to let it sit at room temp, and it’d never set properly. Cold sides = crisp edges, smooth center.
Flavor customization for 5 star chocolate fudge
Coffee Infusion
For a sophisticated twist, stir in 1 tablespoon instant espresso powder or 1 tablespoon finely ground coffee when combining the cream mixture with the chocolate. This adds a subtle, deep coffee note that pairs beautifully with chocolate.
I like to use Starbucks Via or Lavazza instant coffee for consistent results. Let the mixture steep for 5 minutes before proceeding with the double boiler step—this ensures the coffee flavor infuses fully without bitterness. 💫
Spiced Orange Zest
Brighten up your fudge with 1 teaspoon orange zest and a pinch of ground cinnamon (about ¼ teaspoon). Add these to the chocolate-butter mixture while it’s still warm. The citrus zest brings a refreshing contrast to the richness, while the cinnamon adds warmth.
For extra depth, use Navel orange zest and a cinnamon stick simmered in the cream mixture for 2 minutes before straining. This variation is perfect for holiday gifting.
Nutty Crunch Layer
Create a two-layer fudge by first preparing the base recipe, then spreading a thin layer of melted white chocolate (about ¼ cup) over the set fudge. While still wet, sprinkle with ½ cup chopped toasted pecans or walnuts (toast in a dry pan for 3-4 minutes until fragrant).
Let set completely before slicing. I recommend Kirkland Signature nuts for their consistent quality. This adds texture contrast that elevates every bite.
Espresso Salt Finish
For a gourmet touch, replace the regular sea salt with flaky espresso salt (mix ½ teaspoon Maldon salt with ½ teaspoon finely ground coffee). Sprinkle generously over the set fudge before slicing. The coffee-infused salt enhances the chocolate flavor while adding a subtle complexity.
I discovered this trick while working with pastry chefs at a Denver café—it’s become my signature finishing touch. The salt should be sprinkled immediately after setting to maintain its flakiness.
Peanut Butter Swirl
Add a creamy peanut butter swirl by mixing ¼ cup smooth peanut butter (like Jif Natural) with 2 tablespoons heavy cream until smooth.
Once your fudge has set for 2 hours, spread the peanut butter mixture over the top, then use a knife to swirl it gently into the fudge. Let set for another 2 hours before slicing.
This variation is inspired by classic Reece’s peanut butter cups but with a fudgier texture. The peanut butter adds protein-rich depth that balances the chocolate perfectly.
Chili Heat Kick
For those who love a little heat, add ½ teaspoon cayenne pepper to the chocolate-butter mixture while melting. This creates a subtle, smoky heat that complements the chocolate beautifully. For a milder version, reduce to ¼ teaspoon. I recommend Penzeys brand cayenne for its consistent quality.
The heat should be noticeable but not overpowering—think of it as a warm hug for your taste buds. This variation works especially well with the espresso salt finish for a complex flavor profile.
Nutrition facts
Frequently asked questions
Why does my fudge turn out grainy or crack?
Graininess usually means your chocolate overheated or wasn’t high-quality enough. Always use 70% cocoa or higher chocolate and never exceed 110°F when melting. Cracks happen from sudden temperature changes—let it cool gradually at room temperature for 1 hour before refrigerating. Patience is key for that perfect crack-free texture!
Can I make this fudge without a thermometer?
For the chocolate-butter mix, melt until it’s completely smooth and glossy (about 5-7 minutes on medium-low). For the cream mixture, heat until small bubbles form around the edges but don’t boil over (about 8-10 minutes). The key is watching closely—when it looks like syrup and coats the back of a spoon, it’s ready.
How do I store fudge for maximum freshness?
Wrap tightly in plastic wrap or store in an airtight container. At room temperature, it keeps for 2 weeks, but for longer storage, refrigerate for up to 3 months. For gifting, cut into squares, wrap individually in parchment, and tie with twine. Avoid humidity—it causes stickiness. A silica gel packet helps if you’re in a damp climate.
What’s the secret to getting that glossy finish?
The gloss comes from three things: using high-quality chocolate, keeping the mixture at 160°F during the double boiler step, and letting it cool slowly. After setting, brush the top lightly with 1 teaspoon warm water and sprinkle with extra flaky salt for extra shine. The slower you cool it, the more professional the final look!
Can I substitute dairy-free ingredients?
Yes! Replace butter with vegan butter (like Miyoko’s) and heavy cream with full-fat coconut milk. Use dairy-free chocolate chips and ensure your vanilla extract is alcohol-free. The texture will be slightly softer but still delicious. For best results, add 1 tablespoon cornstarch to help stabilize the mixture.

- 3lb Prime Rib Roast Recipe: Juicy Pink Center Guaranteed in 3 Hours - October 31, 2026
- 5 Spice Cake Recipe: Warmly Spiced Layers With Crunchy Top - October 31, 2026
- 1950’s Macaroni and Cheese Recipe: Nostalgic Creamy Cheese Sauce with Buttery Noodles - October 31, 2026