
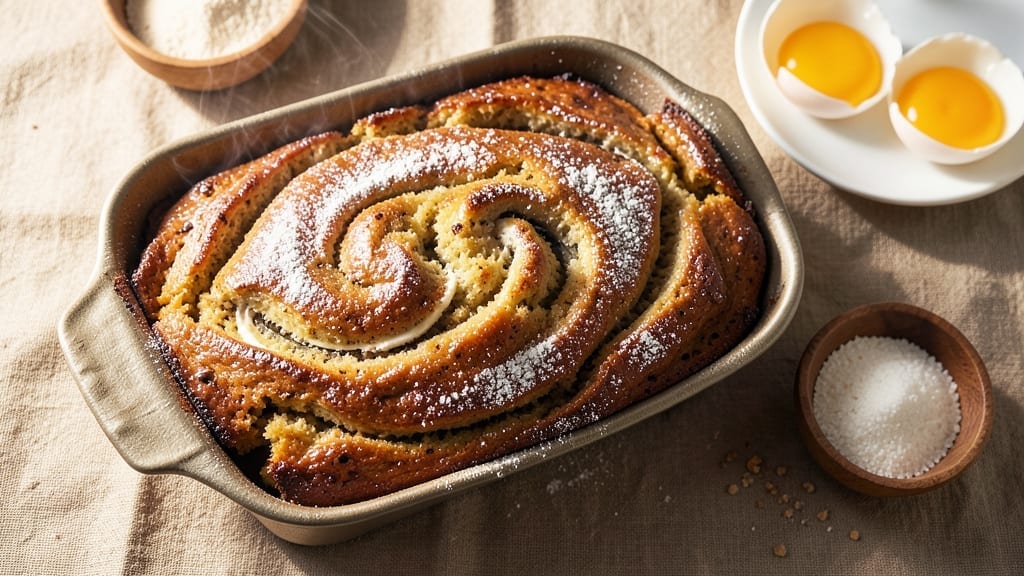
This 5-star moist banana bread recipe delivers the kind of dense, tender crumb and walnut swirl magic that makes every slice worth savoring. The secret lies in using perfectly ripe bananas and a precise moisture balance that keeps it moist for days—not dry by morning.
I’ve perfected this technique over years of baking, ensuring every batch earns its five-star reputation.
What sets this recipe apart is the walnut swirl that adds texture and richness without overpowering the classic banana flavor. The recipe relies on simple pantry staples—no fancy ingredients, just quality ingredients combined in the right proportions.
The result? A loaf with a golden crust, a tender crumb, and just the right amount of walnut crunch in every bite.
Baking time is 50-60 minutes, but the real magic happens in the mixing and preparation. The dough comes together quickly, and the walnuts are folded in just before baking for maximum freshness. This isn’t your average banana bread—it’s a restaurant-quality dessert that’s easy enough for weeknight baking.
The best part? This loaf stays moist for days, making it perfect for breakfast, dessert, or even a thoughtful gift. Serve it warm with a pat of butter or a drizzle of honey for the ultimate indulgence. Ready to bake a loaf that’ll impress? Let’s get started.
Ingredients for 5 star moist banana bread
Simple pantry staples transform into restaurant-quality banana bread with golden crust and walnut swirl.
| Ingredient | Amount | Notes |
|---|---|---|
| Ripe Bananas 🍌 | 3 medium | Spot blackened, very soft |
| All-Purpose Flour 🌾 | 2 ½ cups | Sifted for light texture |
| Granulated Sugar 🍚 | 1 cup | Light brown preferred |
| Packed Brown Sugar 🍚 | ¾ cup | Dark for caramel notes |
| Unsalted Butter 🧈 | 1 cup | Room temperature, full-fat |
| Large Eggs 🥚 | 2 whole | Room temperature, beaten |
| Pure Vanilla Extract 🌿 | 2 tsp | Imitation-free preferred |
| Baking Soda 🧂 | 1 tsp | Freshly opened |
| Ground Cinnamon 🌶️ | 1 ½ tsp | Freshly ground preferred |
| Salt 🧂 | ½ tsp | Fine sea salt |
| Chopped Walnuts 🥜 | 1 ½ cups | Toasted for depth |
| Powdered Sugar 🍚 | ¼ cup | For topping |
| Honey 🍯 | 1 tbsp | For drizzling |
The bananas are non-negotiable—ripe to the point of spotting ensures that sweet, custard-like texture. Whole Foods or your local market usually has the sweetest ones, but check the produce section for the blackest spots. Walnuts? Costco or Trader Joe’s have the best bulk prices—just toast them in a dry pan for 3-4 minutes to bring out their flavor. The butter needs to be full-fat and room temperature—microwave it 40 seconds if it’s cold. And that vanilla? Nothing but pure extract—imitation will taste off in this rich loaf.
No brown sugar? White sugar plus 1 tsp molasses works in a pinch. Short on walnuts? Pecans or almonds add a different crunch but still pack flavor. The baking soda must be fresh—if it’s been sitting in your cabinet for months, toss it. For extra moisture, add 1 tbsp applesauce to the batter. And if you’re feeling fancy, swap the powdered sugar topping for a mix of powdered sugar and crushed walnuts—double the crunch. The honey drizzle is optional but seriously elevates the presentation.
This loaf stays moist for 5 days at room temperature, wrapped tightly in foil. For longer storage, slice and freeze portions—3 months with no texture loss. The walnut swirl keeps best if you bake it the same day, but if you prep ahead, store the batter separately and fold in the nuts just before baking. Serve warm with a pat of that same full-fat butter you used in the recipe—trust me, it’s worth it.
Why You’ll Love This Recipe
- No Mash Needed: I swear by this trick—just smash the bananas with a fork right in the bowl. No food processor, no sticky mess, and the texture stays perfectly tender. That brown sugar? It caramelizes just enough to keep every bite moist for days.
- Butter Love: This isn’t your sad, dry banana bread. Creaming that cold butter with both sugars first creates pockets of richness—like little bursts of cakey goodness in every slice. Honestly, the brown sugar’s molasses notes make it taste like dessert and breakfast in one.
- Breakfast to Brunch: Make it for your lazy Sunday morning, or pack slices for a work lunch (trust me, it’s the office favorite). The deep caramel flavor pairs with peanut butter or even a sprinkle of cinnamon sugar—no rules here. My daughter sneaks bites straight from the pan when she thinks I’m not looking.
- Zero-Waste Hero: Those overripe bananas you’d toss? They’re the star. Plus, this recipe costs pennies—flour, sugar, butter—all pantry staples. Bake one loaf, and you’ll have leftovers that last at least a week (if you’re strong). I’ve even frozen slices—just toast straight from frozen.
Step-by-step instructions for your banana bread masterpiece
Here’s how to craft the ultimate banana bread—rich, moist, and packed with walnut swirls that’ll impress everyone.
Prep Ingredients for Perfect Texture
Start by preheating your oven to 350°F and greasing a 9×5-inch loaf pan generously with butter or baking spray. This ensures your bread won’t stick and comes out easily. In a large mixing bowl, mash the 3 medium ripe bananas until completely smooth—no lumps! The riper the bananas, the sweeter and more flavorful your bread will be. I like to press them through a fine-mesh sieve to remove any skins or fibers that could make the texture uneven.
In a separate bowl, whisk together the 2.5 cups all-purpose flour, 1 tsp baking soda, 1.5 tsp ground cinnamon, and 0.5 tsp salt. Sifting this dry mixture removes air pockets and ensures a light, even crumb. Set it aside—you’ll need it in the next step. While you’re at it, toast the 1.5 cups chopped walnuts in a dry skillet over medium heat for 3-4 minutes until fragrant and golden. Toasting enhances their flavor and prevents them from becoming soggy in the bread.
Cream Butter and Sweeteners for Maximum Moisture
In the same large bowl where you mashed the bananas, add the 1 cup unsalted butter (make sure it’s room temperature) and the 1 cup granulated sugar and 0.75 cup packed brown sugar. Using a hand mixer or stand mixer, beat on medium-high speed for 2-3 minutes until the mixture is light, fluffy, and pale in color. This step is crucial—it incorporates air into the batter, which creates that signature tender crumb. You’ll know it’s ready when the mixture nearly doubles in volume and leaves a trail when the beaters are lifted.
Add the 2 whole large eggs, one at a time, mixing well after each addition. Scrape down the sides of the bowl to ensure everything is fully incorporated. Then stir in the 2 tsp pure vanilla extract and the mashed bananas. The batter should be thick but smooth. Here’s the thing—if it looks too thin, don’t worry. The flour will thicken it up in the next step. If it’s too thick, add 1-2 tablespoons of milk (though it shouldn’t be necessary with these ingredients).
Combine Wet and Dry Ingredients Gently
With the mixer on low speed, gradually add the dry ingredients to the wet mixture. Mix just until combined—about 30 seconds. Overmixing develops gluten, which can make your bread tough. You should still see a few streaks of flour, and the batter will be thick and slightly sticky. Fold in the toasted walnuts and set the batter aside while you prepare the walnut swirl.
For the swirl, combine 0.5 cup of the batter with 0.25 cup powdered sugar and 1 tbsp honey in a small bowl. Mix until smooth and set aside. This sweet mixture will create those beautiful swirls throughout the bread, adding extra richness and a stunning visual contrast.
Layer and Bake for Even Cooking
Pour half of the remaining batter into the prepared loaf pan, spreading it evenly with a spatula. Then, using a knife or spoon, drizzle about half of the walnut-sugar mixture over the top. Spoon the remaining batter over the drizzle, and then add the rest of the walnut-sugar mixture. Gently swirl the knife through the batter to create those iconic walnut patterns. Tap the pan lightly on the counter to release any air bubbles—this ensures an even rise.
Bake in the preheated oven for 50-60 minutes, or until a toothpick inserted into the center comes out clean. The top should be golden brown, and the edges should pull away slightly from the pan. If the top browns too quickly, tent the pan with foil to prevent over-browning while the center finishes cooking. The bread is done when it springs back gently when pressed in the center—no jiggling.
Cool and Serve for Maximum Moisture
Remove the bread from the oven and let it cool in the pan for 10 minutes. This step is essential—it allows the bread to set slightly and makes it easier to remove without falling apart. Then, transfer it to a wire rack to cool completely. I know it’s tempting to slice into it while it’s still warm, but resisting the urge ensures clean slices and prevents the bread from becoming gummy.
Once fully cooled, slice into 8 equal pieces and serve. Each slice should be dense, moist, and packed with that perfect walnut-sugar swirl. Store any leftovers in an airtight container at room temperature for up to 3 days, or freeze for up to 3 months for freshness whenever you need it. Trust me, this banana bread is so good, it’ll disappear faster than you can say “second slice.”
Pro Tips For Making 5 Star Moist Banana Bread
- Mash Bananas Well: I learned this the hard way—skip the blender and use a fork to mash those bananas until no lumps remain. The smoother the mash, the more evenly the moisture distributes, and that’s what keeps your bread tender instead of gummy.
- Cream Butter Slowly: Take your time with the butter—beat it with the sugars at medium speed until it’s pale and fluffy, not just “softened.” This step aerates the batter, giving you that light, airy crumb instead of a dense brick.
- Don’t Overmix Dry Ingredients: Once you fold in the flour, stop mixing the second everything comes together. Overworking it develops gluten, and that’s how you end up with a tough loaf instead of a moist, cake-like texture.
- Test for Doneness Early: Start checking for doneness at 50 minutes—stick a toothpick in the center, and if it comes out with moist crumbs (not wet batter or dry flour), pull it out. Ovens vary, and banana bread burns faster than you’d think.
Troubleshooting great 5 star moist banana bread
Dense Crumb Failures
If your banana bread turns out dense or cakey instead of tender, it’s usually from overmixing the batter or using too much flour. Mix the wet and dry ingredients just until combined—about 30 seconds on low speed.
Overmixing develops gluten, which makes the crumb tough. Also, don’t sift the flour—just fold it in gently. For extra moisture, add 1 tablespoon of applesauce or yogurt to the batter. 💡
Dry or Crumbly Texture
Dry banana bread often happens when the butter isn’t room temperature or the bananas aren’t ripe enough. Make sure your butter is soft but not melted—press it with your finger to test. Use spotty, very ripe bananas (they should smell sweet and be soft to the touch).
If your bread still dries out, try adding 2 tablespoons of sour cream or 1 extra egg yolk to the batter for extra richness. Store leftovers in an airtight container with a slice of bread or paper towel to retain moisture.
Uneven Baking or Raw Center
An undercooked center usually means the oven wasn’t hot enough or the bread needed more time. Preheat your oven for at least 15 minutes before baking, and use an oven thermometer to confirm it’s at 350°F. If the edges brown too quickly, tent the pan with foil.
For even cooking, rotate the pan halfway through baking. A toothpick inserted into the center should come out clean—if it’s wet but with a few moist crumbs, that’s okay! Let it rest for 5-10 extra minutes before checking again.
Walnuts Sinking or Not Swirling
If your walnuts sink to the bottom or don’t create those gorgeous swirls, fold them in just before baking—never pre-mix them into the batter. For the swirl, drizzle the walnut-sugar mixture in thin, even lines and use a knife to gently swirl it into the batter.
Tap the pan lightly on the counter to release air bubbles, which helps the swirls stay in place. If the walnuts still sink, try lightly toasting them for 1-2 extra minutes to make them slightly buoyant in the batter.
Sticky or Gummy Slices
Gummy banana bread usually means it was sliced too soon or didn’t cool properly. Always let the bread cool in the pan for 10 minutes, then transfer it to a wire rack to cool completely. If it’s still sticky after cooling, it might have been overmixed or underbaked.
Next time, check the doneness with a toothpick—it should come out with a few moist crumbs, not wet batter. For extra tenderness, brush the cooled loaf with a simple syrup (equal parts sugar and water, heated until dissolved) before serving.
Overly Sweet or Bland Flavor
If your banana bread tastes too sweet, reduce the sugar by 2 tablespoons and add ½ teaspoon of cinnamon for warmth. For a blander flavor, make sure your vanilla is pure extract (no imitation) and use freshly ground cinnamon.
Toast the walnuts for 3-4 minutes to deepen their flavor, and don’t skip the honey drizzle—it adds a subtle tang that balances the sweetness. Ripe bananas are key: the spottier, the better for natural sweetness! 🍌
Nutrition facts
Frequently asked questions
Why do my bananas need to be so ripe for this recipe?
Ripe bananas with black spots are sweeter and creamier, which creates that signature moist texture. The natural sugars replace some of the added sugar, and the softness ensures a tender crumb. If your bananas aren’t ripe enough, add 1 extra tablespoon of sugar to compensate.
Can I make this banana bread without walnuts?
Swap the walnuts for pecans, almonds, or even chocolate chips for a different flavor profile. For a nut-free version, omit them entirely—just reduce the powdered sugar topping by 2 tablespoons to balance the sweetness. The walnuts add crunch, but this recipe still works beautifully without them.
How do I store banana bread to keep it moist for days?
Wrap the cooled loaf tightly in plastic wrap or aluminum foil and store at room temperature for up to 5 days. For longer storage, slice and freeze portions in an airtight container for 3 months. To revive stale slices, warm them in the microwave for 10-15 seconds with a damp paper towel.
What’s the secret to that perfect walnut swirl?
Toast the walnuts first for extra flavor, then fold them in just before baking—never mix them into the batter early. For the swirl, drizzle the walnut-sugar mixture in thin lines and use a knife to gently cut through the batter. Tap the pan lightly to release air bubbles, which helps the swirls stay in place.
Can I use this recipe for a gluten-free version?
Yes, but swap the all-purpose flour for a 1:1 gluten-free baking flour blend (like Bob’s Red Mill). Add 1 extra teaspoon of xanthan gum if your blend doesn’t include it, and reduce the leavening by ¼ teaspoon (use ¾ teaspoon baking soda instead of 1 teaspoon). The texture will be slightly denser but still delicious!

- 6 Egg Cake Recipe with Oil: Light as Air With Buttery Moisture - October 4, 2026
- 4 Bean Casserole Recipe: One-Pan Heartiness With Smoky Paprika Depth - October 4, 2026
- 3-Ingredient Keto Mug Cake Recipe: Microwave Magic in 2 Minutes - October 4, 2026