
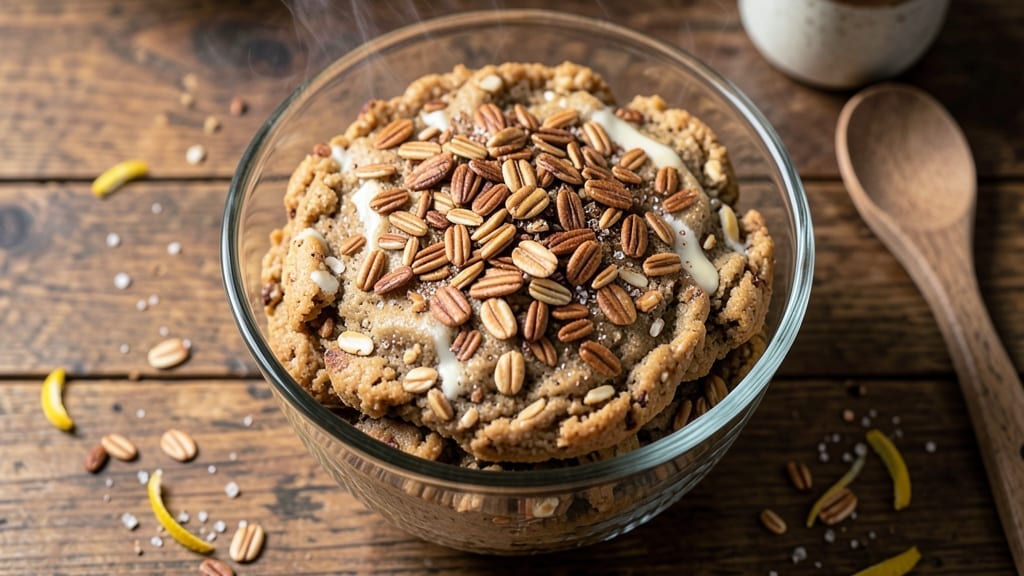
This 5-star oatmeal cookie recipe delivers the perfect balance of buttery brown sugar crunch and chewy centers that’ll earn you rave reviews every time. 🌟 The secret lies in using old-fashioned oats for texture and a precise mix of brown sugar and butter for that signature caramelized flavor—no shortcuts, just restaurant-quality results at home.
What sets these apart is the foolproof technique that ensures chewy interiors and crispy edges without drying out. With just 10 simple ingredients and 15 minutes of prep, you’ll bake a batch that’s rich, aromatic, and packed with warm spices like cinnamon and nutmeg.
The dough’s resting time (don’t skip this!) lets the flavors meld for maximum depth.
By the time they emerge from the oven, you’ll have golden, crackly-topped cookies with soft, tender centers that hold their shape but still melt in your mouth.
The aroma alone will fill your kitchen with nostalgia, and the first bite delivers that perfect balance of sweetness, crunch, and chewiness that makes these 5-star every time.
These cookies stay fresh for days in an airtight container, making them ideal for gifting, holiday baking, or satisfying cravings all week. Let’s get baking—your taste buds will thank you.
Ingredients for 5 star oatmeal cookie
Ten simple ingredients transform into restaurant-quality cookies with buttery crunch and chewy centers.
| Ingredient | Amount | Notes |
|---|---|---|
| Old-Fashioned Rolled Oats 🌾 | 2 cups | Not quick oats, for texture |
| Unsalted Butter 🧈 | 1 cup | Cold, cubed for creaming |
| Packed Brown Sugar 🍯 | 1 cup | Light or dark, your choice |
| Granulated Sugar 🍚 | ¼ cup | Balances the brown sugar |
| Large Eggs 🥚 | 2 whole | Room temperature preferred |
| Pure Vanilla Extract 🌸 | 2 tsp | Real vanilla, not imitation |
| Ground Cinnamon 🌿 | 1 tsp | Freshly ground for warmth |
| Ground Nutmeg 🌿 | ¼ tsp | Freshly grated preferred |
| All-Purpose Flour 🌾 | 1 ½ cups | Sifted for light texture |
| Sea Salt 🧂 | ½ tsp | Fine grain for balance |
| Chopped Walnuts 🥜 | ½ cup | Optional for crunch |
The oats make or break this recipe. Old-fashioned rolled oats give that signature chewy texture—quick oats will turn gummy. Bob’s Red Mill or Quaker are my go-tos, but any store-brand works if it says ‘old-fashioned.’ Butter matters too: use unsalted and keep it cold until mixing. The brown sugar? Pack it tightly—don’t scoop it. For vanilla, real extract (not imitation) makes a world of difference. Walnuts are optional but add that perfect crunch—Trader Joe’s has the best pre-chopped kind.
No old-fashioned oats? Pulse quick oats in a food processor for 10 seconds to mimic texture. Short on butter? Coconut oil works in a pinch (same amount), but it adds a slight coconut flavor. The cinnamon and nutmeg are non-negotiable for that warm spice profile—Penzeys or bulk bins have the freshest. For the flour, King Arthur is my go-to, but any all-purpose will do. If you’re gluten-free, swap for a 1:1 blend but expect slightly different texture. The dough will feel thick, but that’s normal—don’t overwork it.
These cookies improve with age. Bake half, store in an airtight container for 2-3 days—they get even more flavorful. Freeze dough balls for up to 3 months—just bake straight from frozen, adding 2 minutes. For gifting, package in cellophane bags with ribbon. They stay fresh for 5 days at room temp if sealed tight. Pro tip: Underbake slightly—they firm up as they cool, so pull them when edges are golden but centers are still soft.
Why You’ll Love This Recipe
- No-Fuss Mixing: I swear, this dough comes together in five minutes—just toss the oats, butter, and sugars until it’s crumbly, then fold in the eggs. No food processor, no overworking, just a spoon and a bowl. Honestly, my lazy Sundays thank me every time.
- Caramel Crunch Magic: That perfect chew? It’s all in the rolled oats and brown sugar—crispy edges with a soft, buttery center. The eggs bind it just right, so it’s never dry or gummy. (Yes, even on a Tuesday night.)
- Bulk-Friendly Bliss: Make a double batch, freeze half, and you’ve got cookies for weeks. They thaw in 10 minutes—great for last-minute gifts or when you’re too tired to bake. My kids’ teachers love these for classroom treats.
- Pantry Staple Power: You’re using things you already have: butter, sugar, eggs, oats. No weird ingredients or last-minute grocery runs. Between us, this recipe saved me $15 last month compared to store-bought. (And they’re way better.)
Step-by-step instructions for buttery brown sugar oatmeal cookies
These cookies deliver a perfect balance of chewy centers and crispy edges—here’s how to nail it every time.
🍳 Step 1: Cream Butter and Sugars to Light and Fluffy
In a stand mixer fitted with the paddle attachment, beat the 1 cup unsalted butter (cold, cubed) with the 1 cup packed brown sugar and 0.25 cup granulated sugar on medium speed for 3-4 minutes. You’re looking for a pale, fluffy mixture that nearly doubles in volume—the butter should look almost ribbon-like when you lift the paddle.
This creaming process incorporates air, which creates those beautiful crackly tops and helps the cookies spread just enough. I like to scrape down the sides every 30 seconds to ensure even mixing. If your butter isn’t cold enough, the mixture will turn greasy instead of light and airy—trust me, it makes a difference.
👨🍳 Step 2: Add Eggs and Flavorings for Depth
Add the 2 whole large eggs one at a time, mixing on low speed for 30 seconds after each addition until fully incorporated. Then add the 2 tsp pure vanilla extract, 1 tsp ground cinnamon, 0.25 tsp ground nutmeg, and 0.5 tsp sea salt. Mix on low speed for another 30 seconds until just combined—you should still see some flour streaks when you’re done.
The nutmeg might seem like a small amount, but it adds that warm, cozy depth that makes these cookies truly special. I always use freshly ground spices when possible—they pack more flavor punch than pre-ground versions. Here’s where it gets fun: give the mixture a taste. It should be sweet but balanced with that hint of spice and salt.
👨🍳 Step 3: Fold in Dry Ingredients and Oats
In a separate bowl, whisk together the 1.5 cups all-purpose flour and 2 cups old-fashioned rolled oats. Then, using a silicone spatula, gently fold the dry ingredients into the wet mixture until just combined. Be careful not to overmix—you should still see some oat clusters and flour streaks. Add the 0.5 cup chopped walnuts (if using) and fold them in last.
The oats give these cookies their signature texture—chewy centers with a satisfying crunch. I like to keep some of the oats whole while others get slightly crushed during mixing, which creates that perfect bite in every cookie. If your dough seems too dry, you can add 1-2 teaspoons of milk to help bring it together, but don’t overdo it or your cookies will spread too much.
⏰ Step 4: Chill the Dough for Perfect Shape
Cover the dough with plastic wrap and refrigerate for at least 30 minutes (I prefer 1 hour or even overnight). This chilling step is crucial—it allows the flour to fully hydrate and the butter to firm up slightly, which prevents excessive spreading in the oven. Cold dough also means the cookies hold their shape better when they hit the hot oven.
While the dough chills, preheat your oven to 350°F and line two baking sheets with parchment paper. I like to use the 1-hour chilling time if I have it—it makes a noticeable difference in the final texture. If you’re short on time, the 30-minute minimum will work, but your cookies might spread slightly more.
🔥 Step 5: Bake to Golden Perfection
Using a 2-tablespoon cookie scoop, portion the chilled dough onto the prepared baking sheets, spacing the cookies about 2 inches apart. They won’t spread much, but giving them room ensures even baking. Bake for 12-14 minutes until the edges are golden brown and the centers still look slightly underdone.
Here’s the thing—I know it’s tempting to check early, but resist! The cookies will continue cooking on the hot baking sheet after you remove them. They’re done when they pull away slightly from the edges of the parchment but still have a soft, slightly puffy center. Let them cool on the baking sheet for 5 minutes before transferring to a wire rack to cool completely.
Pro Tips For Making 5 Star Oatmeal Cookie
- Pulse Oats Twice: Use your food processor to pulse the rolled oats in two batches—first for 3 seconds, then again for 2 seconds after mixing with wet ingredients. This keeps some texture while preventing a dense, brick-like cookie. (Yes, I’ve made that mistake. Trust me.)
- Brown Butter First: Cook the unsalted butter until it’s a deep golden brown with nutty aroma—about 5-6 minutes over medium heat—before mixing it into the sugars. The flavor leap is worth the extra time, and it caramelizes the brown sugar better than cold butter ever will.
- Chill the Dough: Divide the dough into two disks, wrap in plastic, and refrigerate for at least 2 hours (or overnight). This prevents flat, greasy cookies and lets the oats soften just enough for chewy perfection. (I used to skip this and got sad, thin cookies.)
- Use Room-Temp Eggs: Crack eggs straight from the fridge into a bowl, let them sit for 10 minutes, then whisk. Cold eggs create pockets in the dough that don’t bind well, leading to uneven baking. Room-temp eggs = consistent texture every time.
Pro cooking tips for this recipe
Creaming Like a Pro
The butter-sugar creaming stage is where flavor and texture magic happens. Use a stand mixer with the paddle attachment (not whisk) to beat 1 cup cold cubed butter with 1 cup packed brown sugar and ¼ cup granulated sugar on medium speed for 3-4 minutes.
The mixture should lighten to a pale, fluffy consistency—almost doubling in volume. Scrape down the bowl every 30 seconds to prevent greasy pockets. If your butter melts too quickly, chill the bowl for 5 minutes mid-creaming. 🌟
Dough Consistency Secrets
Your dough should be thick but pliable—like wet sand that holds together when squeezed. If it crumbles, add 1 tsp milk at a time until it just comes together. Overmixing develops gluten, which makes cookies tough.
Use a silicone spatula to gently fold dry ingredients, preserving those lovely oat clusters. For extra chewiness, press a few oats into the bottom of each scooped dough ball before baking. ✨
Chilling Game-Changer
Never skip chilling! The 30-60 minute refrigeration lets the flour hydrate and butter firm up, preventing excessive spreading. For best results, chill overnight—this deepens flavors and improves texture. Place dough in a single layer on a parchment-lined tray before refrigerating to prevent sticking.
Pro move: Freeze dough balls for up to 3 months—bake straight from frozen, adding 2 extra minutes. ❄️
Baking Precision
Use 350°F for perfect golden edges with soft centers. Bake for 12-14 minutes until edges are set but centers still look slightly underdone. The cookies will firm up as they cool.
For even baking, rotate pans midway through. Underbake slightly—they’ll continue cooking on the hot sheet. Let cool 5 minutes on the pan before transferring to prevent cracking. 🔥
Equipment Upgrades
Invest in a 2-tablespoon cookie scoop for uniform size and a wire cooling rack to prevent soggy bottoms. For crispier edges, use dark baking sheets (they conduct heat better). A digital thermometer ensures accurate oven calibration. My go-to is a Lodge half-sheet pan—it heats evenly and lasts forever. 💡
Flavor Boosters
Enhance the classic recipe with 1 tsp lemon zest for brightness or ½ tsp cardamom for warmth. For extra richness, replace 2 tbsp flour with 2 tbsp almond flour.
Swap walnuts for pecans or toasted coconut flakes for variety. Always taste the dough before baking—adjust sweetness or spice as needed. The perfect cookie starts with balanced flavors! 🌶️
Nutrition facts
Frequently asked questions
Why do your oatmeal cookies need to chill before baking?
Chilling the dough for 30-60 minutes (or overnight!) prevents excessive spreading and develops deeper flavors. The cold butter firms up slightly, helping cookies maintain their shape while baking. This step also lets the flour hydrate properly, resulting in that perfect chewy texture. Skipping it risks flat, cakey cookies instead of the signature thick, crackly-topped style.
Can I make these cookies gluten-free?
Yes, but texture will change slightly. Replace the 1.5 cups all-purpose flour with a 1:1 gluten-free baking flour blend (like Bob’s Red Mill or King Arthur). Add ½ teaspoon xanthan gum if your blend doesn’t include it. Expect cookies that are slightly denser but still delicious. For best results, use a gluten-free oat flour if available.
How do I store these cookies to keep them fresh?
Store in an airtight container at room temperature for 5-6 days—they actually improve with age! For longer storage, freeze dough balls for up to 3 months (bake straight from frozen, adding 2 minutes to baking time). To revive stale cookies, warm in a 200°F oven for 3-5 minutes. The walnuts stay crispy when stored properly!
Why are my cookies spreading too much?
Overmixing the dough or skipping the chilling step are the most common causes. Ensure your butter is cold when creaming and chill dough for at least 30 minutes. Also check your oven temperature—if it runs hot, reduce to 325°F. Using a 2-tablespoon scoop and spacing cookies 2 inches apart gives them room to bake properly.
Can I add chocolate chips to these cookies?
Fold in ½ cup chocolate chips (semi-sweet or dark) with the walnuts. For a professional touch, melt ½ cup chocolate, spread on cooled cookies, and sprinkle with flaky sea salt. Use high-quality chocolate—it makes all the difference. Pro tip: Chill the dough with chocolate chips for 1 hour to prevent melting.

- 3lb Prime Rib Roast Recipe: Juicy Pink Center Guaranteed in 3 Hours - October 31, 2026
- 5 Spice Cake Recipe: Warmly Spiced Layers With Crunchy Top - October 31, 2026
- 1950’s Macaroni and Cheese Recipe: Nostalgic Creamy Cheese Sauce with Buttery Noodles - October 31, 2026