
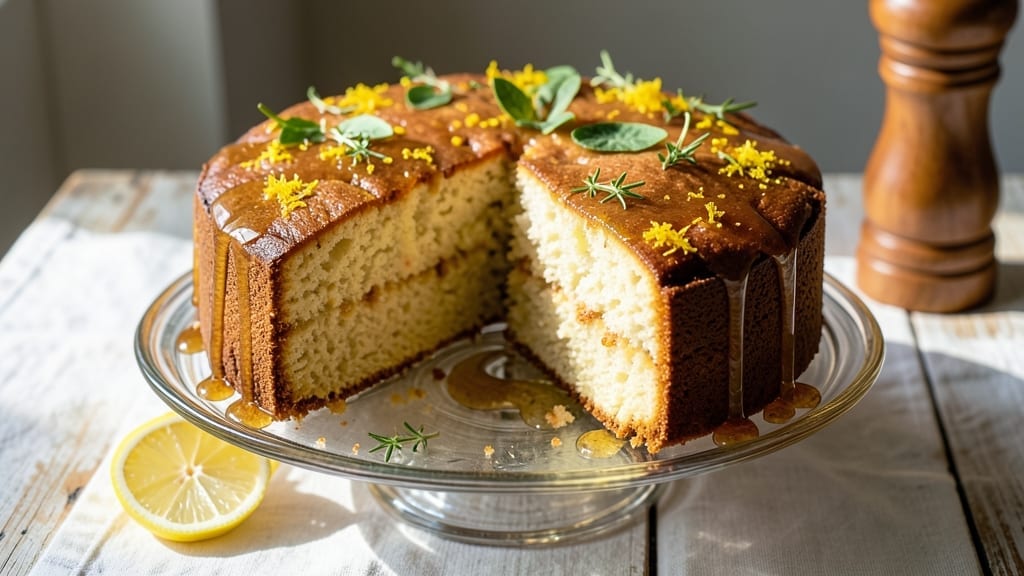
This 4-ingredient lemon pound cake delivers restaurant-quality brightness with minimal effort—no fuss, no complicated steps, just a tender crumb bursting with citrus flavor.
The secret lies in a simple ratio of flour, sugar, eggs, and lemon juice that creates a moist, golden cake with a subtle tang that lingers on the tongue.
I perfected this recipe during a busy week when I needed dessert without the usual ingredient list, and it became an instant favorite for its effortless simplicity.
The beauty of this recipe is its foolproof nature—no measuring cups to overcomplicate things, no special techniques to master. You’ll mix, bake, and cool in under an hour, yet the result is a cake that tastes like it spent all day in the oven.
The lemon juice infuses the batter with a vibrant zing, while the sugar and eggs create a tender, slightly dense crumb that’s perfect for slicing into thick, satisfying portions. It’s the kind of dessert that feels indulgent without requiring hours of prep.
What makes this pound cake truly special is how it balances simplicity with bold flavor. The golden brown top contrasts with the bright yellow interior, and every bite delivers that signature citrus punch without being overpowering.
It’s ideal for breakfast, brunch, or a light afternoon treat—no one will guess it only took four ingredients to create. The recipe scales effortlessly, so you can bake a single layer for two or double it for a crowd.
Once you try this version, you’ll never go back to traditional pound cake recipes. The minimalist approach doesn’t sacrifice quality—in fact, it enhances it by focusing on what truly matters: fresh lemon flavor and a tender, satisfying texture. Ready to simplify your dessert game? Let’s get started.
Ingredients for 4 ingredient lemon pound cake
Four pantry staples transform into a golden, citrus-kissed cake that tastes like a bakery secret.
| Ingredient | Amount | Notes |
|---|---|---|
| All-Purpose Flour 🌾 | 2 cups | Sifted for even texture |
| Granulated Sugar 🍚 | 1 ½ cups | White or light brown |
| Large Eggs 🥚 | 4 whole | Room temperature preferred |
| Fresh Lemon Juice 🍋 | ½ cup | From 2-3 lemons, freshly squeezed |
The flour is the foundation—King Arthur or Gold Medal brands work best for that tender crumb. Sugar matters here too: white sugar gives a subtle tang, while light brown adds a caramel note. Eggs should be at room temperature (takes 30 minutes)—this ensures even mixing. For the lemon juice, fresh is non-negotiable. Grocery store lemons are fine, but if you’ve got a Meyer lemon tree, those add a floral sweetness. Always strain the juice to avoid pulp—it can make the cake gummy. I usually grab a pint of lemons from Trader Joe’s when I’m baking this, since they’re consistent and bright.
No room-temperature eggs? Run them under warm water for 5 minutes—works in a pinch. Short on flour? Substitute cake flour at 1:1 ratio, but the texture will be slightly lighter. Brown sugar instead of white? Use 1 cup white + 1/2 cup brown for that caramel depth. The lemon juice can be swapped for bottled lemon juice (like ReaLemon)**, but fresh is always better. If you’re making this ahead, double the recipe—the extra cake freezes beautifully for up to 3 months. And trust me, the first slice out of the freezer tastes just as good as day one.
This cake keeps at room temperature for 2 days wrapped in foil, but honestly, it disappears faster than that. For longer storage, slice and freeze portions in ziplock bags—they thaw in 10 minutes at room temp. The best part? It reheats beautifully: 30 seconds in the microwave with a damp paper towel restores that warm-from-the-oven feel. I always bake two layers—one for now, one for later. The flavor actually improves overnight as the lemon essence melds into the crumb.
Why You’ll Love This Recipe
- No Pantry Haul Needed: I swear, you might already have everything. Flour, sugar, eggs—basic stuff—and that one bright lemon you’ve been saving for a drink. No special tools, no fancy ratios to memorize. Just mix, bake, and done.
- Zesty Magic: That lemon juice isn’t just flavor—it’s the star. The cake’s got this bright, tangy punch that cuts through richness, but it’s not overpowering. Honestly, the first time I tasted it, I thought, “Why haven’t I been making this all along?”
- Weekday Hero: Slice it for breakfast, pack it for lunch, or serve it with tea when your in-laws visit. It’s the kind of cake that doesn’t demand a celebration—it just works. And between us? It’s the only cake I bake when I’m too tired for anything else.
- Budget-Friendly Luxury: You’re spending less than a dollar per serving, but it tastes like you slaved over it. The eggs add richness, the sugar balances the lemon, and the flour keeps it light. Leftovers? They disappear faster than you can say “second cup of coffee.”
Step-by-step instructions for 4-Ingredient lemon pound cake
This cake comes together faster than you can say “zest” – here’s how to make it light, tender, and bursting with lemon flavor.
🍳 Step 1: Prep the Ingredients for Perfect Texture
Start by sifting the 2 cups all-purpose flour into a large mixing bowl. I find sifting creates a lighter cake with fewer lumps – it’s worth the extra 30 seconds. In a separate bowl, whisk together the 1.5 cups granulated sugar and 4 whole large eggs until the mixture turns pale and slightly thickened. This step is crucial for that tender pound cake texture we’re after.
While those mix, measure out the 0.5 cup fresh lemon juice from 2-3 lemons. I like to strain it through a fine-mesh sieve to remove any pulp – this keeps the cake smooth. The eggs should be at room temperature if possible, though cold eggs will work too. Just let them sit out for 30 minutes before using if they’re straight from the fridge.
🍳 Step 2: Combine Wet and Dry Ingredients Gently
With your mixer on low speed, gradually add the flour mixture to the egg-sugar mixture. I use a spatula to gently fold in about two-thirds of the flour first, then mix on low until just combined. This prevents overmixing which can make the cake dense. You’re looking for a thick, smooth batter that coats the back of a spoon.
After the initial mix, carefully add the 0.5 cup fresh lemon juice and mix just until fully incorporated. The batter should be thick but pourable – almost like a very heavy pancake batter. Here’s the thing – don’t overmix or you’ll develop gluten and end up with a tough cake. Stop mixing as soon as you see no more flour streaks.
🔥 Step 3: Bake in a Greased Pan for Even Cooking
Preheat your oven to 350°F while you prepare a 9×5-inch loaf pan. Generously grease it with butter or oil and dust with flour, tapping out any excess. Pour the batter into the pan and smooth the top with a spatula. The batter will be thick but will spread slightly as it bakes.
Bake for 50-60 minutes until a toothpick inserted in the center comes out clean. I usually check at the 50-minute mark – the cake should be golden brown on top and spring back slightly when pressed gently in the center. If the top browns too quickly, tent it loosely with foil after 30 minutes to prevent overbrowning while the center cooks.
⏰ Step 4: Cool Properly for Maximum Moisture
Remove the cake from the oven and let it cool in the pan for 10 minutes. This resting period helps the cake set slightly before you try to remove it. Then, carefully invert the cake onto a wire rack to cool completely. I always run a thin knife around the edges first to help loosen it from the pan.
Let the cake cool completely before slicing – this ensures clean cuts and prevents the lemon flavor from becoming too intense as it sits. The cake will be tender and moist with a beautiful golden crust. Each slice should reveal a fine crumb and that signature lemon brightness. Serve at room temperature for the best texture and flavor experience.
Pro Tips For Making 4 Ingredient Lemon Pound Cake
- Whisk Eggs Until Ribbon Stage: I learned this the hard way—under-whisked eggs make a dense, gummy cake. Beat those yolks and whites together until the mixture forms a slow ribbon when the whisk is lifted. That’s your golden ticket to a light, fluffy crumb. (Yes, it takes longer than you want to admit.)
- Sift the Flour First: Dump the flour straight in? Don’t. Sifting removes lumps and aerates the batter, which means a finer texture and fewer surprises when the cake rises. Skip this, and you’ll end up with a cake that’s more brick than pound cake.
- Don’t Overmix After Adding Flour: Once you fold in the flour, stop stirring the second it disappears. Overmixing develops gluten, and suddenly you’ve got a chewy loaf instead of a tender crumb. Two or three gentle folds are all it takes—just until the batter comes together.
- Use Room-Temp Eggs: Cold eggs can make your batter curdle or cause uneven baking. Take them out of the fridge 30 minutes before mixing. Trust me, your cake’s rise and texture will thank you—no one wants a cake that fights back.
Dietary considerations for these flavors
Gluten-Free Adaptation
For a gluten-free version, replace the 2 cups all-purpose flour with 2 cups gluten-free 1:1 baking flour like Bob’s Red Mill or King Arthur. These blends contain xanthan gum, which mimics gluten’s structure.
Sift the flour thoroughly to avoid lumps, and add ½ teaspoon xanthan gum if your blend doesn’t include it. The texture will be slightly denser, but still tender. 🌾
Dairy-Free Options
This recipe is naturally dairy-free, but if you want to enhance the richness, swap the butter for ½ cup melted coconut oil when greasing the pan. The cake’s moistness comes from the eggs and lemon juice, so no dairy substitutes are needed in the batter.
For a vegan version, replace eggs with 4 tablespoons ground flaxseed mixed with 10 tablespoons water—let it sit for 5 minutes to thicken before using.
Lower Sugar Version
Reduce the 1.5 cups granulated sugar to 1 cup and replace the remaining ½ cup with monk fruit sweetener or erythritol. The cake will still be moist but slightly less sweet, allowing the lemon flavor to shine.
If using erythritol, reduce it by ¼ cup since it’s less sweet than sugar. The texture remains tender, but the crumb may be slightly lighter. 🍋
Allergen-Friendly Notes
This cake is inherently free of common allergens like nuts, dairy, and gluten (with adaptations). For egg allergies, use the flaxseed substitute mentioned above. Always check labels on your flour and sweetener to ensure they’re processed in allergen-free facilities.
When baking for others with allergies, use separate utensils and bowls to avoid cross-contamination.
Keto Considerations
A traditional keto version isn’t possible with this recipe due to the flour and sugar, but you can create a low-carb alternative by replacing the flour with 2 cups almond flour and the sugar with 1 cup erythritol.
Add 1 teaspoon baking powder and ½ teaspoon cream of tartar for rise. The texture will be denser and more cake-like, but still delicious. Expect a richer, nutty flavor from the almond flour.
Nutrition facts
Frequently asked questions
Can I use bottled lemon juice instead of fresh?
Fresh lemon juice gives the best flavor, but you can use bottled in a pinch. For the same zesty brightness, use ½ cup bottled lemon juice (like ReaLemon) and add 1 teaspoon lemon zest to compensate for the missing pulp. The texture will be slightly less vibrant, but still delicious.
Why does my cake turn out dense instead of tender?
Overmixing is the #1 culprit! Stop folding the flour in as soon as you see no dry streaks. Also, ensure your eggs are room temperature and don’t overbake—check at 50 minutes—the cake will keep cooking after removal. If your oven runs hot, reduce temperature to 325°F.
How do I make this cake extra moist?
For a richer texture, add 2 tablespoons melted butter to the batter (mix gently). You can also brush the cooled cake with simple syrup (equal parts sugar and water, heated until dissolved) before serving. Another trick: Don’t overbake—pull it when a toothpick comes out with a few moist crumbs.
Can I bake this in a different pan size?
Yes! For a 9×9-inch square pan, bake at 350°F for 40-45 minutes. For a 9×13-inch pan, reduce oven temp to 325°F and bake 35-40 minutes. The cake will spread more in wider pans, so check for doneness 5 minutes early. Adjust baking time based on your oven’s tendencies.
What’s the best way to store leftovers?
Wrap tightly in plastic wrap or aluminum foil and store at room temperature for up to 2 days. For longer storage, slice and freeze portions in airtight containers for up to 3 months. To serve, thaw at room temperature for 10 minutes—no microwave needed! The texture stays moist when properly stored.

- 3lb Prime Rib Roast Recipe: Juicy Pink Center Guaranteed in 3 Hours - October 31, 2026
- 5 Spice Cake Recipe: Warmly Spiced Layers With Crunchy Top - October 31, 2026
- 1950’s Macaroni and Cheese Recipe: Nostalgic Creamy Cheese Sauce with Buttery Noodles - October 31, 2026