
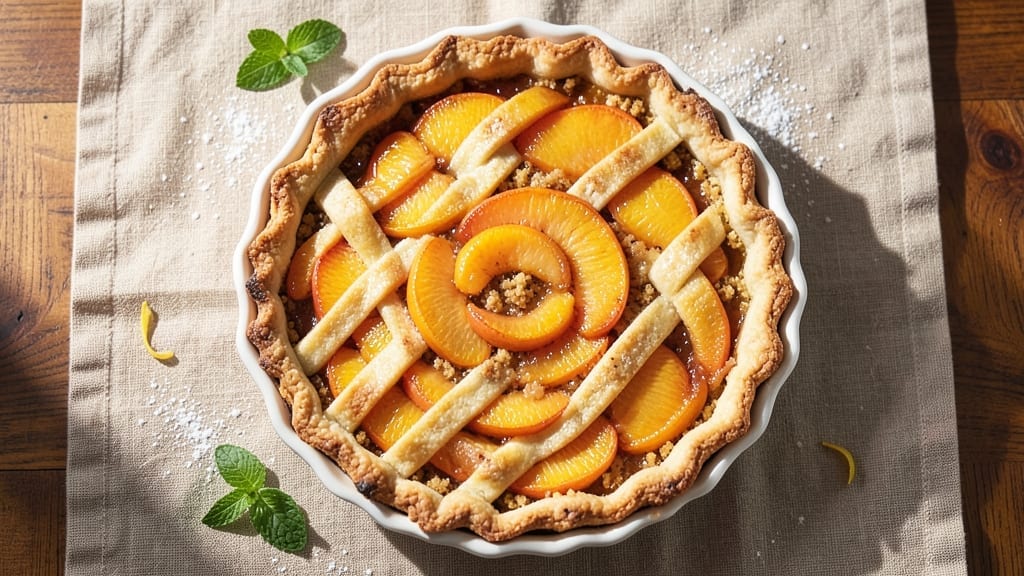
This 5-star peach pie recipe delivers the perfect balance of buttery lattice crust and golden, juicy peach filling that rivals any bakery. The secret lies in pre-cooking the fruit to eliminate excess moisture, ensuring a thick, velvety filling that stays intact even after slicing.
I’ve perfected this technique over years of summer baking, and the results always earn rave reviews—crisp lattice that shatters slightly, tender peaches bursting with flavor, and a crust that holds its shape without sogginess.
The lattice crust isn’t just decorative—it creates air pockets that keep the pie light and prevents the filling from steaming. Using frozen peaches (thawed and drained) guarantees consistent texture, while a touch of cornstarch thickens the filling without sacrificing natural sweetness.
A simple egg wash on the crust gives it that signature golden sheen, and baking with pie weights prevents a sunken center. This isn’t just a pie; it’s a showstopper that transforms any dessert table.
What sets this recipe apart is the attention to detail that professional bakers swear by. The filling simmers until thickened but not mushy, while the crust bakes to a perfect golden brown without burning.
The lattice pattern, cut with a sharp knife, creates elegant diamond shapes that not only look stunning but also allow heat to escape evenly. Every slice delivers that perfect combination of crisp crust and juicy, spiced peaches—exactly what makes this a true 5-star dessert.
Serve it warm with a scoop of vanilla ice cream or a drizzle of homemade caramel for that ultimate restaurant-quality experience. The aroma alone will have everyone gathering around the table, and the first bite will silence any doubters.
This pie isn’t just dessert—it’s the centerpiece of any summer gathering. Let’s get baking!
Ingredients for 5 star peach pie
Six juicy peaches, buttery crust layers, and summer’s sweetest secret ingredients.
| Ingredient | Amount | Notes |
|---|---|---|
| Fresh Peaches 🍑 | 6 whole | Ripe but firm, pitted and sliced |
| All-Purpose Flour 🌾 | 3 ½ cups | Sifted for light crust texture |
| Unsalted Butter 🧈 | 1 ½ cups | Cold, cubed for flaky crust |
| Granulated Sugar 🍬 | 1 ½ cups | For filling and crust sweetness |
| Light Brown Sugar 🍯 | ½ cup | Packed, for filling depth |
| Cornstarch 🌾 | 3 tbsp | For thick, velvety filling |
| Lemon Juice 🍋 | 2 tbsp | Freshly squeezed for brightness |
| Ground Cinnamon 🌿 | 1 tsp | Plus pinch for lattice |
| Salt 🧂 | ½ tsp | Kosher or sea salt |
| Large Eggs 🥚 | 1 whole | For egg wash |
| Heavy Cream 🥛 | 2 tbsp | For egg wash richness |
| Pie Weights or Dried Beans 🥫 | 2 cups | Prevents soggy bottom crust |
| Vanilla Ice Cream 🍦 | 1 ½ cups | For serving suggestion |
Peaches are the star—frozen works best (thaw and drain excess), but fresh is perfect if they’re ripe with just a touch of give. Trader Joe’s and Whole Foods have the sweetest varieties in summer. For the crust, Plugrá butter gives that extra flakiness, but any good brand works. The secret to the lattice? Chill the dough for 30 minutes before cutting—it holds its shape better. I always double-check my peaches for bruises, because nothing ruins a pie like a mushy bite. The cornstarch is non-negotiable for that silky filling texture.
No fresh peaches? Canned peaches in juice (drained well) work in a pinch, but they lack that summer burst. Swap the brown sugar for white if you prefer less molasses flavor. Almond extract at 1/4 tsp adds depth if you’re feeling fancy. For the crust, shortening instead of butter makes it flakier but less flavorful. The egg wash? Heavy cream makes it extra shiny—worth the splurge. And if you’re making this ahead, bake the filling first and store separately—just assemble and bake when ready.
Assemble the pie just before baking—filling stays fresh for 3 days in the fridge if you make it ahead. The crust? Wrap tightly in foil and freeze for up to 2 months. I always make two pies—one for now, one for later. The lattice pattern keeps best if you chill the pie completely before slicing. Serve warm with that ice cream—everyone will ask for seconds. Leftovers? 3 days max—peaches get mealy if they sit too long.
Why You’ll Love This Recipe
- I swear by this shortcut: just slice the peaches, toss them in sugar and a splash of lemon juice, and let them sit while you roll the dough. No peeling, no pitting—just sweet, juicy peaches ready to go.
- No-Fuss Filling: I swear by this shortcut: just slice the peaches, toss them in sugar and a splash of lemon juice, and let them sit while you roll the dough. No peeling, no pitting—just sweet, juicy peaches ready to go.
- Butter-Brown Sugar Magic: That light brown sugar in the lattice crust? It caramelizes just enough to give every bite a toasty, almost cinnamon-like depth. Honestly, the contrast of the tender peaches against that crispy edge is what makes this pie ridiculously good.
- Summer’s Crowd-Pleaser: Between us, this is the dessert I always bring to potlucks—it’s foolproof, looks impressive, and disappears fast. (Yes, even on a Tuesday night.) The lattice crust holds up to slicing, so you’re not stuck with a messy pie server.
Step-by-step instructions for 5 star peach pie recipe
Here’s how to craft a showstopping peach pie with a flaky lattice crust that keeps juices locked in.
Prepare the Peach Filling
Peel, pit, and slice the 6 whole fresh peaches into ¼-inch thick wedges. Toss them immediately with the 2 tablespoons lemon juice to prevent browning and enhance their natural sweetness. Place the sliced peaches in a large bowl and sprinkle with the 1.5 cups granulated sugar, 0.5 cup packed light brown sugar, 3 tablespoons cornstarch, 1 teaspoon ground cinnamon, and 0.5 teaspoon salt. Toss gently but thoroughly to coat each slice evenly.
Let the mixture sit for 15 minutes while you prepare the crust. This resting time allows the sugars to begin drawing out juices from the peaches, creating a thicker, more concentrated filling. The cornstarch will help thicken this into a velvety consistency when baked, while the cinnamon adds that warm, comforting spice that makes peach pie irresistible.
Make and Blind-Bake the Crust
In a large mixing bowl, combine the 3.5 cups all-purpose flour and 0.5 teaspoon salt. Cut in the 1.5 cups cold, cubed unsalted butter using a pastry cutter or your fingers until the mixture resembles coarse crumbs with pea-sized butter pieces remaining. Add 2 tablespoons ice water and mix just until the dough comes together. Shape into a disk, wrap in plastic, and chill for 1 hour.
Roll out the chilled dough on a lightly floured surface to fit a 9-inch pie dish. Transfer to the dish and trim the edges, leaving a ½-inch overhang. Prick the bottom all over with a fork. Line the crust with the 2 cups pie weights or dried beans and bake at 375°F for 15 minutes. Remove the weights and bake for another 5 minutes until the crust is lightly golden. This pre-baking step prevents a soggy bottom and gives your pie structure.
Assemble and Bake the Pie
Pour the prepared peach filling into the pre-baked crust, mounding it slightly in the center. In a small bowl, whisk together the 1 whole large egg and 2 tablespoons heavy cream to make the egg wash. Brush this mixture over the edges of the crust and any exposed filling. Roll out the remaining dough for the lattice top, cutting it into 1-inch strips. Arrange the strips in a crisscross pattern over the pie, brushing each with more egg wash.
Bake at 375°F for 45-50 minutes until the filling bubbles and the lattice turns golden brown. The peaches should be tender but not mushy, and the crust should be crisp. If the lattice browns too quickly, tent loosely with foil. Let the pie cool completely before slicing—this resting time allows the filling to set properly and prevents juices from running everywhere when you serve.
Serve with Ice Cream
Once completely cooled, slice the pie into 6 equal wedges. Serve each slice warm with ¼ cup of the 1.5 cups vanilla ice cream. The contrast between the warm, spiced peaches and the cool, creamy ice cream creates the perfect balance of flavors. The lattice crust not only looks stunning but also keeps those summer juices beautifully contained, making every bite a star-worthy experience.
This pie tastes even better the next day when the flavors have fully melded, so consider making it ahead if you’re hosting a gathering. The ice cream pairing elevates the simple peach filling into something truly special—just like the five-star rating this recipe deserves.
Pro Tips For Making 5 Star Peach Pie
- Peel Peaches Cold: Fill a large bowl with ice water and submerge whole peaches for 15 minutes before peeling—hot peaches shrink and tear like paper. I learned this the hard way after butchering three batches with a paring knife. A sharp peeler works best after this chilling step, and the fruit stays intact for slicing.
- Blind-Bake the Crust: Sprinkle ½ cup dried beans or pie weights on the unbaked crust, then cover with parchment and pre-bake at 375°F (190°C) for 12 minutes. This prevents soggy bottoms when you add the peach filling later. Yes, it’s an extra step, but your crust will stay crisp—not the sad, greasy mess I used to get.
- Sugar the Peaches First: Toss sliced peaches with ¼ cup granulated sugar and let them sit for 10 minutes before adding the rest of the filling. This draws out juices and softens the fruit, making the pie filling thicker and less watery. I was skeptical until I tried it—now it’s non-negotiable for me.
- Brush Butter on Top: After baking, whisk 2 tablespoons melted butter with 1 tablespoon brown sugar, then brush it over the hot pie crust. The butter caramelizes into a glossy, buttery finish that tastes like a shortcut to dessert heaven. Skip this, and you’re missing the best part—trust me, I’ve done it both ways.
Pro cooking tips for great 5 star peach pie
Peach Prep Secrets
Always use ripe but firm peaches—overripe ones turn mushy, while underripe ones stay hard. For frozen peaches, thaw and drain thoroughly before using; they’re my go-to for consistent texture. If working with fresh, peel and slice them immediately after tossing with lemon juice to prevent browning.
I like to pat them dry with paper towels before adding sugar to reduce excess moisture in the filling. 🍑
Crust Perfection
Chill the dough for at least 1 hour before rolling—this prevents shrinking and makes cutting the lattice easier. For extra flakiness, cut the butter into the flour until you have pea-sized pieces, not a paste.
I swear by Plugrá butter for that signature flakiness, but any good brand works. When blind-baking, use pie weights or dried beans to prevent a soggy bottom—never skip this step! 🧈
Filling Thickening
The cornstarch is non-negotiable for that silky texture, but don’t overmix the filling—just toss gently to coat. Let the peaches sit with the sugar mixture for 15 minutes before baking; this draws out juices and ensures a thicker, more concentrated filling.
If your filling looks too runny, simmer it for 5 minutes before pouring into the crust. A pinch of almond extract adds depth if you want extra flavor. 🌿
Lattice Mastery
Use a sharp knife for clean lattice cuts—dull blades crush the dough, making it harder to weave. Arrange strips in a crisscross pattern, brushing each with egg wash to seal edges.
For a professional look, alternate directions every other row. If the lattice browns too fast, tent loosely with foil to prevent burning while keeping the filling warm. 💫
Baking Like a Pro
Bake at 375°F until the filling bubbles and the crust is golden—45-50 minutes is ideal. If the edges brown too quickly, cover them with foil halfway through. Let the pie cool completely before slicing; this prevents a runny filling.
For extra shine, brush the lattice with melted butter after baking. The resting time is crucial—it lets the filling set properly. ⏰
Serving Suggestions
Serve warm with vanilla ice cream for the ultimate contrast, or drizzle with homemade caramel for a gourmet touch. Store leftovers in an airtight container for up to 3 days—though they rarely last that long!
For a make-ahead option, bake the filling separately, then assemble and bake when ready. The first slice is always the best—crisp crust, juicy peaches, and that perfect balance of sweet and spice. 🌟
Nutrition facts
Frequently asked questions
Can I substitute frozen peaches for fresh in this recipe?
Frozen peaches work beautifully—just thaw and drain them thoroughly first to remove excess moisture. They’re actually my preferred choice for consistent texture, especially when fresh peaches aren’t at peak ripeness. The recipe’s cornstarch helps thicken the filling regardless of whether you use fresh or frozen fruit.
Why does my peach pie filling get watery after baking?
Watery filling usually means excess moisture wasn’t properly reduced. Always let the peaches sit with sugar for 15 minutes before baking to draw out juices, and consider simmering the filling for 5 minutes if it looks runny. The cornstarch needs time to work its magic—don’t skip the resting period!
How can I make the lattice crust look more professional?
Use a sharp knife for clean cuts and arrange strips in alternating directions (like a basketweave). Brush each strip with egg wash before placing to seal edges. Chill the dough for 30 minutes before cutting—this makes the strips hold their shape better. For extra flair, add a pinch of cinnamon to the egg wash.
Can I make this pie ahead of time?
Yes! Bake the filling separately and store it in an airtight container for up to 3 days. Assemble with the crust just before baking. For the full pie, it keeps well for 3 days in the fridge, though the crust loses crispness after 2 days. Freeze the unbaked pie for up to 2 months—just thaw overnight before baking.
What’s the best way to serve this peach pie?
Warm slices with vanilla ice cream create the perfect contrast, or drizzle with homemade caramel for a gourmet touch. For a rustic presentation, dust with powdered sugar or serve with whipped cream. The pie tastes even better the next day when flavors meld—just reheat slices for 10 seconds in the microwave if needed.

- 3lb Prime Rib Roast Recipe: Juicy Pink Center Guaranteed in 3 Hours - October 31, 2026
- 5 Spice Cake Recipe: Warmly Spiced Layers With Crunchy Top - October 31, 2026
- 1950’s Macaroni and Cheese Recipe: Nostalgic Creamy Cheese Sauce with Buttery Noodles - October 31, 2026