
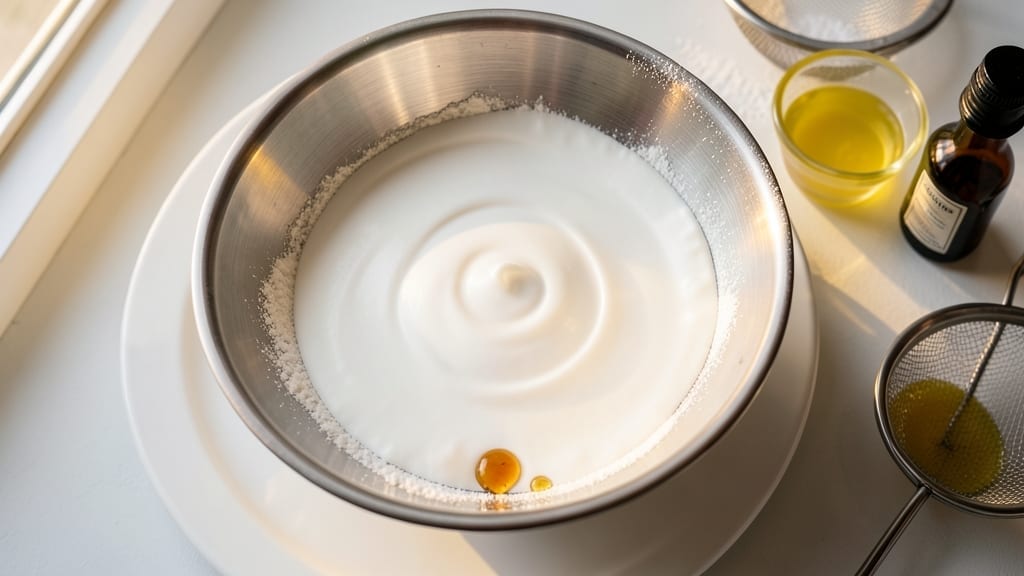
Achieving that flawless, mirror-gloss royal icing finish starts with this 5-star recipe that delivers professional-level results every time. The secret lies in precise egg white measurements and powdered sugar ratios that create a stable, pipeable icing capable of crisp details and smooth surfaces.
I developed this formula after years of cake decorating, where even slight variations in consistency could ruin hours of work.
What sets this royal icing apart is its foolproof stability—no weeping, no cracking, just a smooth, glossy finish that dries to a durable matte sheen perfect for piping borders or creating intricate lacework.
The recipe uses meringue powder to enhance stability while maintaining that signature royal icing sheen, and includes flavor options to complement any cake design. For maximum shine, I recommend adding a tiny drop of clear glycerin to the final mixture.
This icing achieves its 5-star quality through careful temperature control and proper mixing techniques that eliminate air bubbles while maintaining a thick, pipeable consistency. The result is an icing that holds sharp edges, creates clean lines, and dries to a professional matte finish that won’t yellow or become sticky.
Whether you’re decorating a tiered wedding cake or delicate sugar flowers, this recipe delivers the precision and durability you need.
Once mastered, this royal icing becomes your secret weapon for cake decorating—transforming simple cakes into showstopping centerpieces. The recipe scales perfectly for both small projects and large productions, with tips included for adjusting consistency based on humidity and temperature. Let’s get started on creating that signature mirror-gloss finish.
Ingredients for 5 star royal icing
Eight essential ingredients for that signature mirror-gloss royal icing finish.
| Ingredient | Amount | Notes |
|---|---|---|
| Large Egg Whites 🥚 | 4 whole | Freshly separated, room temperature |
| Powdered Sugar 🍚 | 4 cups | Sifted for smooth texture |
| Meringue Powder 🧂 | 1 tbsp | For enhanced stability |
| Clear Glycerin 💧 | ½ tsp | For mirror-gloss shine |
| Vanilla Extract 🍃 | 1 tsp | Pure, high-quality preferred |
| Lemon Juice 🍋 | ¼ tsp | Freshly squeezed for tang |
| Corn Syrup 🍯 | 1 tbsp | For flexibility adjustments |
| Almond Extract 🌿 | ¼ tsp | Optional for flavor variation |
Egg whites are the backbone of royal icing—pasteurized works in a pinch, but fresh is ideal. Room temperature whites whip up faster and hold more air, giving you that signature gloss. I always grab mine from the local bakery or Whole Foods—they keep them colder, which matters for freshness. The powdered sugar? Domino brand is my go-to—it’s sifted and fine, which prevents graininess. If you’re using regular powdered sugar, sift it yourself twice for that silky texture. Meringue powder is non-negotiable for stability—Royal Icing Stabilizer from baking supply stores is worth the investment.
No meringue powder? Corn syrup or light corn syrup at half the amount works in a bind, but it won’t be as stable. Vanilla extract matters—pure, not imitation. The glycerin is optional but makes a huge difference for that mirror finish. Short on lemon juice? White vinegar at half the amount gives similar acidity. For flavor variations, swap vanilla for almond extract, peppermint extract, or even a drop of food coloring—just remember, a little goes a long way. The corn syrup is your secret weapon for adjusting consistency; add it gradually if your icing is too stiff.
This icing keeps for 3-4 days in an airtight container at room temperature, but it’s best used within 24 hours for peak shine. For longer storage, cover tightly and refrigerate—bring to room temp before using. Humidity is your enemy; if your kitchen is damp, add an extra 0.25 tsp glycerin or reduce powdered sugar by 0.25 cup. Icing thickens as it sits, so thin with water or corn syrup if needed. Portion into small containers for easy access—piping bags with couplers are a game-changer for decorating.
Why You’ll Love This Recipe
- No-Fuss Whip: I’ve made royal icing a dozen times—this version cuts out the guesswork. Just fold in the meringue powder, add glycerin for that silky stretch, and you’re done. No overbeating, no lumps, no stress.
- Vanilla Kiss: That little splash of extract isn’t just for flavor—it’s the secret to a smooth, balanced sweetness. The glycerin keeps it glossy, but the vanilla makes it taste like a bakery’s finest, not just sugar and eggs.
- Cupcake to Cake: Use it for flooding cookies, piping borders, or even gluing cake tiers together. The meringue powder gives it just enough structure to hold its shape, so it’s perfect for weddings, birthdays, or whenever you need something extra.
- Stays Fresh: Make a big batch—this stuff lasts weeks in an airtight container. The glycerin prevents it from drying out, so you’re not scrambling last-minute. (Yes, even on a Tuesday night.)
Step-by-step instructions for mirror-gloss royal icing
Here’s how to create professional-grade royal icing that dries to a stunning mirror finish.
Prepare the Egg Whites for Maximum Stability
Place the 4 whole Large Egg Whites in a clean, grease-free metal bowl. I use a stainless steel bowl because it conducts heat evenly and won’t react with the acidity of the lemon juice. Let them sit at room temperature for 10-15 minutes—this ensures they whip to full volume without developing gluten strands.
While waiting, sift the 4 cups Powdered Sugar through a fine-mesh sieve into another bowl. This removes any lumps that could create graininess in your final icing. The finer the sugar, the smoother your finished product will be. I like to sift it directly over the bowl I’ll use for whipping to minimize transfer steps later.
Whip the Egg Whites to Soft Peaks
Using a stand mixer fitted with the whisk attachment, beat the egg whites on medium speed for 1-2 minutes until they form soft peaks. You’ll see the mixture thicken and hold its shape when the whisk is lifted—this is crucial because over-whipping at this stage can incorporate too much air, making the icing unstable later.
Here’s the thing—don’t rush this step. The egg whites need to reach this stage before adding sugar, or you’ll end up with a gritty texture. If you’re using a hand mixer, work in 30-second bursts to avoid overheating the eggs. The temperature should remain cool to the touch throughout this process.
Gradually Incorporate Powdered Sugar and Stabilizers
With the mixer running on low speed, slowly add the sifted powdered sugar 1 cup at a time, allowing each addition to fully incorporate before adding the next. This gradual approach prevents the sugar from weighing down the egg whites too quickly, which can cause the mixture to curdle. After each addition, increase the speed to medium and whip for 30 seconds to re-incorporate air.
Once all the powdered sugar is incorporated, add the 1 tbsp Meringue Powder, 1 tbsp Corn Syrup, 0.5 tsp Clear Glycerin, 1 tsp Vanilla Extract, 0.25 tsp Lemon Juice, and 0.25 tsp Almond Extract. Mix on low speed for 1 minute to ensure everything is evenly distributed. The meringue powder acts as a stabilizer, while the glycerin and corn syrup work together to create that signature mirror-gloss finish.
Whip to Stiff Peak Consistency
Increase the mixer speed to high and whip the icing for 5-7 minutes until it reaches stiff peak consistency. You’ll know it’s ready when the icing forms a stiff peak that doesn’t flatten when the whisk is lifted, and it leaves clean, sharp lines when drizzled. This stage is critical—if the icing is too soft, it won’t hold its shape when piped, and if it’s too stiff, it’ll crack as it dries.
For a quick test, pipe a small amount onto parchment paper. If it holds its shape without spreading or sagging, it’s ready. If it’s too runny, whip for another 30 seconds; if it’s too thick, add 1 teaspoon of water at a time until you reach the desired consistency. The icing should be smooth, glossy, and hold its shape perfectly.
Adjust Consistency for Your Decorating Needs
Royal icing can be used at different consistencies depending on your project. For outlining, use the icing as-is—it should be thick enough to hold its shape when piped. For flooding cake panels, thin it slightly with 1-2 teaspoons of water at a time until it reaches a pudding-like consistency that spreads smoothly but doesn’t pool.
For the mirror-gloss finish, you’ll want the icing to be slightly thicker than flooding consistency. Test it by piping a small circle onto parchment paper—it should spread slightly but still maintain a smooth, even surface. The combination of glycerin and corn syrup in this recipe ensures the icing dries with a high-gloss sheen that reflects light beautifully, giving you that coveted five-star finish.
Pro Tips For Making 5 Star Royal Icing
- Whisk Egg Whites Cold: Grab those egg whites straight from the fridge—no room temp nonsense. Cold whites whip faster and hold more air, which means your royal icing will be lighter and spread smoother. I learned this the hard way after a batch turned out denser than fondant.
- Sift Powdered Sugar Twice: Clumps in powdered sugar are the silent enemy of silky icing. Use a fine-mesh sieve and sift it before mixing, then sift the meringue powder separately into the bowl. Yes, it’s extra work, but your piping will thank you—no grainy surprises when you’re trying to write “Happy Birthday” on a cupcake.
- Add Glycerin Last: Drizzle that glycerin in after the icing is mostly mixed—just a teaspoon at a time. Too early, and it’ll weaken the structure before the sugar and meringue powder can stabilize. Start with half the amount, then adjust for shine. (Your icing will look like glass, not glue.)
- Use a Stand Mixer: Hand-whisking egg whites for royal icing is a workout, not a recipe. A stand mixer with the whisk attachment (on medium-high) cuts the time in half and gives you that professional-level stiffness. Skip the “I’ll do it by hand” phase—your arms will hate you later.
Perfect pairings for this recipe
Flavor Pairings
This vanilla-almond royal icing shines with berry compotes—strawberry or raspberry works best. I layer a thin coat of icing, then pipe delicate swirls before adding fresh berries. The acidity cuts through the sweetness beautifully.
For a sophisticated twist, try citrus zest (lemon or orange) mixed into the icing—just 1 tsp zest adds a bright, professional touch. 🍓
Cake & Cookie Pairings
This icing is perfect for vanilla or almond cakes—the flavors complement without competing. For cookies, use it to create intricate lace patterns on sugar cookies or piping borders on shortbread.
I love pairing it with matcha white chocolate cookies for a modern fusion. The high-gloss finish makes even simple designs look elegant. 🍪
Seasonal Variations
For holiday cakes, swap vanilla for peppermint extract (½ tsp) and add red food coloring for festive red borders. In summer, try coconut extract (¼ tsp) with lime zest for a tropical vibe.
The glycerin keeps the shine even in humid summer air—no sticky surprises! 🎄
Garnish & Finishing
Add edible gold leaf or luster dust for a luxurious touch—just sprinkle over wet icing before it dries. For texture, pipe tiny stars or leaves using a Wilton 2B tip. A dusting of powdered sugar after drying prevents stickiness while keeping the mirror finish. 💛
Beverage Pairings
Serve decorated cakes with chilled Earl Grey tea—its bergamot notes enhance the vanilla-almond flavors. For a dessert wine pairing, Moscato d’Asti (light and floral) complements the sweetness without overpowering. Coffee lovers? A cold brew with vanilla syrup mirrors the icing’s flavors perfectly. ☕
Nutrition facts
Frequently asked questions
Why does my royal icing turn grainy?
Graininess usually comes from lumps in powdered sugar or under-whipping the egg whites. Always sift your sugar twice and whip egg whites to soft peaks before adding sugar. If you’re in a hurry, use meringue powder—it helps create a smoother texture by stabilizing the mixture.
How do I fix royal icing that’s too thick or too thin?
For thick icing, thin with 1 tsp water at a time until it reaches pudding consistency for flooding or holds shape for piping. If it’s too thin, whip for 1-2 extra minutes—the meringue powder helps rebuild structure. Never add extra powdered sugar, as it can make the icing brittle.
Can I make this royal icing without egg whites?
Yes! Use pasteurized egg whites (sold in cartons) for safety, or substitute with aquafaba (chickpea brine) at a 1:1 ratio. For best results, add 1 extra tbsp meringue powder to stabilize. The texture will be slightly less glossy but still pipeable.
What’s the best way to store leftover royal icing?
Store in an airtight container at room temperature for 3-4 days or refrigerate for up to 1 week. Bring to room temp before using—cold icing pipes poorly. For long-term storage, freeze in 1-tbsp portions and thaw in the fridge overnight. Add 1 tsp water to restore consistency after thawing.
How do I get that professional mirror-gloss finish?
The glycerin and corn syrup in this recipe create the shine, but technique matters too. Pipe onto a smooth, grease-free surface and use a damp paintbrush to spread evenly. For extra gloss, add 1 extra drop glycerin before piping. Work in a cool, dry environment—humidity kills shine!

- 3lb Prime Rib Roast Recipe: Juicy Pink Center Guaranteed in 3 Hours - October 31, 2026
- 5 Spice Cake Recipe: Warmly Spiced Layers With Crunchy Top - October 31, 2026
- 1950’s Macaroni and Cheese Recipe: Nostalgic Creamy Cheese Sauce with Buttery Noodles - October 31, 2026