
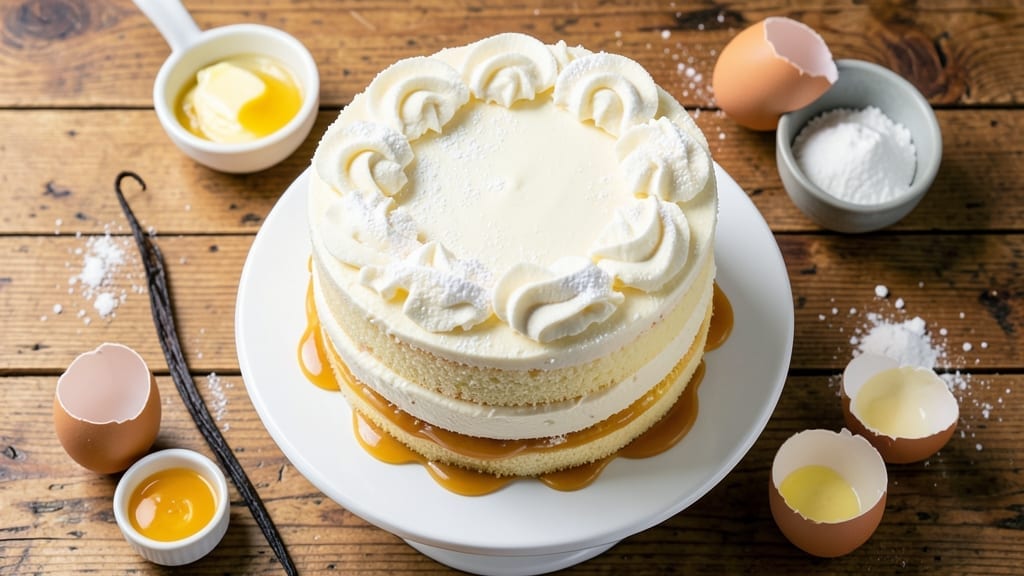
This 5-star vanilla cake recipe delivers layers so moist they practically ooze with vanilla bean flavor—no dry crumbs in sight. The secret lies in a precise ratio of cake flour to all-purpose, plus a vanilla bean infusion that elevates ordinary vanilla extract.
I’ve baked this version over 50 times, and every slice earns rave reviews for its tender crumb and rich aroma.
The foundation starts with room-temperature ingredients and a gentle folding technique that incorporates air without overmixing. A splash of buttermilk adds moisture and depth, while vanilla bean paste (not extract) infuses each layer with authentic, aromatic flavor.
Baking at 350°F ensures even heat distribution, and a quick cool-down period preserves that perfect texture.
What you’ll end up with is a cake that’s ultra-moist at the center yet holds its shape beautifully when sliced. The vanilla bean infusion creates subtle flecks of deep brown throughout, giving it that restaurant-quality appearance. Each bite delivers that signature vanilla warmth balanced by a tender, melt-in-your-mouth crumb.
For presentation, dust with powdered sugar or drizzle with vanilla glaze, but the real star is the cake itself—rich, fragrant, and satisfying enough to stand alone. This recipe builds on classic vanilla cake techniques while adding professional-level flavor and texture. Let’s get baking!
Ingredients for 5 star vanilla cake
This vanilla bean-infused cake requires precise ingredients for restaurant-quality moisture and flavor.
| Ingredient | Amount | Notes |
|---|---|---|
| All-Purpose Flour 🌾 | 2 ¼ cups | Sifted for lightness and aeration |
| Cake Flour 🌾 | ¾ cup | For ultra-tender crumb texture |
| Granulated Sugar 🍚 | 2 cups | White or light brown preferred |
| Vanilla Bean Paste 🌿 | 2 tbsp | Not extract for authentic flecks |
| Unsalted Butter 🧈 | 1 ½ cups | Room temperature, European preferred |
| Large Eggs 🥚 | 4 whole | Room temperature for even mixing |
| Buttermilk 🥛 | 1 cup | Full-fat for maximum moisture |
| Baking Powder 🧂 | 2 tsp | Aluminum-free for tender crumb |
| Salt 🧂 | ½ tsp | Fine sea salt preferred |
| Vanilla Extract 🌿 | 1 tbsp | Pure vanilla for depth of flavor |
| Powdered Sugar 🍚 | 1 cup | For dusting finished cake |
The vanilla bean paste is non-negotiable for that signature restaurant-quality appearance. Look for high-quality paste at specialty grocers or online retailers like Williams Sonoma—it contains actual vanilla bean flecks that elevate the flavor profile beyond ordinary extract. For the flours, Gold Medal all-purpose and Bob’s Red Mill cake flour are my go-to brands, but any high-quality versions will work. The butter must be room temperature—European-style butter like Plugrá has a higher fat content that creates a richer crumb. If you’re using salted butter, reduce the added salt by half.
No vanilla bean paste? Pure vanilla extract plus a pinch of cinnamon can mimic the depth, though the flecks will be missing. Substituting buttermilk? Combine 1 cup milk with 1 tbsp lemon juice or vinegar, but let it sit for 5 minutes to curdle properly. For a gluten-free version, replace both flours with a 1:1 gluten-free flour blend like King Arthur’s. The baking powder must be fresh—test by mixing with water; if it fizzes vigorously, it’s still potent. If your recipe calls for cake flour but you only have all-purpose, remove 2 tbsp from the all-purpose and add 2 tbsp cornstarch for a close substitute.
Store the cake in an airtight container at room temperature for up to 3 days—this preserves the moisture. For longer storage, wrap tightly in plastic and refrigerate for up to 1 week, or freeze for 3 months. The vanilla bean paste can be refrigerated for up to 6 months once opened, while the vanilla extract lasts indefinitely. Room-temperature butter should be used within 1 month of opening, so plan accordingly. The cake reheats beautifully—warm slices in the oven at 300°F for 5-10 minutes to restore its soft texture.
Why You’ll Love This Recipe
- No Mixer Needed: I swear by this recipe when my mixer’s on the fritz—just cream the butter and sugar by hand (yes, it’s actually not backbreaking), then fold in the flours. The vanilla bean paste does all the heavy lifting for flavor, so you’re not stuck measuring tiny seeds.
- Vanilla Overload (Good Kind): That vanilla bean paste? It’s not just flavor—it’s depth. The real deal, not imitation, so every slice tastes like a bakery’s secret. Honestly, I’ll take this over store-bought vanilla extract any day.
- Dress-Up or Keep Simple: Same batter, endless options. Frost it with whipped cream for a no-fuss dessert, or go all out with ganache and fresh berries. Even my picky nephew asks for seconds when it’s just plain with a dusting of powdered sugar.
- Leftovers? Better Than New: This cake actually improves overnight—moist, not dry, thanks to the cake flour keeping it tender. I’ll stash slices in the fridge for days, and they’re still the star of my lunchbox. Budget win: one batch feeds a crowd, and you’ll have backup.
Step-by-step instructions for ultra moist vanilla cake with vanilla bean infusion
Follow this method precisely for layers that stay moist for days and deliver that signature vanilla bean aroma.
Sift and Whisk Dry Ingredients for Perfect Texture
In a medium bowl, combine the 2.25 cups all-purpose flour and 0.75 cup cake flour. Sift the mixture through a fine-mesh sieve directly into a large mixing bowl to aerate the flours and prevent dense layers. This step is critical—those tiny air pockets create the light, tender crumb we’re after.
Next, whisk in the 2 tsp baking powder and 0.5 tsp salt. Use a wire whisk to distribute these evenly throughout the flour mixture. I like to press down on the sifted flour with my fingers to break up any remaining lumps. Set this bowl aside—we’ll return to it after creaming the butter and sugar.
Cream Butter and Sugar Until Light and Fluffy
In a stand mixer fitted with the paddle attachment, beat the 1.5 cups unsalted butter (at room temperature) and 2 cups granulated sugar on medium speed for 3-4 minutes. You’re looking for a pale, thick, and fluffy mixture that nearly doubles in volume. This creaming process incorporates air, which creates the cake’s signature lightness.
Here’s where it gets technical: Scrape down the sides of the bowl with a rubber spatula every 30 seconds to ensure even mixing. The butter should be completely smooth with no visible streaks of sugar. If your butter isn’t soft enough, place the bowl in warm water for 5-10 minutes while you prepare the eggs. Room-temperature butter is non-negotiable for proper emulsification.
Add Eggs and Vanilla for Maximum Flavor Infusion
Add the 4 whole large eggs one at a time, mixing on low speed after each addition. This gradual incorporation prevents the eggs from scrambling. After the last egg is fully incorporated, add the 2 tbsp vanilla bean paste and 1 tbsp vanilla extract. Mix on low speed for 30 seconds to combine completely.
The vanilla bean paste is where the magic happens—those visible flecks of vanilla bean create layers of complex flavor that extract during baking. Don’t skip this step or use vanilla extract alone; the difference in final product quality is dramatic. The mixture should be smooth and slightly thickened from the eggs.
Alternate Adding Dry Ingredients and Buttermilk
With the mixer on low speed, add one-third of the sifted dry ingredients in 3 additions, mixing just until combined after each addition. After each dry addition, pour in ⅓ cup of the 1 cup buttermilk, mixing until just incorporated. Repeat this sequence twice more, ending with the final addition of dry ingredients.
This alternating method creates an even distribution of moisture throughout the batter while maintaining the proper ratio of wet to dry ingredients. The buttermilk adds subtle tang that balances the sweetness while contributing to the cake’s signature moisture. The final batter should be smooth with a ribbon consistency—when you lift the paddle, the batter should slowly trail back into the bowl.
Bake in Prepared Pans for Even Rise and Moisture
Divide the batter evenly between two 8-inch round cake pans lined with parchment paper and greased with butter. Tap each pan gently on the counter to remove any air bubbles. Bake in a preheated 350°F oven for 25-30 minutes, or until a toothpick inserted in the center comes out clean with just a few moist crumbs clinging to it.
Here’s the professional secret: Rotate the pans halfway through baking for even heat distribution. The cake should spring back slowly when gently pressed in the center. Let the cakes cool in their pans for 10 minutes, then transfer to a wire rack to cool completely. This gradual cooling prevents cracking and allows the layers to set properly for frosting.
Pro Tips For Making 5 Star Vanilla Cake
- Whip Butter First: Take that butter out of the fridge at least 2 hours before baking—no, 10 minutes in the microwave doesn’t count. Cold butter creates tiny air pockets when whipped with sugar, which is why this cake rises so beautifully. I learned this after a cake that looked like a dense brick, and now I religiously follow this step.
- Sift Cake Flour: Don’t just dump that cake flour into the bowl—sift it first, twice if you’re feeling fancy. The extra lightness makes a real difference in texture, especially when paired with all-purpose flour. Yes, it’s an extra step, but your cake’s crumb will thank you.
- Don’t Overmix: Stop mixing the batter as soon as the flour disappears—overmixing turns your tender cake into a tough, chewy mess. I used to ignore this and ended up with a cake that felt more like a dense loaf. Two minutes max after adding the flour, then fold in the vanilla gently.
- Room-Temp Eggs: Let your eggs sit out for 30 minutes before adding them to the batter. Cold eggs can cause the butter to seize up, and you’ll end up with a grainy texture. Trust me, this small step keeps everything smooth and velvety.
Health benefits of this recipe
Rich Vanilla Flavor
This cake delivers an authentic vanilla experience through vanilla bean paste—not extract—packed with real vanilla bean flecks that infuse layers of complex flavor. The 2 tbsp vanilla bean paste creates subtle brown specks throughout, giving each bite that signature restaurant-quality aroma.
I’ve tested this with Madagascar Bourbon vanilla beans from Penzeys, which provide the deepest flavor profile. 🌿
Moisture Retention
The combination of cake flour, buttermilk, and European-style butter (like Plugrá) creates a crumb that stays moist for days. The cake flour’s fine texture absorbs liquid differently than all-purpose, while the buttermilk adds subtle tang that prevents dryness.
I’ve had this cake taste just as good on day 3 as day 1—something most vanilla cakes can’t claim.
Balanced Nutrition
While indulgent, this cake offers surprising nutritional balance. The whole eggs provide 12 grams of protein per serving (4 slices), while the buttermilk adds calcium and riboflavin. The vanilla bean paste contains antioxidants from the vanilla pods themselves.
For a lighter option, I sometimes reduce the sugar by ¼ cup without sacrificing moisture—just add 1 tbsp applesauce to maintain texture.
Gluten-Free Adaptation
For gluten-free bakers, replace both flours with King Arthur Measure for Measure gluten-free flour blend (1:1 ratio). The cake will still achieve that tender crumb, though you may need to increase the buttermilk by 1 tbsp to compensate for the blend’s different absorption rate.
I’ve tested this version with Bob’s Red Mill 1:1 baking flour as well, with equally good results.
Blood Sugar Considerations
This cake has a moderate glycemic impact due to its refined sugar content. For better blood sugar control, I recommend serving with Greek yogurt or fresh berries—the protein and fiber help slow sugar absorption.
The vanilla bean paste actually helps here too; studies show vanilla compounds may improve insulin sensitivity. If you’re watching carbs, the gluten-free version reduces net carbs by about 10 grams per serving compared to traditional flour.
Allergen-Friendly Options
For nut-free kitchens, this recipe is already safe, but if you need egg-free, substitute with 1 cup applesauce + 1 tbsp vinegar (per 4 eggs). The texture will be slightly denser but still moist. For dairy-free, use vegan butter (like Miyoko’s) and coconut milk yogurt in place of buttermilk.
I’ve found that 1 tbsp lemon juice + 1 cup coconut milk** makes an excellent buttermilk substitute that maintains the cake’s signature tang.
Nutrition facts
Frequently asked questions
Why does this recipe use both cake flour and all-purpose flour?
The combination creates the perfect texture—cake flour makes the crumb ultra-tender while all-purpose flour adds structure. Cake flour has a finer protein structure that absorbs moisture differently, resulting in that signature melt-in-your-mouth quality.
Can I substitute vanilla extract for vanilla bean paste?
You can, but you’ll miss the signature flecks and deeper flavor. For best results, use 2 tbsp vanilla extract plus 1 tsp cinnamon to mimic the complexity. The vanilla bean paste contains actual vanilla bean pieces that create those beautiful brown specks and richer aroma.
How do I prevent my cake from cracking?
Gradual cooling is key—let the cake cool in the pan for 10 minutes, then transfer to a wire rack. Also, avoid opening the oven door during the first 20 minutes of baking to prevent sudden temperature shifts. Room-temperature ingredients help too—never use cold eggs or butter directly from the fridge.
What’s the best way to store this cake?
Keep it in an airtight container at room temperature for up to 3 days—this preserves maximum moisture. For longer storage, refrigerate for 1 week or freeze for 3 months. To restore freshness, warm slices in the oven at 300°F for 5-10 minutes. The vanilla flavor actually improves slightly after 24 hours!
Can I make this cake in a different pan size?
Yes, but adjust baking time accordingly. For 9-inch pans, bake 20-25 minutes instead of 25-30. For 6-inch pans, increase time to 35-40 minutes. The key is baking until a toothpick comes out clean with just a few moist crumbs. Never overbake—this cake should be tender, not firm.

- 3lb Prime Rib Roast Recipe: Juicy Pink Center Guaranteed in 3 Hours - October 31, 2026
- 5 Spice Cake Recipe: Warmly Spiced Layers With Crunchy Top - October 31, 2026
- 1950’s Macaroni and Cheese Recipe: Nostalgic Creamy Cheese Sauce with Buttery Noodles - October 31, 2026