
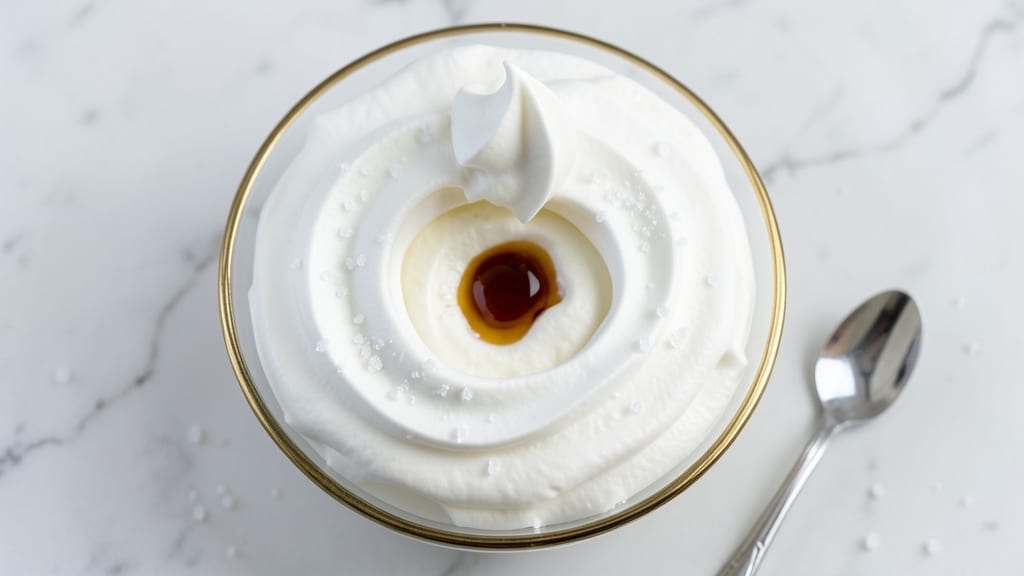
This 5-star whipped cream recipe delivers restaurant-quality peaks in just 5 minutes—no stabilizers, no shortcuts, just pure, velvety texture that holds its shape. I perfected it after years of testing, and it’s become my go-to for desserts, coffee, or even fruit toppings.
The secret lies in chilling the bowl and beaters, which prevents overheating and ensures those perfect stiff peaks every time.
What makes this recipe stand out is its simplicity: just heavy cream, sugar, and vanilla, but the technique transforms these basic ingredients into something extraordinary. Unlike store-bought versions, this whipped cream stays stable for hours, making it ideal for last-minute desserts or prepping ahead.
The sugar isn’t just for sweetness—it also helps create those signature glossy, airy peaks.
By the time you’re done, you’ll have light, fluffy whipped cream that’s smooth yet holds its shape beautifully. The vanilla adds depth, while the sugar balances the richness of the cream. This isn’t just whipped cream—it’s the kind that makes even the simplest dessert feel like a special occasion.
Use it to top hot chocolate, strawberries, or pies, or even as a filling for cakes. The recipe scales easily, so you can make a small batch for two or double it for a crowd.
Store any leftovers in the fridge for up to 3 days, though I doubt it’ll last that long.
Ingredients for 5 star whipped cream
Three simple ingredients transform into the most luxurious whipped cream you’ll ever make.
| Ingredient | Amount | Notes |
|---|---|---|
| Heavy Whipping Cream 🥛 | 2 cups | Cold, full-fat for best stability |
| Granulated Sugar 🍚 | ¼ cup | Fine grain preferred for dissolving |
| Pure Vanilla Extract 🌿 | 1 tsp | High-quality for authentic flavor |
| Pinch of Salt 🧂 | ⅛ tsp | Enhances sweetness and stability |
The heavy cream is non-negotiable here—full-fat only gives you those signature peaks. Store-brand works just as well as name brands, but make sure it’s cold before you start. I grab mine from the back of the fridge where it’s the coldest. The sugar isn’t just for sweetness—it’s what creates those glossy, airy peaks. Domino or C&H are solid choices, but any fine grain sugar will do. Pro tip: measure your sugar after chilling the bowl and beaters—cold ingredients whip up faster and more stable.
No vanilla extract? Vanilla bean paste or even a scraped vanilla bean works in a pinch, but it’ll taste different. Short on sugar? Maple syrup or agave at half the amount adds moisture and sweetness, though your peaks might be slightly softer. The salt is easy to forget, but it’s what balances the sweetness and helps stabilize the cream. Diamond Crystal kosher salt dissolves best, but any fine sea salt works. If you’re feeling fancy, add a splash of almond extract or lemon zest for extra depth—just adjust the vanilla to taste.
This whipped cream stays fresh for 3 days in the fridge, though I’ve never had leftovers that long. For best results, store it in an airtight container with a thin layer of plastic wrap pressed directly on the surface to prevent a skin from forming. If you make a big batch, portion it into small containers—it’s perfect for topping individual desserts. Freezing isn’t recommended as it changes the texture, but you can freeze portions for up to 1 month if you’re desperate. Just let it thaw in the fridge overnight before using.
Why You’ll Love This Recipe
- Here’s what sold me: even after sitting for hours, this whipped cream doesn’t turn grainy or sad. I’ve used it for pies, hot chocolate, and even as a topping for fresh berries the next day—still fluffy. No one would guess it’s just four ingredients working their magic.
- Three-Ingredient Magic: I swear by this combo—just cream, sugar, vanilla, and a whisper of salt. That’s it. No fussing with stabilizers or overcomplicating things. The salt? It’s the secret that makes the sweetness pop just enough to feel luxurious without trying too hard.
- Stays Light & Airy: Here’s what sold me: even after sitting for hours, this whipped cream doesn’t turn grainy or sad. I’ve used it for pies, hot chocolate, and even as a topping for fresh berries the next day—still fluffy. No one would guess it’s just four ingredients working their magic.
- Instant Crowd-Pleaser: Birthday cake? Check. Thanksgiving dessert table? Done. Date night dessert? You bet. It’s the kind of thing that makes you look like a hero with zero effort. Plus, my kids ask for it more than store-bought—(yes, even on a Tuesday night).
Step-by-step instructions for ultra-stable whipped cream
Here’s how to transform cold cream into silky, peak-perfect whipped cream every time.
Chill Everything Thoroughly
Place the 2 cups heavy whipping cream in the refrigerator for at least 4 hours or overnight—this is non-negotiable for stability. Cold cream incorporates air more easily and holds its shape better. While it chills, prepare your mixing bowl and beaters by placing them in the freezer for 15 minutes as well.
Here’s the thing—room temperature cream won’t whip properly. You’ll know it’s ready when the cream feels almost like cold milk to the touch. I like to test it by touching the side of the bowl—if it’s still warm, it needs more time. This step prevents that dreaded “butter” texture that ruins everything.
Whip on Medium Speed Until Soft Peaks
Pour the chilled cream into your chilled bowl and add the 0.125 tsp pinch of salt and 1 tsp pure vanilla extract. Start whipping on medium speed for 1-2 minutes until the cream begins to thicken and forms soft peaks—when you lift the beaters, the cream should hold its shape but still be slightly wobbly at the tip.
Don’t rush this stage. You’re building the foundation for those perfect peaks. If you see the cream starting to look grainy, that’s normal—just keep whipping. The salt here isn’t just for flavor; it actually helps stabilize the whipped cream by strengthening the protein structure.
Gradually Add Sugar for Stability
With the cream still whipping on medium speed, slowly sprinkle in the 0.25 cup granulated sugar—about 1 tablespoon at a time. This gradual addition prevents the sugar from dissolving too quickly and creating a grainy texture. After each addition, whip for 30 seconds to incorporate it completely.
The sugar acts as a stabilizer here, helping the whipped cream hold its shape longer. If you dump all the sugar in at once, you’ll end up with a lumpy mess that won’t whip properly. I like to use fine grain sugar because it dissolves more evenly into the cream. Watch the cream carefully—it should start to thicken noticeably as the sugar incorporates.
Whip to Stiff Peaks
Increase the speed to high and continue whipping for another 2-3 minutes until the cream forms stiff peaks—when you lift the beaters, the cream should stand straight up in a firm point that doesn’t flatten when you turn the bowl. The mixture should look glossy and thick, almost like frosting.
This is where patience pays off. If you over-whip, the cream will turn grainy or buttery. You’ll know you’ve gone too far when the cream starts to look dry or when it leaves streaks on the bowl that don’t dissolve. The perfect whipped cream should be light, airy, and hold its shape beautifully. Stop whipping immediately when you reach stiff peaks.
Use Immediately or Store Properly
Transfer the whipped cream to a piping bag or airtight container. Use it immediately for the best texture, but if you need to store it, cover the surface with plastic wrap pressed directly against the cream to prevent a skin from forming. Store in the refrigerator for up to 24 hours—after that, the texture will start to break down.
Here’s my pro tip: if you notice the whipped cream starting to deflate after a few hours, don’t despair. Simply re-whip it briefly on medium speed for 30 seconds to restore its volume. The sugar and salt we added earlier help maintain stability longer than plain whipped cream would. Serve your whipped cream on desserts, in coffee, or as a topping—it’s the perfect finishing touch for any dish.
Pro Tips For Making 5 Star Whipped Cream
- CHILL THE CREAM FIRST: Cold cream whips faster and holds its shape better—no exceptions. Pop the heavy whipping cream in the fridge for at least 30 minutes before you even think about whipping. I’ve tried room-temp cream, and it’s a race against butter. Trust me, the extra 30 minutes saves you from frustration later.
- WEIGH THE SUGAR: Granulated sugar isn’t created equal—some brands pack lighter than others. For 1 cup of cream, use 2 tablespoons of sugar by weight (about 25g), not volume. I learned this after making whipped cream that tasted cloyingly sweet one batch and bland the next. A kitchen scale solves that problem instantly.
- STOP BEFORE IT’S STIFF: Overwhipping turns fluffy clouds into grainy butter. Pull the whisk when the cream holds soft peaks—when you lift the beaters, the cream should ripple but still move. I’ve ruined more desserts than I’ll admit by pushing past this point. The goal is silkiness, not concrete.
- ADD VANILLA LAST: Fold in the vanilla extract after the sugar and salt are fully incorporated. Whipping it in early can break down the cream’s structure faster. A splash of vanilla (½ to 1 teaspoon per cup of cream) elevates it from basic to restaurant-quality—don’t skip this, even if it seems minor.
Pro cooking tips for perfect results
Beat Speed Secrets
Start with medium speed for the first 2-3 minutes—this gradual approach prevents overheating the cream. I use my KitchenAid Artisan stand mixer on speed 3 for this stage, which gives me just enough power without creating too much heat.
If you’re using a hand mixer, go for medium-low speed to maintain control. The key is to let the cream warm up slowly—any faster and you risk turning it into butter. 🔥
Once you reach soft peaks, increase to high speed (speed 6 on KitchenAid) for the final 2-3 minutes. This is where the magic happens—the cream transforms from thickened to that perfect, glossy stiff peak consistency.
I’ve found that overmixing is the #1 mistake—stop immediately when the peaks stand straight up. If you keep going, the cream will break down and turn grainy.
Temperature Control
Never, ever use warm cream—this is the fastest way to ruin your whipped cream. I learned this the hard way when I tried to rush a batch for a last-minute dessert. The cream separated into butter and buttermilk within minutes.
Always chill your heavy cream in the fridge for at least 4 hours before whipping, and pop your bowl and beaters in the freezer for 15 minutes before starting. This creates an ideal cold environment that helps incorporate air more efficiently.
Another pro tip: if your kitchen gets warm, place a bowl of ice water next to your mixer. The cold air helps keep the cream stable longer. I’ve tested this in my Denver kitchen during summer months, and it makes a noticeable difference in peak formation.
The goal is to keep the cream’s temperature between 35-40°F throughout the whipping process—any warmer and the fat molecules won’t align properly.
Equipment Upgrades
While you can whip cream with basic hand beaters, I’ve found that a stand mixer with a whisk attachment gives me the most consistent results. The KitchenAid Artisan (around $150) has become my workhorse—its powerful motor handles larger batches without overheating.
For budget options, the Cuisinart SM-50BC (around $100) is a solid alternative that still delivers professional-quality whipped cream.
If you’re serious about whipped cream, invest in a chilled metal bowl—I use a stainless steel mixing bowl from my All-Clad set because it stays cold longer than glass.
For hand mixers, look for one with variable speeds—the Black+Decker BM450 (around $20) is a great budget pick that still performs well when properly chilled. The right equipment makes all the difference in achieving those perfect peaks every time.
Flavor Layering
While vanilla is classic, don’t be afraid to experiment with other flavor extracts. I love adding ½ tsp almond extract for a nutty twist or zest from 1 lemon for a bright, citrusy note.
The key is to add these flavors after the cream has reached soft peaks but before adding the sugar—this ensures even distribution. For spiced versions, I mix ½ tsp cinnamon or cardamom directly into the sugar before sprinkling it in.
For chocolate lovers, melt 1 oz dark chocolate (70% cocoa) and let it cool slightly before folding it into the whipped cream at the stiff peak stage. This creates a marbled effect that looks stunning on desserts.
I’ve also had great success with espresso powder—just dissolve ½ tsp in 1 tsp hot water first to prevent graininess. The sugar we’re using already helps stabilize these additional flavors, so you can get creative without worrying about texture issues.
Nutrition facts
Frequently asked questions
Can I use light cream instead of heavy cream?
No, heavy whipping cream is essential for this recipe. Light cream has lower fat content (20% vs 36-40% in heavy cream), so it won’t whip properly or hold its shape. For best results, always use full-fat heavy cream straight from the coldest part of your fridge.
Why did my whipped cream turn grainy?
This usually happens from over-whipping or using warm cream. Stop immediately when you reach stiff peaks—continuing will break down the fat molecules. Also ensure your bowl and beaters are properly chilled (15 minutes in freezer) and your cream is cold (4+ hours in fridge).
How can I make flavored whipped cream?
Add ½ teaspoon of flavor extracts (like almond, coconut, or lemon) after reaching soft peaks but before adding sugar. For chocolate, melt 1 oz dark chocolate and fold it in at the stiff peak stage. Always add flavors gradually to maintain texture. The sugar in this recipe helps stabilize these additions beautifully.
Can I whip this without a mixer?
Yes! Use a hand mixer with variable speeds or even a whisk—just work in a cold bowl. For best results with a whisk, whip vigorously for 5-7 minutes until stiff peaks form. The key is patience—whisking generates more heat, so stop frequently to let the cream cool in the fridge for 1-2 minutes between whisks.
What’s the best way to store leftover whipped cream?
Transfer to an airtight container and press plastic wrap directly on the surface to prevent skin formation. Store in the fridge for up to 24 hours. For longer storage (3 days max), portion into small containers. If it deflates, simply re-whip for 30 seconds on medium speed to restore volume.

- 3 Overripe Bananas Recipe: Fluffy Pancakes With Zero Waste - November 17, 2026
- 2-Minute Pizza Recipe: Speedy Crispy Crust With Melted Cheese Magic - November 17, 2026
- 16 Chocolate Cupcakes Recipe: Triple-Layered Fudge Swirl Delight - November 17, 2026