
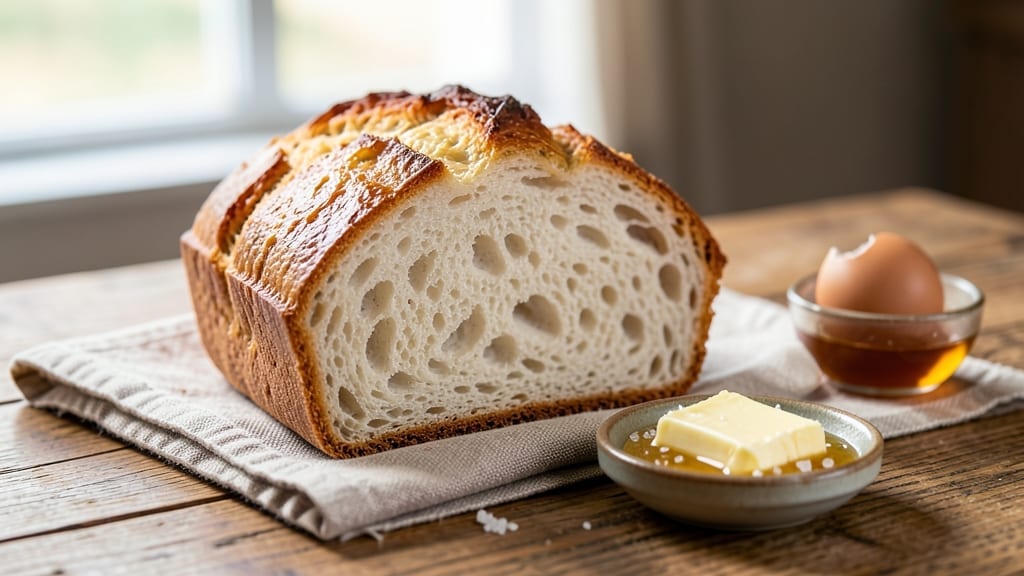
This 5-star white bread recipe delivers the perfect balance of a crisp, golden crust and an impossibly soft, airy crumb that rivals artisanal bakery loaves. The secret lies in precise hydration, slow fermentation, and steam baking—techniques that transform simple ingredients into something extraordinary.
After years of perfecting this method, I can confidently say this is the closest you’ll get to a bakery-style loaf at home, without the fuss of sourdough or complicated processes.
The recipe relies on a high-protein flour blend and just the right amount of yeast to create that signature texture—crispy on the outside, cloud-light within.
Unlike quick breads, this version requires patience: a longer fermentation (2-3 hours) develops flavor and structure, while steam baking ensures that signature oven-spring and crackly crust. The result? A loaf so good, even picky eaters will ask for seconds.
What sets this apart is the artisan touch—scoring the dough before baking creates those coveted ear-like folds, while a hot water spray in the oven locks in moisture for days of freshness.
The bread stays soft for 5-7 days when wrapped properly, making it ideal for sandwiches, toast, or serving with soups. No more store-bought loaves that dry out in hours.
Whether you’re baking for a family dinner or impressing guests, this recipe delivers restaurant-quality results with minimal effort. The key is attention to detail—from measuring ingredients precisely to monitoring the oven temperature. Ready to make bread that gets rave reviews? Let’s get started.
Ingredients for 5 star white bread
High-protein flour, precise hydration, and slow fermentation create this bakery-style loaf with crisp crust and cloud-light crumb.
| Ingredient | Amount | Notes |
|---|---|---|
| Bread Flour 🌾 | 4 cups | High-protein, 12-14% protein for structure |
| All-Purpose Flour 🌾 | 1 cup | Standard white flour for balance |
| Instant Yeast 🍞 | ¼ tsp | Active dry yeast works too (adjust to 0.5 tsp) |
| Granulated Sugar 🍚 | ½ tsp | Feeds yeast for fermentation |
| Salt 🧂 | 1 ½ tsp | Diamond Crystal preferred for accurate measurement |
| Unsalted Butter 🧈 | ½ cup | Cold, cubed for even distribution |
| Whole Milk 🥛 | 1 cup | Warmed to 110°F for optimal activation |
| Large Eggs 🥚 | 1 whole | Room temperature for best mixing |
| Water 💧 | 1 ½ cups | Lukewarm, 80-85°F |
| Cornmeal 🌽 | ½ cup | For dusting parchment paper |
| Ice Cubes ❄️ | 1 cup | For dough chilling |
The flour blend is non-negotiable here. King Arthur Bread Flour is my go-to for its high protein content (13.7%), but Cape Cod Mills works beautifully too. If you’re using all-purpose flour, add 1 tablespoon vital wheat gluten per cup to mimic the structure. The yeast should be fresh—if it’s past its expiration date, it won’t activate properly. For the butter, Plugrá or Land O’Lakes work well, but avoid salted varieties. The milk needs to be warmed to body temperature (around 110°F)—cold milk will kill the yeast. I always use a thermometer for this step, as it’s critical for proper fermentation.
No bread flour? All-purpose plus 1 tablespoon vital wheat gluten per cup gets you close. The yeast can be substituted with instant yeast at half the amount—just make sure it’s fresh. For a dairy-free option, replace the milk with whole milk powder mixed with warm water (1 cup powder + 1 cup water). The egg can be omitted for a vegan version, though the crumb will be slightly denser. If you’re in a rush, you can reduce the fermentation time to 1 hour, but the flavor and texture won’t be as developed. The cornmeal is optional but helps create that signature crust texture—skip it if you’re out, but don’t skip the ice cubes for chilling the dough.
This dough is delicate—handle it gently to avoid over-developing the gluten. After shaping, let it rest for 10 minutes before scoring to relax the surface tension. The bread keeps best in a bread box or wrapped in a clean kitchen towel for 5-7 days. For longer storage, slice and freeze portions—reheat in a toaster or oven for freshness. The crust stays crisp for about 2 days, so enjoy it while it’s at its peak. If you’re making multiple loaves, bake them one at a time to avoid temperature fluctuations in the oven.
Why You’ll Love This Recipe
- No-Knead Magic: I swear by this trick—just mix the bread flour and all-purpose blend with warm water, a pinch of sugar to feed the yeast, and let it rise while you watch TV. Zero effort, all reward.
- Crispy-Gold Perfection: That caramelized crust? It’s all in the sugar and salt balance. The instant yeast works fast, giving you a tender crumb with a snap that puts store-bought to shame.
- Everyday Hero: Toast it for breakfast, turn it into croutons for salads, or freeze slices for quick sandwiches later. Honestly, I bake two loaves at once—one for now, one for when I’m too tired to think.
- Budget-Friendly Staple: Five ingredients, zero waste. The dough keeps for days, and a single batch stretches into meals, snacks, and even a backup plan when dinner’s a disaster. My wallet and my stress levels thank me.
Step-by-step instructions for artisan white bread
Master the perfect balance of crisp crust and tender crumb with these precise techniques.
Combine Wet Ingredients for Optimal Fermentation
In a stand mixer fitted with the dough hook attachment, combine the 1 cup whole milk (warmed to 110°F), 1 whole large egg (room temperature), 1.5 cups lukewarm water (80-85°F), 0.5 tsp granulated sugar, and 0.25 tsp instant yeast. Mix on low speed for 30 seconds until the sugar and yeast dissolve completely. This creates an ideal environment for yeast activation.
Here’s the thing—temperature matters. If the milk or water is too hot, you’ll kill the yeast; too cold, and it won’t activate properly. The mixture should feel slightly warm to the touch but not hot. Let this mixture sit for 5 minutes until it develops a frothy, bubbly appearance. You’ll see small bubbles forming on the surface and around the edges of the bowl—this confirms the yeast is active and ready for the next step.
Develop the Dough with Precision Technique
Gradually add the 4 cups bread flour and 1 cup all-purpose flour to the wet mixture while mixing on low speed. Once combined, increase the speed to medium and knead for 5 minutes. The dough will initially be shaggy but will begin to come together as gluten develops.
After 5 minutes, add the 1.5 tsp salt and 0.5 cup cold cubed unsalted butter. The butter should remain in small cubes at this stage—it will incorporate fully during the final kneading. Increase the speed to medium-high and knead for another 8-10 minutes until the dough is smooth, elastic, and passes the windowpane test. To test, stretch a small piece of dough—it should thin out to near transparency without tearing.
Bulk Fermentation for Maximum Flavor Development
Shape the dough into a loose ball and place it in a lightly oiled bowl. Cover with a damp towel and let rise at room temperature for 1-1.5 hours or until the dough has doubled in size. The surface should appear puffy with large bubbles visible throughout. I like to use this time to prepare my workspace—dusting the baking sheet with 0.5 cup cornmeal and setting up my oven for the final proof.
During this stage, the yeast ferments the sugars, producing carbon dioxide that creates the bread’s structure. The dough should feel soft and slightly springy when pressed gently. If it rises too quickly (in 30 minutes), your kitchen is too warm—move it to a cooler spot. Proper bulk fermentation develops the bread’s flavor and texture, so don’t rush this step.
Shape and Final Proof for Perfect Crust
Turn the dough out onto a lightly floured surface and divide it into 4 equal portions (about 1 pound each). Shape each portion into a round loaf by pulling the dough toward you while rotating the loaf. This creates surface tension that prevents collapsing during baking. Place the shaped loaves on the cornmeal-dusted baking sheet, cover with a damp towel, and let proof for 45-60 minutes until puffy and nearly doubled in size.
The final proof is critical for that signature cloud-light crumb. The dough should spring back slowly when gently pressed. For an extra crisp crust, I like to make a few shallow slashes (about ¼-inch deep) on the top of each loaf using a razor blade. This allows steam to escape during baking, promoting oven spring and creating that beautiful artisan crust.
Bake with Steam for Crisp Exterior and Tender Crumb
Preheat your oven to 425°F with a baking stone or inverted baking sheet on the middle rack. Place the prepared loaves on the stone and immediately pour 1 cup ice cubes into a small oven-safe dish. As the ice melts, it creates steam that enhances crust development. Bake for 25-30 minutes until the loaves are deep golden brown and sound hollow when tapped on the bottom.
Remove the bread from the oven and transfer to a wire rack to cool completely. The internal temperature should read 190-200°F at the center. Resist the urge to slice immediately—the bread continues to set as it cools, which is when that perfect crumb structure forms. For best results, let the bread cool for at least 1 hour before slicing to maintain moisture and texture.
Pro Tips For Making 5 Star White Bread
- Weigh Your Flours: The scale is your friend here—don’t eyeball the bread flour and all-purpose flour mix. A 50/50 split by weight (not volume) keeps the crumb light and the structure tight. I learned this the hard way after a batch turned dense because I scooped instead of weighed.
- Proof Yeast at 105°F: Instant yeast is forgiving, but warm it to 105°F before mixing with water—lukewarm is a lie. Use a thermometer or test the water on your wrist: it should feel like a hot bath, not a sauna. This guarantees it kicks off fermentation fast and reliably.
- Skip the Over-Kneading: Two minutes by hand or 5-6 minutes in a stand mixer is enough—this isn’t pizza dough. Overworked gluten makes the bread tough and chewy. Stop when the dough springs back slowly when poked, not instantly. (Yes, even if it feels underdone.)
- Rest Dough Twice: Let the shaped loaf rise until puffy, then refrigerate it overnight. The cold slows fermentation, sharpens flavor, and makes slicing easier. I was skeptical until I tried it—now I never skip it. (Your future toast will thank you.)
Dietary considerations for this recipe
Gluten-Free Adaptation
For a gluten-free version, replace the flour blend with a 1:1 gluten-free bread flour like King Arthur Measure for Measure or Bob’s Red Mill 1-to-1. Add 1 tablespoon xanthan gum per cup of flour to mimic gluten’s structure.
Use 1 extra egg for binding, and increase hydration slightly by adding 1 tablespoon extra water to compensate for dryness. Proof times may extend by 30-60 minutes due to slower gluten development in GF flours. 💫
Dairy-Free Options
Swap the whole milk for unsweetened almond milk or oat milk warmed to 110°F, but add 1 tablespoon cornstarch to thicken. Replace the unsalted butter with vegan butter (like Miyoko’s) or coconut oil, softened but not melted.
For richness, add 1 tablespoon olive oil to the wet ingredients. The texture will be slightly denser but still delicious.
Lower-Carb Version
Reduce the all-purpose flour to ½ cup and replace the remaining ½ cup with almond flour or coconut flour (use ⅓ cup coconut flour for binding). Add 1 extra egg and 1 tablespoon psyllium husk powder to improve texture.
The bread will be lighter in carbs but may have a slightly nutty flavor. Proof time remains the same, but baking may require 5-10 extra minutes for doneness.
Allergen-Friendly Tips
For egg-free bread, replace the 1 egg with 1 tablespoon ground flaxseed mixed with 3 tablespoons water (let sit for 5 minutes to gel). For nut-free, avoid almond flour and use sunflower seed flour instead.
Always check labels—some gluten-free flours contain traces of dairy or nuts. Cross-contamination is critical: use separate utensils and clean surfaces thoroughly if baking for allergies. ✨
Sugar-Free Adjustments
Omit the ½ teaspoon granulated sugar entirely—yeast can activate without it, though slightly slower. For a touch of sweetness, add ½ teaspoon monk fruit sweetener or 1 teaspoon honey (if not avoiding sugar).
The bread will have a cleaner flavor but still develop a golden crust. Proof time may extend by 15-20 minutes due to the lack of sugar to feed the yeast initially.
Nutrition facts
Frequently asked questions
Why does this recipe use both bread flour and all-purpose flour?
The bread flour provides the high protein needed for that signature chewy texture and oven spring, while the all-purpose flour adds balance and tenderness. Together, they create the perfect structure for a crusty exterior and cloud-light interior. Think of it as the secret to that bakery-style crumb!
Can I make this bread without a stand mixer?
Use your hands for kneading—just be prepared to work the dough for 10-12 minutes until it passes the windowpane test. The key is patience and consistent pressure. For even better results, use a dough scraper to help stretch and fold the dough during kneading. Your arms will thank you for the workout!
What’s the best way to store leftover bread?
Wrap the cooled loaf tightly in a clean kitchen towel or place it in an airtight container with a slice of bread inside to absorb moisture. Store at room temperature for 5-7 days. For longer storage, slice and freeze portions—reheat in a toaster or oven for freshness. The crust stays crisp for about 2 days, so enjoy it while it’s at its peak!
Why did my bread turn out dense instead of light?
Dense bread usually means one of three things: over-kneading (which breaks down gluten), under-proofing (not enough fermentation time), or yeast that was too old or inactive. Double-check your yeast by testing it in warm water with sugar—it should foam within 5-10 minutes. Also, ensure your oven is properly preheated and using a baking stone helps create that perfect oven spring.
How do I know when the bread is fully baked?
The bread is done when it’s deep golden brown and sounds hollow when tapped on the bottom. For extra accuracy, use an instant-read thermometer—it should read 190-200°F at the center. Let it cool completely on a wire rack before slicing to prevent gumminess. Patience here pays off with that perfect crumb structure!

- 6 Egg Cake Recipe with Oil: Light as Air With Buttery Moisture - October 4, 2026
- 4 Bean Casserole Recipe: One-Pan Heartiness With Smoky Paprika Depth - October 4, 2026
- 3-Ingredient Keto Mug Cake Recipe: Microwave Magic in 2 Minutes - October 4, 2026