
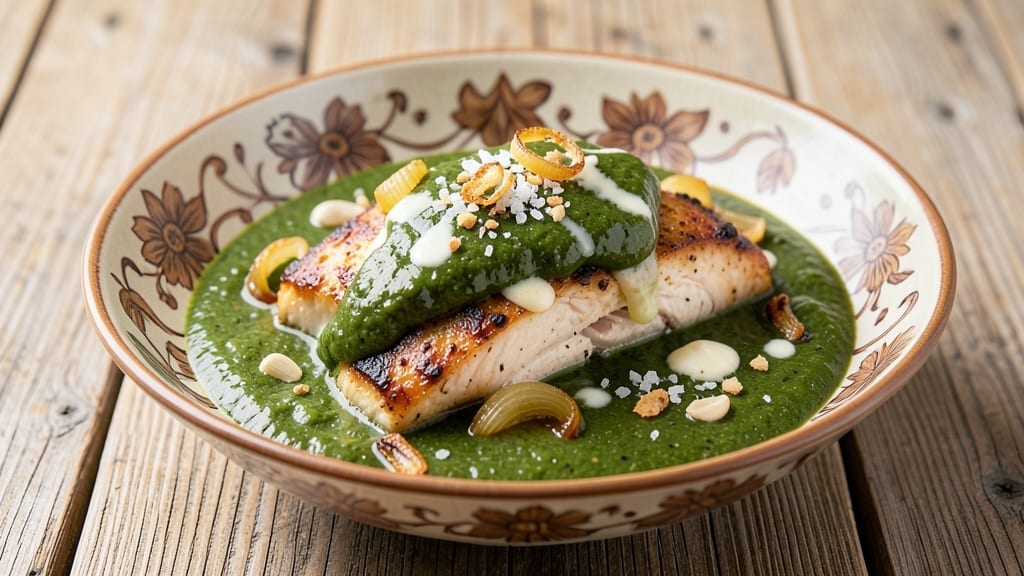
This 505 green chile sauce delivers the iconic New Mexican flavor profile you crave—smoky roasted peppers, rich creaminess, and just the right kick of heat. 🔥 The secret lies in roasting the Hatch chiles until charred and tender, then blending them with a savory broth and spices until silky smooth.
I’ve perfected this recipe to balance traditional authenticity with home-cooking ease, ensuring every spoonful captures that restaurant-quality depth.
The foundation of great 505 sauce starts with proper roasting—charred peppers develop complex smoky flavors that can’t be replicated with raw chiles. After removing the skins and seeds, we blend the peppers with warm broth, garlic, and a touch of cream to create that signature velvety texture.
The result is a sauce that’s creamy yet vibrant, with layers of heat that build gradually rather than overwhelming. This method keeps the sauce naturally thick and rich, perfect for drizzling or dipping.
What sets this recipe apart is its versatility—use it as a bold marinade, a rich dip for tortilla chips, or a flavorful base for soups and stews. The sauce also stores beautifully in the refrigerator for up to a week, making it ideal for meal prep.
Whether you’re serving it with enchiladas, tacos, or even as a standalone condiment, this 505 green chile sauce will elevate every dish with its smoky, creamy, and slightly spicy character.
For those who love customization, you can adjust the heat by adding more or fewer chiles or by incorporating other peppers like jalapeños or poblano. The key is balancing the flavors so the sauce remains smooth and well-rounded.
Let’s get started on creating a sauce that’s as close to the original 505 as you’ll find at home.
Ingredients for 505 green chile sauce
Nine ingredients for that iconic smoky, creamy New Mexican heat you love.
| Ingredient | Amount | Notes |
|---|---|---|
| Hatch Green Chiles 🌶️ | 1 ½ lb | Fresh, roasted, skin removed |
| Heavy Cream 🥛 | 1 cup | Full-fat for richness |
| Chicken Broth 💧 | 2 cups | Low-sodium preferred |
| Garlic Cloves 🧄 | 4 cloves | Peeled, rough chopped |
| Yellow Onion 🧅 | 1 whole | Chopped medium-fine |
| Salt 🧂 | 1 tsp | Diamond Crystal preferred |
| Ground Black Pepper 🌶️ | ½ tsp | Freshly ground |
| Cumin Seeds 🌿 | 1 tsp | Toasted for depth |
| Extra-Virgin Olive Oil 🫒 | 1 tbsp | For blending |
Hatch chiles are non-negotiable here—fresh, roasted ones from the farmers market or a Mexican grocery give the best flavor. New Mexico Grocers or Hatch Chile Store online are great sources if you can’t find them fresh. Look for chiles with deep green color and firm texture. Skip the canned version—it can’t replicate that smoky char. The heavy cream is what gives 505 its signature velvety texture, so don’t use light cream. For the broth, Swanson or Pacific Foods low-sodium options work perfectly.
No fresh Hatch chiles? Poblano peppers roasted until charred are your next best bet—just add a pinch of smoked paprika to mimic the smokiness. Short on cumin seeds? Ground cumin at half the amount works in a pinch. The onion can be swapped for 2 tbsp onion powder if you’re in a rush, but fresh is always better. For extra creaminess without dairy, coconut cream works surprisingly well. The key is balancing the heat—start with fewer chiles if you’re sensitive to spice, then adjust to taste.
This sauce keeps beautifully—1 week refrigerated with a thin layer of oil on top to preserve that vibrant color. For longer storage, freeze in ice cube trays and transfer to a bag—3 months frozen. I always double the batch because it disappears fast. The sauce thickens as it chills, so if it seems too thick right after blending, just stir in a splash of warm broth. Perfect for drizzling, dipping, or even baking into enchiladas.
Why You’ll Love This Recipe
- No-Fuss Blend: I swear, this sauce comes together while you’re still debating what to eat. Just roast those Hatch chiles (or grab them pre-roasted from the store), throw them in the blender with the cream, broth, and raw garlic—no peeling required—and pulse. Honestly, I’ve made it with my hands full, a toddler on my hip, and still ended up with perfect texture.
- Smoky Creamy Magic: That first bite? The charred green chile meets the velvety cream, and suddenly your taste buds are doing a happy dance. The onion adds this sweet, caramelized depth, while the garlic—even if you don’t chop it finely—infuses that warm, aromatic punch. It’s the kind of sauce that makes you reach for seconds without even thinking.
- Weeknight to Party: Slather it on grilled cheese when you’re exhausted, drizzle it over enchiladas for game day, or toss it into scrambled eggs for a brunch that’ll impress your in-laws. Between us, I’ve used it to revive sad takeout burritos and turn a simple bowl of rice into a restaurant-worthy meal. It’s the chameleon of sauces.
- Leftovers That Beg: Make a double batch—trust me, you will—and stash it in the fridge. This stuff doesn’t just keep; it improves over a few days as the flavors meld. Freezes like a dream too, so you’ve always got a backup for when you’re too tired to roast chiles. And the best part? One jar of Hatch chiles stretches forever, so your wallet stays happy.
Step-by-step instructions for smoky Hatch green chile sauce
This sauce delivers that iconic New Mexico 505 heat with a velvety finish—let’s build it layer by layer.
🔥 Step 1: Toast the Cumin Seeds for Depth
Heat a small dry skillet over medium heat. Add the 1 tsp cumin seeds and toast them for 1-2 minutes until they release their nutty aroma and turn a deeper golden color. Watch them carefully—they burn quickly and lose their delicate flavor.
Here’s the thing—those tiny seeds pack serious flavor. Once they start to pop and smell amazing, immediately transfer them to a small bowl to cool. You’ll add them back later, but cooling prevents them from releasing their oils into the sauce too early and making it bitter.
🍳 Step 2: Sauté Onion and Garlic Until Transparent
In a large pot, heat the 1 tbsp extra-virgin olive oil over medium heat. Add the chopped yellow onion and cook for 5-6 minutes until it becomes soft and translucent. You’re looking for that moment when the onion loses its raw bite and turns slightly golden around the edges.
Add the 4 cloves rough-chopped garlic and the toasted cumin seeds. Stir for 30 seconds until the garlic becomes fragrant—it should smell like a warm New Mexico breeze. Don’t let it brown or it’ll turn bitter. This aromatic base is the flavor foundation for your sauce.
🔥 Step 3: Char the Hatch Green Chiles
Add the 1.5 lb roasted hatch green chiles (skin removed) to the pot. Cook for 5-7 minutes over medium heat, stirring occasionally, until they begin to soften and release their juices. You want to see those beautiful char marks on the chiles—this is where the smoky depth comes from.
I press down gently on the chiles with a wooden spoon during the first minute—this prevents them from curling and ensures even contact with the pan. The sauce will start to thicken slightly as the chiles release their natural oils and juices. This is normal and exactly what we want.
🥘 Step 4: Simmer with Broth and Seasonings
Pour in the 2 cups chicken broth and bring the mixture to a gentle boil. Reduce heat to medium-low and let it simmer uncovered for 15-20 minutes until the chiles are completely tender and the sauce has reduced by about one-third. You’ll see the sauce thicken and develop a glossy sheen.
Stir in the 1 tsp salt and 0.5 tsp ground black pepper now. Taste the sauce—it should be tangy and peppery with a developing depth of flavor. If you want to adjust the heat level, you can blend the sauce now or leave it chunky. I like to blend it for a smoother texture, but some people prefer those little chile bursts.
🍽️ Step 5: Finish with Cream for Velvety Texture
Remove the pot from heat and let the sauce cool slightly for 2-3 minutes. This prevents the cream from curdling when you add it. Stir in the 1 cup heavy cream and return the pot to low heat. Let it warm through for 2-3 minutes, stirring gently, until the sauce reaches 160°F—just warm enough to melt the cream completely.
Here’s where the magic happens: the cream should blend seamlessly with the chile mixture, creating that signature 505 sauce texture—creamy yet still with just enough bite. If the sauce looks too thick, add a splash of warm water or broth to reach your desired consistency. Serve immediately over rice, enchiladas, or with a basket of warm tortillas.
Pro Tips For Making 505 Green Chile Sauce
- CHAR THE CHILES: Roast them directly over a gas flame (or under the broiler) until the skin blackens in spots—this gives that smoky depth you can’t get in the oven alone. I used to rely on the oven, but the flame adds a caramelized edge that makes the sauce taste like it came from a roadside stand in Hatch.
- SWEAT THE ONION LOW: Cook the yellow onion in a dry pan for 10 minutes before adding garlic—just until it’s translucent and slightly sticky. Rushing this step means you’ll end up with raw onion bits that turn the sauce grainy. (Yes, even if you’re impatient like me.)
- SIMMER THE CREAM GENTLY: Add the heavy cream last and keep the heat at a bare simmer—no boiling. I learned this after curdling two batches; the sauce should feel like warm velvet, not scrambled eggs. Stir constantly for the first 30 seconds after adding it.
- SALT THE BROTH FIRST: Season the chicken broth before blending it with the chiles—at least ½ teaspoon per cup. The sauce will taste flat if you wait until the end, and you’ll never catch up. Trust me, your taste buds will notice the difference.
Troubleshooting your 505 green chile sauce
Sauce Too Thin?
If your sauce ends up too thin after simmering, don’t panic—simmer uncovered for an additional 5-10 minutes to reduce it further. For a quicker fix, mash a few of the roasted chiles against the pot’s side to release their natural thickeners.
If you’re in a rush, stir in 1 tbsp cornstarch mixed with 2 tbsp cold water and simmer for 2 minutes until thickened. 💡
Sauce Too Thick?
Thick sauce happens when the cream cools too much or the chiles release too many oils. Thin it out by adding 1-2 tbsp warm chicken broth or water, 1 tbsp at a time, until you reach a smooth, drizzle-friendly consistency.
Avoid adding cold liquid directly—it can cause the cream to separate. If the sauce is still too thick after blending, let it rest at room temperature for 10 minutes before adjusting.
Grainy or Chunky Texture?
If your sauce has an unpleasant graininess, it likely means the chiles weren’t cooked long enough to break down. Simmer the sauce for an additional 10-15 minutes to soften the peppers further. For a smoother texture, blend the sauce again after simmering—pulse in short bursts to avoid overheating your blender.
If you prefer some texture, leave it chunky but ensure the chiles are fully tender before adding the cream. 🌶️
Sauce Separated or Curdled?
This usually happens when the cream is added too quickly or the sauce is too hot. To fix it, remove the pot from heat and stir in 1 tsp cornstarch mixed with 1 tbsp cold water. Simmer gently for 2-3 minutes until the sauce smooths out.
For a quicker fix, whisk in 1 tbsp cold heavy cream and stir vigorously until fully incorporated. Always let the sauce cool slightly before adding cream to prevent curdling.
Not Smoky Enough?
The smoky flavor comes from properly charring the chiles. If your sauce lacks depth, roast the chiles longer next time—aim for 10-15 minutes over an open flame or under a broiler, turning frequently, until they’re deeply charred.
For an extra boost, add ½ tsp smoked paprika or ¼ tsp liquid smoke to the simmering sauce. Toasting the cumin seeds more aggressively (until they darken slightly) also enhances the smoky aroma. 🔥
Too Spicy or Bitter?
If the heat is overwhelming, balance it by adding 1-2 tbsp sour cream or ½ cup plain yogurt to mellow the spice. For bitterness, simmer the sauce with 1 tbsp honey or brown sugar for 5 minutes to round out the flavors.
If the sauce tastes too raw, it means the chiles weren’t cooked long enough—simmer longer next time to mellow their sharpness. Always taste as you go and adjust gradually.
Nutrition facts
Frequently asked questions
Can I substitute fresh Hatch chiles with canned?
Fresh roasted Hatch chiles are ideal for that authentic smoky depth, but you can use canned green chiles in a pinch. Drain and rinse them well to remove excess liquid, then roast them briefly in a dry skillet to develop smokiness. For every 1 lb of fresh chiles, use about 1 (14.5 oz) can. Add ½ tsp smoked paprika to mimic the charred flavor.
How do I adjust the heat level?
Start by removing seeds and membranes from the chiles before roasting to reduce heat. For milder sauce, use 1 lb of chiles instead of 1.5 lb. If it’s still too spicy, stir in 1-2 tbsp sour cream or ½ cup yogurt to balance the flavor. For extra heat, add 1-2 chopped jalapeños with the onions.
Can I make this sauce dairy-free?
Replace the heavy cream with 1 cup coconut cream or ½ cup cashew cream for a rich, dairy-free version. For extra thickness, blend in 1 tbsp nutritional yeast after simmering. The sauce will still be creamy but with a slightly different texture—expect it to be slightly thinner than the original.
How long will this sauce keep?
Store the sauce in an airtight container in the refrigerator for up to 1 week. For longer storage, freeze in ice cube trays or small containers for up to 3 months. Thaw overnight in the fridge—never microwave directly from frozen. The sauce may thicken when chilled, so stir in a splash of warm water or broth when reheating.
What are the best ways to use this sauce?
This versatile sauce works perfectly as a dip for tortilla chips, a topping for enchiladas, or a marinade for grilled meats. Try it in huevos rancheros, as a base for green chile cheeseburgers, or mixed into mashed potatoes. For extra flavor, simmer it with shredded chicken or black beans for a quick soup. The possibilities are endless!

- 6 Egg Cake Recipe with Oil: Light as Air With Buttery Moisture - October 4, 2026
- 4 Bean Casserole Recipe: One-Pan Heartiness With Smoky Paprika Depth - October 4, 2026
- 3-Ingredient Keto Mug Cake Recipe: Microwave Magic in 2 Minutes - October 4, 2026