
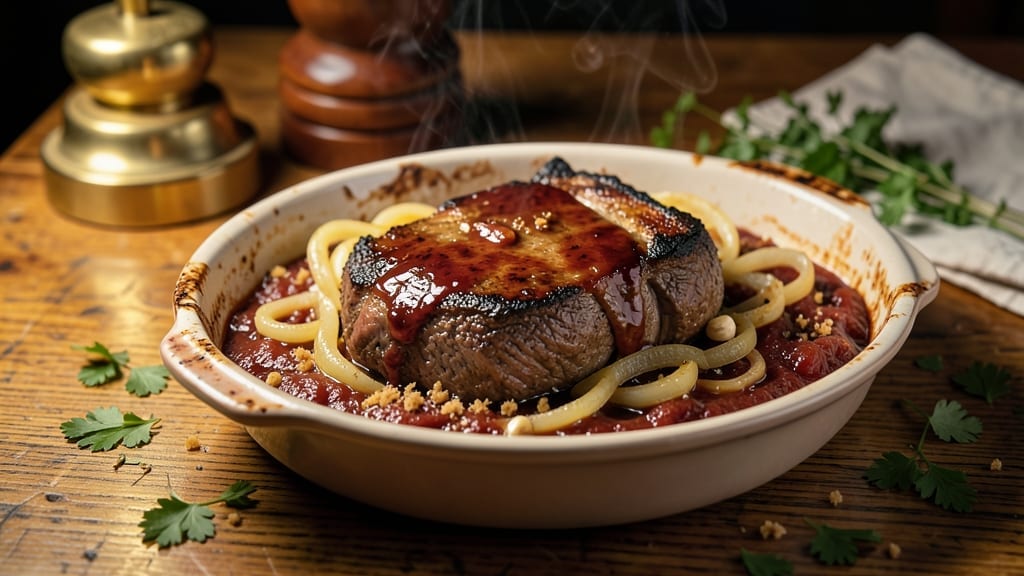
This 50s Prime Time Cafe pot roast recipe brings back the golden era of American comfort food with its deep, slow-simmered flavors and caramelized onions. 💛 The secret lies in searing the beef first to lock in juices, then braising it low and slow until it’s fork-tender—a technique that transforms tough cuts into melt-in-your-mouth perfection.
I’ve perfected this version to deliver that nostalgic diner-style richness without requiring hours of babysitting in the kitchen.
The beauty of this recipe is its simplicity: just a few quality ingredients working together to create something extraordinary. You’ll start with a rich blend of aromatics—caramelized onions, garlic, and herbs—that build layers of flavor as the roast simmers.
The slow cooking process allows the beef to absorb these flavors deeply, resulting in a dish that’s both comforting and impressive. This is the kind of meal that feels like a warm hug on a chilly evening.
By the time you serve it, you’ll have tender beef that practically falls apart, surrounded by a rich, velvety gravy that clings to every bite. The caramelized onions add sweetness and depth, while the herbs bring a fresh, aromatic note.
This pot roast is perfect for a family dinner, a cozy Sunday lunch, or even a special occasion that calls for a touch of classic elegance. The best part? It’s easy to prepare and even easier to enjoy.
Pair it with classic sides like creamy mashed potatoes, buttery carrots, or crusty bread to soak up every last bit of that delicious gravy. The presentation is just as important as the taste—garnish with fresh parsley and a drizzle of gravy for that authentic 50s diner feel.
Let’s bring a little nostalgia to your dinner table with this timeless recipe.
Ingredients for 50s prime time cafe pot roast
Just 14 ingredients transform into nostalgic 50s-style pot roast perfection.
| Ingredient | Amount | Notes |
|---|---|---|
| Beef Chuck Roast 🥩 | 3 lb | Well-marbled for tenderness |
| Yellow Onions 🧅 | 2 large | Sliced thin for caramelizing |
| Garlic Cloves 🧄 | 6 cloves | Minced for aromatic base |
| Beef Broth 💧 | 3 cups | Low-sodium preferred |
| Red Wine 🍷 | 1 cup | Bold dry variety like Cabernet |
| Tomato Paste 🍅 | 2 tbsp | For depth of flavor |
| Fresh Thyme 🌿 | 1 tbsp | Leaves only, chopped |
| Fresh Rosemary 🌿 | 1 tbsp | Chopped sprigs |
| Salt 🧂 | 1 ½ tbsp | Kosher or sea salt |
| Black Pepper 🌶️ | 1 tbsp | Freshly ground |
| Olive Oil 🫒 | 2 tbsp | For searing beef |
| Flour 🌾 | 2 tbsp | All-purpose for gravy |
| Carrots 🥕 | 2 medium | Peeled and sliced |
| Potatoes 🥔 | 4 medium | Russet for fluffiness |
| Fresh Parsley 🌿 | ¼ cup | Chopped for garnish |
The beef is everything here—chuck roast with good marbling melts into tender perfection. Costco or Whole Foods usually have the best cuts, but check your local butcher too. Look for pieces with visible fat marbling, not lean cuts. The onions? Yellow onions caramelize best—red or white won’t get as sweet. I always buy a big bag of them from Trader Joe’s when they’re on sale, and they last for months in the fridge. The fresh herbs (thyme and rosemary) should smell vibrant—if they’re wilted, skip them and use dried at half the amount.
No red wine? Beef broth plus a splash of balsamic vinegar works perfectly. The tomato paste can be skipped if you’re not a fan, but it adds that classic diner-style depth. For the potatoes and carrots, medium russets and baby carrots are ideal—no need to peel the carrots if you’re using the baby kind. The flour for the gravy should be all-purpose, but if you’ve got cornstarch, mix half and half for a thicker sauce. And trust me on the kosher salt—it dissolves better than table salt, so you won’t over-salt your masterpiece.
This reheats beautifully—honestly tastes even better the next day once everything melds together. Keeps for 4-5 days in the fridge, and freezes perfectly for 3 months. I always make double batches because it’s just too good to resist. The gravy thickens as it sits, so add a splash of broth when reheating. Garnish with fresh parsley right before serving—it adds that final pop of color that makes it look like you slaved over this for hours (even though you didn’t).
Why You’ll Love This Recipe
- One-Pot Magic: I swear by this recipe when I’m too tired to scrub pots. Toss everything—chuck roast, onions, garlic, broth, wine—into a single Dutch oven and let it slow-cook. The onions caramelize right in the pan, and the wine mellows into something rich without extra effort.
- Wine-Infused Richness: That splash of red wine? It’s the secret weapon. It cuts through the beef’s richness while adding a deep, savory note that makes every bite feel like a little victory. Honestly, my picky husband actually asks for seconds now.
- Weeknight to Dinner Party: Same recipe, totally different vibes. Weeknights? Serve it over mashed potatoes with crusty bread. Fancy night? Garnish with fresh thyme and pair it with roasted veggies. It’s my go-to when I need to impress without stressing.
- Budget-Friendly Leftovers: A chuck roast stretches for days—this isn’t just dinner, it’s your meal prep savior. The broth reduces into a luscious sauce, so reheating feels like a gourmet experience. (Yes, even on a Tuesday night.)
Step-by-step instructions for 50s prime time cafe pot roast
Here’s how to recreate that nostalgic, slow-simmered richness from classic American diners.
🔥 Step 1: Sear the Beef Chuck Roast Perfectly
Pat the 3 lb beef chuck roast dry with paper towels—this helps create that beautiful crust. Heat the 2 tbsp olive oil in a heavy Dutch oven over medium-high heat until shimmering. Place the roast in the pot, searing on all sides until deeply browned, about 5-6 minutes total. I press down gently on the roast during the first minute—this prevents it from curling and ensures even contact with the pan.
While searing, you’ll see golden brown patches forming—this is your crust building. Once browned, remove the roast and set it aside. The goal here is to lock in those juices through the Maillard reaction, which creates that deep, savory flavor we crave in pot roast. Don’t rush this step; patience pays off with incredible flavor.
🍳 Step 2: Caramelize the Onions and Build the Base
In the same Dutch oven (those browned bits are pure flavor), add the 2 large sliced yellow onions and cook over medium heat for 8-10 minutes, stirring occasionally. You’re looking for soft, translucent onions that start to turn golden brown at the edges—that’s when you know they’re caramelizing. This process takes time, but it’s worth it for that sweet, rich flavor.
Add the 6 minced garlic cloves and cook for another 30 seconds until fragrant. Stir in the 2 tbsp tomato paste and cook for 1 minute to deepen the color. This aromatic base will form the flavor foundation for your entire pot roast. The onions should be soft enough to break apart easily with a spoon—if they’re still firm, give them a few more minutes.
🥘 Step 3: Deglaze and Simmer the Pot Roast
Pour in the 1 cup red wine, scraping up all those delicious browned bits from the bottom of the pot. Let it simmer for 2-3 minutes until reduced by half. Then add the 3 cups beef broth, 1 tbsp fresh thyme, 1 tbsp fresh rosemary, 1.5 tbsp salt, and 1 tbsp black pepper. Return the roast to the pot, fat-side up.
Bring everything to a gentle simmer, then cover and transfer to a preheated 325°F oven. Here’s where the magic happens—slow cooking transforms tough beef into tender, melt-in-your-mouth perfection. Cook for 3 hours, then carefully remove the roast and shred it with two forks, returning it to the pot. The meat should pull apart easily, and the sauce should be rich and flavorful.
🥘 Step 4: Prepare and Add the Vegetables
While the pot roast finishes cooking, peel and slice the 2 medium carrots and 4 medium potatoes into even pieces. Toss them with the 2 tbsp flour to help thicken the sauce slightly. Add these vegetables to the pot with the shredded beef, stirring gently to combine. Return to the oven and cook for another 30-45 minutes until the vegetables are tender and the sauce has thickened slightly.
I like to check the vegetables at the 20-minute mark—they should be soft but still hold their shape. If the sauce looks too thin, you can remove the lid and let it reduce for 5-10 minutes. The goal is a thick, velvety sauce that coats every bite of meat and vegetable.
🍽️ Step 5: Finish and Serve with Fresh Parsley
Remove the pot from the oven and let it rest for 10 minutes before serving. This resting time allows the juices to redistribute throughout the meat and vegetables, ensuring each bite is moist and flavorful. Before serving, sprinkle with the 0.25 cup chopped fresh parsley for a pop of color and freshness.
Ladle the pot roast over creamy mashed potatoes or crusty bread to soak up that rich sauce. The combination of tender beef, caramelized onions, and perfectly cooked vegetables creates a dish that’s as comforting as it is delicious—just like they made in classic 50s diners. Serve immediately while everything is hot and the flavors are at their peak!
Pro Tips For Making 50s Prime Time Cafe Pot Roast
- Sear the Chuck Hard: I learned this the hard way—skipping a deep sear means your pot roast will taste like it simmered in broth, not caramelized magic. Get that roast screaming hot in a dry pan for 5-6 minutes per side until it’s dark brown, not just pink. The crust locks in flavor and makes all the difference when it braises.
- Dice Onions Like Dice: Big chunks of onion turn mushy and disappear into the broth. Cut them into ¼-inch pieces—small enough to melt into the sauce but not so fine they dissolve into nothing. My grandmother swore by this, and she was right: uniform size means even cooking and a sauce that’s actually there when you serve it.
- Deglaze with Wine First: Pour that red wine in before adding broth—let it bubble and reduce for 2 minutes to cook off the alcohol. I was skeptical until I tried it: the wine’s acidity cuts through the richness of the chuck, and the reduced base makes the sauce richer without tasting like you’re drinking broth. Skip this, and your dish loses depth.
- Cover Tight, Low and Slow: Does it look weird? Yes. Does it work? Every single time. Use a tight-fitting lid (or foil sealed around the edges) and keep the heat at 300°F (150°C) for 3-4 hours. The slow cook transforms tough chuck into melt-in-your-mouth perfection—no need to babysit the pot. Resist the urge to peek; moisture is your friend here.
Flavor customization for this dish
Classic 50s Sweetness
Add 2 tbsp brown sugar to the caramelized onions for a touch of nostalgia—this was a common diner trick in the 50s to balance the savory beef. I like to sprinkle it in during the last 5 minutes of caramelizing so it melts into the onions naturally.
The subtle sweetness reminds me of my grandmother’s pot roast, which always had that perfect balance of rich and slightly sweet flavors. 💛
Herb Variations
Swap out the rosemary for 1 tbsp fresh sage if you prefer—it adds an earthy depth that pairs beautifully with the beef. Or try 1 tsp dried marjoram for a more Mediterranean twist while keeping the classic diner feel.
I’ve even used 1 tbsp fresh parsley in the braising liquid for brightness, but keep the thyme as it’s essential for that authentic 50s flavor profile.
Umami Boost
For extra depth, add 1 tbsp soy sauce or 1 tsp Worcestershire sauce to the braising liquid. These umami-rich ingredients were less common in 50s recipes but add a modern twist that enhances the beef’s natural flavors.
I often use 1 tsp soy sauce when I have it on hand—it’s a secret weapon that makes the sauce even more complex without overpowering the dish.
Spicy Kick
If you like heat, add ½ tsp smoked paprika or a pinch of cayenne pepper to the braising liquid. For a milder kick, try 1 tsp chipotle powder mixed with the tomato paste.
This adds warmth without overpowering the classic flavors. I’ve found that a pinch of cayenne at the very end gives just enough heat to make the dish feel special without being spicy.
Creamy Finish
Stir in ¼ cup heavy cream during the final 10 minutes of cooking for a luxurious finish. This was inspired by the creamy gravies diners served in the 50s, but it’s a modern shortcut that adds richness.
I like to temper the cream first by mixing it with a spoonful of the hot sauce before adding it to the pot—this prevents curdling and keeps the sauce silky smooth.
Gravy Upgrade
Thicken the gravy with 1 tbsp cornstarch mixed with 2 tbsp cold water instead of flour for a glossier finish. This trick comes from my time working in a diner—it makes the gravy cling to the meat better and gives it that restaurant-quality sheen.
I always keep a small bowl of cornstarch slurry on hand when making pot roast because it’s a game-changer for the final presentation.
Nutrition facts
Frequently asked questions
Can I use a different cut of beef instead of chuck roast?
While chuck roast is ideal for its marbling and tenderness, you can substitute with chuck shoulder or bottom round roast. Avoid lean cuts like sirloin—they won’t become as tender. If using round, increase cooking time by 30-45 minutes and add ½ cup beef broth to compensate for lower fat content.
How do I make this in a slow cooker?
Brown the beef in a skillet first, then transfer to your slow cooker with all aromatics. Add 1 cup water instead of broth to prevent overflow, and cook on low for 8 hours or high for 5-6 hours. Shred the meat, then return to the slow cooker with veggies for 30 more minutes. The sauce will be thinner—thicken with cornstarch slurry if needed.
Why did my pot roast turn out dry?
Overcooking or skipping the resting time are the most common causes. Always cook to 205°F internal temp (not 165°F), then let it rest 15 minutes before slicing. For extra moisture, add ½ cup broth during the last 30 minutes of cooking. The Dutch oven’s tight lid helps retain steam—never remove it during braising.
What’s the best way to reheat leftovers?
Reheat gently in a skillet with 2 tbsp beef broth over medium-low heat for 5-7 minutes, stirring occasionally. For microwave reheating, cover with a damp paper towel and heat in 1-minute intervals until steaming. The sauce thickens when cold—add a splash of broth if it’s too stiff. Leftovers taste even better the next day!
Can I make this pot roast ahead of time?
This dish actually improves overnight. Cook as directed, then refrigerate in an airtight container for up to 4 days. Reheat in the oven at 350°F for 20 minutes covered, then uncovered for 10 minutes to crisp the sauce. For freezing, cool completely, then freeze for up to 3 months. Thaw overnight in the fridge before reheating.

- 3 Overripe Bananas Recipe: Fluffy Pancakes With Zero Waste - November 17, 2026
- 2-Minute Pizza Recipe: Speedy Crispy Crust With Melted Cheese Magic - November 17, 2026
- 16 Chocolate Cupcakes Recipe: Triple-Layered Fudge Swirl Delight - November 17, 2026