
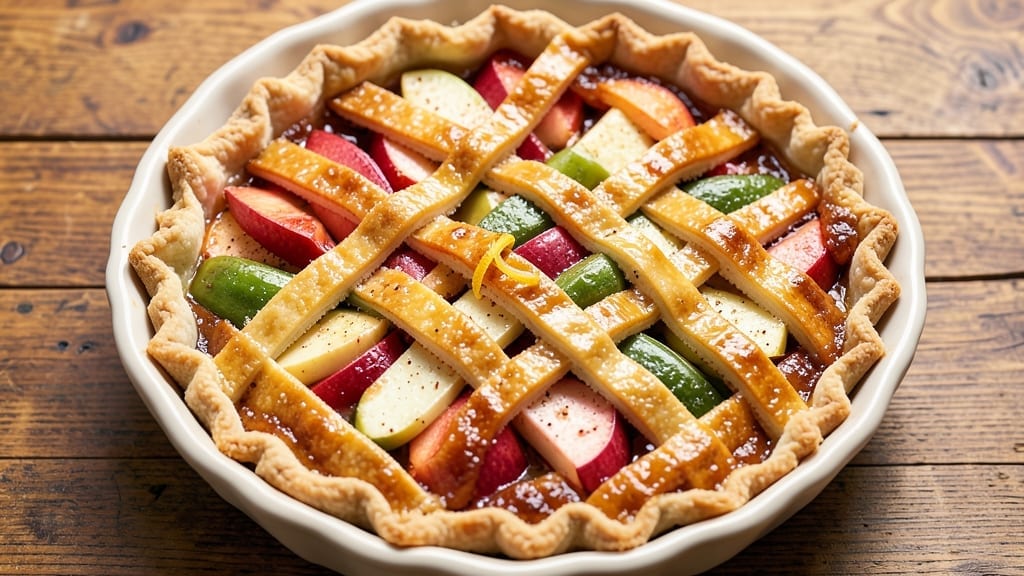
This 6 apple pie recipe delivers the perfect balance of flaky lattice crust and tender, spiced apple filling that captures every juicy drizzle. The secret lies in a cold butter crust that stays crisp while the apples soften just enough to release their natural sweetness—never mushy.
I’ve baked this pie for holidays and weeknight desserts alike, and it never disappoints.
The lattice crust isn’t just decorative—it creates golden, crispy windows that let steam escape while trapping the warm apple aroma inside. You’ll start with a classic pie dough, but the technique for cutting the lattice strips ensures clean, even slices that hold up perfectly.
No rolling pins or fancy tools required; just a sharp knife and steady hands.
By the time it emerges from the oven, you’ll have a deeply aromatic pie with a caramelized top, flaky layers, and filling that’s just tender enough to melt into every bite.
The spices—cinnamon, nutmeg, and a pinch of clove—infuse the apples with warmth, while the lattice stays crisp enough to cut through the richness.
Serve warm with vanilla ice cream or whipped cream, or let it cool slightly for clean slices that reveal the perfect ratio of crust to filling. This pie is the kind that disappears fast—so make sure to save a slice for later. Ready to bake?
Ingredients for 6 apple pie
Cold butter, flaky crust, and spiced apples—here’s what you’ll need for perfect pie.
| Ingredient | Amount | Notes |
|---|---|---|
| All-Purpose Flour 🌾 | 3 ½ cups | Sifted for flaky crust |
| Unsalted Butter 🧈 | 1 ½ cups | Cold, cubed for texture |
| Granulated Sugar 🍚 | 1 ½ cups | For crust and filling |
| Large Eggs 🥚 | 1 whole | Cold, for binding |
| Ice Water 💧 | ½ cup | For pie dough |
| Mixed Apples 🍎 | 8 cups | Peeled, cored, sliced |
| Ground Cinnamon 🌿 | 2 tbsp | Freshly ground preferred |
| Ground Nutmeg 🌿 | 1 tsp | Freshly grated |
| Ground Cloves 🌶️ | ½ tsp | Pinch for warmth |
| Lemon Juice 🍋 | 1 tbsp | Freshly squeezed |
| Salt 🧂 | 1 tsp | Kosher or sea salt |
| Vanilla Ice Cream 🍦 | 2 cups | For serving |
| Heavy Cream 🥛 | ½ cup | Optional for whipped topping |
The butter is non-negotiable here. Use European-style butter if you can—it’s higher in fat, which means better flakiness. Grab a block from Whole Foods or your local market, not the pre-packaged sticks. The apples? Granny Smith and Honeycrisp work best—tart and sweet in perfect balance. If you can’t find them, Fuji or Gala are solid backups. Slice them uniformly (about 1/4-inch thick) so they cook evenly. And don’t skip the lemon juice—it keeps the filling bright and prevents browning.
No vanilla ice cream? Homemade whipped cream with a splash of vanilla extract works just as well. Short on cinnamon? Substitute with 1.5 tbsp cinnamon + 0.5 tsp allspice for a different but still delicious twist. The nutmeg and cloves are optional, but trust me—they add depth that makes this pie taste like a bakery. For the dough, if you’re using a food processor, pulse the butter until it’s pea-sized. If you’re cutting it in by hand, keep it cold and work quickly. And if you’re nervous about the lattice, practice cutting strips on a separate dough scrap first.
The dough keeps for 3 days in the fridge or 3 months frozen. Prep the filling ahead and store it in the fridge for up to 24 hours before baking—it’ll taste even better. Once baked, let the pie cool completely before slicing (if you can wait that long). The lattice stays crisp for 2 days at room temperature, but it’s best served warm with ice cream. For leftovers, store in an airtight container and reheat in a 350°F oven for 10 minutes to restore the flakiness.
Why You’ll Love This Recipe
- No-Fuss Dough: I swear by this butter-flour-egg combo—it’s my shortcut to a flaky crust that doesn’t require rolling or stress. Just mix, chill, and roll out when ready. (Yes, even on a Tuesday night.)
- Sweet-Tart Magic: That sugar-butter ratio in the crust? It’s the secret to a buttery, caramelized edge that balances the apples’ natural tartness. Honestly, the first bite makes me forget I’m not at a bakery.
- Weekend or Weeknight: Slice it warm for breakfast with yogurt, pack it for lunch, or serve it chilled with ice cream. I’ve even used the leftovers in apple crisp—versatile enough for any craving.
- Leftovers That Last: One pie feeds my family for days—sandwiches, smoothies, or reheated slices. The crust stays crisp, and the apples stay juicy. Budget-friendly? Absolutely. Waste-free? Even better.
Step-by-step instructions for lattice crust apple pie
Here’s how to build a pie with a golden lattice that holds every juicy apple drizzle.
Make the Perfect Pie Dough
In a large bowl, combine the 3.5 cups all-purpose flour and 1 teaspoon salt. Cut in the 1.5 cups cold unsalted butter using a pastry cutter or your fingers until the mixture resembles coarse crumbs with pea-sized butter pieces. This texture is key—it creates flaky layers when baked.
Add the 1 whole cold egg and mix just until the dough comes together. Then drizzle in the 0.5 cup ice water, 1 tablespoon at a time, mixing gently with a fork. Once the dough holds together when pressed, turn it out onto a lightly floured surface and knead just until smooth—about 30 seconds. Divide into two equal discs, wrap in plastic, and chill for at least 1 hour (up to 2 days).
Prepare the Apple Filling
In a large bowl, toss the 8 cups mixed apples with 1.5 cups granulated sugar, 2 tablespoons ground cinnamon, 1 teaspoon ground nutmeg, 0.5 teaspoon ground cloves, 1 tablespoon lemon juice, and 1 teaspoon salt. This balance of spices and acidity keeps the apples tender while preventing browning. Let the mixture sit for 10 minutes to allow the flavors to meld.
While the apples macerate, preheat your oven to 375°F. Roll out one of the chilled dough discs to fit a 9-inch pie dish, leaving a 1-inch overhang. Transfer the dough to the pie dish, trim the edges, and crimp decoratively. Pour in the apple filling, mounding it slightly in the center—this ensures even baking.
Build the Classic Lattice Topping
Roll out the second dough disc to about 1/8-inch thickness. Using a sharp knife or pizza cutter, cut the dough into 12 strips, about 1/2-inch wide. This is where the magic happens—arrange 6 strips horizontally across the pie, spacing them evenly. Then lay 6 strips vertically on top, alternating the ends so they form a star pattern. Press gently where they cross to seal.
Brush the lattice with a little egg wash (1 egg beaten with 1 tablespoon water) for a golden finish. For extra shine, sprinkle with a pinch of granulated sugar. The lattice lets steam escape while keeping the filling enclosed—perfect for that classic pie look and texture.
Bake to Golden Perfection
Place the pie on a baking sheet (to catch drips) and bake for 50-60 minutes until the crust is deep golden brown and the filling bubbles gently at the edges. If the lattice starts browning too quickly, loosely cover it with aluminum foil. The pie is done when the filling is bubbly and the crust is firm to the touch.
Let the pie cool for at least 2 hours before slicing—this resting time lets the juices set and the lattice crisp up. Serve warm with 2 cups vanilla ice cream and a dollop of 0.5 cup whipped heavy cream for the ultimate dessert experience.
Pro Tips For Making 6 Apple Pie
- Chill the Butter First: Cold butter makes flaky crusts—no exceptions. Cut the unsalted butter into ½-inch cubes and refrigerate them for 20 minutes before mixing with flour. I used to skip this, and my crusts always turned out dense or greasy. Trust me, the extra 20 minutes saves you from a soggy bottom.
- Mix Dry Ingredients Fast: Pulse the flour, sugar, and salt in the food processor just until combined—no more. Overmixing develops gluten, which leads to a tough crust. I learned this after making a pie crust that felt like eating a cracker. Keep it quick and light.
- Prevent Overfilling the Crust: Fill the crust no more than ¾ full with apples. Apples release juice as they cook, and overfilling guarantees a messy spillover. Press the apples down gently but don’t pack them—leave room for them to soften without overflowing. (Yes, I’ve had to clean up apple batter from the oven floor.)
- Use Cold Water for Dough: Ice water is your friend here—literally. Add it 1 tablespoon at a time to the dough until it just holds together when pressed. Too much water makes the crust gummy, and too little makes it dry and crumbly. Start with 4-5 tablespoons and adjust. I’ve ruined more crusts than I’d like to admit by eyeballing it.
Pro cooking tips for 6 apple pie
Cold Butter Matters
The secret to a flaky crust starts with cold butter—never room temperature. Cut the 1.5 cups unsalted butter into the flour mixture using a pastry cutter or your fingers until you see pea-sized pieces no bigger than a pea.
If your butter melts, your crust will turn out tough. I recommend using a Whole Foods Market European-style butter—it has a higher fat content (82% vs. 80%) which gives you that extra flakiness. 🧈
Dough Chill Time
Never skip chilling the dough! After forming the two discs, wrap them tightly in plastic and refrigerate for at least 1 hour. This resting time relaxes the gluten, making it easier to roll out and preventing shrinking.
I’ve made this mistake—rolling out dough too soon leads to a sad, shrunken pie crust. Pro tip: Place the dough between two sheets of parchment paper before chilling for easier handling later.
Apple Prep Trick
Slice your apples 1/4-inch thick and toss them with 1 tablespoon lemon juice immediately after cutting. This prevents browning and keeps the filling bright. For even cooking, arrange the apple slices in concentric circles in the pie dish, alternating directions so they don’t all cook at the same rate.
I like to use a mix of Granny Smith and Honeycrisp—the tartness balances the sweetness perfectly. 🍎
Lattice Perfection
When cutting the lattice strips, use a sharp knife or pizza cutter for clean edges. Arrange the strips in a star pattern by alternating the ends—this creates those classic pie windows. Press gently where the strips cross to seal them without fully closing the lattice.
For extra shine, brush the lattice with egg wash and sprinkle with granulated sugar before baking. This gives you that beautiful golden finish.
Baking Like a Pro
Place your pie on a baking sheet to catch any drips—this is non-negotiable. Bake at 375°F for 50-60 minutes, but watch closely after 40 minutes. If the lattice starts browning too quickly, loosely cover it with aluminum foil.
The pie is done when the crust is deep golden brown and the filling is bubbly. Let it cool for at least 2 hours before slicing—this resting time is crucial for the lattice to crisp up properly.
Spice Balance
The spice blend is what elevates this pie from good to amazing. Use freshly ground cinnamon (pre-ground loses flavor quickly), and don’t skimp on the nutmeg and cloves—they add warmth that makes the pie taste like it came from a bakery.
If you’re feeling adventurous, add a pinch of cardamom for an unexpected but delicious twist. Taste the filling before baking—adjust the sugar if needed, but remember the apples will release more sweetness as they cook. 🌶️
Nutrition facts
Frequently asked questions
Can I use store-bought pie dough for this recipe?
Yes, but homemade dough makes a noticeable difference in flakiness and flavor. If using store-bought, choose refrigerated pie crust (not pre-baked) and follow the package instructions for rolling. For the lattice, chill the dough for 15 minutes before cutting strips to prevent sticking. The homemade version gives you better control over the butter-to-flour ratio for that perfect flaky texture.
What if my lattice falls apart when I lift it onto the pie?
This happens when the dough is too warm or not rolled evenly. Chill the lattice dough for 10 minutes before cutting strips, and roll it to 1/8-inch thickness for stability. Work quickly when transferring—lift from the center first, then gently drape over the pie. If it still tears, use a little egg wash to glue pieces together before baking.
How do I prevent a soggy bottom crust?
Prevent soggy crust by creating a thin sugar crust first: sprinkle 2 tablespoons sugar over the bottom crust before adding filling. This helps absorb moisture. Also, blind-bake the bottom crust for 5-7 minutes at 375°F before adding filling. For extra insurance, place a parchment-lined baking sheet under the pie to catch drips and support the crust.
Can I make this pie ahead of time?
Assemble the pie (unbaked) up to 24 hours ahead and refrigerate. Bake when ready—just add 5-10 extra minutes to the baking time. For a fully baked pie, cool completely, then wrap tightly in plastic. Store at room temperature for 2 days or freeze for up to 3 months. Reheat frozen pies at 350°F for 20-30 minutes to restore crispness.
What’s the best way to slice the pie without breaking the lattice?
Use a sharp, hot knife (dip in hot water between slices) and angle it slightly as you cut. Warm the pie for 5 minutes at 350°F before slicing to make the lattice more pliable. Cut through the lattice strips cleanly, then gently lift each slice to maintain the pattern. Serve immediately for the crispiest texture—lattice loses crispness as it cools.

- 3lb Prime Rib Roast Recipe: Juicy Pink Center Guaranteed in 3 Hours - October 31, 2026
- 5 Spice Cake Recipe: Warmly Spiced Layers With Crunchy Top - October 31, 2026
- 1950’s Macaroni and Cheese Recipe: Nostalgic Creamy Cheese Sauce with Buttery Noodles - October 31, 2026