
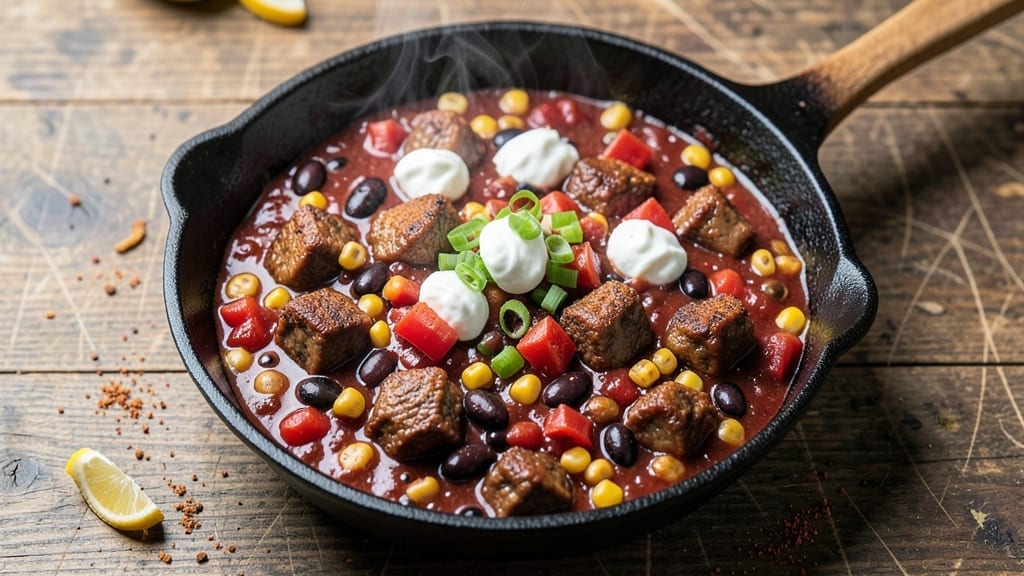
This 6-can chili recipe delivers restaurant-quality depth without the fuss—perfect for feeding a crowd or meal prepping for the week.
I developed it after years of testing chili recipes, focusing on balancing six essential cans of beans, tomatoes, and spices to create a hearty, flavorful base that builds complexity as it simmers. The secret lies in layering spices gradually and letting the chili develop its own richness over time.
What sets this recipe apart is its foolproof technique for achieving perfect texture and flavor every time. You’ll start with a simple combination of canned beans, tomatoes, and broth, then build depth with chili powder, cumin, and a touch of cocoa powder for warmth.
The slow cooking process transforms tough ingredients into tender, flavorful bites that practically melt in your mouth.
By the time you’re done, you’ll have a deeply aromatic, hearty chili with a perfect balance of smoky, spicy, and slightly sweet notes. The beans become tender and flavorful, the tomatoes develop a rich depth, and the spices meld together into a cohesive, satisfying blend.
This chili is hearty enough to stand alone but also pairs beautifully with cornbread, tortilla chips, or a crisp green salad.
Whether you’re cooking on the stovetop, in a slow cooker, or using an Instant Pot, this recipe adapts to your schedule while delivering consistent results. The instructions are straightforward, and the ingredients are simple to find, making it the perfect chili for any occasion. Let’s get started!
Ingredients for 6 can chili
Six cans of beans and tomatoes transform into a deeply aromatic chili that feeds a crowd.
| Ingredient | Amount | Notes |
|---|---|---|
| Black Beans 🌿 | 2 cans | 15 oz each, drained and rinsed |
| Kidney Beans 🌿 | 2 cans | 15 oz each, drained and rinsed |
| Diced Tomatoes 🍅 | 2 cans | 28 oz each, fire-roasted preferred |
| Tomato Sauce 🍅 | 1 can | 24 oz, crushed tomatoes preferred |
| Beef Broth 💧 | 2 cups | Low-sodium preferred, homemade or quality brand |
| Chili Powder 🌶️ | 3 tbsp | High-quality, not pre-mixed |
| Ground Cumin 🌿 | 2 tsp | Freshly toasted for deeper flavor |
| Smoked Paprika 🌶️ | 1 tbsp | For authentic smoky depth |
| Cocoa Powder 🍫 | 1 tbsp | Unsweetened, for subtle richness |
| Garlic Cloves 🧄 | 4 cloves | Minced, fresh preferred |
| Yellow Onion 🧅 | 1 whole | Medium, diced |
| Olive Oil 🫒 | 2 tbsp | Extra-virgin for flavor |
| Salt 🧂 | 1 tsp | Kosher or sea salt |
| Black Pepper 🌶️ | ½ tsp | Freshly ground preferred |
| Bay Leaves 🌿 | 2 whole | For subtle herbal depth |
The foundation starts with quality cans—fire-roasted diced tomatoes from Muir Glen or Trader Joe’s add natural sweetness, while black and kidney beans ensure hearty texture. For chili powder, Penzeys or bulk bins at natural food stores deliver the most authentic flavor. The cocoa powder is a game-changer (unsweetened, not Dutch-processed)—it deepens the chili’s complexity without overpowering. Fresh garlic and onion are non-negotiable here; pre-minced jarred garlic lacks the punch of freshly chopped. If you’re short on time, Trader Joe’s has pre-diced onions that save minutes without sacrificing flavor.
No fire-roasted tomatoes? Regular crushed tomatoes work fine, but add a pinch of sugar to balance acidity. Swapping kidney beans for pinto or black beans changes texture slightly but keeps the chili hearty. Running low on cocoa powder? Dark chocolate chips (60% or higher) melted into the broth mimic the effect. The smoked paprika is crucial for that authentic smoky flavor—substitute with regular paprika plus a pinch of liquid smoke if needed. For a vegetarian twist, replace the beef broth with low-sodium vegetable broth and add a can of lentils for extra protein.
This chili tastes even better the next day as flavors meld together. Store in an airtight container in the fridge for up to 5 days or freeze portions for 3 months. I always double the batch—half for dinner, half for lunches. To reheat, add a splash of broth if it’s too thick. The spices stay potent for 6 months in a sealed container, so buy them in bulk if you’re making this often. Leftovers reheat beautifully on the stovetop or in the microwave, though stovetop keeps the texture better.
Why You’ll Love This Recipe
- I’ll be real: this chili is the kind of recipe that makes you feel like a hero when you walk into a room smelling like simmered tomatoes and spices. Six cans mean actual portions—no guessing if you’ve made enough—and the black and kidney beans blend so well, you won’t even notice the shortcut.
- Six Cans, Zero Stress: I’ll be real: this chili is the kind of recipe that makes you feel like a hero when you walk into a room smelling like simmered tomatoes and spices. Six cans mean actual portions—no guessing if you’ve made enough—and the black and kidney beans blend so well, you won’t even notice the shortcut.
- Deep, Rich Simmer: That beef broth? It’s the backbone here. When it reduces with the diced tomatoes and tomato sauce, the flavors get this unexpected depth—sweet, smoky, and just a little tangy. Honestly, I’ve had chilis that cost twice as much taste half as good.
- Meal Prep MVP: Between us, this is my go-to for game days, potlucks, or just lazy Sundays. The texture holds up for days, and it reheats like a dream—no mushy beans or sad spices. (Yes, even on a Tuesday night.)
Step-by-step instructions for hearty 6-Can chili
This chili delivers deep, smoky complexity with every bite—let’s build it layer by layer.
Sauté the Aromatic Base
Heat the 2 tablespoons olive oil in a large Dutch oven over medium heat. Add the diced yellow onion and cook for 5 minutes until softened and translucent. Here’s the thing—you want the onions to caramelize just slightly at the edges, which adds sweet depth to the chili. Add the 4 cloves minced garlic and cook for another 30 seconds until fragrant, stirring constantly to prevent burning.
Next, add the 3 tablespoons chili powder, 2 teaspoons ground cumin, 1 tablespoon smoked paprika, and 1 tablespoon cocoa powder. Stir vigorously for 1 minute to toast the spices and release their essential oils. This step is where the magic happens—the spices should smell rich and earthy, with a hint of chocolatey depth from the cocoa. The pot will look like a colorful cloud of dust, but don’t worry—it’s working its flavor magic.
Build the Chili Foundation
Pour in the 2 cans diced tomatoes and 1 can tomato sauce, stirring to combine with the spice mixture. Let this simmer for 5 minutes to allow the flavors to meld. The tomatoes should soften slightly and release their juices, creating a vibrant base. Add the 2 cups beef broth and 1 teaspoon salt, then bring the mixture to a gentle boil.
This is the moment that matters: add the 2 whole bay leaves and reduce heat to low. Let it simmer uncovered for 20 minutes, stirring occasionally. You’ll notice the mixture thickens slightly as the liquid reduces, and the raw tomato flavor mellows into something richer. This slow simmer develops the chili’s depth—don’t rush it. The bay leaves will infuse subtle herbal notes that elevate the entire dish.
Add the Beans and Simmer
Add the 2 cans black beans and 2 cans kidney beans, stirring gently to distribute them evenly. The beans should be fully submerged in the liquid. Here’s where it gets fun—taste the chili now. You’ll notice it’s still developing, with bright tomato and spice flavors. This is perfect; the beans will absorb these flavors as they cook.
Return the chili to a simmer and cook uncovered for 45 minutes, stirring occasionally. The beans should soften slightly, and the chili should thicken to a hearty consistency. You’ll see the surface develop a thin skin—this is normal and indicates the liquid is reducing properly. If the chili gets too thick before the beans are tender, add ¼ cup water to loosen it. The beans should be heated through but still hold their shape, not mushy.
Finish with Seasoning and Rest
Remove the 2 bay leaves and taste the chili again. This is your final chance to adjust the seasoning. Add ½ teaspoon black pepper and more salt if needed—remember, the flavors will mellow as it rests. The chili should be rich, smoky, and complex, with a perfect balance of heat and depth. If it needs more warmth, add a pinch more chili powder or smoked paprika.
Let the chili rest off the heat for 10 minutes. This resting period allows the flavors to fully meld and the beans to absorb all that delicious liquid. The chili will thicken slightly as it cools, and the spices will settle into harmony. Serve immediately with toppings like shredded cheese, sour cream, or fresh cilantro, or let it sit for a few hours to develop even deeper flavor. Either way, you’ve just made a chili that’s worthy of a crowd.
Pro Tips For Making 6 Can Chili
- CRANK THE HEAT FIRST: Dump all your diced tomatoes, tomato sauce, and broth into the pot and bring it to a rolling boil before adding the beans. I learned this the hard way—skipping the initial high heat means your chili will simmer unevenly, leaving some ingredients undercooked or mushy. Let it roar for 5 minutes first, then lower to a steady simmer.
- DRAIN AND RINSE BEANS: Open those cans of black and kidney beans, dump them into a colander, and rinse them under cold water. The canned liquid is salty and starchy, and it’ll turn your chili into a gluey mess if you leave it in. I used to skip this, and my chili always ended up thick and pasty—now it’s smooth and balanced.
- STIR IN BEANS LAST: Hold off on adding the beans until the very end of cooking, when your chili has already simmered for at least 20 minutes. Beans absorb flavor like sponges—if you add them too early, they’ll soak up all the broth and leave your chili watery. Toss them in with the last 10 minutes, and they’ll stay tender without turning the pot into soup.
- USE A DEDICATED POT: Skip the nonstick pan or your biggest pot—grab a heavy-bottomed Dutch oven or a deep stockpot. Chili needs space to breathe, and a dedicated pot prevents spills and makes skimming foam or adjusting consistency way easier. I tried making this in a skillet once, and half of it ended up on the stove. Don’t be that person.
Wine and beer pairings for these flavors
Red Wine Pairings
For this hearty chili, I reach for a medium-bodied red wine like a Zinfandel from California—its jammy berry notes and subtle spice mirror the chili’s depth. The acidity cuts through the richness, while the dark fruit complements the cocoa and smoked paprika.
If you prefer something lighter, a Chianti Classico from Tuscany offers bright cherry and herbal notes that refresh your palate between bites. 🍷
White Wine Options
Don’t overlook white wines! A Riesling with its off-dry sweetness and citrus zest balances the chili’s smokiness beautifully. Look for a German Spätlese—the residual sugar softens the heat while the acidity keeps the dish feeling fresh.
For a crisp alternative, a Vermentino from Sardinia brings bright lemon and almond notes that contrast the chili’s earthiness. 🍷
Beer Pairings
For beer lovers, a Mexican lager like Modelo Especial is my go-to—its clean, slightly malty profile lets the chili’s flavors shine without competing. If you want something bolder, a Belgian witbier (like Hoegaarden) adds a peppery, citrusy lift that brightens the dish.
For a local twist, try a Denver-style amber ale—its caramel and toasty notes complement the chili’s smoky depth. 🍺
Non-Alcoholic Choices
Skip the alcohol? No problem. A sparkling hibiscus tea (like Jamaica tea) adds tartness and visual flair, while a ginger beer with lime cuts through the richness. For something heartier, a smoky mezcal soda with a pinch of salt enhances the chili’s depth without alcohol.
I often serve this with a cucumber-mint infused water for a refreshing contrast. 💧
Pro Tips for Pairing
Let the wine or beer breathe for 10 minutes before pouring—this opens up the flavors to match the chili’s complexity. If your chili is extra spicy, opt for wines or beers with higher acidity (like a Sauvignon Blanc or IPA) to cool your palate.
I always serve chili with a small glass of wine or beer—it’s the perfect way to savor every spoonful. ✨
Nutrition facts
Frequently asked questions
Can I make this chili in a slow cooker?
For a slow cooker version, sauté the onions and garlic first, then transfer everything to your slow cooker. Cook on low for 6-7 hours or high for 3-4 hours, stirring occasionally. The slow cooking enhances the flavors even more, making it perfect for hands-off meal prep. Just skip the initial 20-minute simmer on the stovetop.
How do I adjust the spice level?
Start with the 3 tablespoons chili powder and 1 tablespoon smoked paprika as written for a medium heat level. For milder chili, reduce the chili powder to 2 tablespoons and omit the smoked paprika. For extra heat, add ½ teaspoon cayenne pepper or 1 teaspoon chipotle powder. Always taste as you go—you can’t overdo the spices, but you can’t fix bland chili!
What’s the best way to store and reheat leftovers?
Store chili in an airtight container in the fridge for up to 5 days or freeze portions for 3 months. To reheat, warm on the stovetop over medium-low heat for 10-15 minutes, stirring occasionally and adding a splash of broth if it thickens too much. Microwave reheating works too—just stir halfway through. The flavors actually improve after the first night as everything melds together!
Can I make this vegetarian?
Yes! Replace the beef broth with low-sodium vegetable broth and add 1 can lentils or 1 cup cooked quinoa for extra protein. For meaty texture, use 1 package crumbled tempeh or 1 can mushrooms. Keep the cocoa powder and spices the same—they’ll still create that rich, smoky depth. The chili will be heartier with these additions!
Why does my chili get too thick or too thin?
If your chili gets too thick, add ¼ cup water or broth while simmering. For thin chili, simmer uncovered for 10-15 extra minutes to reduce the liquid. The beans release starch as they cook, which naturally thickens the chili. For a creamier texture, stir in 2 tablespoons cornstarch mixed with 2 tablespoons water at the end. The key is patience—don’t rush the cooking time!

- 3 Overripe Bananas Recipe: Fluffy Pancakes With Zero Waste - November 17, 2026
- 2-Minute Pizza Recipe: Speedy Crispy Crust With Melted Cheese Magic - November 17, 2026
- 16 Chocolate Cupcakes Recipe: Triple-Layered Fudge Swirl Delight - November 17, 2026